
Related Manuals for GRAPHTEC Craft ROBO CC100


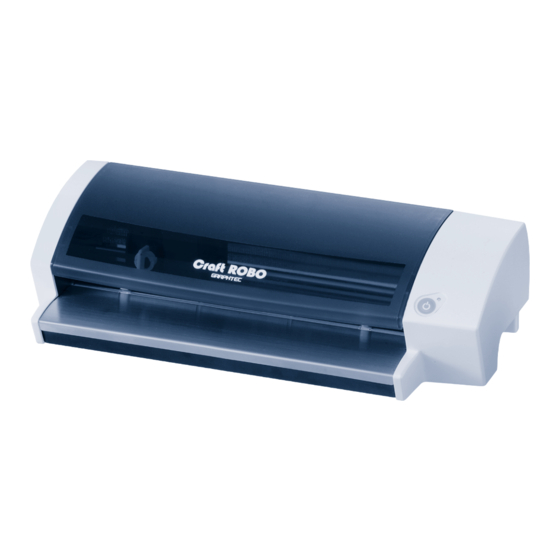
Summary of Contents for GRAPHTEC Craft ROBO CC100
- Page 1 621249060 CC100 Quick Application Guide To Ensure Safe and Media Trial Kit Media Handling Usage Precautions for When You Have Correct Use User Guide Instructions Media Used for Cutting Problems… P.23 P.25 P.26...
-
Page 3: To Ensure Safe And Correct Use
To Ensure Safe and Correct Use • To ensure safe and correct use of your Craft ROBO, read this Guide thoroughly before use. • After having read this Guide, keep it in a handy location for quick reference as needed. •... -
Page 4: Safety Precautions
• After confirming that smoke is no longer being generated, contact your • If the Craft ROBO requires repair, sales representative or nearest Graphtec vendor to request repair. contact your sales representative or • Never try to perform repair yourself. Repair work by inexperienced nearest Graphtec vendor. - Page 5 Safety Precautions WARNING Do not allow dust or metallic matter to Be careful when handling the cutter adhere to the power plug. blade. • A dirty power plug may result in • Touching the blade with your bare hand electrical shock or a fire hazard due to may cause injury.
- Page 6 • Use of the Craft ROBO in such status cord from the socket hazard due to current leakage. may result in electrical shock or a fire hazard due to current leakage. • Contact your sales representative or nearest Graphtec vendor to request repair. Beware of electrical shock...
- Page 7 Safety Precautions CAUTION Do not attempt to lubricate the Craft When using indoor lighting such as a ROBO’s mechanisms. fluorescent lamp or an electrical lamp, provide a distance of at least one • Such action may cause it to break down. meter between the Craft ROBO and the Prohibited light source.
- Page 8 Media Trial Kit User Guide Media Trial Kit User Guide By using the Media Trial Kit, you will be able to learn the basic operations in a short time. To Make a Name Label Menu Create a name label Examples with a photo Trial Kit Menu...
- Page 9 Select “ISO A4” for Document Size Select the printer you use in the and “Landscape” for Orientation, and Printer box, and make sure that then click the [OK] button. Graphtec Craft ROBO has been specified in the Craft ROBO box. Media Trial Kit User Guide...
- Page 10 Media Trial Kit User Guide Design a Name Label Enter a name Place the image Draw a cut line on the label Image capture button Enter a name Left-click at the position where you wish the name to be placed Capture a photo or an image and then position it Click the Text tool button to display the Text...
- Page 11 Specify the drawn line as a cut line, and then print out the design Specify the cut line Check the Cut line data and the Print data Print the data you have created ROBO Master window Output Settings button Preview button Preview window Click Preview of cut data...
- Page 12 “Media loading” step. displayed on the screen to the cutter plunger tip. Click the Output to Craft ROBO button confirm that the driver name reads Graphtec Craft ROBO, and then click the [OK] button to start the Craft ROBO Controller.
- Page 13 Load the printed film label sheet Close the top cover Perform Auto Registration Mark Reading in your Craft ROBO LED lamp Standby switch Press the standby switch on your Craft ROBO and Close the top cover. confirm that the LED lamp is lit. Align the printed Click the [Next] button to proceed to the Click film label sheet with the guide line, and then turn...
-
Page 14: Perform Cutting
Media Trial Kit User Guide Perform Cutting Perform cutting Finished! [OK] button Click the [OK] button to start cutting. Do not touch the Craft ROBO during the cutting operation. When cutting has been completed, remove the sheet. Turn the feed knob to remove it. The name label is complete. - Page 15 Output Settings window. button to display the Registration Select “ISO A4” for Document Size Make sure that Graphtec Craft ROBO Mark Settings screen. and “Landscape” for Orientation, and has been specified in the Craft Click “Use Registration Marks” to then click the [OK] button.
- Page 16 Media Trial Kit User Guide Design a Character String or an Object Enter a character string Add a frame Enclose the characters with a frame by using one of these drawing tools [ Insert a check in the Outline checkbox Enter a character string Adding a frame around the To draw a shape using the Rectangle...
- Page 17 Click the Output to Craft ROBO button Quick Start Instruction Sheet). , confirm that the driver name Standby switch, LED lamp reads Graphtec Craft ROBO, and then click the [OK] button to start the Craft Close the top cover. ROBO Controller.
- Page 18 Media Trial Kit User Guide Perform Cutting and Affix the Name Perform cutting Weed the name and affix Transfer the characters to Affix the name to the the application sheet the application sheet desired item [OK] button Click the [OK] button to start cutting. Do not touch the Craft ROBO during the cutting operation.
- Page 19 Printer box, and make sure that that you have to the pop-up. Or, Capture a photo or an image and installed ROBO Master. It is Graphtec Craft ROBO has been you can cut an original photo or then position it usually located in the following specified in the Craft ROBO box.
- Page 20 Printer output button Click Click the Output to Craft ROBO button , confirm that the driver name reads Graphtec Craft ROBO, and then click the [OK] button to start the Craft ROBO Controller. Preview of cut data Preview of print data...
- Page 21 Make preparations for cutting Load the printed sheet in your Craft ROBO and mount the cutter Perform Auto Registration Mark Reading Close the top cover. Make sure that the blade Click the [Next] button to adjustment cap is [yellow], and proceed to the “Alignment”...
- Page 22 Media Trial Kit User Guide Perform Cutting Perform cutting Finished! [OK] button Click the [OK] button to start cutting. Do not touch the Craft ROBO during the cutting operation. When cutting has been completed, remove the sheet. Turn the feed knob to remove it. The pop-up card is complete when you assemble it.
- Page 23 Media Handling Instructions Printing Media on a Printer The media types labeled q, w, and t can be printed on an inkjet printer. Please read the following sections “Printer Driver Settings”, “Printing Procedure” and “Printing Precautions” before performing printing. Media Types Contained in the Media Trial Kit Overall Cutting Conditions Media Front/Reverse...
-
Page 24: Media Handling Precautions
Media Handling Instructions Printing Procedure Continued from page 23 (1) Read the User’s Manual for your printer before performing printing. (2) When loading media in the printer, check that the print side (see Fig. 1) faces upwards and load only the media (together with the protective liner in the case of media types q or w). (3) Please load the media manually. - Page 25 Usage Precautions for Media Used for Cutting Graphtec only guarantees the cutting results for media supplied by Graphtec and cut under suitable conditions. Please read all the following precautions carefully if you plan to use non-Graphtec media. Media Type Precautions Even if the media is thinner than the extended blade length, its thickness, strength and the hardness of the fibers may cause it not to be cut through completely.
- Page 26 User’s Manual on the CD-ROM. If the problem cannot be corrected by taking the actions described here, please visit the Graphtec web site for further information on the Craft ROBO. Craft ROBO does not work Errors are displayed on the computer Symptom: The LED lamp does not light up even when the standby switch is pressed.
- Page 27 Media is not cut properly Symptom: Media cannot be cut cleanly Symptom: Some areas of the media are not cut. The media is not held in place. Cause Solution Cause Solution The cutter or ball-point pen Mount the cutter or ball-point pen correctly in the plunger holder. The media size for the cutting data Make sure that the media size for the cutting data is the same as the size of is not correctly mounted in...
- Page 28 • Windows is a registered trademark of Microsoft Corporation in the US and other countries. ® 621249060 Other company names and product names are trademarks or registered trademarks of their respective owners.
Need help?
Do you have a question about the Craft ROBO CC100 and is the answer not in the manual?
Questions and answers