Table of Contents
Advertisement
Quick Links
Download this manual
See also:
Installation Manual
Advertisement
Table of Contents

Subscribe to Our Youtube Channel
Related Manuals for Furuno FELCOM19 Inmarsat Mini-C MES


Summary of Contents for Furuno FELCOM19 Inmarsat Mini-C MES
- Page 1 OPERATOR'S MANUAL INMARSAT MINI-C MES FELCOM19 Model www.furuno.com...
- Page 2 The paper used in this manual is elemental chlorine free. ・FURUNO Authorized Distributor/Dealer 9-52 Ashihara-cho, Nishinomiya, 662-8580, JAPAN A : JUN 2012 Printed in Japan All rights reserved. A1 : AUG . 29, 2012 Pub. No. OME-56750-A1 *00017651410* *00017651410* (DAMI ) FELCOM19...
- Page 3 How to discard a used battery Some FURUNO products have a battery(ies). To see if your product has a battery, see the chapter on Maintenance. Follow the instructions below if a battery is used. Tape the + and - terminals of battery before disposal to prevent fire, heat generation caused by short circuit.
-
Page 4: Safety Instructions
Refer any power at the switchboard and repair work to a qualified technician. contact a FURUNO service techni- cian. Do not approach the antenna unit closer than the distance shown Do not disassemble or modify the below when transmitting. - Page 5 SAFETY INSTRUCTIONS Warning Label Warning labels are attached to the communication unit. Do not remove the labels. If a label is missing or damaged, contact a FURUNO agent or dealer about replacement. Name: Warning Label (1) WARNING Type: 86-003-1011-3 To avoid electrical shock, do not remove cover.
-
Page 6: Table Of Contents
TABLE OF CONTENTS FOREWORD ........................vii SYSTEM CONFIGURATION ..................ix INMARSAT C SYSTEM OVERVIEW ..............1-1 1.1 Introduction ........................ 1-1 1.2 Communications Network ..................1-3 OPERATIONAL OVERVIEW .................2-1 2.1 Communication Unit....................2-1 2.1.1 How to turn the power on and off ..............2-1 2.1.2 Diagnostics..................... - Page 7 TABLE OF CONTENTS 3.12.1 How to export system settings ..............3-22 3.12.2 How to import system settings ..............3-22 FILE OPERATIONS ....................4-1 4.1 Files and Working Areas ....................4-1 4.2 How to Prepare Files ....................4-1 4.2.1 How to prepare a routine file ................4-1 4.2.2 How to prepare a confidential file ..............4-2 4.2.3...
- Page 8 TABLE OF CONTENTS 6.3 DNID (Data Network Identification) ................6-8 6.3.1 How to display DNIDs ..................6-8 6.3.2 How to enable, disable DNIDs ............... 6-8 6.4 EPADR (Enhanced Pre-Assigned Data Reporting) ........... 6-9 6.4.1 How to prepare a data report ................. 6-9 6.5 LRIT Overview ......................
-
Page 9: Foreword
FOREWORD A Word to FELCOM19 Owners Congratulations on your choice of the FURUNO FELCOM19 Inmarsat Mini-C MES. We are con- fident you will see why the FURUNO name has become synonymous with quality and reliability. Since 1948, FURUNO Electric Company has enjoyed an enviable reputation for innovative and dependable marine electronics equipment. - Page 10 FOREWORD Program No. Unit Program no. Date of modification COMMUNICATION 1650248-xx UNIT PC TERMINAL 1650241-xx About Inmarsat-C This manual provides a brief introduction to the Inmarsat C system, in Chapter 1. For further in- formation, see the Inmarsat home page at www.inmarsat.com. viii...
-
Page 11: System Configuration
SYSTEM CONFIGURATION ANTENNA UNIT IC-119 100-115/200-230 VAC AC-DC 1φ, 50/60 Hz Power Supply PR-240 24 VDC PERSONAL COMPUTER 12/24 VDC (Windows OS) COMMUNICATION UNIT IC-219 (with internal GPS receiver) * At least two SSAS Alert Units JUNCTION BOX are required. CATEGORY OF UNITS: IC-318 NAVIGATOR... - Page 12 SYSTEM CONFIGURATION This page is intentionally left blank.
-
Page 13: Inmarsat C System Overview
INMARSAT C SYSTEM OVERVIEW Introduction The Inmarsat C system provides worldwide telex and data transmission and reception of written information to owners of an Inmarsat C transceiver or a terrestrial telex net- work via satellite. Further, e-mail can be sent via the internet. Communication mode is store-and-forward telex, which means all information sent are first stored at an LES (Land Earth Station) and then delivered to designated party. - Page 14 1. INMARSAT C SYSTEM OVERVIEW Same as left Same as left Same as left Satellite 0.0 m 0.0 m 0.0 m -/+: To set option -/+: To set option -/+: To set option AOR-West AOR-East OCC: Operation Control Center SCC: Satellite Control Center NCS: Network Coordination Station MES: Mobile Earth Station LES: Land Earth Station...
-
Page 15: Communications Network
1. INMARSAT C SYSTEM OVERVIEW Inmarsat-C satellite coverage area Communications Network The illustration below shows the Inmarsat C communications network. Network NCS/NCS Signaling Link Coordination Station (NCS) NCS/LES NCS Common Channel Signaling Link Mobile Earth Station (MES) MES Signaling Data Channel Data Terminal Communications... - Page 16 1. INMARSAT C SYSTEM OVERVIEW Section Description NCS common channel The NCS has two major functions: • Transmit information on a common channel. • Transmit EGC messages to MESs. NCS/LES signaling link The NCS/LES signaling link connects the NCS to all LESs in its region.
-
Page 17: Operational Overview
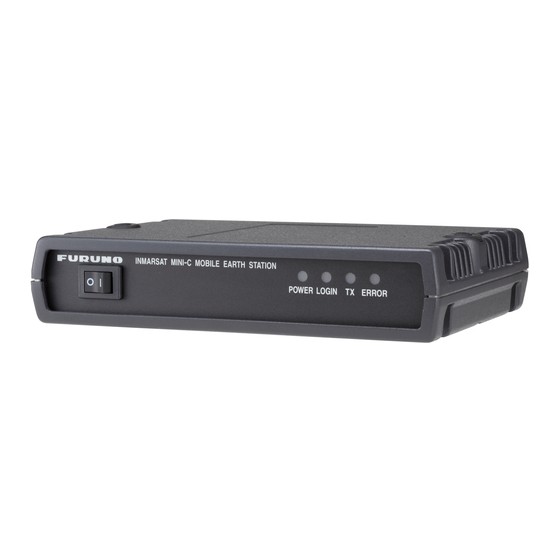
OPERATIONAL OVERVIEW Communication Unit The communication unit is the heart of the FELCOM system, transmitting and receiv- ing messages via the Inmarsat system. POWER Status LEDs Switch POWER: Lights (in green) when power is on. LOGIN: Lights (in green) when logged in; flashes (in green) in other instances. -
Page 18: How To Install The Software
2. OPERATIONAL OVERVIEW 2.2.1 How to install the software 1. Turn on the PC. 2. Set the installation CD-ROM in the CD drive of the PC. 3. Click the icon of SETUP. EXE. 4. Click the [Next] button. Enter user and organization. Click the applicable radio but- ton at the bottom of the screen. - Page 19 2. OPERATIONAL OVERVIEW 7. Click the [Install] button to start the installation. When the installation is completed, the FELCOM dialog box appears. 8. Click the [Close] button at the top right corner of the dialog box. The [Setup Com- plete] dialog box appears. Note: If you want to launch the program now, click the box next to "Yes, launch the program file."...
-
Page 20: Starting, Quitting The Application
2. OPERATIONAL OVERVIEW 2.2.2 Starting, quitting the application For information about terminal unit operation see the PC’s owner’s manual. 1. Turn on the communication unit. 2. Turn on the terminal unit. 3. Double-click the F19PC icon to start the application. After the program loads the standby display appears. -
Page 21: Shortcut Keys
2. OPERATIONAL OVERVIEW Function Caps Lock Turns upper case alphabet input on or off. The Caps Lock LED lights when upper case alphabet input is on. Inserts horizontal tab characters. The number of tab characters the key can insert per line of text can be programmed for two, four or eight tabs. -
Page 22: Function Keys
2. OPERATIONAL OVERVIEW 2.2.5 Function keys The function keys are labeled F1-F10 on the keyboard and they provide the following functions. Transmit Reports File No use Options Logs StopAlarm Edit Setup Menu (key) Function File (F1) Opes and closes file; print files; MIME decoding. Edit (F2) Text editing facilities (copy, paste, search and replace, etc.). -
Page 23: Standby Display
2. OPERATIONAL OVERVIEW Standby Display After the equipment is turned on and the diagnostic test is completed, the standby dis- play appears, showing the results of the test. The system status monitor provides var- ious operating information. For further information, see section 8.4. File Edit Transmit... -
Page 24: Display Indications
2. OPERATIONAL OVERVIEW 2.3.1 Display indications The display is divided in three areas: 1) The function menu area 2) The working area 3) The operating status area 1) Function File Edit Transmit Reports Logs Options Setup StopAlarm Menu 2) WORKING AREA 3) Operating Status (3a) - Page 25 2. OPERATIONAL OVERVIEW Successful Login.: Login was successful. Login failed.: Login failed. Successful Logout: Logout was successful. Logout failed.: Logout failed. Successful Forced Clearing.: Forced clearing successful. Forced Clearing Failed.: Forced clearing unsuccessful. SENDING MESSAGE PACKETS: Sending TX message packets. WAITING FOR ACKNOWLEDGEMENT: Waiting for acknowledgement from LES.
-
Page 26: Menu Overview
2. OPERATIONAL OVERVIEW (6) Logging status LOGOUT: Logged out with ocean region. LOGIN: Logged in with ocean region. LOGIN (flashing): Logging in with ocean region. (7) Other information Various messages appear at this location. No display: No receive message in memory, or printer is operating. REC. -
Page 27: Error Messages And Alerts
2. OPERATIONAL OVERVIEW alphanumeric data entry window appears depending on your selection. For exam- ple, the window at right shows the options for [Word Wrap]. 4. Press the ↑ or ↓ key to select an option desired and press the Enter key. 5. -
Page 28: How To Select A Printer
2. OPERATIONAL OVERVIEW How to Select a Printer 1. Press the F1 key to open the [File] menu. File 2. Press the 8 key to open the [Print Setting] window. 1. New ALT-N 2. Open ALT-O 3. Close ALT-Q Print Setting 4. -
Page 29: System Initialization
SYSTEM INITIALIZATION This chapter provides the information necessary for initializing the FELCOM19. Once the equipment is initialized, you need do no more than press a few keys to get fully automatic transmission and reception. Inmarsat assigns an MES (your ship) an Inmarsat Mobile Number (IMN) when it ap- plies for Inmarsat registration and it is entered during the installation of the MES. -
Page 30: Pc Window Setup
3. SYSTEM INITIALIZATION 5. Select [MES Operation Mode] then press the Enter key to show the MES Opera- tion window. 6. Select an operating mode, [INMARSAT-C] or [EGC]. The INMARSAT-C setting provides telex communications and operates as an EGC receiver when the equip- ment is not transmitting or receiving. - Page 31 3. SYSTEM INITIALIZATION 8. Select [Window Color] then press the Enter key. Window Color Select Preset Load Default - - - - - - - - - - - - - - - - - - - - - - - Edit Color Window [ Base Window...
- Page 32 3. SYSTEM INITIALIZATION Preset Window Fore Color Back Color Base Window BLACK L-WHITE RCV Message Display BLACK WHITE EGC Message Display BLACK WHITE EDIT 1 BLACK WHITE EDIT 2 BLACK L-CYAN Function BLACK WHITE Sub Menu 1 BLUE L-WHITE Sub Menu 2 BLUE WHITE Sub Menu 3...
- Page 33 3. SYSTEM INITIALIZATION EDIT BASE WINDOW File Edit Transmit Reports Logs Options Setup StopAlarm < [1] UNTITLED1 > MENU CAUTION MESSAGE 3) Select [Fore Color]. 4) Use ← or → key to select a color. 5) Select [Back Color]. 6) Use ← or → key to select a color. 7) To select colors for other windows repeat steps 2)-6).
-
Page 34: Login And Logout
3. SYSTEM INITIALIZATION Login and Logout Each time the terminal unit is turned on, login your vessel with the Inmarsat C system to enable communications between your vessel and an LES. This is called login. Note that you can transmit or receive EGC messages even if you are not logged in. If you will not be using the FELCOM for a prolonged period, you should logout from the Inmarsat C system, before turning off the communication unit. -
Page 35: Logout
3. SYSTEM INITIALIZATION 5. Login begins, and the screen should look something like the one shown below. File Edit Transmit Reports Logs Options Setup StopAlarm Options Login Starting Login Process. Press any key to escape. LOGIN replaces IDLE. Flashing during login SYNC ( NCS ) Current State: LOGIN 02-02-25 02:02 (UTC) -
Page 36: Egc Settings
3. SYSTEM INITIALIZATION EGC Settings 3.4.1 What is the EGC (Enhanced Group Call) service? The EGC service enables EGC information providers to send SafetyNET , Fleet- and System messages via an LES to a specific groups of ships, or to all ships within a defined geographical area. - Page 37 3. SYSTEM INITIALIZATION 3) System: EGC system-related is sent by Inmarsat to certain ship groups and geo- graphical areas. 3.4.2 EGC settings The FELCOM receives EGC messages directed to its present position and Navarea without further programming. The EGC Setup screen lets you select additional areas for which to receive messages and also the Navtex station and type of message for Coastal Warning (NAVTEX Re-broadcast).
- Page 38 3. SYSTEM INITIALIZATION 7. Press the Enter key to close the window. Note: [Fixed Area] is where you enter fixed areas (max. 3) for chart correction ser- vice. However, this service is not yet available; enter no data. 8. Select [Station Code] then press the Enter key. 9.
-
Page 39: How To Add Egc Channels
3. SYSTEM INITIALIZATION 3.4.3 How to add EGC channels The EGC Channel List stores EGC channels. There are currently four EGC channels, one for each satellite. These four channels are pre-programmed into the unit and marked in the [EGC Channel List] with asterisks. When more EGC channels become available you can add them to the list as below. -
Page 40: How To Add Ncs Channels
3. SYSTEM INITIALIZATION How to automatically print EGC messages FleetNET and SafetyNET messages can be automatically printed. 1. Press the F8 and 5 keys to display the [Auto Mode Setup] menu. 2. Select [Auto EGC Message Print] then press the Enter key. 3. -
Page 41: Les List
3. SYSTEM INITIALIZATION LES List The LES List provides for storage of 44 LES names per ocean region. 3.6.1 How to register an LES to the LES list When a new LES is added, add it to the [LES List] as shown below. See the Appendix 4 for a list of LES. -
Page 42: How To Edit The Les List
1. Press the F8, 8 and 1 keys to display the [Station List]. Station List Group Station Name Type Code ID / Address E-Mail abc@ furuno.co.jp E-Mail xyz@ furuno.co.jp Seagull TELEX/ 463609999 Page Up, Page Down: Move... - Page 43 3. SYSTEM INITIALIZATION 2. Press the ↓ key to put the cursor on a blank line then press the Enter key. Station Group Station Name Destination Type TELEX/MES Prefix Code Country Code Station ID Modem Type E-Mail Address Remarks Erase the Name to delete this station. 3.
- Page 44 3. SYSTEM INITIALIZATION 4. Enter telex subscriber number (for ship-to-shore) or MES Inmarsat Mobile Num- ber (for ship-to-ship) then press the Enter key. A maximum of 15 characters can be used, including space. 5. Select [Remarks] then press the Enter key. 6.
-
Page 45: How To Edit The Station List
3. SYSTEM INITIALIZATION 2. Enter the recipient’s mobile phone number, beginning with the country code, then press the Enter key. 3. Select [Remarks] then press the Enter key. 4. Enter remarks then press the Enter key. A max. of 20 characters can be used. 5. -
Page 46: How To Create A Directory
3. SYSTEM INITIALIZATION How to Create a Directory Incoming and outgoing messages may be saved to the hard disk. If no directory is ® specified, all messages are saved to the My Documents folder (in Windows Vista messages are saved to the FELCOM folder in Documents). 3.9.1 How to create a directory for message storage 1. -
Page 47: How To Specify The Directory For Message Storage
3. SYSTEM INITIALIZATION 3.9.2 How to specify the directory for message storage 1. Press the F8 and 7 keys to open the [Directories] menu. 2. Select [Message Directory] then press the Enter key. New Folder (M) Cancel 3. Select the directory where to store messages then click the [OK] button. Note 1: The name of each message is automatically saved in the directory assigned, and the file name is with the year, month and day (YYYY:MM:DD) the message was received. -
Page 48: E-Mail Service/Sms Station List
3. SYSTEM INITIALIZATION 3.10 E-mail Service/SMS Station List E-mail service providers and SMS stations are already registered in the FELCOM. To add new e-mail service provider or SMS stations, follow the procedure below. 1. Press the F8, 8 and 5 keys to show the [E-Mail/SMS Service List]. E-Mail/SMS Service List LES Name AOR.W AOR.E POR... -
Page 49: E-Mail Settings
3. SYSTEM INITIALIZATION 18. Select [Separator:] then press the Enter key. 19. Type appropriate “Separator” (for example, blank space, STX, etc.) then press the Enter key. 20. Select [SMS:] then press the Enter key. 21. If it is necessary to enter the special Prefix “sms+” before telephone number, type it here. -
Page 50: How To Export, Import System Settings
3. SYSTEM INITIALIZATION 3.12 How to Export, Import System Settings System settings (as well as messages) may be saved to a selected folder and loaded onto the terminal unit. This is useful for having backup copies of system settings. 3.12.1 How to export system settings 1. -
Page 51: File Operations
FILE OPERATIONS This chapter describes how prepare, edit, save and print files (messages). Files and Working Areas To create a new message it is necessary to open a new file. After a new file is opened, one of two working areas in the internal memory is secured to create the message. The term “open a file”... -
Page 52: How To Prepare A Confidential File
4. FILE OPERATIONS 2. Press the 1 key to select [New]. The display should now look something like the illustration below. <[1] UNTITLED1> 0001| Cursor can be a square or an underline. ---- * ---------+---------+---------+---------+---------+---------+---------< TELEX 1 Char. [ Line Col. -
Page 53: Editor Menu Settings
4. FILE OPERATIONS How to prepare a message with both addressee code and password Type the addressee code as shown in the illustration below and then type the text of message. Be sure to enter colon. S???-addressee code-password: (text of message) maximum 8 characters each The recipient enters the password to view the contents of the message. -
Page 54: Text Operations
Highlight 0002 THIS INMARSAT STATION CONGRATULATIONS ON YOUR CHOICE 0003 CONGRATULATIONS ON YOUR CHOICE OF FURUNO FELCOM 3. Press the F2 key to open the [Edit] menu. 4. Press the 1 key to select [Cut]. The highlighted text is cut Edit and the remaining text is reformatted. - Page 55 4. FILE OPERATIONS Search and replace How to search text 1. At the [Edit] menu, press the 6 key to select [Search or Search or Replace Replace]. 1. Search Alt-F 2. Replace Alt-R 2. Press the 1 key to select [1. Search]. Search 3.
-
Page 56: How To Save Files
4. FILE OPERATIONS Go to line Move the cursor to the desired line in the current file. Goto Line 1. Top of Text HOME • Top of text: Go to top of text 2. End of Text 3. Goto Line •... -
Page 57: How To Open Files
4.4.2 How to switch between files You can switch between files by pressing the 9 key (Change Window) on the [Edit] menu ([F2]), or pressing Alt+V on the editor screen. FURUNO [F2] 9: Change Window or [ALT] + [V] How to alternate display of files in working area 1 and 2. -
Page 58: How To Save A File Under A New Name
4. FILE OPERATIONS How to Save a File Under a New Name 1. Open a file referring to section 4.4.1. 2. Edit the file. 3. Press the F1 key then the 3 (Close) or 4 (Save) key as applicable. 4. For [Close], press the Enter key. 5. -
Page 59: How To Decode An E-Mail Attachment
4. FILE OPERATIONS How to Decode an E-Mail Attachment When you can't read an e-mail attachment because it has been coded by MIME (Mul- tipurpose Internet Mail Extensions), you may decode it as below. 1. Save the MIME-coded file to the hard disk. (See section 5.2.5 for the procedure.) This step is not necessary if [Auto Receive Message Save] is turned on in the [Au- to Mode Setup] menu. - Page 60 4. FILE OPERATIONS This page is intentionally left blank. 4-10...
-
Page 61: Inmarsat Communications
INMARSAT COMMUNICATIONS This chapter explains how to send and receive. Before conducting any communica- tions, be sure to login with the NCS in your area, following the instructions in section 3.3.1. To send e-mail, register for e-mail services with appropriate LES which provides such services. -
Page 62: How To Send A Prepared Message
5. INMARSAT COMMUNICATIONS Destination Message Subscriber Code Remarks type English Inmarsat C MES Telex Telex Telex ITA2 PSTN Modem type “T30”. E-mail E-mail Russian Inmarsat C MES PSDN DATA Not available E-mail E-mail DATA Japanese Inmarsat C MES PSDN DATA Telex Not available Not available... - Page 63 Immediate Delivery Delay Code [ TRANSMIT ] 4. Select [Station Name] then press the Enter key to open the Station List. Station List Group Station Name Type Code ID / Address FURUNO TELEX/ FRNINMBTSTS TELEX/ 343199999 Seagull E-Mail Seagull@furuno.co.jp whale E-Mail whale@furuno.co.jp...
- Page 64 5. INMARSAT COMMUNICATIONS 6. For E-mail, follow the procedure below. For other communication formats, go to step 7. 1) Select [Subject] then press the Enter key. 2) Type subject then press the Enter key. 3) To attach a file, select [Attach File] then press the Enter key. Select File ENTER: Select DEL: Remove...
- Page 65 5. INMARSAT COMMUNICATIONS 18. Press the Enter key to send the message to the message queue. (To escape, se- lect [No] then press the Enter key.) The message "Message is entered in sending Queue. Press any key." appears. Note 1: If some data has not been entered, the message "Input Error: xx" (xx: er- ror content) appears.
- Page 66 5. INMARSAT COMMUNICATIONS Sent Message but not delivered DELIVERY STATUS NOT RECEIVED (in case of timeout) Message File : 00FOX.TXT Message Size : 277 characters : Stratos M.N. Date : 02-03-10 Priority : Normal Time : 06:06 (UTC) Destination : TELEX/MES (Prefixed) 00111222222222222222 (IA5) Display log printout example (Confirmation ON, delivery status not delivered) Depending on traffic, it may take at least 15 minutes to receive confirmation.
- Page 67 5. INMARSAT COMMUNICATIONS 3. Select [Destination Type] then press the Enter key. TELEX/MES E-Mail PSDN X400 DNID Special TELEX/MES (Prefixed) (Prefixed) PSDN (Prefixed) X400 (Prefixed) DNID (Prefixed) Special (Prefixed) 4. Select destination type then press the Enter key. 5. Continue the procedure according to the destination type. Telex/MES: page 5-7 FAX: page 5-7 E-mail: page 5-8...
- Page 68 5. INMARSAT COMMUNICATIONS 5. Select [Modem Type] then press the Enter key. Modem Type V.21 300bps Duplex V.22 1200bps Duplex 2400bps Duplex V22B V.22bis V.23 600/1200bps V26B V.26bis 2400/1200bps V26T V.26ter 2400bps Duplex V27T V.27ter 4800/2400bps V.32 9600bps Duplex Other 6.
-
Page 69: How To Send A File Saved To The Hard Disk
5. INMARSAT COMMUNICATIONS 5.1.3 How to send a file saved to the hard disk 1. Close any open files. 2. Press the F3 and 1 keys to show the [Transmit Message] menu. Transmit Message 1. Transmit Message 2. Cancel Priority Normal 3. -
Page 70: How To Cancel Transmission On A Message Awaiting Transmission
1. Press the F3 and 3 keys to show the [Request Delivery Status] list. If there are no messages in the list, "No message" appears. Request Delivery Status Message File Destination Priority Send Status Delivery FURUNO KDDI Normal Waiting FURUNO KDDI Normal Sending... - Page 71 5. INMARSAT COMMUNICATIONS Request delivery status list description Item Description Message number Message File File name. Station Name of the remote party. The name of the LES that received the message. Priority Normal only Send Status The transmission status from the MES (own ship) to the LES; waiting or sending, and date and time of transmission for messages sent.
- Page 72 1. Press the F3 and 3 keys to show the [Request Delivery Status] list. If there are no messages in the list, "No message" appears. Request Delivery Status Message File Station Priority Send Status Delivery FURUNO KDDI Normal 11-11-25 16:10 edit msg.002 FURUNO KDDI Normal 2.
-
Page 73: How To Access The 2-Digit Code Service
5. INMARSAT COMMUNICATIONS 5.1.6 How to access the 2-digit code service A range of special safety and general maritime services, known as the 2-digit code services, may be sent. The list below shows the 2-digit code services available. 1. Use the text editor to prepare a message requesting a 2-digit code service. 2. -
Page 74: Sent Message Log
The [Sent Message] log stores all messages sent. You can view the contents of the log as shown below. 1. Press the F6 and 1 keys to show the [Sent Message] log. Sent Message Message File Destination Priority Send Status Delivery FURUNO KDDI Normal Waiting FURUNO KDDI Normal Sending ASDFASDF... -
Page 75: Receiving
5. INMARSAT COMMUNICATIONS Receiving 5.2.1 When a message is received Each time the FELCOM receives a telex or e-mail it displays the message "Successful Receiving message." If [Auto Receive Message Save] and [Auto Receive Message Print] (in the [Auto Mode Setup] menu) are set for ON, the message is automatically saved and printed (except confidential and password-affixed messages). -
Page 76: How To Set The Receive Alarm
5. INMARSAT COMMUNICATIONS 5.2.2 How to set the receive alarm You can get an audio alarm when a telex message Auto Mode Setup or e-mail is received. The default setting is OFF. Auto Communication Log Print 1. Press the F8 and 5 keys to show the [Auto Receive Alarm Auto Receive Message Save Mode Setup] menu. - Page 77 5. INMARSAT COMMUNICATIONS 3. Press the Enter key for routine messages and messages with addressee code (no password). Received Message Detail FROM FURUNO TO FRONTIER THE QUICK BROWN FOX JUMPS OVER LAZY DOG. ABCDEFGHIJKLMNOPQRSTUVWXYZ. 1234567890 [Ctrl]+[E]: Export [Ctrl]+[P]: Print [Ctrl]+[R]: Reply For messages with both addressee code and password, the password entry win- dow appears.
-
Page 78: How To Automatically Print Received Messages
English (for example, Japanese). Press the Ctrl+E key to save the file to the hard disk. Open the file with a different application. One attachment Received Message Detail FROM : FURUNO TO: FRONTIER 1 attachment 18 bytes, test Text... -
Page 79: How To Save Received Messages
5. INMARSAT COMMUNICATIONS 5.2.5 How to save received messages 1. Press the F6 and 2 keys to display the [Received Message] log. 2. Select the file to save. To confirm contents of a file, press the Enter key. For con- fidential messages the password entry window appears after pressing the Enter key. -
Page 80: Communication Log
5. INMARSAT COMMUNICATIONS Communication Log The [Communication Log] stores the particulars of the latest 50 received and sent messages. When the log becomes full, the oldest message is automatically deleted. 5.3.1 How to display and print the communication log 1. Press the F6 and 4 keys to display the [Communication Log]. Communication Log - - - - - - - - - - - - - - - - - - - - - - - - - - - - - - - - - - - - - - - - - - - - - - - - - - - - - - - - - - - - - - No. -
Page 81: Egc Messages
5. INMARSAT COMMUNICATIONS EGC Messages When an EGC message is received, "RECEIVING EGC MESSAGE" appears at the bottom left corner of the display. If "Auto EGC Message Print" in the [Auto Mode Set- up] menu is ON, EGC messages are automatically printed. EGC messages are auto- matically received, printed and saved to the terminal unit selected with [EGC Output Port] on the [System Setup] menu. -
Page 82: How To Display The Egc Message Log
5. INMARSAT COMMUNICATIONS has been disabled by the MES operator will be written over. If none has been disabled, then the new download is not accepted. Follow the procedure below to enable or disable an ENID. 1. Press the F4 and 2 keys to show the [EGC Network ID] screen. EGC Network ID List Ctrl+P: Print Mark '*' means activation. -
Page 83: Data Report And Polling
DATA REPORT AND POLLING This chapter provides the information necessary for data reporting and polling recep- tion. Data reporting provides automatic data transmission at regular intervals from your ship to your home office. When your ship receives a polling command from your home office;... -
Page 84: How To Prepare A Data Report
6. DATA REPORT AND POLLING 6.1.1 How to prepare a data report 1. Press the F5 and 1 keys to show the [Data Report] menu. Data Report 2. Press the appropriate numeric key to select a data report. 1. Data Report 1 2. -
Page 85: How To Prepare A Message Report
6. DATA REPORT AND POLLING 13. [Yes] is selected; press the Enter key to register the settings. 14. Long-press the Esc key to return to the standby display. 6.1.2 How to prepare a message report 1. Press the F5 and 2 keys to show the [Message Report] menu. Mesasge Report 2. -
Page 86: How To Automatically Print Data Report, Polling Command
6. DATA REPORT AND POLLING 10. Select [LES ID] then press the Enter key. 11. Select LES then press the Enter key. 12. Select [Activation] then press the Enter key. 13. Select [Regular Interval] or [Daily] as appropriate then press the Enter key. 14. -
Page 87: Polling
6. DATA REPORT AND POLLING Polling When the FELCOM receives a polling command from your home office it automatically transmits data to your home office. The data are position, speed, bearing and other data sent from a navigator or an interface unit. A polling command from your home office can also activate a data report or message report if the corresponding setting is completed on the FELCOM. -
Page 88: Other Polling Commands
720-5644325. Then, that MES transmits po- sition, speed, bearing, water temperature, current and depth. P???/12345678/TELEX/203/720/5644325/: To have other MES transmit position, speed and bearing by e- mail to abc@furuno.co.jp, for example, use the following com- mand. P???/12345678/EMAIL/203/abc@furuno.co.jp:... -
Page 89: Polling Reception
6. DATA REPORT AND POLLING 6.2.3 Polling reception No operator intervention is required during polling reception. The printer (printer PP-510, optionally available) prints the status of polling reception and transmits data in response to polling request as shown below. TX start frame (time) Data reporting POLLING Message - - - Program Unreserved Data Reporting - - -... -
Page 90: Dnid (Data Network Identification)
6. DATA REPORT AND POLLING DNID (Data Network Identification) When you make a contract with an information provider, DNIDs are downloaded from the information provider to the FELCOM, via the appropriate LES. Up to 64 DNIDs can be downloaded to the FELCOM. You can see which DNIDs are stored by following the procedure shown below. -
Page 91: Epadr (Enhanced Pre-Assigned Data Reporting)
6. DATA REPORT AND POLLING EPADR (Enhanced Pre-Assigned Data Report- ing) EPADR increases the efficiency of maritime data reporting, allowing vessels using satellite services to reliably send position reports and comply with the International Maritime Organization's (IMO) new Long Range Identification and Tracking (LRIT) regulations. -
Page 92: Lrit Overview
6. DATA REPORT AND POLLING LRIT Overview 6.5.1 LRIT overview This equipment can function as a marine communications terminal for the LRIT (Long- Range Identification and Tracking) system, as prescribed by the IMO resolution MSC.202(81). The LRIT uses the FELCOM's Data Report/Polling feature for LRIT po- sition reporting. -
Page 93: About The Lrit System
6. DATA REPORT AND POLLING 6.5.2 About the LRIT system Power the equipment and keep it logged in at all times except for special occasions such as when the ship is dry-docked for repairs. Position information is automati- cally sent at fixed intervals, thus no operation is required. However, keep the equip- ment in a ready state to received commands from the LRIT data center. - Page 94 6. DATA REPORT AND POLLING This page is intentionally left blank. 6-12...
-
Page 95: Other Functions
OTHER FUNCTIONS This chapter describes how to • Abort operation • Scan NCS • Select EGC and NCS channels • Display LES information How to Abort an Operation You can abort transmission, receiving or scanning (on the NCS common channel) as follows: 1. -
Page 96: How To Select Egc Receiving Channel
7. OTHER FUNCTIONS How to Select EGC Receiving Channel EGC channel can be selected when the terminal unit is set to operate as an EGC-only receiver. However, this procedure is shown for reference only; currently there is only one EGC channel per NCS. 1. -
Page 97: How To Find Les Information
7. OTHER FUNCTIONS How to Find LES Information Each time you log in LES data is automatically downloaded through the NCS common channel to the FELCOM, and saved to the LES Information display. You may view this display as follows: 1. - Page 98 7. OTHER FUNCTIONS Description of services Bit No. Flag Meaning Flag Maritime distress alerting No Maritime distress alerting None SafetyNET traffic No SafetyNET traffic None Inmarsat C traffic No Inmarsat C traffic None Store and forward No Store and forward None Half duplex No Half duplex...
-
Page 99: Maintenance And Troubleshooting
MAINTENANCE AND TROUBLESHOOTING This chapter provides the information necessary for the maintenance and checking of the FELCOM. Please review the safety information at the beginning of this manual be- fore attempting any maintenance procedures. General Checking and Maintenance Turn off the power before conducting any maintenance procedures other than the cleaning of the communication unit. -
Page 100: Diagnostics
8. MAINTENANCE AND TROUBLESHOOTING Diagnostics 8.2.1 Self test at power on The communication unit performs the ROM sum test and RAM read and write test at power up. If the test results are normal, the equipment goes into standby. If error is found you cannot transmit. -
Page 101: Performance Verification (Pv) Test
8. MAINTENANCE AND TROUBLESHOOTING Performance Verification (PV) Test After the FELCOM is installed, the installer usually confirms that it is functioning prop- erly, by logging in and conducting the PV test. This test consists of receiving a test message from an LES, transmitting a message to the LES and a distress alert test. The results of the test appear on the PV test result display. -
Page 102: How To Show The Pv Test Results
8. MAINTENANCE AND TROUBLESHOOTING 8.3.3 How to show the PV test results 1. Press the F7, 8 and 2 keys to show the PV test results. PV Test Result Ctrl+P: Print ESC: Quit Test Date & Time 02-02-25 01:58 (UTC) Attempts First attempt BBER... - Page 103 8. MAINTENANCE AND TROUBLESHOOTING How to read the system status monitor Date: Current date. Time: Current time. Position: Own ship L/L position (either manual entry or automatic input by navigator). Waypoint: L/L position of destination waypoint set on navigator. Course: Course. Speed: Ship’s speed.
-
Page 104: Current Position Log
8. MAINTENANCE AND TROUBLESHOOTING Current Position Log Position is saved to the [Current Position Log] every hour, and the log stores the latest 100 positions. When the log becomes full, the eldest entry is automatically deleted and positions are renumbered. To display the log, press the F7, 9 and 1 keys. -
Page 105: How To Replace The Fuse
Have a licensed radio- or too low. communications techni- cian check the set. EEPROM ERROR. EEPROM trouble. Contact a FURUNO agent or dealer for advice. Invalid MES ID. This equip- MES ID is corrupted. Have a licensed radio- ment is defected. Please communications techni- contact FURUNO. -
Page 106: Warning Messages
8. MAINTENANCE AND TROUBLESHOOTING 8.7.2 Warning messages Messages in this category are prefixed with "WARNING". Error message Meaning Action BBER over 80%. Scanning BBER (Bulletin Board Error Select NCS manually. NCS start manually. Rate) exceeded 80%. Cannot enter new DNID. Memory for DNIDs is full. -
Page 107: Appendix 1 Menu Tree
APPENDIX 1 MENU TREE F1: File 1. New 2. Open 3. Close 4. Save 5. Delete (no use) 6. Rename (no use) 7. Print 8. Print Setting 9. MIME (Decode) F2: Edit 1. Cut 2. Copy 3. Paste 4. Insert (With Citation) 5. - Page 108 APPENDIX 1 MENU TREE F3: Transmit 1. Transmit Message Priority Normal Message File Station Name TELEX/MES Destination Type Prefix Code (Prefix selected) E-Mail Country/Ocean Code Destination PSDN Modem Type X400 (FAX, FAX prefixed selected) DNID Address (E-mail, SMS) Special Subject (For e-mail) TELEX/MES (Prefixed) Attach File (For e-mail) FAX (Prefixed)
- Page 109 APPENDIX 1 MENU TREE F5: Reports 1. Data Report 1. Data Report 1 Status ON: Enhanced Data Report ON: Usual Data Report Position Only Report Length Position and Course/Speed Position and Course/Speed with SEA INF DNID, LES ID, Member No. Destination Regular Interval, Daily Activation...
- Page 110 APPENDIX 1 MENU TREE LES ID LES selection Activation Regular Interval, Daily Interval Time 00:10 - 99:59; 00:10 (Regular Interval chosen) Report Times 1 - 999; 1, - - - (No Limit) Start Time 1 (Daily chosen) 00:00 - 23:59 Start Time 2 (Daily chosen) 00:00 - 23:59 Start Time 3 (Daily chosen)
- Page 111 APPENDIX 1 MENU TREE F8: Setup 1. System Setup System Date & Time Date input IMN input MES Operation Mode INMARSAT-C, EGC Nav Port* LAN Port* Message Output Port* EGC Output Port* Network Setup* Command Window * No use. (For service technicians.) 2.
- Page 112 APPENDIX 1 MENU TREE Additional Position 1 position 4. EGC Setup Navarea 9 areas max. Fixed Area Waypoint (ON) Station Code Type of Message Ice reports ON, OFF Meteo. forecasts ON, OFF Pilot service ON, OFF LORAN messages ON, OFF SATNAV messages ON, OFF Other navaid msg...
- Page 113 APPENDIX 1 MENU TREE 8. Configuration 1. Station List Station Group Max. 5 characters (Max. 99 stations) Max. 15 characters Station Name TELEX/MES Destination Type Prefix Code E-Mail (Prefix chosen) Country Code PSDN Station ID X400 DNID Special TELEX/MES (Prefixed) FAX (Prefixed) PSDN (Prefixed) X400 (Prefixed)
- Page 114 APPENDIX 1 MENU TREE 6. Export/Import Export 1. Sent Message 2. Received Message 3. EGC Message 4. Station List 5. LES List 6. E-Mail/SMS Service List 7. Test 8. Maintenance 9. Settings Import 1. Station List 2. LES List 3. E-Mail/SMS Service List 4.
-
Page 115: Appendix 2 Messages
APPENDIX 2 MESSAGES Below are the various operational messages and their meanings. Messages are arranged accord- ing to function key. Confirmation message These messages appear in the confirmation window. Confirmation window 1. "Save this message?" You are asked if you want to save a message. 2. - Page 116 APPENDIX 2 MESSAGES 8. "Checking" Checking MIME. 9. "Now decoding..." 10. "Completed." Save/MIME completed. 11. "Decode failed." MIME decoding failed. 12. "This terminal does not support this code." You attempted to decode a file not supported by the terminal. 13. "Decoded % file(s)." Decoding MIME-coded file.
- Page 117 APPENDIX 2 MESSAGES F5: Data report 1. "Input Error: Country/Ocean Code." Invalid country/ocean code entered. 2. "Input Error: Destination." Invalid station ID entered. 3. "Input Error: LES ID." Invalid LES ID entered. 4. "Input Error: Interval Time" Invalid interval time entered. 5.
- Page 118 APPENDIX 2 MESSAGES 5. "Timeout! Logout Acknowledgement not received." Logout acknowledgement not received. 6. "Logout failed because of RESTORATION mode Network." You attempted to logout when the restoration mode is active. AP-12...
-
Page 119: Appendix 3 Abbreviations
APPENDIX 3 ABBREVIATIONS Abbreviation Meaning Acquire Automatic Gain Control Antenna AOR-E Atlantic Ocean Region-East AOR-W Atlantic Ocean Region-West AORE Same as AOR-E AORW Same as AOR-W Ascii American Standard Code for Information Interchange ASCII Same as Ascii Australia BBER Bulletin Board Error Rate bits per second Carrier to Noise ratio Cate... - Page 120 APPENDIX 3 ABBREVIATIONS Abbreviation Meaning Enhanced Group Call E-mail END, ENID EGC Network Identity Number EPADR Enhanced Pre-Assigned Data Report Escape Ethernet Euro (currency) External Facsimile (receiver) Freq Frequency GMDSS Global Maritime Distress Safety System Global Positioning System Hertz International Alphabet No. 5 Identification Inmarsat Maritime Number International Maritime Organization...
- Page 121 APPENDIX 3 ABBREVIATIONS Abbreviation Meaning Longitude LRIT Long Range Identification and Tracking Mobile Earth Station Meteo. Meteorological MIME Multipurpose Internet Mail Extensions Message Navigation Network Coordination Station Netherlands No Good Number Norway Operation Control Center Operation PADR Pre-Assigned Data Report Personal Identification Number Pacific Ocean Region PSD, PSDN...
- Page 122 APPENDIX 3 ABBREVIATIONS Abbreviation Meaning SMTP Simple Mail Transfer Protocol SSAS Ship Security Alert System Status Sync Synchronize, Synchronized Synthe Synthesizer Size T30FAX T.30 Fax TCXO Temperature Compensated Crystal Oscillator Time Division Multiplexing TERM Terminal Telex Transmit (send) UNSYNC Unsynchronized Universal Time Coordinate UUENCODE Unix-to-Unix encode...
- Page 123 APPENDIX 4 INTERNATIONAL TELEX/ TEL. COUNTRY CODE LIST, LES LIST International Telex/Telephone Country Code List Telephone Telex Country Area and Country Remarks for Telex Code Country Code Code Afghanistan Alaska Albania Algeria American Samoa American Virgin Is. Telex calls to former WUI subscribers, insert the figure "9"...
- Page 124 APPENDIX 4 INTERNATIONAL TELEX/TEL. COUNTRY CODE LIST, LES LIST Telephone Telex Country Remarks for Telex Code Area and Country Country Code Code Kampuchea Rep. Cambodia Cameroon Disregard the figure "0" at head of subscriber number. Canada Destination code is the same as for Spain. Canary Is.
- Page 125 APPENDIX 4 INTERNATIONAL TELEX/TEL. COUNTRY CODE LIST, LES LIST Telephone Telex Country Area and Country Remarks for Telex Code Country Code Code Falkland Is. (Malvinas) Faroe Is. Fiji Finland France French Guiana French Polynesia Gabon Gambia Georgia Germany (Fed, Rep. of) Ghana Gibraltar Greece...
- Page 126 APPENDIX 4 INTERNATIONAL TELEX/TEL. COUNTRY CODE LIST, LES LIST Telephone Telex Country Area and Country Remarks for Telex Code Country Code Code Jamaica Japan KDDI (for 5 digits) Jordan Kazakhstan Kenya Kiribati Subscriber numbers are 770XX Korea (Demo, People's (899) Rep.
- Page 127 APPENDIX 4 INTERNATIONAL TELEX/TEL. COUNTRY CODE LIST, LES LIST Telephone Telex Country Area and Country Remarks for Telex Code Country Code Code Montserrat Morocco Mozambique Myanmar (formerly Burma) Namibia Nauru Nepal Netherlands Netherlands Antilles New Caledonia New Zealand Nicaragua 2XXXX other numbers are for Semi-automatic calls. Niger Nigeria Niue Is.
- Page 128 APPENDIX 4 INTERNATIONAL TELEX/TEL. COUNTRY CODE LIST, LES LIST Telephone Telex Country Area and Country Remarks for Telex Code Country Code Code Subscriber numbers are 916XXX Reunion Disregard the figure "0" at head of Romania subscriber number. Russian Federation Rwanda Saipan San Marino Sao Tome &...
- Page 129 APPENDIX 4 INTERNATIONAL TELEX/TEL. COUNTRY CODE LIST, LES LIST Telephone Telex Country Area and Country Remarks for Telex Code Country Code Code Turks & Caicos Is. Tuvalu U. A. E. 2XXXX, 3XXXX, 5XXXX Abu Dhabi 695XX Ajman 4XXXX Dubai 8XXXX Fujairah 9XXXX Ras Al Khaimah...
-
Page 130: Appendix 4 International Telex/Tel. Country Code List, Les List
APPENDIX 4 INTERNATIONAL TELEX/TEL. COUNTRY CODE LIST, LES LIST Telephone Telex Country Area and Country Remarks for Telex Code Country Code Code Telex calls to places other than Kinshasa Subscriber Zaire beginning with 2XXXX can be made as Semi-automatic calls. Zambia Zanzibar Zimbabwe... -
Page 131: Appendix 5 International Telex Abbreviations, International Telegraphy Alphabet
APPENDIX 5 INTERNATIONAL TELEX ABBREVIATIONS, INTERNATIONAL TELEGRAPHY ALPHABET International Telex Abbreviations Abbreviation Meaning Advise Acknowledge Again BI(GS) Good bye I cut off. Confirm Collation How do you receive? Out of order Down Error From Go ahead Minutes Wait(Waiting) MUTI Mutilated Correspondence to this subscriber is not admitted. - Page 132 APPENDIX 5 INTERNATIONAL TELEX ABBREVIATIONS, INTERNATIONAL TELEGRAPHY ALPHABET International Telegraphy Alphabet FIGURES LETTERS FIGURES LETTERS BELL CARRIAGE RETURN LINE FEED LETTERS FIGURES SPACE BLANK * = Cannot be entered. AP-26...
-
Page 133: Appendix 6 Digital Interface
APPENDIX 6 DIGITAL INTERFACE Digital Interface Input sentences: BWC, BWR, DBT, DTM, GGA, GLL, GNS, GSA, MTW, RMA, RMB, RMC, VDO, VDR, VTG, WPL, ZDA Output sentences: None Data reception Data is received in serial asynchronous form in accordance with the standard referenced in IEC 61162-1 Ed.4 2010-11. - Page 134 APPENDIX 6 DIGITAL INTERFACE BWR: Bearing and distance to waypoint - rhumb line $ **BWR,hhmmss.ss,llll.ll,a,IIIII.II,a,yyy.y,T,yyy.y,M,yyy.y,N,c--c,A,*hh<CR><LF> 9 10 11 12 13 1. UTC of observation (000000.00 - 240001.00) 2. Waypoint latitude (0.00000 - 9000.00000) 3. N/S 4. Waypoint longitude (0.00000 - 18000.00000) 5.
- Page 135 APPENDIX 6 DIGITAL INTERFACE GGA: Global positioning system fix data $**GGA,hhmmss.ss,llll.lll,a,yyyyy.yyy,a,x,xx,x.x,x.x,M,x.x,M,x.x,xxxx,*hh<CR><LF> 5 6 7 8 9 10 11 12 13 14 1. UTC of position (no use) 2. Latitude (0.00000 - 9000.00000) 3. N/S 4. Longitude (0.00000 - 18000.00000) 5. E/W 6.
- Page 136 APPENDIX 6 DIGITAL INTERFACE GSA: GNSS DOP and active satellites $**GSA,a,x,xx,xx,xx,xx,xx,xx,xx,xx,xx,xx,xx,xx,x.x,x.x,x.x,a*hh<CR><LF> 1. Mode (M=manual, forced to operate in 2=2D 3=3D mode A=automatic, allowed to automatically switch 2D/3D) 2. Mode (1=fix not available 2=2D 3=3D) 3. ID number of satellites used in solution (01 - 96, NULL) 4.
- Page 137 APPENDIX 6 DIGITAL INTERFACE RMB: Recommended minimum specific navigation data $**RMB,A,x.x,L,CCCC,CCCC,xxxx.xx,a,xxxxxx.xx,a,xxx.x,xxx,xx.x,A,a*hh <CR><LF> 1 2 3 11 12 1314 1. Data status (A=data valid, V=navigation receiver warning) 2. Cross track error (NM) (0.00 - 9.99), No use 3. Direction to steer (L/R), No use 4.
- Page 138 APPENDIX 6 DIGITAL INTERFACE VDR: Set and drift $**VDR,x.x,T,x.x,M,x.x,N,*hh <CR><LF> 1 2 3 4 5 6 1. Direction, degrees (0.0 - 360.0) 2. T=True (fixed) 3. Direction, degrees (0.0 - 360.0) 4. M=Magnetic (fixed) 5. Current speed (0 - 99.99) 6.
-
Page 139: Specifications
FURUNO FELCOM 19 SPECIFICATIONS OF INMARSAT MINI-C MES FELCOM 19 GENERAL Transmitting frequency 1626.5 to 1646.5 MHz Receiving frequency 1537.0 to 1544.2 MHz Channel interval 5 kHz Better than -23.7 dB/K (elevation angle 5°) EIRP 7 to 16 dBW (elevation angle 5°) - Page 140 This page is intentionally left blank. SP-2...
-
Page 141: Index
INDEX equipment trouble ........8-7 warning............ 8-8 Abbreviations ........AP-13 Export system settings ......3-22 Abort............7-1 Alerts ............2-11 Files combining ..........4-8 Communication log confidential ..........4-2 displaying ..........5-20 opening ........... 4-7 printing ..........5-20 printing ............ 4-8 Communication unit routine ............. - Page 142 INDEX Polling commands..........6-5 PIN code registration........6-5 reception ..........6-7 Position input ...........3-17 Printing received messages, automatic....5-18 PV test procedure ..........8-3 results............8-4 Received message alarm ......5-16 Receiving deleting received messages....5-19 displaying received message ....5-16 message..........5-15 printing received messages ....5-16 received message alarm ......5-16 saving received messages.....5-19 saving received messages automatically ........5-19...
Need help?
Do you have a question about the FELCOM19 Inmarsat Mini-C MES and is the answer not in the manual?
Questions and answers