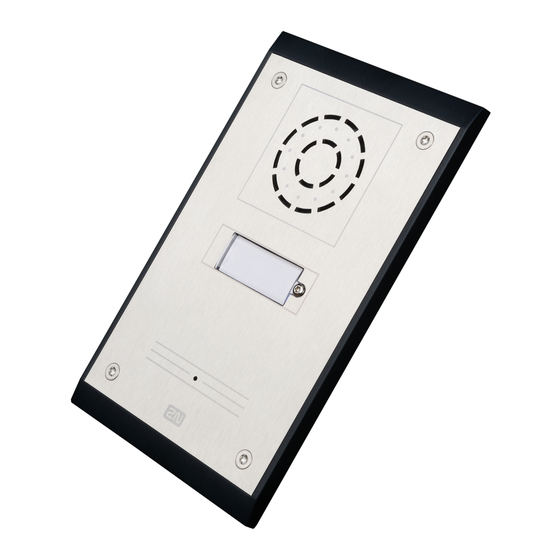
2N Helios IP Uni Installation Manual
Door access intercom
Hide thumbs
Also See for Helios IP Uni:
- Installation manual (35 pages) ,
- Installation manual (34 pages)
Table of Contents
Advertisement
Quick Links
Download this manual
See also:
Installation Manual
Advertisement
Table of Contents

Summary of Contents for 2N Helios IP Uni
- Page 1 ® Helios IP Uni Door Access Intercom Brief Installation Manual www.2n.cz Version: 1.0.2...
-
Page 3: Before You Start
Before You Start 1.1 Before You Start Product Completeness Check ® Please check the contents of your 2N Helios IP Uni delivery: ® 1 2N Helios IP Uni (selected model) 1 Torx 10 / Torx 20 double-ended wrench ® 1 2N... -
Page 4: Mechanical Installation
Mechanical Installation 1.2 Mechanical Installation Mountiong Type Overview Refer to the table below for a list of mounting types and necessary components. Flush mounting – classic bricks (also hollow bricks, thermally insulated walls, etc.) What you need: A properly cut hole Plaster, mounting glue, mounting foam or mortar as necessary Flush mounting –... -
Page 5: Common Mounting Principles
Select flush mounting where possible to make your product elegant looking, more vandal resistant and more secure. Caution ® Stainless steel screws are used for the 2N Helios IP Uni assembly. Other screws than stainless steel ones corrode soon and may aesthetically deteriorate the surrounding environment! Having removed the front panel, make sure that no dirt gets inside the ... -
Page 6: Flush Mounting - Classic Bricks
Mechanical Installation Flush Mounting – Classic Bricks 1. Cut a wall hole using the template enclosed. Make sure that all the required cables are available in the hole. 2. Unpack the plastic mounting box. Break out the cable holes as necessary and make sure that the wall hole is big enough for the box. -
Page 7: Flush Mounting - Plasterboard
Mechanical Installation Flush Mounting – Plasterboard If this is your first plasterboard installation, check the function of the intercom side clamps. Loosen and then re-tighten the clamp screw to see how it turns automatically and starts moving forwards in its slot. Remember to return the clamp into the original position after the check! Caution... -
Page 8: Electric Installation
Electric Installation 1.3 Electric Installation ® This subsection describes how to connect 2N Helios IP Uni into your Local Area Network (LAN) and how to connect supply voltage and the electric lock. PCB Connectors Description of Connectors LAN connector OUT1... -
Page 9: Electric Lock Connection
MDIX function and so both the straight and crossed cable versions can be used External Power Supply Connection ® Helios IP Uni can be fed either from an external 12V/1A DC power supply or from the LAN equipped with the PoE 802.3af supporting network elements. External Power Supply An external 12V power supply is connected to terminal block X19. -
Page 10: Button Tags - Insertion And Replacement
Tag Inserting / Replacing ® Helios IP Uni provides an intuitive, easy access to the name plates. The tags are easy to insert and replace even without a manual. - Page 11 Static/Dynamic Address Setting Mode Switching ® In case your 2N Helios IP Uni device is equipped with 1 or 2 buttons, you can switch the modes using one button only. ® Connect 2N Helios IP Uni to the power supply (or, disconnect and reconnect ...
-
Page 12: Maintenance
Maintenance 1.6 Maintenance Cleaning If used frequently, 2N® Helios IP Uni gets dirty. To clean it, use a piece of soft cloth moistened with clean water. We recommend you to obey the following principles while cleaning: Never use aggressive detergents (such as abrasives or strong disinfectants). -
Page 13: Technical Parameters
Technical Parameters 1.7 Technical Parameters Signalling protocol SIP (UDP) Buttons Transparent, white backlit buttons with easily Button design replaceable name tags Button count 1 or 2 Audio Microphone 1 integrated microphone Amplifier 1W (class D) Loudspeaker Volume control Adjustable with automatic adaptive mode Full duplex Yes (AEC) Audio stream... - Page 16 2N TELEKOMUNIKACE a.s. Modřanská 621, 143 01 Prague 4, Czech Republic Tel.: +420 261 301 500, Fax: +420 261 301 599 E-mail: sales@2n.cz Web: www.2n.cz 1815...


Need help?
Do you have a question about the Helios IP Uni and is the answer not in the manual?
Questions and answers