
Related Manuals for Sartorius CUBIS MSU


Summary of Contents for Sartorius CUBIS MSU
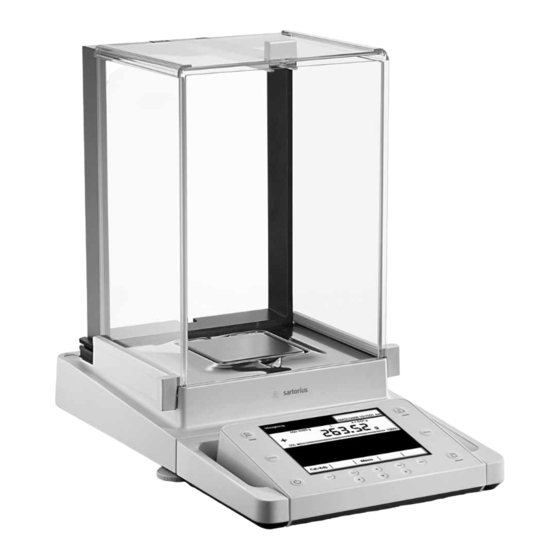
- Page 1 Brief Instructions Sartorius Cubis Series Electronic Precision and Analytical Balances MSU Models 98648-017-12...
-
Page 2: Table Of Contents
Information for the User Contents Notes on using this manual ..... . . 3 System Settings (Menu) ......23 Safety Instructions . -
Page 3: Notes On Using This Manual
This manual is considered a part of the product. Keep this manual in a safe and easily accessible location. If the manual should be lost or misplaced, please contact Sartorius for a replacement or download the latest manual from our website: www.sartorius.com... -
Page 4: Safety Instructions
Cubis models are designed specially for use in research, education and day-to-day laboratory tasks in science, technology and industry. They are designed to be used exclusively indoors. Cubis models can be operated standalone, connected to a PC or in a network. Cubis MSU Brief Instructions... -
Page 5: Operation
You can also set up password protection to meet your security requirements. If you do not require the user management features, simply leave this area unconfigured; the balance can be operated without defining any users. Cubis MSU Brief Instructions... - Page 6 PRINT key: Prints the measurement results currently displayed or an application- specific printout. On/off key: Switches on/off and into standby. Softkeys: Activate the function indicated directly above them. Cursor softkeys for navigation on the display. Keys for operating the electronic draft shield (optional) Cubis MSU Brief Instructions...
-
Page 7: Quick Start: First Weighing Operation
Open the draft shield (if applicable) and carefully place the sample on the weighing pan (in a suitable container). Close the draft shield (if present on your model). Once the readout has stabilized and the unit of measurement is displayed, you can read off the measurement value. Cubis MSU Brief Instructions... -
Page 8: Touch Screen User Interface
Print: Printout is active; print job not yet completed GLP: GLP-compliant printing is active (includes header) SQmin: SQmin value is shown if the weight value is less than SQmin U or U* or PA: The selected DKD value (measurement uncertainty) is shown Cubis MSU Brief Instructions... -
Page 9: Using The Touch Sreen
To continue to the next program step, select Next If the scroll indicator appears on the right edge of the display, there are more options than are shown on the display. Page down with the cursor keys to view all the selection options. Cubis MSU Brief Instructions... -
Page 10: Activating Or Changing Users
Use the cursor softkeys to select the user you would like to activate, then confirm with the softkey w. y The program returns to the operating mode, the selected user is logged in with the corresponding rights. Selecting will activate the currently selected user. Start Cubis MSU Brief Instructions... -
Page 11: Task Management
The available tasks are listed as touch screen buttons. When the balance is delivered, this overview is empty. Only after tasks have been configured are they displayed here. Select to start the currently selected task (identifiable based on the Start highlighting). Cubis MSU Brief Instructions... -
Page 12: Using Applications With Factory Settings
– Weighing in Percent – SQmin Function – Timer Controlled Action – Individual Identifiers – Totalizing – Density Determination – DKD Measurement Uncertainty – Statistics – Second Tare Memory (Manual Tare) – Calculation – Counting – Averaging – Checkweighing Cubis MSU Brief Instructions... - Page 13 Set weighing parameters Set printout parameters Enter name Save task A detailed description of how to combine tasks as well as an overview of the combination possibilities can be found in the user manual on the included CD-ROM. Cubis MSU Brief Instructions...
- Page 14 Device Parameters. Select Next Printout Parameters Prompt. Check the settings and modify them as needed. Explanations of the individual options can be found in the System Settings chapter in the section Device Parameters. Select Next. Cubis MSU Brief Instructions...
-
Page 15: Executing A Task
Follow the instructions on the display. In this brief instruction manual, we only describe the applications Weighing and Density Determination. For complete descriptions of all applications, please refer to the full user manual on the included CD-ROM. Cubis MSU Brief Instructions... -
Page 16: Weighing
The task list is displayed. Select the desired task. If the desired task is already marked, select Start. Select Weighing y The program switches to the operating mode, and the task is activated. Follow the instructions on the display. Cubis MSU Brief Instructions... -
Page 17: Density Determination
DKD Measurement Uncertainty, Second Tare Memory or Individual Identifiers. Prerequisites: In order to perform a density determination, you must have the Sartorius Density Determination Kit YDK01MS or similar kit. The bases for calculation applied in density determination are described in the user manual on the included CD-ROM. - Page 18 Options for combining applications are described in detail in the user manual on the included CD-ROM. Task Configuration: Determining the Density of a Solid Two methods are available for determining the density of solids: Buoyancy or Displacement. Cubis MSU Brief Instructions...
- Page 19 Enter the number of wires in the density kit Wire diameter: Enter the diameter of the wires in mm Vessel diameter: Enter the diameter of the vessel in mm All other prompts are the same as those for the Sartorius density kit (see above). Cubis MSU Brief Instructions...
- Page 20 Switch to application menu, if you have not already done so. y The task list is displayed. Select the desired task. Press Start to begin the task. y The program switches to operating mode. Follow the instructions on the display. Cubis MSU Brief Instructions...
-
Page 21: Calibration And Adjustment
Calibration/Adjustment with Built-in Calibration Weight Switch to the operating mode, if necessary. Make certain that the weighing pan is empty. Select Cal./Adj. Select and then Internal calibration/adjustment Start. Cubis MSU Brief Instructions... -
Page 22: Calibration/Adjustment With External Calibration Weight
The procedure is executed; progress is shown on the display. Wait until the calibration/adjustment has been completed (approximately 15 seconds). y When the procedure has ended, the selection list is shown again. Select to return the balance to the operating mode. Back Cubis MSU Brief Instructions... -
Page 23: System Settings (Menu)
Calibration/adjustment data – Timer controlled action – Device information – Device parameters – Import/export data – Service You have already learned how to use the menus. Only the configuration options and their meanings are described below. Cubis MSU Brief Instructions... -
Page 24: Level The Balance
Selecting the Unit for Calibration/Adjustment. Options: *Grams/kilograms. Defining External Calibration Weights Defining the Number of External Calibration Weights. Entering the Data for External Calibration Weights. Weight value / identifier / certificate Cubis MSU Brief Instructions... -
Page 25: Timer Controlled Action
Displaying the manufacturer, model, serial number, host name, IP address To view the parameters for SQmin and DKD, select SQminDKD To view the version of the balance, display and control unit and application software, select Version Cubis MSU Brief Instructions... -
Page 26: Device Parameters
View available memory. Select this option to see how much capacity is available in Alibi memory. Device Parameters Here you can edit the device configuration settings for the balance. These settings are user-independent. Cubis MSU Brief Instructions... - Page 27 : Defines whether the balance is automatically tared after Taring after printout a printout is generated. Options: *Off/on : Defines which event should trigger a printout. Print event Options: *Print button/start of the task/initialization of the application/result print Cubis MSU Brief Instructions...
- Page 28 Auto Delete. You can configure the Alibi memory to be regularly deleted and define the deletion cycle (in days). Restoring the Factory Settings (Reset) You can delete all of your settings and restore the factory settings. Cubis MSU Brief Instructions...
-
Page 29: Importing And Exporting Data From An Sd Card
The data is copied to the SD card. Import: folder on the SD card from which you would like to copy data Select the Mark the data you wish to import and select Next. y The data is copied from the SD card. Cubis MSU Brief Instructions... -
Page 30: User Management
If the desired option is already selected (highlighting), select to reach the next Next prompt. If more than one option can be selected for a single setting, select after Next making your selection(s) to proceed to the next prompt. Cubis MSU Brief Instructions... - Page 31 Step 5: Set the Acoustic Signal If the signal is on, a short beep-tone is emitted each time an operating element on the display is used. Select the desired volume Select to disable the acoustic signal. Cubis MSU Brief Instructions...
- Page 32 Select the upper button. Enter the desired password (minimum 4 characters, maximum 8; only numbers and uppercase letters are permitted). Press the lower button, and enter the password again. Select Next Cubis MSU Brief Instructions...
-
Page 33: Activating A User
The available users are listed. The currently active user is indicated by an arrow and a darker background. Select the user you would like to activate. y The program switches to operating mode; the selected user is activated and shown in the user info area on the upper right. Cubis MSU Brief Instructions... -
Page 34: Editing A User Profile
Select the profile you wish to copy. Select Next Enter a new profile name and a new description for the copied profile. Select Save y The display switches to the user selection list, which now includes the new (copied) profile. Cubis MSU Brief Instructions... - Page 35 The users selected for password deletion are listed in a confirmation prompt. If you wish to modify the selection, select To confirm the deletion, press y The display switches to the screen for editing user settings. Cubis MSU Brief Instructions...
- Page 36 Sartorius AG. The status of the information, specifications and illustrations in this manual is indicated by the date given below. Sartorius AG reserves the right to make changes to the technology, features, specifications and design of the equipment without notice. Status:...
Need help?
Do you have a question about the CUBIS MSU and is the answer not in the manual?
Questions and answers