Rotax 912 Series Installation Manual
Hide thumbs
Also See for 912 Series:
- User manual ,
- Maintenance manual (456 pages) ,
- Installation manual (136 pages)
Table of Contents
Advertisement
Advertisement
Chapters
Table of Contents

Related Manuals for Rotax 912 Series


Summary of Contents for Rotax 912 Series
- Page 1 AIRCRAFT ENGINES ref. no.: IM-912 | part no.: 898643...
- Page 2 This legend shall be included on any reproduction of these data, in whole or in part. The Manual must remain with the engine/aircraft in case of sale. Copyright 2012 © - all rights reserved. ROTAX is a trade mark of BRP-Powertrain GmbH&Co. KG. In the following document ®...
- Page 3 If any passages of this Manual are not clearly understood or if you have any questions, please contact an authorized distributor- or Service Center for ROTAX aircraft engines. BRP-Powertrain GmbH & Co KG (hereinafter “BRP-Powertrain“) wishes you much pleasure and satisfaction flying your aircraft powered by this ROTAX aircraft engine.
- Page 4 BRP-Powertrain INSTALLATION MANUAL NOTES INTRO Effectivity: 912 Series Edition 2/Rev. 0 page 2 August 01/2012...
- Page 5 08 01 2012 08 01 2012 08 01 2012 08 01 2012 08 01 2012 08 01 2012 08 01 2012 08 01 2012 08 01 2012 08 01 2012 Effectivity: 912 Series Edition 2/Rev. 0 page 1 August 01/2012...
- Page 6 08 01 2012 08 01 2012 08 01 2012 08 01 2012 08 01 2012 08 01 2012 08 01 2012 08 01 2012 08 01 2012 08 01 2012 Effectivity: 912 Series Edition 2/Rev. 0 page 2 August 01/2012...
- Page 7 08 01 2012 08 01 2012 08 01 2012 80-00-00 08 01 2012 08 01 2012 08 01 2012 08 01 2012 08 01 2012 08 01 2012 Rear page Effectivity: 912 Series Edition 2/Rev. 0 page 3 August 01/2012...
- Page 8 BRP-Powertrain INSTALLATION MANUAL NOTES Effectivity: 912 Series Edition 2/Rev. 0 page 4 August 01/2012...
-
Page 9: Table Of Amendments
73-00-00 08 01 2012 DOA* 75-00-00 08 01 2012 DOA* 76-00-00 08 01 2012 DOA* 78-00-00 08 01 2012 DOA* 79-00-00 08 01 2012 DOA* 80-00-00 08 01 2012 DOA* Effectivity: 912 Series Edition 2/Rev. 0 page 1 August 01/2012... - Page 10 BRP-Powertrain INSTALLATION MANUAL NOTES Effectivity: 912 Series Edition 2/Rev. 0 page 2 August 01/2012...
- Page 11 CO-Measurement for configuration with not GENUINE-ROTAX airbox 75-00-00 08 01 2012 chap. 4.1) Note added 78-00-00 08 01 2012 chap. 1) Caution added 78-00-00 08 01 2012 chap. 4.1) Muffler graphic change Effectivity: 912 Series Edition 2/Rev. 0 page 3 August 01/2012...
- Page 12 BRP-Powertrain INSTALLATION MANUAL NOTES Effectivity: 912 Series Edition 2/Rev. 0 page 4 August 01/2012...
-
Page 13: Table Of Contents
BRP-Powertrain INSTALLATION MANUAL Chapter: 00-00-00 GENERAL NOTE This section describes the installation of engine type ROTAX 912 Series. Introduction NOTE: The ROTAX 912 Series includes all engines such as the 912 A, 912 F, 912 S, 912 UL and 912 ULS. - Page 14 BRP-Powertrain INSTALLATION MANUAL NOTES 00-00-00 Effectivity: 912 Series Edition 2/Rev. 0 page 2 August 01/2012...
-
Page 15: General Note
For additional information on engines, maintenance or parts, you can also contact yout nearest authorized ROTAX-aircraft engine distributor. For ROTAX Authorized Distributors for Aircraft Engines see latest Opera- ROTAX Distributors tors Manual or on the Internet at the official Website www.FLYROTAX.com. -
Page 16: Type Description
2 yes for configuration 3 yes for configuration 4 yes NOTE: Conversion of the configuration 2/4 to configuration 3 may be accomplished by ROTAX Authorized Distributors or their Service Center. 00-00-00 Effectivity: 912 Series Edition 2/Rev. 0 page 4... -
Page 17: Standard Version
Optional - External alternator (12 V 40 A DC) - Vacuum pump (only for configuration 1, 2 and 4 possible) - Hydraulic constant speed propeller governor (only for configuration 3) Effectivity: 912 Series 00-00-00 Edition 2/Rev. 0 page 5 August 01/2012... - Page 18 Components especially developed and tested for this engine are readily available at BRP-Powertrain. The following auxiliary equipment has been tested on ROTAX engine type 912 for safety and durability to the standards of aviation. The furnishing of proof in accordance to the latest FAR or EASA has to be conducted by the aircraft manufacturer.
-
Page 19: Abbreviations And Terms Used In This Manual
DCDI Dual Capacitor Discharge Ignition d.c. direct current Department of Transport Design Organisation Approval EASA European Aviation Safety Agency iRMT independent ROTAX Maintenance Technician Installation Manual Exhaust Gas Temperatur Effectivity: 912 Series 00-00-00 Edition 2/Rev. 0 page 7 August 01/2012... - Page 20 Part number Time Since New TSNP Time Since New Part Time Between Overhaul Volt Visual Flight Rules List of Effective Pages Maintenance Manual shows the serial component number 00-00-00 Effectivity: 912 Series Edition 2/Rev. 0 page 8 August 01/2012...
-
Page 21: Conversion Table
21 13 8.4 5.3 3.3 2.1 1.3 0.8 0.52 1 bar = 100000 Pa/1000 hPa/ 100 kPa 1 bar = 14.5037 lbf/in (psi) 1 in Hg = 33.8638 hPa Effectivity: 912 Series 00-00-00 Edition 2/Rev. 0 page 9 August 01/2012... -
Page 22: Safety Notice
ENVIRONMENT NOTE Environment note gives you tips and behaviors to environmental protec- tion. A revision bar outside of the page margin indicates a change to text or graphic. 00-00-00 Effectivity: 912 Series Edition 2/Rev. 0 page 10 August 01/2012... -
Page 23: Safety Information
Unless correctly equipped to provide enough electri- cal power for night IFR (according latest requirement as ASTM), the ROTAX 912 UL/ULS is restricted to DAY VFR only. - In addition to observing the instructions in our Manual, general safety and accident preventative measures, legal regulations and regulations of any aeronautical authority must be observed. - Page 24 - Unauthorized modifications of engine or aircraft will automatically exclude any liability of the manufacturer for sequential damage. - This engine may be equipped with an other than the GENUINE-ROTAX vacuum pump. The safety warning accompanying the air pump must be given to the owner/operator of the aircraft into which the air pump is installed.
-
Page 25: Instruction
BRP-Powertrain is null and void (see Warranty Condi- tions). Spare parts are available at the authorized ROTAX Distributor and their Service Center. Any warranty by BRP-Powertrain becomes null and void if spare parts and or accessories other than GENUINE-ROTAX spare parts and/or accessories are used (see latest Warranty Conditions). -
Page 26: Technical Documentation
The status of the Manuals can be determined with the aid of the table of Status amendments. The first column indicates the revision state. This figure should be compared with the revision provided on ROTAX-Air- craft Engines Website: www.FLYROTAX.com. Amendments and current versions can be downloaded free of charge. - Page 27 This number (e.g. 00277) is of no signifi- cance for the content. Installation drawings and a DMU-model for (virtual) installation analysis Installation draw- ings are available from the ROTAX Authorized Distributors or their Service Centers. Effectivity: 912 Series 00-00-00 Edition 2/Rev. 0...
- Page 28 Schutzvermerk DIN 34 beachten FORM AND LOCATIONTOL. ACC. TO FORM AND LOCATIONTOL. ACC. TO DIN ISO 1101 DIN ISO 1101 CONSIDER COPYRIGHT DIN 34 CONSIDER COPYRIGHT DIN 34 Fig. 2 09171,09170 00-00-00 Effectivity: 912 Series Edition 2/Rev. 0 page 16 August 01/2012...
- Page 29 Permissible installation positions Page 12 Preparations for trial run of engine Page 14 Conduct test run Page 14 Verification of the throttle lever detent for max. Page 14 continuous power Effectivity: 912 Series 10-10-00 Edition 2/Rev. 0 page 1 August 01/2012...
- Page 30 BRP-Powertrain INSTALLATION MANUAL NOTES 10-10-00 Effectivity: 912 Series Edition 2/Rev. 0 page 2 August 01/2012...
-
Page 31: Preparations For Engine Installation
The engine can be attached with steel angles anchored on a timber plate. - When the engine is delivered, check that the GENUINE-ROTAX pack- ing is not damaged. - If the packing is damaged, contact the authorised sales and service partner for ROTAX aircraft engines. -
Page 32: Preservation And Storage Of The Engine
BRP-Powertrain. This warranty is subject to the following conditions: Warranty - The engine must be stored in the GENUINE-ROTAX packing as sup- plied by BRP-Powertrain. - The covers on various openings must not be removed. - The engine must be stored in a suitable place (at min. -40 °C/-40 °F and max. -
Page 33: Protective Coverings
1x each cap Supply and discharge of coolant 1x each cone plug Propshaft on configuration 3 1x disk plug Carburetor (if not equipped with an airbox) 2x disk plug Effectivity: 912 Series 10-10-00 Edition 2/Rev. 0 page 5 August 01/2012... -
Page 34: Engine Suspension And Installation Position
The engine suspension must be designed to prevent NOTICE WARNUNG and vibration excessive engine movement and to minimise noise emission and vibration on the airframe. If the GENUINE-ROTAX engine suspension frame is NOTICE WARNUNG not being used, a vibration test must be carried out. See SL-912-010. 10-10-00 Effectivity: 912 Series Edition 2/Rev. - Page 35 All elements for neutralising vibrations must be cap- NOTICE WARNUNG ments tive. The y-axis must be perpendicular to the longitudinal axis of the aircraft. Vertical axis Permissible deviation from perpendicular: 10°. Deviation Fig. Effectivity: 912 Series 10-10-00 Edition 2/Rev. 0 page 7 August 01/2012...
-
Page 36: Attachment Points
A minimum of 4 attachement points must be used. NOTICE WARNUNG These must be distributed symmetrically between the left (L) and right (R) sides. 10-10-00 Effectivity: 912 Series Edition 2/Rev. 0 page 8 August 01/2012... -
Page 37: Definition Of Attachment Points
Tighten all engine suspension screws as specified by the aircraft manufacturer. Attachment points Graphic Fig. 3 08318 Effectivity: 912 Series 10-10-00 Edition 2/Rev. 0 page 9 August 01/2012... - Page 38 5000 N/ 2000 N/ 3000 N/ 100 Nm/ 73.75 ft.lb 196.85 in. 78.74 in. 118.11 in. 10-10-00 Effectivity: 912 Series Edition 2/Rev. 0 page 10 August 01/2012...
- Page 39 25 mm/0.98 in. 25 mm/0.98 in. 25 mm/0.98 in. 19 mm /0.75 in. 16 mm /0.63 in. up to gearbox S/N 28986 starting from gearbox S/N 28987 Effectivity: 912 Series 10-10-00 Edition 2/Rev. 0 page 11 August 01/2012...
-
Page 40: Permissible Installation Positions
The centres of attachment points L1 and R1 must be on a y2 axis parallel Propeller axis to the y-axis. Permissible deviation from parallelism: 5° 5° 5° Fig. 4 02454 10-10-00 Effectivity: 912 Series Edition 2/Rev. 0 page 12 August 01/2012... - Page 41 BRP-Powertrain INSTALLATION MANUAL The y-axis must be perpendicular to the longitudinal axis of the aircraft. Vertical axis Permissible deviation from perpendicular: 10° Fig. 5 00515 Effectivity: 912 Series 10-10-00 Edition 2/Rev. 0 page 13 August 01/2012...
-
Page 42: Preparations For Trial Run Of Engine
If nominal performance won‘t be reached or is in excess of, examination of the installation and engine will be necessary. Don‘t conduct any test flights before fault has been NOTICE WARNUNG traced and found. 10-10-00 Effectivity: 912 Series Edition 2/Rev. 0 page 14 August 01/2012... - Page 43 Page 13 Requirements for correct operation of the integrated rec- Page 14 tifier-regulator Connection of the electric rev counter (tachometer) Page 16 Technical data Page 16 Connection Page 17 Effectivity: 912 Series 24-00-00 Edition 2/Rev. 0 page 1 August 01/2012...
-
Page 44: Subject
BRP-Powertrain INSTALLATION MANUAL Subject Page Battery Page 17 Capacitor (Option electrical fuel pump) Page 17 Easy start function on the electronic module (optional) Page 17 Wiring diagram Page 18 24-00-00 Effectivity: 912 Series Edition 2/Rev. 0 page 2 August 01/2012... -
Page 45: Requirements For The Circuit Wiring
Do not bend, kink, pinch or otherwise improperly stress NOTICE WARNUNG the wiring harness. Use proper routing, clamping and strain relief on wiring harnesses. Effectivity: 912 Series 24-00-00 Edition 2/Rev. 0 page 3 August 01/2012... -
Page 46: Electromagnetic Compatibility (Emc/Emi)
- Radio frequency (RF) sensitivity (conducted) - Radio frequency (RF) sensitivity (radiated) - Audio frequency sensitivity - Lightning strike sensitivity - Conducted radio frequency (RF) interference - Radiated radio frequency (RF) interference 24-00-00 Effectivity: 912 Series Edition 2/Rev. 0 page 4 August 01/2012... -
Page 47: Technical Data And Connection Of The Electric Components
- with on each plug socket 6.3 x 0.8 to DIN 46247 Connection Graphic Cyl. 1 Cyl. 2 Cyl. 3 Cyl. 4 Part Function Feeding wires (yellow) Fig. 1 02498 Effectivity: 912 Series 24-00-00 Edition 2/Rev. 0 page 5 August 01/2012... -
Page 48: Rectifier-Regulator
G = yellow - from generator R = red - to battery, positive terminal B = battery positive terminal L = warning lamp circuit C = control or field circuit Fig. 2 08631 24-00-00 Effectivity: 912 Series Edition 2/Rev. 0 page 6 August 01/2012... - Page 49 NOTICE WARNUNG mined and is valid only at the following conditions: - Ambient temperature: 20 °C (68 °F) - Voltage: permanent 13.5 V ± 5 % - Tolerance: max Effectivity: 912 Series 24-00-00 Edition 2/Rev. 0 page 7 August 01/2012...
-
Page 50: Electronic Modules
2000 3000 4000 5000 6000 (1/min.) Fig. 3 02500 2.3) Electronic modules Fig. 4. Component temp. for the electronic modules (1): max. 80 °C (176 °F). Component tem- perature 24-00-00 Effectivity: 912 Series Edition 2/Rev. 0 page 8 August 01/2012... -
Page 51: Ignition Switches (Mag Switch)
(EMI) depends essentially on the wire used. Min. section area: 2x 0.75 mm (18 AMG) (shielded flexible cable, shielding braid on both ends grounded to prevent EMI (e.g. specification MIL-27500/18). Effectivity: 912 Series 24-00-00 Edition 2/Rev. 0 page 9 August 01/2012... - Page 52 3.96 mm. At the new version the cable grommet and fasten connector are integrated in the 6-pole connec- tor housing. See also SI-912-013, latest issue. 24-00-00 Effectivity: 912 Series Edition 2/Rev. 0 page 10 August 01/2012...
-
Page 53: Assembly Of The Flat Pin Terminal
Faston connector and insulation sheath of the old version are available as spare part. See also SI-912-013, latest is- sue. NOTE: The pin holder must not be pressed with excessive force. Effectivity: 912 Series 24-00-00 Edition 2/Rev. 0 page 11 August 01/2012... - Page 54 BRP-Powertrain INSTALLATION MANUAL Assembly of the flat pin terminal Graphic Part Function Cable grommet Flat pin terminal Wiring (airframe) Crimping pliers Position in the connector housing Fig. 6 08323 24-00-00 Effectivity: 912 Series Edition 2/Rev. 0 page 12 August 01/2012...
-
Page 55: External Alternator (Optional Extra)
(tightening torque 4 Nm (35 in.lb). Via engine block. Grounding Control wiring (field circuit) (3): Control wiring - Via supplied standard plug (Sumitomo 6111-2568) and 6.3 x 0.8 Fasten connectors. Effectivity: 912 Series 24-00-00 Edition 2/Rev. 0 page 13 August 01/2012... -
Page 56: Requirements For Correct Operation Of The Integrated Rec
Wire size of the main circuit at least 4 mm (0.006 in Cross section A capacitor of at least 22000 µF/25 V is necessary to flatten voltage. Capacitor 24-00-00 Effectivity: 912 Series Edition 2/Rev. 0 page 14 August 01/2012... - Page 57 3 times the propeller speed. Graphic 1/min. / rpm. n Propeller 1000 1500 2000 2500 rpm. propeller n Generator 2000 3000 4000 5000 6000 7000 8000 rpm. alternator Fig. 8 00547 Effectivity: 912 Series 24-00-00 Edition 2/Rev. 0 page 15 August 01/2012...
-
Page 58: Connection Of The Electric Rev Counter (Tachometer)
(-V) 360° speed 6000 rpm (load 100 Ω) speed 6000 rpm (load 100 kΩ) (+V) (+V) 1 Umdr. (rev.) (-V) 360° 1 Umdr. (rev.) (-V) 360° Fig. 9 00219 24-00-00 Effectivity: 912 Series Edition 2/Rev. 0 page 16 August 01/2012... - Page 59 The start function can be used for aircraft, which have an engine start problem in cold conditions. NOTE: In addition also a modified fly wheel hub is offered, which aids improved starting. Effectivity: 912 Series 24-00-00 Edition 2/Rev. 0 page 17 August 01/2012...
- Page 60 Are included in the standard volume of supply of the engine. 22-24 Are included in the standard volume of supply of the engine. 10-14 Are available as accessory. 15-22 Can‘t be supplied by BRP-Powertrain. Can‘t be supplied by BRP-Powertrain. 24-00-00 Effectivity: 912 Series Edition 2/Rev. 0 page 18 August 01/2012...
- Page 61 BRP-Powertrain INSTALLATION MANUAL Wiring diagram Graphic Effectivity: 912 Series 24-00-00 Edition 2/Rev. 0 page 19 August 01/2012...
- Page 62 Electric rev counter Trigger coil assy. (tachometer) 2 capacitor Electrical fuel pump 22000 µF 2 ignition switches Starting equipment at the electronic modules Masterswitch Fig. 11 08639 24-00-00 Effectivity: 912 Series Edition 2/Rev. 0 page 20 August 01/2012...
- Page 63 Technical data Page 3 Operating limits Page 4 Vacuum pump Page 5 Technical data Page 5 Hydraulic governor for constant speed propeller Page 7 Technical data for connections Page 7 Effectivity: 912 Series 61-00-00 Edition 2/Rev. 0 page 1 August 01/2012...
- Page 64 BRP-Powertrain INSTALLATION MANUAL NOTES 61-00-00 Effectivity: 912 Series Edition 2/Rev. 0 pages 2 August 01/2012...
-
Page 65: Technical Data
If no limits are available in the technical literature, a max. of 1.0 IPS (inches per second) at 5000 rpm. can be as- sumed. Effectivity: 912 Series 61-00-00 Edition 2/Rev. 0 page 3 August 01/2012... - Page 66 Modification of the propeller shaft is not permitted. NOTICE WARNUNG Max. torque: - ROTAX 912 A, F, UL for i=2.2727 238 Nm (176 ft.lb) (at propeller) - ROTAX 912 A, F, UL for i=2.4286 255 Nm (188 ft.lb) (at propeller) - ROTAX 912 S, ULS for i=2.4286...
-
Page 67: Technical Data
Pay attention to manufacturers specifications. NOTICE WARNUNG NOTE: Speed reduction from crankshaft to hydraulic governor is Speed reduction 1.724 or 1.842, i.e. the vacuum pump runs with 0.58 or 0.54 of engine speed. Effectivity: 912 Series 61-00-00 Edition 2/Rev. 0 page 5 August 01/2012... - Page 68 Max. 17 mm (9/16“) Governor drive Internal spline 20/40 SMS 1834 NA 14x1.27x30x12 Power consumption Max. 600 W Vacuum pump Graphic Part Function Vacuum pump Attachment flange Gasket Fig. 4 08328 61-00-00 Effectivity: 912 Series Edition 2/Rev. 0 page 6 August 01/2012...
-
Page 69: Hydraulic Governor For Constant Speed Propeller
Technical data for connections Fig. 5. General note NOTE: See therefore also SB-912-052 “Installation/Use of gover- nors for ROTAX engine type 912 and 914“, latest issue. Drive via propeller gearbox. Drive - Position of the propeller connection (1) on the governor flange Axes... - Page 70 Thread Thread length Max. 14 mm (0.55 in.) Governor drive Internal spline 20/40 SMS 1834 NA 14x1.27x30x12 Power consumption Max. 600 W Operating pressure Max. 30 bar (435 psi) 61-00-00 Effectivity: 912 Series Edition 2/Rev. 0 page 8 August 01/2012...
- Page 71 Page 8 Centre of gravity of engine and standard accesso- Page 8 ries Moments of inertia Page 8 Operating limits Page 9 Deviation from the apparent perpendicular Page 9 Effectivity: 912 Series 72-00-00 Edition 2/Rev. 0 page 1 August 01/2012...
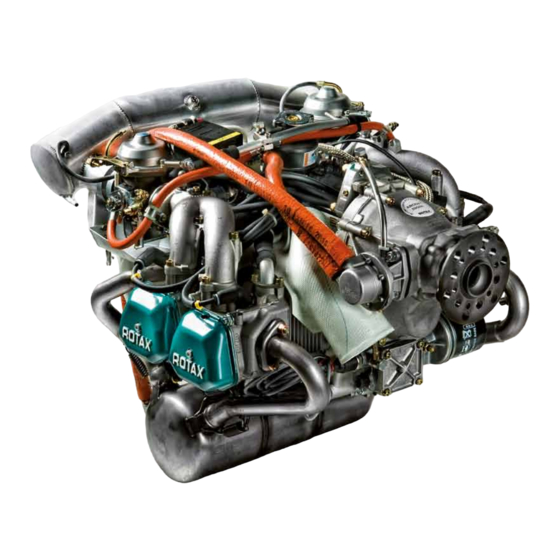
- Page 72 BRP-Powertrain INSTALLATION MANUAL Engine Overview Part Function Airbox Carburetor Mechanical fuel pump Fig. 1 09170 72-00-00 Effectivity: 912 Series Edition 2/Rev. 0 page 2 August 01/2012...
-
Page 73: Engine Components, Engine Views, Cylinder Designation
Cyl. 2 Cylinder 2 Cyl. 4 Cylinder 4 Side view Part Function Propeller flange Propeller gear Vacuum pump or hydraulic governor for con- stant speed propeller Constant depression carb Ignition cover Effectivity: 912 Series 72-00-00 Edition 2/Rev. 0 page 3 August 01/2012... -
Page 74: Front View
Fig. 2 00502 Front view Part Function Oil filter Sensor for oil temperature Oil pump Sensor for oil pressure Compensation tube Sensor for cylinder head temperature Fig. 3 00503 72-00-00 Effectivity: 912 Series Edition 2/Rev. 0 page 4 August 01/2012... -
Page 75: Top View
Cyl. 1 Part Function Mechanical fuel pump Exhaust socket Intake manifold Electronic module Electric starter Ignition housing Engine number Expansion tank Connection for manifold pressure External alternator Fig. 4 00504 Effectivity: 912 Series 72-00-00 Edition 2/Rev. 0 page 5 August 01/2012... - Page 76 BRP-Powertrain INSTALLATION MANUAL NOTES 72-00-00 Effectivity: 912 Series Edition 2/Rev. 0 page 6 August 01/2012...
-
Page 77: Technical Data
The engine weight is defined by the following conditions: General note - Engine dry from serial production with internal alternator, with over- load clutch (see chapter Description of design). ROTAX 912 A, 912 F, 912 UL: Version Version Weight Version 2 and 4 57.1 kg (125 lb) -
Page 78: Installation Dimensions
10900 11390 axis y1-y1 (kg cm (25.866 lb ft (27.029 lb ft moment of inertia around 17400 18200 axis z1-z1 (kg cm (41.291 lb ft (43.190 lb ft 72-00-00 Effectivity: 912 Series Edition 2/Rev. 0 page 8 August 01/2012... - Page 79 3) Operating limits Documentation overview: Manuals Operating limits Manual Engine speed See Operators Manual 912 Series, chap. 2.1 Acceleration See Operators Manual 912 Series, chap. 2.1 Oil pressure See Operators Manual 912 Series, chap. 2.1 Oil temperature See Operators Manual 912 Series, chap. 2.1 Coolant temperature See Operators Manual 912 Series, chap.
- Page 80 BRP-Powertrain INSTALLATION MANUAL Bank angle Graphic max. 40° max. 40° Bank or rotation Gravity Bank angle Acceleration Result of F1 and F2 Fig. 5 07191, 08325 72-00-00 Effectivity: 912 Series Edition 2/Rev. 0 page 10 August 01/2012...
- Page 81 Page 22 Requirements on the intake air ducting Page 23 Airfilter Page 23 Airbox Page 23 Technical data Page 25 Data for optional components of air intake system Page 27 Effectivity: 912 Series 73-00-00 Edition 2/Rev. 0 page 1 August 01/2012...
- Page 82 BRP-Powertrain INSTALLATION MANUAL Fuel system Overview Part Function Fuel pump Fuel hose assy. Fig. 1 08825 73-00-00 Effectivity: 912 Series Edition 2/Rev. 0 page 2 August 01/2012...
-
Page 83: Fuel System
- Fuel shut off valve - Electrical fuel pump - Manometer - Return line from tank to engine (with integrated adapter sleeve) as well as the required fuel lines and connections. Effectivity: 912 Series 73-00-00 Edition 2/Rev. 0 page 3 August 01/2012... - Page 84 Mechanical fuel pump* Fuel pressure control* Electrical fuel pump 1x check valve Return line from tank to engine (with integrat- ed adapter sleeve) * Standard version Fig. 2 07306 73-00-00 Effectivity: 912 Series Edition 2/Rev. 0 page 4 August 01/2012...
-
Page 85: Operating Limits
The design and layout of the entire fuel system must NOTICE WARNUNG ensure engine operation within the specified operat- ing limits. See 912 Series Operators Manual, section 2.1) Operating Limits. 1.2.1) Fuel pressure Fig. 3. General note Non-compliance can result in serious injuries or death! -
Page 86: Electrical Fuel Pump
Secure fuel hoses with suitable screw clamps or by crimp connection. Fuel return line The engine manufacturere requires the use of a fuel NOTICE WARNUNG return line. The fuel pressure can be adjusted using different adapter sleeve. 73-00-00 Effectivity: 912 Series Edition 2/Rev. 0 page 6 August 01/2012... - Page 87 15 Nm (135 in.lb) und LOCTITE 221 Banjo bolt At loosening or tightening of the banjo bolt (4) (tighten- NOTICE WARNUNG ing torque 10 Nm = 90 in.lb) support the fuel manifold appropriately. Effectivity: 912 Series 73-00-00 Edition 2/Rev. 0 page 7 August 01/2012...
-
Page 88: Fuel Manifold
73-00-00 Effectivity: 912 Series Edition 2/Rev. 0 page 8 August 01/2012... - Page 89 Hose connection on fuel pump (2) supplied with fire sleeved lines. Sleeved lines Fuel intake connection (5): Fitting (8) 9/16-18 UNF (AN-6) Tightening torque 15 Nm (135 in.lb) Fuel outlet connection (6): Hose nipple (7) 3/4 DIN 7642 Effectivity: 912 Series 73-00-00 Edition 2/Rev. 0 page 9 August 01/2012...
-
Page 90: Fuel Pump
1.4.3) Check valve Specification Opening pressure 0.1 bar - 0.15 bar (1.5 psi. - 2.2 psi.) Permitted pressure in reverse-biasing 2 bar (29 psi.) Burst pressure 5 bar (72.5 psi.) 73-00-00 Effectivity: 912 Series Edition 2/Rev. 0 page 10 August 01/2012... -
Page 91: Carburetor
If necessary install additional insulation or heat shields. Certification to the latest requirements such as FAR or EASA has to be conducted by the aircraft manufacturer. Effectivity: 912 Series 73-00-00 Edition 2/Rev. 0 page 11 August 01/2012... - Page 92 (2) with a draining connection (3) is fitted which serves as a heat shield as well. Drip tray and draining connection Graphic Part Function Float chamber venting lines Drip tray Draining connection Fig. 7 08644 73-00-00 Effectivity: 912 Series Edition 2/Rev. 0 page 12 August 01/2012...
-
Page 93: Drainage Piping On Airbox And Drip Trays
Connecting nipple (3) for leakage line: Connecting nip- ple for leakage Outside dia. 6 mm (1/4‘‘‘) line Slip on length Max. 17 mm (11/16‘‘) Effectivity: 912 Series 73-00-00 Edition 2/Rev. 0 page 13 August 01/2012... -
Page 94: Drainage Piping On Carburetor
However, it is possible for fuel to be expelled from these lines. Normally these lines are connected to fitting on the ROTAX airbox to provide the ideal ambient air pressure and away of draining any expelled fuel overboard. -
Page 95: Connections For Bowden Cable Actuation And Permissible Load
Action travel 65 mm (2.56 in.) Actuating force Min. 1.5 N (.3 lb) Max. 8 N (1.8 lb) Limit load 20 N (4.5 lb-force) NOTE: Throttle opens by spring. Effectivity: 912 Series 73-00-00 Edition 2/Rev. 0 page 15 August 01/2012... - Page 96 Max. 45 N (10 lb) Limit load 100 N (22 lb) Directive for choke actuation: The choke shaft (1) is marked (2). This mark has to point towards cable engagement (3). 73-00-00 Effectivity: 912 Series Edition 2/Rev. 0 page 16 August 01/2012...
-
Page 97: Requirements On Cable Actuation
The two throttles have to be controlled by two separate Bowden cables Bowden cable working synchronously. Adjust the cables to a free travel of 1 mm (.04 in.). Effectivity: 912 Series 73-00-00 Edition 2/Rev. 0 page 17 August 01/2012... -
Page 98: Requirements On The Throttle Lever
Adjustable positive stops for idle- and full throttle position are of course required. These stops have to be designed such to render adjustibility and to pre- vent overload of the idle stop on the carburetor. 73-00-00 Effectivity: 912 Series Edition 2/Rev. 0 page 18 August 01/2012... - Page 99 BRP-Powertrain INSTALLATION MANUAL The sketch depicts a feasible arrangement. Graphic Startleistung Take off power Leerlauf Idle Fig. 11 09137 Effectivity: 912 Series 73-00-00 Edition 2/Rev. 0 page 19 August 01/2012...
- Page 100 BRP-Powertrain INSTALLATION MANUAL NOTES 73-00-00 Effectivity: 912 Series Edition 2/Rev. 0 page 20 August 01/2012...
-
Page 101: Air Intake System
If an airbox or GENUINE-ROTAX airbox is retrofitted at a Airbox retrofitted ROTAX 912 (A, F, UL) Series, a change in the carb jetting is required. See Illustrated Part Catalog 912/914 chapter 22 and/or SB-912-044 “Use of the ROTAX supplied air- box“, latest issue. -
Page 102: Requirements On The Air Intake System
If an airbox of not ROTAX origin is used provisions for preheating the intake air have to be made to prevent formation of ice in the intake system. -
Page 103: Requirements On The Intake Air Ducting
- a min. flow rate of 6.23 m /min (220 yd 3.2.4) Airbox - Volume at least 2.5 Liter (.66 US gal) General note - Outline dimension see Fig. 12. Effectivity: 912 Series 73-00-00 Edition 2/Rev. 0 page 23 August 01/2012... - Page 104 (drainage lines of the airbox separately are allowed). Pressure differences between intake pressure and NOTICE WARNUNG pressure in the carburetor chambers may lead to engine malfunction due to incorrect fuel supply. 73-00-00 Effectivity: 912 Series Edition 2/Rev. 0 page 24 August 01/2012...
- Page 105 If the engine has been installed without employment of NOTICE WARNUNG the optional ROTAX engine frame which includes also support of the airbox, than provide an appropriately support (6) for the airbox. Connecting nipple (2) of drainage line: Connecting nip- Outside dia.
- Page 106 BRP-Powertrain INSTALLATION MANUAL Air intake system Graphic NOTE: Make sure that the air intake tubes of the airbox for fresh air and preheated air are connected correctly, Fig. shows the GENUINE-ROTAX airbox. Warm Cold (Preheated air) (Fresh air) Part Function...
-
Page 107: Airfilter
INSTALLATION MANUAL 3.3) Data for optional components of air intake system Fig. 13. Air filter Weight: - See chap. 72-00-00 section: Technical data. Air filter Graphic Fig. 13 09149 Effectivity: 912 Series 73-00-00 Edition 2/Rev. 0 page 27 August 01/2012... - Page 108 BRP-Powertrain INSTALLATION MANUAL Fig. 14. Airbox Airbox (configuration part no. 867756). Weight: See also chap. 72-00-00 section: Technical data. Airbox part no. 867756. Graphic NOTES Fig. 14 09174 73-00-00 Effectivity: 912 Series Edition 2/Rev. 0 page 28 August 01/2012...
- Page 109 Airbox Airbox (new version part no. 667355 in comparison to the old version). Weight: See also chap. 72-00-00 section: Technical data. Airbox part no. 667355 Graphic Fig. 15 08646 Effectivity: 912 Series 73-00-00 Edition 2/Rev. 0 page 29 August 01/2012...
- Page 110 BRP-Powertrain INSTALLATION MANUAL NOTES 73-00-00 Effectivity: 912 Series Edition 2/Rev. 0 page 30 August 01/2012...
- Page 111 Page 23 Coolant capacity Page 24 Cooling air duct Page 25 General notes on the cooling air ducts Page 26 Data for optional components of cooling system Page 27 Effectivity: 912 Series 75-00-00 Edition 2/Rev. 0 page 1 August 01/2012...
- Page 112 BRP-Powertrain INSTALLATION MANUAL Cooling system Overview Part Function Expansion tank Radiator cap Water tube Water pump Fig. 1 08532 75-00-00 Effectivity: 912 Series Edition 2/Rev. 0 page 2 August 01/2012...
-
Page 113: Cooling System
NOTE: The temperature sensors are located in cylinder head 2 and If a GENUINE-ROTAX radiator is being used, then an oil-water heat Radiator exchanger must not be present. The radiator is dimensioned to cater for the heat of the coolant and cannot cope with the additional heat generated by the oil system. - Page 114 BRP-Powertrain INSTALLATION MANUAL Cooling system Graphic Part Function Expansion tank Pressure cap Radiator Overflow bottle Fig. 2 09152 75-00-00 Effectivity: 912 Series Edition 2/Rev. 0 page 4 August 01/2012...
-
Page 115: Operating Limits
912 S/ULS Max. 135 °C (275 °F) Permanent monitoring of cylinder head temperature is necessary. Additional monitoring of the actual coolant temperature is possible but not necessary for waterless coolant. Effectivity: 912 Series 75-00-00 Edition 2/Rev. 0 page 5 August 01/2012... - Page 116 The boiling point of conventional coolant is 120 °C (248 °F) with a 50/50 mix- ture proportion and a system pressure of 1.2 bar (18 psi). 75-00-00 Effectivity: 912 Series Edition 2/Rev. 0 page 6 August 01/2012...
-
Page 117: Coolant Types
120 °C (248 °F) at a pressure of 1.2 bar (18 psi). The max. coolant temperature limit is therefore 120°C (248 °F). Permanent monitoring of coolant temperature and cylinder head tempera- ture is necesssary. Effectivity: 912 Series 75-00-00 Edition 2/Rev. 0 page 7... - Page 118 “boiling over“ (vapor loss), but not to prevent detonation, which can occur with cylinder head temperatures higher than 150 °C (300 °F) (for ROTAX 912 A/F/UL) and 135 °C (275 °F) (for ROTAX 912 S/ULS). It does not require pressure to maintain its boiling point. Due to a lower thermal conductivity the engine temperature will typically run about 5-10 °C (41-...
- Page 119 Marking Graphic DO NOT WATER TO THIS SYSTEM STOP! EVANS NPG+ WATERLESS COOLANT ONLY! Part Function Warning sticker Radiator cap Opening pressure information of radiator cap Fig. 3 08809 Effectivity: 912 Series 75-00-00 Edition 2/Rev. 0 page 9 August 01/2012...
- Page 120 BRP-Powertrain INSTALLATION MANUAL NOTES 75-00-00 Effectivity: 912 Series Edition 2/Rev. 0 page 10 August 01/2012...
-
Page 121: Checking The Efficiency Of The Cooling System
(cowling or free installation, tractor or pusher, fight speed etc.). Temperature sensors Graphic Fig. 4 00327 Effectivity: 912 Series 75-00-00 Edition 2/Rev. 0 page 11 August 01/2012... - Page 122 The sensor may be installed in a “TEE“ inline with the fluid hose or the Installation expansion tank may be modified to attach the sensor (not supplied by BRP-Powertrain). 75-00-00 Effectivity: 912 Series Edition 2/Rev. 0 page 12 August 01/2012...
- Page 123 Once the calculation is made and the indicating instrument re-labelled it is acceptable to use the cylinder head temperature as the primary cockpit display instead of installing a sensor in the coolant flow. Effectivity: 912 Series 75-00-00 Edition 2/Rev. 0...
- Page 124 In no case a cylinder head temperature higher than the NOTICE WARNUNG limit of 150 °C (300 °F) (for ROTAX 912 A/F/UL) and 135 °C (275 °F) (for ROTAX 912 S/ULS) can be de- fined because detonation could not be sufficiently pre- vented.
- Page 125 To minimize flow resistance, use radiators that have both a parallel flow and have a low flow resistance. A prime example would be the GENUINE-ROTAX radia- tors. Be sure to use short hoses and pipelines. All components of the cooling system must be suitably...
- Page 126 Also it is necessary to inform the pilots about the daily inspection of the coolant level in the aircraft manufac- turers operators (pilots) manual or an adequate link to the ROTAX 912 Series Operators Manual.
- Page 127 INSTALLATION MANUAL Connecting dimension Graphic 200± 10 mm 252± 5 mm Part Function Expansion tank Radiator cap Connection to the radiator Connection to the overflow bottle Fig. 7 07136 Effectivity: 912 Series 75-00-00 Edition 2/Rev. 0 page 17 August 01/2012...
- Page 128 (5) appropriate to specific installation (see illus- tration). Use two M6x20 Allen screws and lock washers to attach the water inlet elbow. Tighten screws to 10 Nm (90 in.lb.). 75-00-00 Effectivity: 912 Series Edition 2/Rev. 0 page 18 August 01/2012...
- Page 129 NOTE: The expansion tank (1) is fitted on top of the engine. Permissible position Graphic Part Function Expansion tank Radiator cap Radiator outlet Effectivity: 912 Series 75-00-00 Edition 2/Rev. 0 page 19 August 01/2012...
- Page 130 The overflow bottle and its supply and discharge must NOTICE WARNUNG not be installed close to the exhaust system, as emerg- ing coolant can be flammable under certain conditions. 75-00-00 Effectivity: 912 Series Edition 2/Rev. 0 page 20 August 01/2012...
- Page 131 BRP-Powertrain INSTALLATION MANUAL 3.3) ROTAX overflow bottle (optional extra) If the optional ROTAX overflow bottle is used, the purging system must be General note arranged as shown below. NOTE: To vent coolant steam from the overflow bottle in case of overheating, the plastic cap can be retrofitted with a hose nipple and hose.
- Page 132 Hose nipple Graphic LOCTITE 603 6 mm (0.236 in.) 11,5mm (0.453 in) Part Function Nut M6 Hose nipple Gear-type hose clamp Hose Bypass opening (slot) Cowling Fig. 10 09132,05033,09126 75-00-00 Effectivity: 912 Series Edition 2/Rev. 0 page 22 August 01/2012...
- Page 133 WARNUNG transfer thermal energy of approx. 25 kW (24 BTU/s) (for ROTAX 912 A/F/UL) or approx. 28 kW (26.5 BTU/ s) (for ROTAX 912 S/ULS) at take-off power. In an installation as depicted with the radiator (1) in a higher position than the standard supplied expansion tank, a water accumulator (2) has to be fitted instead of the expansion tank.
- Page 134 5800 rpm. At full throttle, an approximate value of around 0.75 m (28.59 cu.ft/sec) can be assumed for the required cooling air flow. The flow resistance of the coolant in the optional ROTAX radiator is cor- Flow resistance rectly adjusted for the cooling system.
- Page 135 As long as the oil and coolant temperatures are within the operating limits, no cooling air ducts are necessary. Cooling air duct Graphic Schraube / screw M5 Fig. 12 02050 Effectivity: 912 Series 75-00-00 Edition 2/Rev. 0 page 25 August 01/2012...
- Page 136 The stated maximum permissible loads (per screw) NOTICE WARNUNG are valid only if using the minimum specified thread length, and must never be exceeded. Thread height 18 mm (0.71 in.)). 75-00-00 Effectivity: 912 Series Edition 2/Rev. 0 page 26 August 01/2012...
- Page 137 (Nm) in x, y and z axis Min. length of thread (mm) 15 mm (0.59 in.) 4.4) Data for optional components of cooling system Fig. 13 and Fig. 15 Overflow bottle Fig. 13 09148 Effectivity: 912 Series 75-00-00 Edition 2/Rev. 0 page 27 August 01/2012...
- Page 138 BRP-Powertrain INSTALLATION MANUAL Weight: see also chap. 72-00-00 section: 2.1) Radiator Fig. 14 08791 Weight: see also chap. 72-00-00 section: 2.1). Cooling air baf- Fig. 15 09165 75-00-00 Effectivity: 912 Series Edition 2/Rev. 0 page 28 August 01/2012...
- Page 139 Page 4 Oil pressure sensor Page 6 Mechanical rev counter (tach drive) Page 8 Monitoring of the intake manifold pressure Page 9 Air temperature in the airbox (optional) Page 10 Effectivity: 912 Series 76-00-00 Edition 2/Rev. 0 page 1 August 01/2012...
- Page 140 BRP-Powertrain INSTALLATION MANUAL NOTES 76-00-00 Effectivity: 912 Series Edition 2/Rev. 0 page 2 August 01/2012...
-
Page 141: Connections For Instrumentation
The graph resistance over temperature has been de- NOTICE WARNUNG termined, and is effective at the following conditions only: Ambient temperature: 20 °C (68 °F) Tolerance: Max ±10 % Effectivity: 912 Series 76-00-00 Edition 2/Rev. 0 page 3 August 01/2012... -
Page 142: Sensor For Oil Temperature
Position of the temperature sensor (1) on the oil pump flange: Position Axes Point of support x-axis y-axis z-axis -115.0 mm (-4.53 in) 46.0 mm (1.81 in) -150.0 mm (-5.92 in) 76-00-00 Effectivity: 912 Series Edition 2/Rev. 0 page 4 August 01/2012... - Page 143 Tolerance: Max ±10 % Sensor for oil temperature Graphic (Ω) 1200 1000 140 160 (°C) Part Function Sensor for oil temperature TO marking Graph resistance over temperature Fig. 2 00227, 00327 Effectivity: 912 Series 76-00-00 Edition 2/Rev. 0 page 5 August 01/2012...
-
Page 144: Oil Pressure Sensor
- The Red lead from the sensor has to be connected to the positive bus via a fuse or circuit breaker. - The White lead (output signal) has to be connected directly to the inst- rument. 76-00-00 Effectivity: 912 Series Edition 2/Rev. 0 page 6 August 01/2012... - Page 145 Ambient temperature: 20 °C (68 °F) Tolerance: Max ±3 % Oil pressure sensor Graphic (mA) (bar) Part Function Oil pressure sensor Graph current over pressure sensor Fig. 3 08379,08442 Effectivity: 912 Series 76-00-00 Edition 2/Rev. 0 page 7 August 01/2012...
-
Page 146: Mechanical Rev Counter (Tach Drive)
P4 -465,0 mm (-18.31 in) 87,0 mm (3.43 in) -160,0 mm (-6.3 in) Mechanical rev counter Graphic M18x1, Part Function Ignition housing Rev counter shaft Fig. 4 00560, 00562 76-00-00 Effectivity: 912 Series Edition 2/Rev. 0 page 8 August 01/2012... -
Page 147: Monitoring Of The Intake Manifold Pressure
Monitoring of the intake manifold pressure Graphic Part Function Connection nipple Screw M3.5x6 Fig. 5 02051 Effectivity: 912 Series 76-00-00 Edition 2/Rev. 0 page 9 August 01/2012... -
Page 148: Air Temperature In The Airbox (Optional)
This connection is closed on the standard engine by a plug screw. Connection: Plug screw Thread Thread length approx. 9 mm (3/8“) Airbox Graphic Part Function Plug screw Fig. 6 08647 76-00-00 Effectivity: 912 Series Edition 2/Rev. 0 page 10 August 01/2012... - Page 149 Exhaust system requirements Page 5 Technical data Page 5 Attaching of the exhaust system Page 7 Operating limits Page 9 Data for optional components of exhaust system Page 10 Effectivity: 912 Series 78-00-00 Edition 2/Rev. 0 page 1 August 01/2012...
- Page 150 BRP-Powertrain INSTALLATION MANUAL Exhaust system Overview Part Function Muffler Tension spring Exhaust tube EGT temperature sensor Fig. 1 06303 78-00-00 Effectivity: 912 Series Edition 2/Rev. 0 page 2 August 01/2012...
-
Page 151: General Notes On The Exhaust System
Springs to be secured with safety wire to prevent FOD! See Fig. 2. The sketch illustrates a possibility how to interconnect the exhaust springs to prevent the vibration of these springs and thus premature wear. Effectivity: 912 Series 78-00-00 Edition 2/Rev. 0 page 3 August 01/2012... - Page 152 10 mm (.4 in) stretch Safety wire It is also recommended to fill the springs with high heat silicone for addi- tional damping of vibrations. Fig. 2 08326 78-00-00 Effectivity: 912 Series Edition 2/Rev. 0 page 4 August 01/2012...
-
Page 153: Exhaust System Requirements
- Back pressure at maximum power: max. 0.2 bar (2.9 psi) measured in each case approx. 100 mm (3.94 in.) beyond the end of the exhaust flange) 2.2) If a GENUINE-ROTAX exhaust is not used The four prefitted exhaust sockets with exhaust flange and lock nuts must General note be used. - Page 154 BRP-Powertrain INSTALLATION MANUAL NOTES 78-00-00 Effectivity: 912 Series Edition 2/Rev. 0 page 6 August 01/2012...
-
Page 155: Attaching Of The Exhaust System
Max. permissible forces (safe load) in (N/lb- 1000 N/224.81 force) on x, y and z axis Max. permissible bending moment (safe load) 40 Nm/30 ft.lb in (Nm) on x, y and z axis Effectivity: 912 Series 78-00-00 Edition 2/Rev. 0 page 7 August 01/2012... - Page 156 BRP-Powertrain INSTALLATION MANUAL NOTES 78-00-00 Effectivity: 912 Series Edition 2/Rev. 0 page 8 August 01/2012...
-
Page 157: Operating Limits
WARNUNG (59 °F)) conditions and are only achieved if the engine is equipped with an unmodified GENUINE- ROTAX exhaust system and airbox. The exhaust gas temperatures (EGT) have to measured at the initial Readings of EGT engine installation in an aircraft and must be verified in the course of test flights. -
Page 158: Data For Optional Components Of Exhaust System
Data for optional components of exhaust system See also chap. 72-00-00. Weight Exhaust elbow Graphic Material/thickness: X 15 CrNiSi20-12 (DIN 1.4828) (stainless steel) a = 1.5 mm (0.06 in). Fig. 5 09164 78-00-00 Effectivity: 912 Series Edition 2/Rev. 0 page 10 August 01/2012... - Page 159 Material/thickness: X 6CrNiTi 189 (DIN 1.4541) (stainless steel) a = 1 mm (0.04 in). Fig. 6 09159 Exhaust elbox (tailpipe) Graphic Material/thickness: X 5CrNi 189 (DIN 1.4301) (stainless steel) a = 1 mm (0.04 in). Fig. 7 09153 Effectivity: 912 Series 78-00-00 Edition 2/Rev. 0 page 11 August 01/2012...
- Page 160 1 mm (0.04 in). Fig. 8 09166 Exhaust tube Graphic NOTES Material/-stärke: X 15CrNiSi 20, 12 (DIN 1.4828) (stainless steel) a = 1 mm (0.04 in). Fig. 9 09167 78-00-00 Effectivity: 912 Series Edition 2/Rev. 0 page 12 August 01/2012...
- Page 161 LUBRICATION SYSTEM Fig. 1. General note The ROTAX 912 Series is fitted with a dry sump forced lubrication system with a main oil pump with integrated pressure regulator and oil pressure sensor. This section of the Installation Manual describes the system, operating Table of contents limits and requirements for the lubrication system.
- Page 162 BRP-Powertrain INSTALLATION MANUAL NOTES 79-00-00 Effectivity: 912 Series Edition 2/Rev. 0 page 2 August 01/2012...
-
Page 163: Lubrication System (Oil System)
Oil tank to purging line NOTE: An oil tank is included with the standard engine version. No provision has been made for attachment of an oil cool- er on the engine. Effectivity: 912 Series 79-00-00 Edition 2/Rev. 0 page 3 August 01/2012... -
Page 164: Operating Limits
The lubrication system must be designed such that the permissible operating temperatures and maximum val- ues are not exceeded. Operation limits Manual Oil pressure See OM 912 Series, section. 2.1 Oil temperature See OM 912 Series, section. 2.1 Non-compliance can result in serious injuries or death! WARNUNG WARNING... -
Page 165: Checking The Oil Circuit
(2) or the crankshaft locking screw (3). The magnetic plug (2) or the crankshaft locking screw (3) is removed and the pressure sensor (1) is fitted. Effectivity: 912 Series 79-00-00 Edition 2/Rev. 0 page 5... - Page 166 If crankcase pressure and measuring pressure of the vacuum readings and all operational data (flight attitude, temperatures, etc.) are within the specified limits, then it can be assumed that the oil circuit is working cor- rectly. 79-00-00 Effectivity: 912 Series Edition 2/Rev. 0 page 6 August 01/2012...
-
Page 167: Measuring Of The Vacuum
If the oil is cold, the flow resistance increases, which means that not enough oil will flow on the suc- tion side. Effectivity: 912 Series 79-00-00 Edition 2/Rev. 0 page 7... - Page 168 BRP-Powertrain INSTALLATION MANUAL Measuring of the vacuum Graphic Part Function Suction oil line Oil pump Pressure gauge Fig. 3 08324 79-00-00 Effectivity: 912 Series Edition 2/Rev. 0 page 8 August 01/2012...
-
Page 169: Oil And Purging Line Requirements
- The purging line must be protected from any kind of ice formation from condensation, e.g. insulation protection or routing in a hose with hot air flow and furnishing the vent line with a bypass opening (1) before the cowling outlet (2). Effectivity: 912 Series 79-00-00 Edition 2/Rev. 0 page 9... - Page 170 BRP-Powertrain INSTALLATION MANUAL Purging line Graphic Part Function Bypass opening Outlet through the cowling Fig. 4 04874 79-00-00 Effectivity: 912 Series Edition 2/Rev. 0 page 10 August 01/2012...
-
Page 171: Connecting Sizes And Position Of Connections
M18x1,5x11 Tightening torque of inlet line 25 Nm (18.5 ft.lb) NOTE: Suitable for use of a swivel joint. Oil pump-inlet Graphic Part Function Oil pump (inlet) Fig. 5 09123 Effectivity: 912 Series 79-00-00 Edition 2/Rev. 0 page 11 August 01/2012... - Page 172 Oil pump (inlet) Oil pump (inlet) Thread (3) 3/4-16 UNF (AN-8) Tightening torque of inlet line 25 Nm (18.5 ft.lb) Oil pump-inlet Graphic Part Function Oil pump (inlet) Fig. 7 08633 79-00-00 Effectivity: 912 Series Edition 2/Rev. 0 page 12 August 01/2012...
- Page 173 Connection with screw connection (5) Thread 3/4-16 UNF (AN-8) Tightening torquet of oil return line. 25 Nm (18.5 ft.lb) Tightening torque of banjo bolt (4) 30 Nm (22 ft.lb) M16x1.5x28. Effectivity: 912 Series 79-00-00 Edition 2/Rev. 0 page 13 August 01/2012...
- Page 174 BRP-Powertrain INSTALLATION MANUAL Connection Graphic Part Function Slip-on connection Adaptor 3/4-16 UNF (AN-8) Hose nipple 10 DIN 7642 Banjo bolt M16x1.5x28 Screw connection Fig. 8 08634 79-00-00 Effectivity: 912 Series Edition 2/Rev. 0 page 14 August 01/2012...
-
Page 175: Oil Tank
Check what type of thread or connection there is on NOTICE WARNUNG the supplied oil tank. Connections for oil circuit (engine) Graphic Part Function Oil feed line Oil outlet Purging nipple Fig. 9 08246 Effectivity: 912 Series 79-00-00 Edition 2/Rev. 0 page 15 August 01/2012... - Page 176 956610 Nipple optional Nipple with cap nut / straight Outer dia. 12 mm (0.47 in.) Slip-on length max. 24 mm (0.94 in.) Tightening torque 25 Nm (18.44 ft.lb.) 79-00-00 Effectivity: 912 Series Edition 2/Rev. 0 page 16 August 01/2012...
- Page 177 Oil tank cover assy. (metric M18x1.5) Fig. 10 08799 If the lines are connected incorrectly, the engine will NOTICE WARNUNG not be lubricated and the engine will be damaged very quickly! Effectivity: 912 Series 79-00-00 Edition 2/Rev. 0 page 17 August 01/2012...
-
Page 178: Permissible Position And Location Of The Oil Tank
- Install the oil tank free of vibrations and not directly to the engine. - Oil tank cover (3) and oil drain screw (4) must be easily accessible. 79-00-00 Effectivity: 912 Series Edition 2/Rev. 0 page 18 August 01/2012... - Page 179 INSTALLATION MANUAL Position and location of the oil tank and oil cooler Graphic Part Function Oil tank Oil level Oil tank cover Oil drain screw Oil cooler Fig. 11 09162 Effectivity: 912 Series 79-00-00 Edition 2/Rev. 0 page 19 August 01/2012...
- Page 180 BRP-Powertrain INSTALLATION MANUAL NOTES 79-00-00 Effectivity: 912 Series Edition 2/Rev. 0 page 20 August 01/2012...
-
Page 181: General Notes On The Oil Cooler
- The oil cooler should always be installed below the engine oil pump. The oil cooler must be installed with the radiator caps NOTICE WARNUNG pointing upwards i.e. in positive direction on the z-axis. Effectivity: 912 Series 79-00-00 Edition 2/Rev. 0 page 21 August 01/2012... -
Page 182: Capacity
Volume of oil tank Up to the MIN.-mark 2.5 l (0.66 US gal) Up to the MAX.-mark 3.0 l (0.8 US gal) - Perform oil level check and add oil if necessary. 79-00-00 Effectivity: 912 Series Edition 2/Rev. 0 page 22 August 01/2012... -
Page 183: Purging The Lubrication System
Non-compliance can result in serious injuries or WARNUNG WARNING death! Do not remove the oil tank cover before ensuring that air pressure has been completely released from the tank. Effectivity: 912 Series 79-00-00 Edition 2/Rev. 0 page 23 August 01/2012... - Page 184 Carefully check all lubrication system connections, NOTICE WARNUNG lines and clamps for leaks and tightness. ENVIRONMENT NOTE Protect their environment. Observe to bury no oil! Dispose of oil in an environmentally friendly manner. 79-00-00 Effectivity: 912 Series Edition 2/Rev. 0 page 24 August 01/2012...
- Page 185 Direction of rotation of engine Relevant Plug Part Function Suction line Oil return line Free end Tank Plug Purging connection To oil pump Return from engine Fig. 12 09163,05448 Effectivity: 912 Series 79-00-00 Edition 2/Rev. 0 page 25 August 01/2012...
-
Page 186: Checking The Hydraulic Valve Tappet For Correct
5 min. at 3500 rpm, after refitting the valve co- vers, is required. In order to vent the hydraulic valve tappet, this process can be repeated another 2 times. Repeat on all other cylinders. 79-00-00 Effectivity: 912 Series Edition 2/Rev. 0 page 26 August 01/2012... -
Page 187: Replacement Of Components
All work has to be performed in accordance with the relevant Mainte- Work procedures nance Manual. Effectivity: 912 Series 79-00-00 Edition 2/Rev. 0 page 27 August 01/2012... - Page 188 BRP-Powertrain INSTALLATION MANUAL NOTES 79-00-00 Effectivity: 912 Series Edition 2/Rev. 0 page 28 August 01/2012...
-
Page 189: Data For Optional Components Of Lubrication System
Metric screw socket Thread M18x1,5 Tightening torque 22 Nm (16.23 ft.lb) and LOCTITE Tightening torque of oil feed line 25 Nm (18.5 ft.lb) and outlet, bent socket or hose nipple Effectivity: 912 Series 79-00-00 Edition 2/Rev. 0 page 29 August 01/2012... - Page 190 Hose nipple with cap nut (straight nipple) Hose nipple with union nut Outer dia. 12 mm (0.47 in) Slip-on length max. 24 mm (max. 0.94 in) Tightening torque 25 Nm (18.5 ft.lb) 79-00-00 Effectivity: 912 Series Edition 2/Rev. 0 page 30 August 01/2012...
- Page 191 BRP-Powertrain INSTALLATION MANUAL Connection variants Graphic Effectivity: 912 Series 79-00-00 Edition 2/Rev. 0 page 31 August 01/2012...
- Page 192 M22x1.5 hex. nut Gasket ring 14.2/18/2 Nipple 13.2/9.5 M18x1.5/M14x1.5 screw socket Bent socket assy. M14x1.5 angular tube Hose nipple with cap nut 3/4-16 UNF/M14x1.5 screw socket Fig. 14 08900 79-00-00 Effectivity: 912 Series Edition 2/Rev. 0 page 32 August 01/2012...
- Page 193 Table of contents aircraft engine. Subject Page Electric starter Page 3 Power supply wires from starter relay to the Page 3 electric starter Starter relay assy. technical data Page 4 Effectivity: 912 Series 80-00-00 Edition 2/Rev. 0 page 1 August 01/2012...
- Page 194 BRP-Powertrain INSTALLATION MANUAL Electric starter Overview Part Function Electric starter Fig. 1 05900 80-00-00 Effectivity: 912 Series Edition 2/Rev. 0 page 2 August 01/2012...
- Page 195 DIN 46225 (MIL-T7928; PIDG or equivalent). Connection Graphic Part Function Electric starter Plus terminal Fig. 2 00545 Grounding cable via engine block. Grounding Effectivity: 912 Series 80-00-00 Edition 2/Rev. 0 page 3 August 01/2012...
- Page 196 6.3x0.8 plug connector suitable for Faston connector (female) according to DIN 46247 (MIL-T-7928; (PIDG) or equivalent). Grounding The starter relay must be isolated from the aircraft NOTICE WARNUNG ground. 80-00-00 Effectivity: 912 Series Edition 2/Rev. 0 page 4 August 01/2012...
- Page 197 BRP-Powertrain INSTALLATION MANUAL Starter relay Graphic Part Function Main current connections Control wiring Ground Fig. 3 Effectivity: 912 Series 80-00-00 Edition 2/Rev. 0 page 5 August 01/2012...
- Page 198 BRP-Powertrain INSTALLATION MANUAL NOTES 80-00-00 Effectivity: 912 Series Edition 2/Rev. 0 page 6 August 01/2012...
- Page 199 AIRCRAFT ENGINES...
Need help?
Do you have a question about the 912 Series and is the answer not in the manual?
Questions and answers