Table of Contents
Advertisement
Quick Links
Advertisement
Table of Contents

Subscribe to Our Youtube Channel
Related Manuals for NewTek 3play


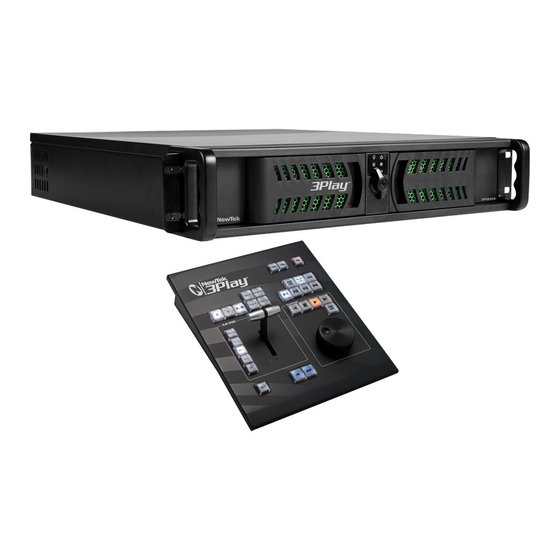
Summary of Contents for NewTek 3play
- Page 2 Revised – Nov 12, 2010 Copyright 2010 NewTek Inc., 5131 Beckwith Blvd. San Antonio, TX USA 78249. 3P , TriCaster, VT[5], SpeedEDIT, LiveSet, LiveMatte, and LiveText are trademarks of NewTek Inc. All other brand names, product names, or trademarks belong to their respective holders...
-
Page 3: Table Of Contents
Administration Screen ....................11 3.4.1 Standard and High Definition .................. 12 3.4.2 Output Mode ......................12 3Play Desktop ......................... 13 Setting Up ..........................15 Command and Control ....................15 Activating & Authorizing Windows™................16 License and Registration ..................17 4.3.1 Online Registration .................... - Page 4 Slow Motion ........................34 5.10 Jog and Jump ........................34 5.11 Event Panel........................35 5.12 Playback Information ..................... 37 3Play Reference ........................39 User Interface Requirements ..................39 3P-10 Control surface ..................... 40 6.2.1 Playback Speed ....................... 40 6.2.2 Event Marking ......................41 6.2.3...
- Page 5 6.3.5 About 3Play ......................55 6.3.6 Shutdown System ....................56 Desktop ......................... 56 6.4.1 Titlebar Display ....................... 57 6.4.2 I/O Configuration ....................57 6.4.3 Record and Device Status ..................63 6.4.4 Monitoring ......................64 6.4.5 Input 1, 2, 3 ......................65 6.4.6...
- Page 6 Registration and Tech Support ..................92 7.5.1 Register 3Play? ....................... 92 7.5.2 Contact Technical Support? ..................93 Miscellaneous ......................... 93 7.6.1 Access Windows™? ....................93 7.6.2 Return to 3Play from the Windows® Desktop ............93 Index ............................95 Credits ............................101...
-
Page 7: About This Manual
ABOUT THIS MANUAL Hate reading manuals? If so, you are part of the majority (estimates are that between 60 and 97% of the human race agree). Many prefer to jump right in, maybe asking a friend for occasional help (and who can blame them)? This manual attempts to tell you what you need to know in a friendly, concise way, while also providing a deeper reference section you can turn to when you really need specifics. -
Page 9: Software License And Limited Warranty
The copyright restrictions of this license extend to any further updates, software patches, or bug fixes made available to you by NEWTEK, whether distributed by floppy disc, CD ROM, DVD ROM or in an electronic format via BBS, ftp, email, etc. - Page 10 This License is effective until terminated. This License will terminate immediately without notice from NEWTEK or judicial resolution if you fail to comply with any provision of this License. Upon such termination you must destroy the Software, all accompanying written materials and all copies thereof.
- Page 11 If this Software was acquired by or on behalf of a unit or agency of the United States Government this provision applies. This Software: (a) Was developed at private expense, and no part of it was developed with government funds, (b) Is a trade secret of NEWTEK for all purposes of the Freedom of Information Act, Page 5...
- Page 12 NewTek warrants that for a period of 1 year from the date or your original purchase of our computer/video product (hardware), it shall be free from defects in material and workmanship. If...
- Page 13 (or operation) of any of the products purchase by you. NewTek’s liability is limited solely to the repair or replacement of the defective product. NewTek is under no obligation or responsibility to enhance or update the product.
-
Page 15: Introduction
RECORDING, MARKING AND EVENTS Recording is intrinsic to 3P – so much so that live input streams are only passed to 3Play’s output when Record is active (previously recorded streams can be output at any time, of course). Page 9... -
Page 16: What Is An Event
For this reason, Record is automatically enabled whenever you press the LIVE button on the 3P- 10 Control Surface (to select incoming live video streams as output). When recording is enabled, all three incoming a/v streams are continuously captured and stored. (Typically, each stream might represent a different camera angle.) Note: For any single session, recording stops automatically after 12 hours. -
Page 17: Administration Screen
Figure 1 Note: A variant of the usual 3Play Desktop is automatically displayed if the External 3P-10 Control Surface is not detected on launch. The Dashboard in this alternate interface provides full 3Play control using the mouse. ADMINISTRATION SCREEN The Administration Screen (Figure 2) appears on your monitor when you power up 3P . -
Page 18: Standard And High Definition
3.4.1 STANDARD AND HIGH DEFINITION records and replays video in a wide variety of popular formats. For a particular 3P session you may wish to connect High Definition (HD) devices, while another environment may consist of Standard Definition (SD) devices. The Video Standard (International model only) and Resolution must be correctly chosen in the New Session section of the Administration Screen before beginning a 3P session. -
Page 19: 3Play Desktop
3PLAY DESKTOP Clicking New Session (or Open Session) in the Administration Screen presents the 3P Desktop (Figure 3), which provides monitoring as well as numerous event management features. Figure 3 As mentioned in Section 3.3, 3P ’s Standard Desktop is designed for use with the external 3P- 10 control surface. -
Page 21: Setting Up
Screen resolution of 1280 x 768 pixels for its user interface. 2. Connect keyboard and mouse to appropriate ports on 3Play’s back plate. 3. Likewise, connect the 3P-10 control surface to a USB port. 4. Connect the A/C power cord from the three-prong connection on 3P ’s rear to an... -
Page 22: Activating & Authorizing Windows
3. Assign a name to the administrator account. You may type your name, company, or simply “3P ”. 4. Click Finish, and you system will re-start. After restarting and accepting NewTek’s 3P User Agreement, the 3P user interface will load automatically. -
Page 23: Lay License And Registration
If you have connected 3P to the Internet, simply click the button under Step 2 in the registration dialog. This will take you to the Registration page (http://register.newtek.com) in the Customer Care section of NewTek’s website where you will find further directions. -
Page 24: Registering By Telephone
4.3.2 REGISTERING BY TELEPHONE NewTek’s Customer Care center can also handle registration requests by telephone, if that is more convenient (when opportunity permits, you should still visit the website as discussed above to gain access to software updates). Please have your Product ID (from the Registration dialog mentioned earlier) handy when you call. -
Page 25: A/V Output
– Attach the SDI source connectors to the BNC connectors marked SDI in the Video In group. Component – Attach the appropriate BNC connectors from your sources to the second, third and fourth BNC connectors (labeled Y, Pb and Pr ) in each row in the Video In group. - Page 26 IMPORTANT NOTES: THE DISPLAY CAPABILITIES OF ALL OUTPUT VIDEO DEVICES CONNECTED TO 3PLAY FOR A GIVEN SESSION MUST MATCH THE SESSION INPUT SETTINGS. THE OUTPUT TYPE SETTING IN THE I/O CONFIGURATION PANEL MUST CORRESPOND TO THE CONNECTED DEVICES (SEE SECTION 4.4.3).
-
Page 27: I/O Configuration
2. Connect 3P ’s audio outputs: Analog audio - Connect external audio devices to the 1/4 inch (6.3mm) balanced phone jacks beside each video input section. b. Digital audio - A separate audio connection is not necessary for SDI output with embedded audio. -
Page 28: Genlock Input
Hint: 3P ’s SDI and analog output sections can be used simultaneously. For example, for an SD session you could choose Composite Output in the I/O Configuration panel (perhaps to view 3P output on a local composite monitor) at the same time as you use the SDI connection to supply broadcast equipment. -
Page 29: Network Connection
Figure 9 Again, ideally both the cameras and the 3P need to be genlocked. If they are not genlocked to the same source as the 3P output, a TBC (Time Base Correction) operation is applied - this can involve frames being dropped or inserted to maintain sync, which is not as desirable. Note: For a deeper explanation of genlocking, please see Section 6.4.2.4. - Page 30 7. Click the Change button, and enter the name of your local workgroup, as provided by your system administrator. 8. Close the OK button. 9. Close the System control panel. At this point, the network connection should be functional. If further help connecting is required, please consult your local system administrator.
-
Page 31: Quick Start
QUICK START This chapter provides a brief ‘hands-on’ tour of the major components and functions of your NewTek 3P ™. In a very short time, these basics will be second nature to you. More detailed reference material on all aspects of 3P follows in Chapter 6, 3Play Reference. - Page 32 3P-10 control surface was not detected on launch. Exit the Desktop by clicking the [x] Close button at upper-right, remove and reconnect the 3P-10, and open another New Session. If a connection problem persists, please contact NewTek Tech Support for assistance. (See Section 6.4.9 for information on the Dashboard.)
-
Page 33: Configuring Inputs
CONFIGURING INPUTS Figure 13 needs to know what sort of video sources are connected to it. Click the gear icon (Figure 13) next to the Close button in the upper-right corner of the 3P Desktop. This opens the I/O Configuration panel (Figure 14). Figure 14 Use the Video drop-down menu to identify your sources by connection type, choosing between Composite,... -
Page 34: Monitoring
MONITORING At this point, the video streams shown on the Input and Output monitors on the Desktop match. Live video is simply being passed through 3P Figure 15 The uppermost monitors are labeled Input Source 1, 2 and 3. These show the live video sources you connected to 3P ’s inputs. -
Page 35: Marking Events
Session Time Recorded - The total duration of audio/video recorded and stored on 3P since this session was created Remaining Disk Space– How much room remains on 3P for additional recording Figure 16 The large Record button at upper-left (Figure 16) is automatically enabled when you press LIVE. This initiates capture of the source video streams. -
Page 36: One Button Marking
The MARK IN and Out functions have some other special features too, permitting a variety of convenient marking workflows. We’ll get into more detail in an upcoming section, but it’s worth noting here that you can mark an event with just one button press! Figure 17 5.5.1 ONE BUTTON MARKING Watch your monitors for a noteworthy occurrence –... -
Page 37: Instant Replay
Press MARK IN on the 3P-10 control surface. This creates a new ‘incomplete’ event in the Master List tab of the Event Panel (only the In Point is shown, not the Duration). Then watch the monitor for something noteworthy to occur. When it does, press MARK OUT to complete the marking operation. -
Page 38: Play Highlight
Another convenient approach to instant replay may suit you better in some cases. Try this method: 1. Press MARK IN (just as you did in steps 1 and 2 of Section 5.5.2, above). 2. Press Play (without pressing MARK OUT). When you pressed Play in this case, an Out Point was automatically generated and –... -
Page 39: Selecting The Camera
SELECTING THE CAMERA Keep in mind that 3P simultaneously records all three inputs, not just the stream shown on the Main Output monitor (see Section 3.2, Recording, Marking and Events). This is true regardless of whether you chose 1-Out or 3-Out as your Output Mode for the session (see Section 3.4.2). Figure 18 In 1-Out mode, you personally choose which of the three available views is transmitted on 3P ’s... -
Page 40: Slow Motion
SLOW MOTION is capable of variable speed play between 0 and 100%. You set the playback rate using the Speed buttons (0%, 33%, 50%, 75% and 100%) or the variable Speed-Bar on the 3P-10 control surface. These controls do not initiate playback; they control playback rate. That said, changing the Speed during playback has an immediate effect. -
Page 41: Event Panel
Here’s something to try: 1. Replay an event in the Master List by pressing ALT + Play. 2. Turn the Shuttle ring counter-clockwise, reversing the event stream – release it after a moment or two. 3. Playback halts at the current frame. 4. - Page 42 type, or for highlight playback (discussed in Section 5.7). Conveniently, Custom Event List tabs can be renamed. Figure 19 Each occupied row in the tabbed panes shows the information associated with one event, listing its ID#, In Point, Duration, an optional Comment, and its primary Camera stream. During playback, a triangular white marker (the Play Position Indicator) at left tracks play progress.
-
Page 43: Playback Information
2. Hold the ALT button down and press MARK IN. 3. If you wish, go ahead and select a new frame for the event to end at in similar fashion, updating the Duration by pressing ALT + MARK OUT. 5.12 PLAYBACK INFORMATION Figure 20 A compact information panel appears between the Main Output monitor and the smaller Output Stream monitors below. - Page 44 Hint: By design, playback continues indefinitely after the end of an event is reached unless you deliberately press Stop (or reach the end of the recorded video). Thus it can occur that the currently displayed frame is not actually a member of any marked event. When this is the case, the Remaining Time field is blank, and looks something like this: --:--:--:-- Page 38...
-
Page 45: 3Play Reference
3PLAY REFERENCE This chapter aims to explain every aspect of your NewTek 3P ™ in full detail. Each button, menu item, feature and control is considered in these pages, so you can take full advantage of your system. As explained in the introduction to the section, these details are... -
Page 46: 10 Control Surface
3P-10 CONTROL SURFACE Figure 21 The 3P-10 control surface provides tactile control of all important operations. Knobs, buttons and controls are logically grouped for convenience. The purpose and use of many of these features and functions are self-explanatory, but several have optional or secondary features, too. Let’s list and define what each button and control does. -
Page 47: Event Marking
2. Speed Presets (25%, 33%, 50%, 75%, 100%): When lit, these buttons override the current Speed-Bar setting, setting the rate to the indicated speed. When the Speed-Bar is moved again, it regains dominance Playback speed controls are located toward the left side of the 3P-10 control surface. As you’ve seen, both Delayed and Event playback can be viewed at reduced speeds. - Page 48 These buttons add and define entries in the Event Lists by setting In and Out Point timecode references for the video stream currently displayed on the Main Output monitor. When both an In Point and an Out Point have been added, the event creation process is complete. The button actions apply to whatever video is displayed on 3P output at the time.
-
Page 49: Record
6.2.3 RECORD 4) REC (Record) button (Figure 24): toggles 3P recording Though unassuming, the importance of the REC button (or to be precise, the function it controls) cannot be overemphasized. Unless 3P is recording, you cannot even see video from live sources. Of course, you are free to turn Record off -- as you might perhaps during long pauses in the action or when a production ends. -
Page 50: Alt
5) Camera 1, 2 & 3 buttons: b) Press to place the corresponding stream on the Main Output monitor. (For 1-Out mode, this also sets the primary stream). Hint: This produces the same result as clicking one of the three Output Stream monitors on the 3P Desktop. -
Page 51: Live
Figure 25 6.2.7 LIVE 8) LIVE (Figure 25): press to restore LIVE playback mode, placing live audio and video from the sources connected to 3P inputs on output. (Clicking LIVE also enables recording automatically if necessary, as noted earlier.) 6.2.8 TRANSPORT The Stop, Play and Play Highlight buttons (Figure 25) also affect video output. - Page 52 record from there, even ignoring Out Points for events. ALT + Play – begins playback from the In Point of a selected event. Play continues seamlessly though the video record from there, ignoring Out Points for events. With just one exception, playback always commences from the frame displayed on output at that moment.
-
Page 53: Jog/Shuttle
6.2.9 JOG/SHUTTLE 12) Jog Wheel/Shuttle Ring (Figure 27): Twist the outer ring clockwise or counter-clockwise to quickly shuttle back and forth through the video stream(s) on output. The video will stop at the selected point on release. Similarly, use the inner jog wheel to ‘dial up’ a different frame with one fingertip. - Page 54 13) RMV (Remove): remove the selected Event List entry (or entries). If an entry is removed from a colored Custom List tab, it will no longer appear in the Master List either. Likewise, events removed from the Master List are removed from any colored tabs they were assigned to.
-
Page 55: Administration Screen
Tools related to the selection made at left are presented in the pane at right. The amount of unused video storage capacity remaining on the system is displayed (in Gigabytes) at lower-right. Let’s look into each of the major options in the Administration Screen. 6.3.1 NEW SESSION Figure 29 – 3Play International Page 49... - Page 56 Output Mode – choose which output mode (1-Out or 3-Out) is best for your current application (see the discussion of output modes following below). Note: All external video devices - both input and output - connected to 3Play must conform to the settings established in this pane.
-
Page 57: Open/Manage Session
In addition to placing camera selection directly under control of the 3P operator, this can be useful for distributing 3P ’s output to different external environments. (For example, one output could supply video for a commentator’s monitor, another to a switcher for broadcast, while the third is supplied for review by referees). - Page 58 Selecting a session Name and clicking Open launches the 3P Desktop (using the former input and output settings), complete with the video record and Event List contents from the earlier session. Among other things, being able to re-open stored sessions is useful for use with the Export Tab feature (See Section 6.4.8.9).
-
Page 59: System Preferences
(HD or SD, and Duration) and the speed of the connection to the external volume. In due course, the restored session’s name will appear in the list pane. 6.3.3 SYSTEM PREFERENCES The System Preferences pane provides a couple of opportunities to customize 3Play to your own liking. Figure 31 The One-Button Mark Preroll drop-down menu pertains to the duration of events marked using the one-button method described in Section 5.5.1. -
Page 60: System Utilities
6.3.4 SYSTEM UTILITIES System Utilities (Figure 32) is home to the (hard drive) Defragment tool and Update 3P utility. Figure 32 6.3.4.1 DEFRAGMENT Over the course of lengthy use, the section of ’s internal storage devoted to audio and video storage can become fragmented. Eventually, this can degrade playback performance. -
Page 61: About 3Play
Otherwise, connect to the Registration page (and the personal Downloads area for your registered NewTek products) and manually download any available update. This way you can be sure the very latest version of the software for your 3P is installed. -
Page 62: Shutdown System
6.3.6 SHUTDOWN SYSTEM Figure 35 This selection provides Restart, Shutdown 3P , and Exit to Windows icons – click them to perform the named action in the usual manner. (In the case of the latter function, you can return to the 3P environment from the Windows™... -
Page 63: Titlebar Display
The 3P Desktop provides visual feedback for 3P operations, including monitoring, event marking, management and playback controls, and output control. In addition, it hosts the I/O Configuration controls for your external sources and output connections. The Desktop is shown after you click Start Session or Open Session in the Administration Screen. Actually, 3P provides two Desktop variants. - Page 64 Figure 38 Click the small gear button (near the Close gadget in the upper-right corner of the Desktop) to open the I/O Configuration panel. The panel can be re-positioned by dragging its titlebar. Figure 39 6.4.2.1 INPUT 1, 2 AND 3 For each video input (numbered 1-3), the I/O Configuration panel provides such video source settings as type, termination, and proc amp controls.
- Page 65 TERMINATION The Termination switch toggles a 75 ohm resistance, which may be required by certain video sources. PROC AMP Individual proc amp control is likewise provided for each video input. The four basic camera adjustments available are Brightness, Contrast, Hue and Saturation. The first two (Brightness and Contrast) are familiar to all of us, and need no explanation.
- Page 66 20dB below Full Scale (often referred to as +4dBu reference level and corresponding to 1.23v RMS). If you like, you can take advantage of that headroom to achieve the highest dynamic range and lowest signal-to-noise ratio possible when recording with 3Play. Page 60...
- Page 67 6.4.2.3 OUTPUT VIDEO CONNECTION This drop-down menu allows the operator to select between Component, Y/C, Composite and SDI output for 3P Figure 42 Some output types do not support high definition resolutions. Thus, the options available vary depending on whether or not the current session is standard or high definition, as follows below: ...
- Page 68 For a single camera or short durations, this is virtually irrelevant. However 3Play’s design involves capturing output from three cameras – small timing variations do matter. Especially over longer periods of time, very trivial timing deviations between sources can produce noticeable and complex synchronization issues on playback.
-
Page 69: Record And Device Status
This is essentially why 3P provides several adjustments in its Genlock section. The Horizontal and Vertical Position settings pin the image in the proper space in the frame, and in doing so could be likened to making sure each marching soldier is in position relative to his fellows as viewed from above. -
Page 70: Monitoring
Record is on. Please see Section 6.2.3 for other important details about the Record function. NOTE: 3PLAY DOES NOT DISPLAY LIVE VIDEO SOURCES WHEN RECORD IS DISABLED. 6.4.3.2 SYSTEM INFORMATION This area shows important system information such as Session Time Recorded and the Remaining Disk Space on the device (displayed as hours, minutes and seconds.) -
Page 71: Input 1, 2, 3
6.4.5 INPUT 1, 2, 3 Figure 46 Three Input Source Monitors at upper-left show live video from video sources connected to Inputs 1-3, providing full-time monitoring of live cameras -- even during Event or Delayed playback. If a particular input is currently on the Main Output monitor, the corresponding Input Source monitor is outlined in green. - Page 72 The three monitors at the bottom of the Desktop show all three synchronized video streams available for output. The much larger monitor just above is referred to as the Main Output monitor. Figure 47 Like the Input Source monitors, the various Output Monitors also incorporate interactive features, discussed in context below.
- Page 73 When 3P is in 1-Out mode, the primary output stream is displayed on the Main Monitor above. A red outline highlights the corresponding output stream monitor. The primary stream is selected by clicking one of the smaller stream monitors. Thus, you can effectively switch the camera view on 3P output by clicking a different output stream monitor (of course 3P-10’s Camera buttons serve the same purpose).
- Page 74 Hint: 3P ’s Desktop monitors are previews, and can drop frames under certain conditions. 3P Output does not do so, however – thus you may use external monitors for greater fidelity if desired. INTERACTIVE JOG The mouse pointer becomes a double-headed arrow when you move it over the Main Output monitor.
-
Page 75: Audio, And Audio Monitoring
(ID#) Highlight - This tag indicates playback is in Highlight Reel mode. When you press Play Highlight, playback of events respects marked Out Points (see Section 6.2.8). The Current Time timecode display shows the current recorded time in LIVE playback mode, or the timecode of the current frame in Delayed, Event or Highlight mode. - Page 76 captures. The Event Panel provides information about events you have marked, along with numerous event organization and management features. 6.4.8.1 MASTER LIST At the top of the Event Panel, you will see 6 tabs. The first of these is labeled Master. The Master List plays a special role in event management.
- Page 77 Pressing TAB on the 3P-10 Control Surface (or clicking a tab) activates a different Custom List. The Master List contains every existing event; but you decide which of these (if any) to add to the Custom Lists. Hint: You can use Custom Lists for a variety of purposes. For example, you could use them to quickly collate events for each quarter of a football game, or arrange them by team or event type, such as goals, penalties, and so on.
- Page 78 You are free to re-order events (and event selections) up and down in the list using the 3P-10 control surface. Use ALT + Arrow (Up/Down) to do so. Alternatively, you can drag them up or down in the list using the mouse. (Re-ordering is especially useful in connection with the Play Highlight feature - see Section 6.2.8, item 11).
- Page 79 Note: For normal playback, when multiple events are selected, playback begins from the last event clicked. The Play Highlight feature treats multi-selection differently, however – see Section 6.2.8) PLAY POSITION INDICATOR Figure 52 During playback, a triangular white marker referred to as the Play Position Indicator is overlaid on the event currently being shown on 3P output.
-
Page 80: Context Menu
6.4.8.6 CONTEXT MENU Right-clicking on an event (or multiple selected events) opens a context menu which includes the following items: Edit IN Point Edit Duration Edit Comment (Color) Remove Event Selecting one of the first three menu options opens an input dialog that allows you to make suitable entries, either timecode or a comment. - Page 81 If the Output Mode is 1-Out, the primary stream is delivered to all of 3P ’s output connectors for transmission to downstream video systems. The Camera switch (in the last column of the Event List) designates the primary stream. The initial Camera setting corresponds to the stream displayed on the large Main Output monitor at the time the event is created.
- Page 82 Pressing Clone duplicates the current event selection. Cloning can be useful when you wish to assign copies of an event to more than one Custom List. Or, perhaps you wish to have copies of events with different Camera assignments for successive playback using Play Higlight. Hint: Trimming a clone offers one way to obtain an event entry that refers to a previously un- marked section of the recording.
-
Page 83: Desktop Dashboard
Figure 56 Export can take some time, depending on the duration of the events selected and their resolution (note that Export to an external drive is faster). A progress gauge is shown during the process. NOTE: YOU CANNOT WORK ON A SESSION DURING EXPORT, SO YOU LIKELY WOULDN’T WANT TO BEGIN THIS DURING OR JUST BEFORE A PRODUCTION. -
Page 84: Keyboard Shortcuts
a 3P session. The reason for this is to provide assurance that - even if your 3P-10 gets lost in transit or suffers some catastrophic accident - you retain full control over 3P The Dashboard features onscreen versions of the marking, transport and speed controls normally accessed from the 3P-10 (see Section 6.2 for details). -
Page 85: Front Connections
Clones selected Event(s) <TAB Cycles backwards through Event Tabs >TAB Cycles forwards through Event Tabs Num Pad Numeric pad to enter Event number SHFT modifier key used for multi selection of Events in list Escapes numeric entry mode SHFT – 1 Changes Default Camera of selected Event(s) to Input 1 SHFT –... -
Page 86: Video Connections
’s front panel connections have been discussed in Section 4.4, but we’ll review them briefly here. 6.7.1 VIDEO CONNECTIONS Three horizontal rows of BNC connectors are grouped and labeled Video In and Video Out respectively. These comprise one row for each a/v input stream, and one for each output. ... -
Page 87: Usb
– so use this function only if you truly find it necessary (a call to NewTek’s excellent Tech Support first may often be fruitful – see Section 7.5.2). SCREEN SHARING AND R EMOTE DESKTOP... -
Page 89: How Do I
HOW DO I … ? In this section, we’ll consider the most common questions 3P operators may have, and of course we’ll provide the answer, too. The answers are intentionally brief - perhaps just a reminder of one or two steps required to perform some operation. For this reason, we’ll also point you to explanatory information elsewhere in this manual whenever that would be useful. -
Page 90: Connections
Register 3Play? ........................92 Access Technical Support? ..................... 93 Miscellaneous ..........................93 Access Windows........................93 Return to 3Play from Windows ....................93 CONNECTIONS 7.1.1 CONNECT CAMERAS? 1. Connect video sources to the appropriate BNC input connectors on 3P ’s front panel, according to your camera’s video output connection type (see Section 4.4.1). -
Page 91: Connect The 3P-10 Control Surface
For 3-Out output mode, you will need three such connections to view all of 3P ’s output streams. For 1-Out output mode, all three of 3P ’s output connections transmit the same stream, selected by the 3P operator (see Sections 3.4.2 and 6.3.1.1). 1. -
Page 92: Connect To A Network
7.1.6 CONNECT TO A NETWORK? Please refer to Section 4.4.5. SESSIONS 7.2.1 START AN SD SESSION? 1. Connect your SD sources to 3P ’s input connectors (see Section 4.4.1). 2. Connect your SD monitors to 3P ’s output connectors (see Section 4.4.2). 3. -
Page 93: Work On A Stored Session
6. Click Open Session. 7. Open I/O Configuration by clicking the little gear in the 3P Desktop titlebar, and configure the video source type for each input (see Section 5.2 and 6.4.2). 7.2.3 WORK ON A STORED SESSION? 1. Select Open/Manage Session in the Administration Panel. 2. -
Page 94: Backup A Session To An External Drive
7.2.6 BACKUP A SESSION TO AN EXTERNAL DRIVE 1. If necessary, close the 3P Desktop by clicking the [x] button at the right-hand end of the titlebar. 2. Click Open/Manage Session in the Administration Panel. 3. Click the name of the session you want to back up in the list shown at right, highlighting it 4. -
Page 95: Cancel An Incomplete Marking Operation
7.3.1.1 ONE-BUTTON METHOD With 3P in LIVE mode, watch for notable events on the Main Output monitor, and press MARK OUT whenever one occurs. This creates a new event, sets an Out Point at the current timecode, and sets the In Point automatically to establish a default Duration (see Sections 5.5.1 and ). -
Page 96: Play An Instant Replay
7.3.4 PLAY AN INSTANT REPLAY? 1. With 3P in LIVE mode, press MARK IN at any convenient time. This creates a new ‘incomplete’ event in the Master List (if nothing interesting happens, press MARK IN again occasionally to update the In Point). 2. -
Page 97: Rename A Custom Event Tab
3. To play the Highlight Reel, press Play Highlight (see Section 5.7 and 6.2.8). (Note: pressing ALT + Play Highlight beings looping playback of the Highlight Reel.) RELATED QUESTIONS: Why didn’t playback stop at the end of the last event in my highlight reel? The last out point in the highlight reel is ignored. -
Page 98: Improve Performance
1. Obtain the unique Product ID from the Registration dialog presented on launching 3P 2. Visit the Registration webpage (in the Customer Care section of the NewTek website) and follow the directions there to obtain your registration code - or call Customer Service. -
Page 99: Contact Technical Support
Visit the NewTek website at www.newtek.com and select Technical Support from the main Customer Care menu at the top of the page. This page always contains the latest support information for your NewTek products, including FAQs for all products. It also lists the Technical Support Department’s hours of operation and contact details. -
Page 101: Index
INDEX NTSC, 25 Register, 17, 92 3Play Desktop, 11, 13, 26, 57 1-Out. See Output Mode Dashboard, 26, 53, 57, 77 Device Status, 28, 64 Remaining Disk Space, 29, 64 3-Out. See Output Mode Session Time Recorded, 29, 64 3P-10 Control Surface, 10, 15, 26, 30, 85... - Page 102 Duration, 73, See 3Play Desktop:Event Panel Backup Session. See Administration Screen: Enter. See 3P-10 Control Surface Open/Manage Session Ethernet connection, 23 Event, 10, 29, 69, see also 3Play Desktop: Event Panel Camera. See 3Play Desktop: Event Panel Clone, 48 Cancel marking. See 3P-10 Control Surface: Duration.
- Page 103 ID#. See 3P-10 Control Surface; see also 3Play Output (external), 27, 65, 85 Desktop: Event Panel Output Stream, 67 In Point, 31, 46, 73, See 3Play Desktop: Event Output Stream, 28, 33, 44, 66 Panel Input Configuration. See I/O Configuration...
- Page 104 PAL. See Video Standard SDI. See Connections Play. See 3P-10 Control Surface: Play Session Play Highlight. See 3P-10 Control Surface Delete. See Administration Screen: Play Position Indicator. See 3Play Desktop: Event Open/Manage Session Panel Session Backup. See Administration Screen: Playback mode Open/Manage Session Delayed, 9, 32, 34, 41, 46 Session Name.
- Page 105 Update 3Play. See Administration Screen: System Utilities Windows™ UPS, 16 Activate, 16 USB, 81 Exit to. See Administration Screen:Shutdown System Variable speed. See 3P-10 Control Surface: Speed, See 3P-10 Control Surface: Speed Y/C. See Connections Video Standard, 19, 26 YUV. See Connections...
-
Page 107: Credits
TriCaster PRO FX, TriCaster STUDIO, TriCaster BROADCAST, SpeedEDIT, DataLink, LiveText, LiveControl, 3P , VT, VT[3], VT[4], VT[5], Video Toaster, Toaster, Inspire 3D, 3D Arsenal and Aura are trademarks of NEWTEK. LightWave and LightWave 3D are registered trademarks of NEWTEK. All other brand names, product names, or trademarks belong to their respective...
Need help?
Do you have a question about the 3play and is the answer not in the manual?
Questions and answers