Table of Contents
Advertisement
Quick Links
Advertisement
Table of Contents

Subscribe to Our Youtube Channel
Related Manuals for NewTek 3Play


Summary of Contents for NewTek 3Play
- Page 2 TriCaster DUO, iVGA, SpeedEDIT, 3PLAY, 3PLAY 820, 3PLAY 425, 3PXD820, 3PXD425, LiveText, DataLink, LiveSet, LiveMatte, TimeWarp, VT, V[T5], Video Toaster, Toaster, 3D Arsenal, Aura, LightWave, LightWave 3D and LightWave CORE are trademarks of NEWTEK. All other brand names, product names, or trademarks belong to their respective holders.
- Page 3 ™...
-
Page 5: Table Of Contents
Introduction ........................5 Overview ........................... 5 Recording, Marking and Events ..................6 2.2.1 What is an Event? ..................... 6 NewTek 3Play™ Control Surface ..................7 Startup Screen ........................8 Replay Desktop ......................... 8 Features ..........................9 2.6.1 Physical ........................9 2.6.2... - Page 6 Input Connections ......................19 3.4.1 Connect A/V Sources ....................19 3.4.2 Genlock Connection ....................20 3.4.3 Timecode Connection ..................... 21 Output Connections ......................22 3.5.1 A/V Output ......................22 3.5.2 HD and SD ....................... 23 3.5.3 Connecting Devices ....................23 3.5.4 Supplemental Video Outputs ..................
- Page 7 Trimming Events ......................44 Managing Events ......................45 4.10 Preparing a Play List......................45 4.10.1 Adding Clips ......................45 4.10.2 Editing and Playback ....................46 4.10.3 Speed Control ......................47 4.11 Rendering a Play List ....................... 47 PART II (Reference) ........................49 The Startup Screen ......................
- Page 8 I/O Configuration ......................75 Output Configuration ...................... 75 7.1.1 Output A and B......................76 7.1.2 Aux/Multiview......................79 7.1.3 Genlock ........................81 7.1.4 Center Frequency ....................83 Input Configuration ......................83 7.2.1 Connection Type ..................... 84 7.2.2 Name ........................87 7.2.3 Proc Amp .........................
- Page 9 IN/OUT (Marking) ......................97 8.9.1 In ..........................97 8.9.2 Out .......................... 98 8.10 UTILITY Buttons ....................... 99 8.10.1 Esc ........................... 99 8.10.2 Remove ........................99 8.10.3 Edit .......................... 99 8.10.4 Add to Play List ...................... 100 Desktop Monitors ......................101 Input Monitors ......................
- Page 10 12.1.2 Add Media ......................118 12.1.3 Filter ........................122 12.1.4 Show/Hide Columns ....................122 12.1.5 Clip Configuration ....................123 12.2 Clips List Table Features ....................124 12.2.1 In/Out Points, Duration (and Trimming) ............... 125 12.2.2 Memo Fields......................125 12.2.3 Managing Events ....................126 12.3 Clip Transport ........................
- Page 11 Improve the Quality of Multiview Output? ............151 A.1.5 Connect the Genlock Reference Signal? ............... 152 A.1.6 Connect the 3Play™control surface? ..............152 A.1.7 Insert/Remove a Drive From a Removable Drive Bay ........... 152 A.1.8 Connect An External Hard Drive?................154 A.1.9...
- Page 12 Contact Technical Support? .................. 165 A.6.3 Find Hardware/Firmware Revision Numbers? ............165 Miscellaneous ....................... 165 A.7.1 Set up remote desktop control of 3Play? ............. 165 A.7.2 Deal With Clips or images That Seem Blurry? ............165 A.7.3 Access Windows™? ....................166 A.7.4...
- Page 13 A.8.2 Why are my clip duration and Countdown times different? ........ 167 Keystroke Shortcuts ......................169 Reliability Testing ......................171 Index ............................173 Credits ............................ 177...
-
Page 15: Part I (Getting Started)
PART I (GETTING STARTED) Introducing NewTek 3Play™ – connections and registration, a top-level overview of primary features, and a hands-on tour to get you started. Page | 1... -
Page 17: About This Manual
Part II – Reference : chapters in this section cover every arcane detail related to using 3Play™ (for those who need it, and those who just like to know everything). Part III – Appendices : leads off with a handy section titled “How do I …?“, a helpful question and answer section with its own brief index. - Page 18 Page | 4...
-
Page 19: Introduction
(up to eight of each for 3Play™ 820, and four in the case of 3Play™ 425). Its output possibilities include professional hardware connections capable of conveying two fully independent video streams to external video systems such as live broadcast switching equipment, and of course file export. -
Page 20: Recording, Marking And Events
RECORDING, MARKING AND EVENTS Recording is intrinsic to NewTek 3Play™, and is configured for each incoming a/v source to be captured prior when creating live production session. When Record is enabled in the live Replay Desktop, configured sources are continuously captured and stored. Typically, each stream might represent a different camera angle. -
Page 21: Newtek 3Play™ Control Surface
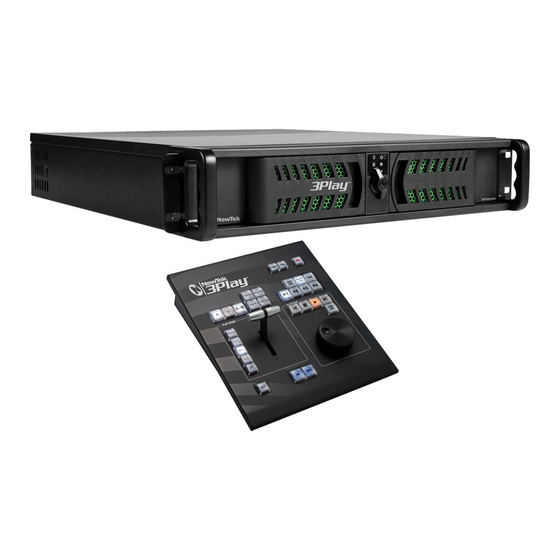
You can even add, remove or reorganize events during recording, or long after your session ends. NEWTEK 3PLAY™ CONTROL SURFACE A dedicated NewTek 3Play™ external control surface (Figure 3) provides primary operational control – see Chapter 8. (Text editing and other supplementary control is supported using the keyboard.) -
Page 22: Startup Screen
STARTUP SCREEN When you power up your NewTek 3Play™ system, the Startup Screen appears. This is your command center for initiating most other operations. Figure 4 The Home page of the Startup Screen allows you to define and open sessions, essentially custom presets for individual productions or other purposes. -
Page 23: Features
(such as highlight reels). A slender Dashboard can optionally be shown at the very bottom of the Replay Desktop. FEATURES Here’s a brief overview of just some of 3Play’s key features: 2.6.1 PHYSICAL ™ 820 ... -
Page 24: Input, Output & Capture
40 hours of storage capacity (1080i) (combined internal drive and 1TB removable drive. 2.6.2 INPUT, OUTPUT & CAPTURE Figure 6 – 3Play™ 820 All audio and video, monitoring and network connectors are easily accessible from the rear for convenient installation in industry standard 19” rack-mount configurations. -
Page 25: Monitoring
Play list module supports inserting pre-recorded video, sound and imagery into your live productions. Send output from 3Play™ to a network connected TriCaster™. ™ 820 Supplemental Aux (Auxiliary) Video output to a projection system or secondary monitor at session resolutions up to 1920x1080. -
Page 26: Video Processing
Cameras 1-4 – The first four live video sources supplied to 3Play’s video inputs. ™ 820 Cameras 1-6 – The first six live video sources supplied to 3Play’s video inputs only. Cameras 1-8 – All eight live video sources supplied to 3Play’s video inputs. -
Page 27: The Clips List
2.6.6 THE CLIPS LIST Figure 10 Segments of recorded data are ‘bookmarked’ as individual events by setting in and out points. Events and their constituent clips, representing the different recorded sources (or ‘angles’) appear in the Clips List (see Section 2.2.1). Figure 11 Events can be rearranged and trimmed in the Clips List. -
Page 28: The Dashboard
2.6.8 THE DASHBOARD The Dashboard replicates major features normally accessed using the NewTek 3Play™ control surface. It is located at the bottom of the Replay Desktop, just below the Play List, and can serve at least two useful purposes. -
Page 29: Setting Up
NewTek TriCaster™ brochure and 3Play™ Welcome letter COMMAND AND CONTROL 1. Connect an external computer monitor to the Interface DVI port on 3Play’s backplate (use an adapter if necessary). ™ 425 Use the DVI connectors nearest to the Video In group for the interface monitor. DVI connectors located at left below the power supply are normally capped and should not be used. -
Page 30: Activating & Authorizing Windows
‘noisy’. Surge protection is especially important in some locales. Power conditioners can reduce wear on 3Play’s power supplies and other electronics, and provide a further measure of protection from surges, spikes, lightning and high voltage. -
Page 31: License And Registration
You can authorize your Windows installation by network or by telephone. Assuming you have an Internet connection available, and have connected 3Play™ to it with an Ethernet cable, the Internet is the fastest method of activation. (See Section 3.12 for more on network connections.) 7. -
Page 32: Online Registration
3Play™ or from another system connected to the Internet) as described next. 3.3.1 ONLINE REGISTRATION If you have connected your 3Play™ to the Internet, simply click the button under Step 3 in the registration dialog. This will take you to the Registration webpage (http://register.newtek.com) in the Customer Care section of NewTek’s website where you will find further directions. -
Page 33: Input Connections
INPUT CONNECTIONS 3.4.1 CONNECT A/V SOURCES External audio and video sources are connected to the appropriate inputs on 3Play’s backplate. Figure 16 – 3Play™ 820 Figure 17 – 3Play™ 425 1. Connect video sources to the appropriate connectors in the VIDEO IN section (Figure 16), whether SDI, Component, Y/C (S-Video) or Composite (may require RCA to BNC adapter). -
Page 34: Genlock Connection
3.4.2 GENLOCK CONNECTION The Genlock input on 3Play’s backplate is for connection of a ‘house sync’ or reference signal (often a ‘black burst’ signal intended specifically for this purpose). Many studios use this method to synchronize equipment in the video chain. Genlocking is commonplace in higher-end production environments, and genlock connections are usually found on professional gear. -
Page 35: Timecode Connection
Figure 19 – 3Play™ 425 If your equipment allows you to do so, you should genlock 3Play™ and all cameras you configure as sources for it (see your camera manual for details). To do so, supply the reference signal from the ‘house sync generator’... -
Page 36: Output Connections
3.5.1 A/V OUTPUT Figure 22 – 3Play™ 820 Figure 23 – 3Play™ 425 3Play™ provides several video and audio output connector groups, and very flexible options for display of your live and recorded video streams. Here are some of the possibilities: ... -
Page 37: Hd And Sd
Transmit another output or multi-bridge monitoring layout to a secondary monitor (or projector) via the Multiview port. An additional output is provided via an HDMI port. This output tracks the active 3Play Output Mode (A or B). 3.5.2 HD AND SD As mentioned earlier, the Video Output section on 3Play’s backplate provides vertical columns of... -
Page 38: Supplemental Video Outputs
(A separate digital audio connection is not necessary for SDI output with embedded audio.) Hint: 3Play’s SDI and analog output sections can be used simultaneously. For example, you could use the Component output to view your program on a local analog video monitor at the same time as you use the HD-SDI connection to supply broadcast equipment. -
Page 39: Tally Lights
(not different subnets), they will appear in the source selector menu for TriCaster’s Net 1 and Net 2 inputs as “3Play(A)” and “3Play(B),” where “3Play” is the network name for the system. Conveniently, the output includes embedded audio, freeing up multiple TriCaster a/v inputs for other purposes. -
Page 40: Starting A Session
STARTING A SESSION If 3Play™ is not already running, power it up now to reveal the Startup Screen. (If 3Play™ is already running, and is in the Replay Desktop or another area of the interface, you may need to click the small [x] button at upper-right to exit, or click the Back arrow at upper-left in the Session Page to return to the Home Page.) - Page 41 Click in this area to modify the name using the keyboard if you like. (The default name is the current date.) Note: 3Play™ supports a variety of optional session configurations for live production. You can choose either HD (High Definition) or SD (Standard Definition) operating modes.
-
Page 42: Configure Video Output
Chapter 4, Live Production Walkthrough), but after a quick look around let’s continue to configure your input and output connections. CONFIGURE VIDEO OUTPUT 3Play™ provides complete video input monitoring right on the Replay Desktop. This allows you to operate it without even connecting downstream video monitors or devices. Page | 28... -
Page 43: Sd Analog Configuration
Additionally, however, you will likely also connect external devices to the VIDEO OUT connectors on 3Play’s backplate (see Section 3.5). High definition devices will be connected to either SDI or Component connections, while other connection types are available for SD devices and sessions. -
Page 44: Configure Multiview Output
You’ll notice output Proc Amp (color) controls below in each output tab as well, along with individual output Audio level sliders. The third tab is labeled Aux/Multiview (3Play™ 820) or simply Multiview (3Play™ 425). CONFIGURE MULTIVIEW OUTPUT We’ll just discuss the Multiview control group here (see Section 7.1.2 for a more thorough... -
Page 45: Configure Video Input
3. With the aid of downstream Waveform and Vector Scopes, adjust 3Play’s Horizontal and Vertical Position and Phase settings. Again, ideally both the cameras and 3Play™ should be genlocked. If cameras are not genlocked to the same reference signal as the 3Play, a TBC (Time Base Correction) operation is automatically applied. - Page 46 Figure 33 3. Click the Configuration button for Camera 1 to open a settings panel (Figure 33). 4. Click the Connection Type menu to reveal a listing of various connection types. Select the correct format, such as 720p (Component), or 1080i (SDI), etc., for the video source you plan to connect to this input.
-
Page 47: Configure Audio
VCR). Select AES/EBU (3Play™ 820 only) or SDI Embedded to connect a digital audio source. Note: Analog levels conform to SMPTE RP-155. The maximum input/output level is +24 dBu, nominal input level +4 dBu (-20dBFS), and the sample rate is 96 kHz. -
Page 48: Networking
Microsoft Windows™ activation (Section 3.2). Here is the basic procedure involved in joining a workgroup: 1. Connect a suitable cable from the ETHERNET port on 3Play’s backplate to your external network. 2. (If necessary) – close the Replay Desktop; click the Back arrow to return to the Home Page. - Page 49 11. At this point, the network connection should be functional. If further help connecting is required, please consult your system administrator. The next section (Chapter 4, Live Production Walkthrough) will guide you through your first experience using 3Play™. Page | 35...
-
Page 51: Live Production Walkthrough
LIVE PRODUCTION WALKTHROUGH This chapter provides a quick hands-on tour of the major components and functions of your NewTek 3Play™. In a very short time, these basics will be second nature to you. More detailed reference material on all aspects of 3Play™ follows in Part II (Reference). - Page 52 1. On the Startup > Home page, click the New button on the icon ring, and configure a new 1080i session. Name it “Practice Session” (without quotation marks). Figure 36 2. As part of the session setup process, assign different camera inputs to the individual drives, using the controls in the Drives and Inputs columns under Record Configuration.
-
Page 53: The Replay Desktop
THE REPLAY DESKTOP Figure 38 5. At this point, you should see the blank Replay Desktop (Figure 38). Figure 39 6. We discussed configuring input and output connections and devices for new sessions back in sections 3.4 (Input Connections), 3.7 (Configure Video Output), 3.8 (Configure Multiview Output), and 3.11 (Configure Audio). -
Page 54: Output And Control Modes
Speed of a LIVE source would automatically kick playback into Delayed mode - if it could. However, this requires 3Play™ to be recording. Let’s try that again, enabling recording first. Remember that Speed (for Output B) is still set to 25% (if you checked, Output A would still be at the default speed, 100%) 15. -
Page 55: Marking Events
16. Notice that the Record button on the Replay Desktop beside the Record button (just beneath Output A) lights up, and a nearby time counter starts keeping track of the total amount of video recorded in the current session. Note: Recording is automatically initiated if you simply press IN. To end recording, hold ALT down while pressing REC. - Page 56 21. Keep an eye on the In Point column for this incomplete event, and push IN again. Notice that the In Point updates when you do this. 22. Complete the current event in the Clips List by pressing the OUT button on the control surface.
-
Page 57: One-Button Marking
4.5.2 ONE–BUTTON MARKING 26. Finish marking any incomplete event, if necessary, by pressing OUT. 27. Wait for a few more seconds to elapse, and then press OUT only – without pressing IN first. 28. Repeat this step a few times, allowing a few moments to pass between repetitions. Notice that even though you haven’t pressed IN first, new ‘complete’... -
Page 58: Trimming Events
34. Type “touchdown” into the Memo field for the current clip (typically comments on the nature of the action captured). 35. Press Next or Previous to move to another event, then use ALT + Next to move to the Memo field for a different camera angle. (Note that moving the highlight to another field concludes text edit mode.) 36. -
Page 59: Managing Events
d. Rotate the Jog Wheel again to locate a suitable Out Point, and press ALT + OUT. MANAGING EVENTS 43. With the mouse, drag either the Event ID column entry or the Memo field for any clip in an event up or down to re-order the events in the Clips List. 44. -
Page 60: Editing And Playback
Let’s use yet another approach to add the clips for all recorded camera angles of a single marked Clips List event to the Play List in consecutive order? 53. Using the mouse, drag the Event ID field for the event of interest onto the Play List pane. -
Page 61: Speed Control
62. With playback stopped, press Stop once. The play position is again reset to the first frame of the first clip in the Play List. (Had playback been underway, pressing Stop twice in succession would have accomplished the same thing.) Hint: Note that the Play List (like the Clips List) has four banks of four pages each. - Page 62 Session page in Startup. 67. Press the large ‘arrow icon’ at upper left to return to the Home page, then click the Shutdown icon 68. Select Shutdown 3Play™ to power the unit down. Page | 48...
-
Page 63: Part Ii (Reference)
PART II (REFERENCE) A thorough examination of the various aspects of your NewTek 3Play™; every button, menu item, feature and control is considered in this section so you can take full advantage of your system. Page | 49... -
Page 65: The Startup Screen
We’ll discuss each of these in the pages that follow, beginning with a review of the concept of sessions. The Startup Screen appears whenever you launch NewTek 3Play™. From here, you create, configure, manage and launch 3Play™ sessions by making selections from the icon ring. -
Page 66: Introduction To Sessions
INTRODUCTION TO SESSIONS Whenever you work with your 3Play™ system, you provide certain information about the production environment: What broadcast standard is used in your locale? Is it PAL, common in Europe among other places, or perhaps NTSC, standard throughout North American regions? ... -
Page 67: The Home Page
Having discussed sessions, let’s go on to consider how you create sessions, and choose which one to work on. This and a few other top level functions are found in the 3Play’s Home page. Figure 42 This primary screen is the first thing you encounter on launching the system. -
Page 68: New (Session)
This results in the corresponding session options pane being displayed, as shown in Figure 43 (Multi-standard model options shown). 5.2.1 NEW (SESSION) As just mentioned, clicking New on the icon ring populates the pane at right with related options. Principally, for each session you must designate (by selecting switches) your local video standard (Multi-standard model only –... - Page 69 VIDEO STANDARD AND RESOLUTION Figure 45 The format of video output by 3Play™ varies according to the session type. The session settings also affect capture. For example, if your session format is SD 4:3, this is the format captured by the Record function, even when the input Connection Type might be HD, to match a specific camera;...
-
Page 70: Open (Session)
Having made your selections, you would normally click the Create Session button at lower right (then Start Session to launch the Replay Desktop), but first let’s explore the features of the Home page a bit more. 5.2.2 OPEN (SESSION) If there are existing sessions on any currently mounted drive(s), the icon ring on the Home Page will default to the Open icon (Figure 46). -
Page 71: Shutdown
Let’s look at the other Home page features briefly before we go on to open a session, though. 5.2.3 SHUTDOWN This selection provides Restart 3Play, Shutdown 3Play, and Exit to Windows links in the right- hand pane. Click a selection to perform the named action in the usual manner. (In the case of the last-named function, you can return to the 3Play™... -
Page 72: Utilities
Registration is required to remove the watermark from output, in part to encourage you to register early. Among other reasons, doing so will serve to identify the unit to NewTek as yours in case of theft, and will also allow you to check for software updates that may have been recently released. - Page 73 4. Comply with any onscreen prompts that follow. Hint: If you wish, you can instead access the same webpage from a second computer connected to the internet, then transfer update files to 3Play™ using a network connection or perhaps a USB thumb-drive.
-
Page 74: Help
Defragmenting the storage volume has the same effect as sliding the books together, resulting in less and larger gaps. The end result is that 3Play™ doesn’t have to frantically search in many different places to assemble the video data you have recorded. This process (defragmentation) can take considerable time, so it’s not something you want to begin just before an important... -
Page 75: The Session Page
THE SESSION PAGE Figure 52 Opening a session from the Home page (whether using Open or New) takes you to the Session Page, providing a new set of options as links at right. Figure 53 The name of the current session is shown in the top-left corner of the screen. The session is displayed in the form “Home/session name”. -
Page 76: Asset Management
Clicking the Import Media link opens a custom import panel offering batch import of files for use in 3Play’s Clips List and Play List. It even allows you to transcode files to appropriate high quality 3Play-friendly file formats at the same time if you wish. - Page 77 Figure 55 Import Media’s quick processing makes this the fastest and most convenient way to prepare production assets for a session. Click Add to open a standard system file window, and select (or multi-select) items to build a list in the Import Media file pane. Some highly compressed video files may not be well suited to live playback.
- Page 78 EXPORT MEDIA Clicking the Export Media link opens a new panel - Figure 57. Figure 57 The Export Media module allows you to create a list of video clips for export, even selecting a new file format for these exports to be converted to (on a per file basis), and designating where to send them.
- Page 79 After selection, click OK to add the clips you chose to the Export Media file pane. The file pane is much like a spreadsheet table, listing all files in the current export batch in its first column, then the current settings for each file in other columns on the same row. A Status column shows the current export status or progress for each file in the list.
- Page 80 Grass Valley Edius® – high quality HD encoding, full raster, 4:2:0 sub-sampling, high bitrate (up to 100 Mb/s). NewTek SpeedEDIT™ – high quality MPEG-2 Program Stream, full raster, 4:2:0 sub-sampling, variable bitrate (up to 100 Mb/s). Sony Vegas® – high quality MPEG-2 Program Stream, full raster, 4:2:0 sub- sampling, variable bitrate (up to 100 Mb/s).
- Page 81 It is generally unwise to commence a file export shortly before a live event, since you cannot launch 3Play’s Replay Desktop during export. If necessary, you can cancel the current export operation. Page | 67...
- Page 82 This is a convenience, but be sure to select a preset suitable for your ultimate needs. In a somewhat related matter, note that 3Play™ records files from external sources in their native formats – which may or may not match the session format. For example, an SD camera recorded by 3Play™...
-
Page 83: Replay Desktop Overview
REPLAY DESKTOP OVERVIEW The Replay Desktop serves as the principal control center for your production. It provides control over input and output configuration, recording, clip marking, Play List preparation and playback, and so This chapter provides a top-level view of the Replay Desktop, with more detailed information following in subsequent chapters. -
Page 84: A Few Hints
From top to bottom, these are: Monitoring • Input Monitors - monitor all inputs, or a sub-set • Output Monitors - large full-time monitors of Output A and B, with optional information overlay s(heads-up display) • Configurable Multiview display on secondary monitor Clips List •... -
Page 85: Customizing The Replay Desktop
Control Type Type Examples Usage Numeric Field In Point, Out Drag in line with the control Point, Duration, orientation to raise or lower Crossfade the current value. Double-click, or click and either press Enter or F2 to type a new value directly. Numeric Audio Gain, Proc Drag in line with the... -
Page 86: Dual Displays And Monitoring
Figure 62 To do so, click the Configuration button (gear icon) at right in the monitor titlebar for a given input. The Input Configuration panels have editable Name text fields. 6.4.2 DUAL DISPLAYS AND MONITORING The Replay Desktop monitor tabs and Multiview options can be flexibly combined to show what you want to see, where you want to see it. -
Page 87: Status Bar
An information display section at right in the Replay Desktop titlebar (Figure 63) provides useful data. Displayed info includes: Session Name Session format Event Start/Event End (optional time display, counts down to corresponding times set in the Timecode Configuration panel) – not illustrated. ... -
Page 89: O Configuration
I/O CONFIGURATION NewTek 3Play™ provides extensive control over your video signal at both input and output stages. In addition to broad format an connection options for audio and video inputs, each video source has its own realtime Proc Amp. As well, independent Proc Amps are provided for both outputs. -
Page 90: Output A And B
7.1.1 OUTPUT A AND B Figure 66 The video format for NewTek 3Play™ video Outputs A, B (and Aux on 3Play™ 820) is identical to the session format. Digital video output is supplied to the SDI output connectors in the corresponding format –... - Page 91 For HD sessions, the only suitable Analog Output Type in popular use is Component, so options are not provided in this case. The three analog connectors in the VIDEO OUT rows for a given output on the system backplate are supplied with the (component) Y, Pr and Pb signals.For SD sessions, however, you can choose between Component or Composite + Y/C.
- Page 92 For example, it is preferable to calibrate a camera's colors at the camera, before sending the signal to the 3Play™ system. Doing so will yield higher color precision. Similarly, it’s often better to adjust output color using controls on down-stream monitors. (The output Proc Amps can never completely compensate for a badly calibrated monitor.)
-
Page 93: Aux/Multiview
The next tabbed pane in the Output Configuration panel may show controls for two distinct outputs – Aux output (3Play™ 820 only) is a supplemental video output with the same set of video connectors as Output A and B; Multiview supports a ‘multi-bridge’ or supplemental monitoring layout connected by a DVI cable. - Page 94 ™ 820 AUX OUTPUT The third connector row in the VIDEO OUT group on 3Play’s backplate is AUX. As for the other two outputs, there are no configuration options for AUX. For SD sessions, the Component or Y/C + Composite connection type options are available. The video stream displayed on AUX is determined by the active Output Mode (A or B –...
-
Page 95: Genlock
Multiview output. See Section 9.2.1 for more on the Heads-Up Display. 7.1.3 GENLOCK The Genlock feature allows the NewTek 3Play™ system to ‘lock’ its video output to a reference video signal (house sync, such as ‘black burst’) supplied to its Genlock input connector. This allows 3Play™... - Page 96 3Play™ system output and any downstream video devices required to handle both it and any other (genlocked) sources. VERTICAL POSITION, HORIZONTAL POSITION AND PHASE Figure 73 Locking all devices to house sync is important, but this alone does not actually ensure a perfect downstream match.
-
Page 97: Center Frequency
A discussion of these adjustments goes beyond the scope of this manual, but a quick online search for the keywords “genlock” and “adjust” turns up a number of excellent references. REFERENCE TYPE The ‘bi-level’ reference signal long used for standard definition television is often used for genlocking both SD and HD installations. -
Page 98: Connection Type
Hint: All connected cameras must conform to the video standard of the current session. The standard options are: 1080i (Component) • Analog source, high definition, interlaced • 1080/60i or 1080/50i • 1920x1080 pixels, 16:9 picture aspect • Connected to 3Play by Y, Pr and Pb input connectors Page | 84... - Page 99 720/60p (Component), 720/50p (Component) • Analog source, high definition, progressive scan • 1280x720 pixels, 16:9 picture aspect • Connected to 3Play by Y, Pr and Pb input connectors 720/60p (SDI), 720/30p (SDI), 720/24p (SDI), 720/50p (SDI), 720/25p (SDI) • Digital source, high definition, progressive scan •...
- Page 100 • PAL analog format, Standard definition, interlaced • 720x576 pixels, 4:3 picture aspect or anamorphic 16:9 picture aspect • Connected to 3Play by Y, Pr and Pb input connectors 576/25i (SDI ) • PAL digital format , standard definition, interlaced •...
-
Page 101: Name
• PAL (S-Video) analog format , standard definition, interlaced • 720x576 pixels, 4:3 picture aspect or anamorphic 16:9 picture aspect • Connected to 3Play by Y and Pb input connectors 576/25i (Composite) • PAL analog format , standard definition, interlaced •... -
Page 102: Audio Settings
Hint: When the Proc Amp is enabled for a specific source, a small yellow indicator is displayed in the upper-right corner, just above the corresponding monitor in any of the three main monitor tabs. (This indicator is itself also a toggle switch.) 7.2.4 AUDIO SETTINGS Figure 77 The lower part of the Input Configuration panel is devoted to Audio Configuration. -
Page 103: Timecode Configuration
More importantly, you can monitor audio levels to be sure you are not overdriving the system, which would result in clipping of the signal. 7.2.5 TIMECODE CONFIGURATION NewTek 3Play™ can supply timecode from its internal system clock, or can refer to an external LTC (Linear Timecode) source supplied to 3Play™ inputs (see Section 3.4.3). - Page 104 23:59:59.00, while frames recorded one minute or more later would have timecode ≥ 01:00:00.00 – seemingly a lower (i.e., ordinarily earlier) timecode value. Note: The 3Play™ system assumes the external LTC signal matches session frame rate and timecode format. For example, NTSC 29.97 and 59.97 sessions result in drop-frame timecode internally (all others are NDF).
-
Page 105: Control Surface
CONTROL SURFACE During operation, your principal contact with the NewTek 3Play™ system will normally be though the use of the control surface. Using its buttons and other controls, you can perform the great majority of necessary functions. This chapter describes the features of the control surface. Further references to the control surface are made in context In subsequent chapters, as well. -
Page 106: Qualifier Buttons
QUALIFIER BUTTONS Figure 80 Figure 81 SHIFT, CTRL, AND ALT SHIFT, CTRL (Control) and ALT are qualifier buttons, similar to their familiar keyboard equivalents. When pressed (and held down), they modify the outcome of other actions, typically providing alternate or extended operations. (These combination operations are described in context as they arise in this section.) RECORD The Record button toggles capture of a/v data to file(s) on mounted storage volumes... -
Page 107: Control Modes
The active Output Mode selection – again, A or B – determines i) what is shown in the Clips and Play List panes on the Replay Desktop, ii) the selection states in those modules, as well as iii) the state of various control surface and Dashboard buttons and settings. All of these attributes are stored independently for each of the two Output Modes. -
Page 108: Play List Mode
In this Control Mode, the item currently selected in the Clips List is automatically displayed on the active output. 8.5.2 PLAY LIST MODE While the PLAY LIST mode button is active, your control surface (or keyboard/Dashboard) operations are directed to the Play List module. Again, a gold outline around the Play List module confirms this, as does the HUD (Heads Up Display –... -
Page 109: Page And Bank (P1-P4)
PAGE AND BANK (P1-P4) Figure 85 Both the Clips List and Play List modules feature four banks, each with four pages, a total of sixteen discreet repositories each in which to organize your media. According to the Control Mode that is operative (Clips or PLAY LIST), pressing a button with present the corresponding page, numbered 1 through 4. -
Page 110: Previous
8.7.1 PREVIOUS | The first button in the upper row selects the previous clip in the Clips List or Play List (when possible, of course.) When SHIFT (see section 8.2) is pressed and held at the same time, pressing the Previous button can multi-select neighboring clips as well. 8.7.2 NEXT | The Next button makes its appearance at the opposite end of the same row in the Transport Control group. -
Page 111: Play Speed (T-Bar Section)
Speed setting is replaced by your action. Figure 87 IN/OUT (MARKING) Marking events is, of course, the core business of NewTek 3Play™. These two simple buttons will see a lot of use. Their roles are not complicated, but it would be good to review them anyway. -
Page 112: Out
ALT + IN Hold down ALT while pressing IN to update the In Point for the selected event in the Clips List, or, when the Play List is displayed on the active output (A or B , the selected clip. The timecode for the In Point is revised to match that of the frame that is currently displayed. -
Page 113: Utility Buttons
8.10 UTILITY BUTTONS Figure 89 8.10.1 ESC Press the Esc (Escape) button cancels a popup dialog, or exits from text input without applying changes. 8.10.2 REMOVE Push the Remove button to remove selected events from the Clips List, or selected clips from the Play List. -
Page 114: Add To Play List
8.10.4 ADD TO PLAY LIST Push Add to PLAYLIST to insert the currently selected clips from the Clips List to the current Play List page. (The operation only proceeds if the Operating Mode is set to Clips when the button is pressed.) Page | 100... -
Page 115: Desktop Monitors
3Play™ provides ample monitoring features, as described herein. Fittingly, NewTek 3Play™ provides monitoring features that are just what you need to prepare and control video replays in your productions. Note: A number of important controls and features are located in the monitoring section for convenience. -
Page 116: Titlebar Features
Clicking a tab labeled Cameras 1-x at left near the top of the screen reveals a group of video preview windows, each representing one input. These previews (often referred to as ISO, or Isolation monitors) display live video sources that are currently connected and configured. Hint: Depending on your selections when creating the session, the sources displayed may or may not be captured to disk when you enable recording. -
Page 117: Interactive Control
Alternatively, when the Control Mode is already LIVE, press 1 - (4 or 8) on the keyboard number pad (or control surface P1 - P4, cameras 1 - 4; ALT + P1 - P4, cameras 5 – 8, 3Play™ 820) to select the corresponding input for display. -
Page 118: Heads-Up Display
NewTek 3Play™ supports two fully independent video and audio output sections, referred to as Output A and Output B. The corresponding output monitors could hardly be more important. They show what you are displaying to your viewing audience at any moment. - Page 119 The output HUD provides a wealth of useful information about the video stream assigned to the monitor. It may include any of the following tags: Name – the output name, as supplied in Output Configuration (see Section 7.1.1). CONTROL –...
-
Page 121: Record And Marking
Chapter 12 (The Clips List) and 13 (The Play List). Live, or previously recorded audio/video data, can be sent to 3Play’s outputs when Record is off; but as event marking is dependent on recording, let’s expand on that matter first. -
Page 122: Recording And The Desktop
The list may include external drives along with those inserted in the 3Play™ system’s removable drive bay(s). Drives that are clearly too small (or too full to accommodate further capture) are not shown. -
Page 123: Clips List
10.2.1 CLIPS LIST Figure 96 – 3Play™ 820 One way to tell which inputs are configured for recording is to observe the Show/Hide Column buttons located in the Clips List titlebar. The numbered buttons for inputs that are simply being passed through but are not configured for recording are ghosted (disabled). -
Page 124: Record On/Off
Figure 98 – 3Play™ 820 Likewise, the Recorded Cameras layout for the Multiview output shows only those sources configured for recording. 10.2.3 RECORD ON/OFF Figure 99 Both the Replay Desktop (Figure 99) and control surface (Figure 100) provide Record buttons. As you’d expect, these controls do the same thing –... -
Page 125: Marking Events
– for example, pressing the (mark) IN or OUT buttons enables Record when necessary (see Section 8.9). Reminder: Previously recorded data can be sent to 3Play™ outputs even with Record off; but for live sources, operations such as Stop, or Speed changes can only be applied when Record is enabled, since this permits the system to automatically switch to Delayed playback mode. - Page 126 Figure 101 Figure 102 The IN and OUT buttons on the control surface perform identically to the Mark In and Mark Out buttons in the Dashboard at the bottom of the Replay Desktop. See Sections 8.9 and 14.5 for full details.
-
Page 127: Output & Control Modes
11.1 OUTPUT MODES In many ways, it would not be incorrect to think of your NewTek 3Play™ system as not just one, but two conjoined playout devices. The system features two independent audio/video output sections –... -
Page 128: Control Modes
– 3Play’s Control Modes. 11.2 CONTROL MODES We’ve seen how to tell the 3Play™ system which output we wish to control, but we’ve yet to discover how to tell it which audio/video source we want the current output to display. That’s where the Control Mode comes into play. - Page 129 – really any source, in any state of play. 3Play™ stores the Control and Output Mode states for Output A and B independently, along with other important parameters – including the Clips List or Play List page, selection state, playhead position, and so on.
-
Page 130: Control And A+B Mode
This brings us back to the A + B Output Mode. You may wonder what effect different controls will have in this special ‘tandem mode’, and what will be displayed on the Replay Desktop. 11.2.1 CONTROL AND A+B MODE In broad terms, the special A + B mode causes transport control operations (Play, Stop, etc.) to occur in tandem, while other operations –... -
Page 131: The Clips List
12 THE CLIPS LIST The core functionality of your NewTek 3Play™ is to capture multiple views of live events, and allow you to quickly recall and display any portion of that recorded footage with ease and accuracy. The Clips List is first stop for newly recorded media, and also serves as the library where production assets are organized and managed. -
Page 132: Add Media
An Add (Media) button sits right beside the Page Selector in the Clips List titlebar. This button is identified by an icon displaying a folder with a + sign (Figure 109). Click the button to open 3Play’s custom Media Browser, which can be used to add video clips and still images to the current Clips List page. - Page 133 MEDIA BROWSER Figure 110 The left and right panes of the Media Browser are the Location List and File Pane, respectively. Hint: Press the keyboard Tab key to cycle between the Location List, Filter and File Pane. LOCATION LIST The Location List is a column of favorite “locations”, grouped under the headings Clips, Stills, and My Media Locations.
- Page 134 EXTERNAL LOCATIONS Clicking the Add Media Location button (Figure 111) at the bottom of the Location List opens a standard system folder selector. Figure 111 The name of any folder you select using this button is added to the Media Browser’s Location List under the main-heading My Media Locations.
- Page 135 These are grouped under horizontal dividers named for sub-folders in the File Pane, which allows related content to be organized conveniently. Double click a file (or press OK, to append it at the end of the current Clips List page. Conveniently, the File Pane supports multi-selection as well. Filenames for media added to the Clips List are initially shown in the Memo field columns for all camera angles.
-
Page 136: Filter
(clear the field to display all events again). 12.1.4 SHOW/HIDE COLUMNS Figure 114 – 3Play™ 820 A group of buttons located at the right-hand end of the Clips List titlebar allows you to selectively show or hide the columns associated with the clips recorded from different inputs. -
Page 137: Clip Configuration
Click this button to open a dialog (Figure 115) that allows you to set several useful default values. Figure 115 – 3Play™ 820 The One Button Marking menu allows you to set the standard time value employed for marking when using the ‘one-button marking’... -
Page 138: Clips List Table Features
12.2 CLIPS LIST TABLE FEATURES By way of reminder (as discussed in depth back in Section 2.2.1), an event is not merely a ‘clip’. Rather it can be compared to a bookmarked section of the complete recording, a synchronized time slice of all of the captured a/v streams. The Clips List provides information about the events that have been marked, along with numerous event organization and management features. -
Page 139: In/Out Points, Duration (And Trimming)
12.2.1 IN/OUT POINTS, DURATION (AND TRIMMING) The initial values in timecode fields are established by your marking operations (Mark In and Mark Out). Afterward, they can be modified (within the bounds of actually recorded footage) in several different ways: You can simply drag the mouse pointer left or right above a timecode field. -
Page 140: Managing Events
Activating the Memo field for text editing can be accomplished in one of two ways – navigate to the field to select it, and then press either Enter or F2 on the keyboard. This will open a text entry field to allow direct keyboard entry. -
Page 141: Clip Transport
Selected items are highlighted. Paste operations within the Clips List (and Play List) will be inserted below the currently selected event, or at the end when no item is selected (as when pasting into new, empty pages). When dealing with multi-selected items, insertions are in order of selection. -
Page 142: Selection & Display
12.4 SELECTION & DISPLAY Generally, the highlighted clip in the active event row is shown on the current output (A or B). In the case of multi-event or multi-clip selections, the last-selected clip is the one displayed on output. 12.4.1 PLAY INDICATOR Clip selection (and consequently, display on output) normally follows Memo field selection, whether by control surface, keyboard or mouse operation –... - Page 143 Press the Add to Play List button on the control surface. Drag a clip selection onto the Play List pane with the mouse. Hint: You can also add all clips from one or more events to a Play List in their natural order in one easy operation.
-
Page 145: The Play List
13 THE PLAY LIST At times you will likely wish to assemble and play a compilation of clips forming a highlight reel, or prepare such a sequence for other purposes. The Play List module supports these special playback features and more. Multiple Play List banks and pages let you organize and switch from one compilation to another with alacrity. -
Page 146: Export Play List
Also like the Clips List, the Play List module offers four banks, each with four pages, for a total of sixteen independent playlists. Pages can be assigned custom names, making it easier to locate just the right one. Click in the Name field (Figure 121) in the Play List titlebar to edit the default page name using the keyboard. - Page 147 Hint: One useful thing to note is that because the Media Browser is context sensitive, when opened from the Music menu it automatically points to Audio locations in its left column (the Locations List). A switch at left of the Music menu allows you to toggle playback of your selection on or off. More elaborate controls are located in the Music Configuration dialog (Figure 124).
-
Page 148: The Play List Table
The Duration time value lets you know the length of the selected audio file, for comparison against the length of the playlist. It is not editable. Hint: Playback of files that are longer than the playlist duration will be automatically truncated (and faded out) when Play List playback ends. -
Page 149: Play List Preparation
Out Point – timecode when the clip will end. Speed – a numeric slider allowing you to preset the speed at which the clip will play back. Crossfade – an on/off toggle switch for a crossfade type transition to the next clip in the playlist, and a numeric input field allowing you to specify the time for the crossfade. -
Page 150: Changing A Clip
13.3.2 CHANGING A CLIP Perhaps, after adding a clip to a playlist, you decide you want to show the same event from a different camera angle. You could go back to the Clips List, locate the event, and add a different clip to the playlist. -
Page 151: In And Out Points (Trimming Clips)
13.3.5 IN AND OUT POINTS (T RIMMING CLIPS) To change the timing of clips in the Play List, you can use the same methods described earlier for the Clips List – see Section 12.2.1. The value in the Ends At field cannot be directly edited. It is a calculated field only, showing the cumulative duration for the current clip and those above it. -
Page 152: Clip Context Menu
13.4 CLIP CONTEXT MENU The Play List also features a context menu (Figure 127). Not unlike its Clips List equivalent, the menu provides access to Cut, Copy and Paste (also available using the standard keyboard shortcuts). It also has one important additional item. Figure 127 The Export Play List option flattens the entire playlist, including audio, down to a single clip which is appended to the current Clips List page. -
Page 153: Play List Edls
These files can be used to reconstitute a playlist in NLE (non-linear editing) applications with EDL file import support. 3Play’s EDL files are created on the master Session Drive for the session, in a folder located at drivename:\Media\EDL\session name\. Page | 139... -
Page 155: The Dashboard
14 THE DASHBOARD On occasion you may find it useful to control your NewTek 3Play™ using the mouse for functions normally invoked using the control surface. The Dashboard, located at the bottom of the Replay Desktop, makes this possible. In addition, the Dashboard offers visual feedback of control surface operations, Speed settings, and the like, which you may just appreciate at any time. -
Page 156: Output Mode
If playback* is underway, selecting a Speed Preset changes the play rate the selected speed. Otherwise, they establish the speed for the next playback operation. * Live throughput is always 100% Speed; if recording is enabled, selecting a lesser Speed value initiates Delayed playback. Thus selecting an event and setting Speed to 50% does not begin slow motion play immediately;... -
Page 157: Mark In/Out
Dashboard equivalents for the other two familiar Control Modes (Clips and Play List) are not provided, but you can easily enable either mode by clicking the mouse in the Clips List or Play List, respectively. Hint: You can also send a given live input directly to the current output (A or B) by clicking the mouse on the corresponding input monitor;... -
Page 158: Play List Loop
14.7 PLAY LIST LOOP When the Loop switch in the Dashboard is enabled, Play List playback will begin again when the end of the current playlist is reached, and continue repeatedly until manually stopped. Hint: Press Ctrl + the PLAY LIST mode button to toggle the Loop (Play List) switch in the Dashboard on the Replay Desktop. -
Page 159: Part Iii (Appendices)
PART III (APPENDICES) A time-saving question and answer section, followed by an extensive listing of Shortcut Keys and keyword index … Page | 145... -
Page 161: Ahow Do I
If you’ve largely mastered your NewTek 3Play™ system, but have a specific question, this may be the best place to look first. The headings that follow list related questions and answers together, along with cross-references and other helpful remarks. - Page 162 Software, Maintenance and Updates ..................162 Improve system performance? ..................... 162 Resolve serious instability or dropped frames? ..............162 Update NewTek 3Play™ software? ..................162 Install virus protection? ......................163 Install my favorite software (or codec)? ................163 Restore the system to original ‘as-shipped’ condition?............164 Registration and Tech Support ....................
-
Page 163: Connections
You might connect an SD camera during an HD session, for example. The official broadcast standard for SD video is Rec. 601, but HD video conforms to Rec. 709 – and NewTek 3Play™ output color space is governed by the session format. -
Page 164: Connect Monitors
When the natural color space for a connected source does not match the current output specification (in this example, Rec. 709), 3Play™ automatically attempts to compensate – but it’s always best to refer to downstream scopes for critical accuracy. 1. As required, connect external Waveform and Vectorscope monitors to 3Play™ outputs 2. -
Page 165: Improve The Quality Of Multiview Output
OUTPUT VIDEO MONITORS/DEVICES Downstream video devices you wish to send 3Play™ output to must be compatible with the video broadcast standard (such as NTSC or PAL) and format (SD or HD) of the current 3Play™ session. 1. Connect cables between downstream devices (whether monitors or other devices) and appropriately labeled video output connectors on the backplate (see Section 3.5.1). -
Page 166: Connect The Genlock Reference Signal
2. See Section 3.9 for details on configuring Genlock settings. A.1.6 CONNECT THE 3PLAY™ CONTROL SURFACE? Connect the USB cable from the control surface to one of your NewTek 3Play’s USB ports. SUPPLEMENTARY QUESTION: Q: My system has suddenly stopped responding to the control surface. What can I do? A: The foremost reason this might happen is if the cable (or extender cable) you are using between the control surface and NewTek 3Play™... -
Page 167: Supplement: What Hard Drives Are Recommended For Newtek 3Play
Q: What hard drives are recommended for removable drive bays? A: NewTek Sales offers additional hard drives for use in the removable bays. NewTek supplied storage media has been carefully tested to meet exacting specifications, and can be expected to provide optimal performance and reliability. -
Page 168: Connect An External Hard Drive
A.1.9 EJECT A HARD DRIVE? Click the Eject gadget in the Home page titlebar in 3Play’s Startup screen for the hard drive you wish to safely disconnect. A.1.10 CONNECT TO A NETWORK? Please refer to Section 3.12. -
Page 169: Sessions
A.2 S ESSIONS SUPPLEMENTARY QUESTION: Q: What is a session? A: Sessions can be thought of as ‘top-level presets’. They store all of the settings, playlists, device configurations, and so on for a given live production. See Section 5.1. A.2.1 DELETE A SESSION (AND ITS CONTENT)? 1. -
Page 170: Events And Recording
2. Under Browse at (right on the Session page), click the link for the type of content you wish to manage (see Section 5.3.1). A.3 E VENTS AND ECORDING A.3.1 START RECORDING? 1. Press the REC button on the control surface. or …... -
Page 171: Cancel An Incomplete Marking Operation
TWO-BUTTON METHOD 1. Press the IN button on the control surface at any convenient time. This creates a new ‘incomplete’ event in the Clips List. 2. (Optional) If nothing noteworthy occurs in the next while, feel free to press IN again from time to time, updating the In Point of the event. -
Page 172: Prepare A Highlight Reel
A.3.7 PREPARE A HIGHLIGHT REEL? 1. Select clips for events you want to include in the Clips List and press Add to Play List to add them to a page in the Play List module. 2. Drag clip entries up or down in the Play List table as necessary to place them in the order you want them to play. -
Page 173: Import Media Files
Import feature instead whenever possible. A.4.3 PREPARE CLIPS FOR THE PLAY LIST USING APPLE® FINAL CUT PRO? We are often asked what format to use for export from Final Cut for best compatibility in 3Play, especially for HD clips. Here are recommended steps: 1. -
Page 174: Add An External File Location To The Media Browser
(See the sub-heading Context Menus in Section 12.1.2) A.4.6 EXPORT FILES TO AN EXTERNAL DRIVE? There are several approaches to exporting media files from within 3Play™ sessions. By far the simplest is to use the Export Media feature in Startup – see the Export Media sub-heading in Section 5.3.1. -
Page 175: Export Files For Use In Apple® Final Cut Pro
A.4.7 EXPORT FILES FOR USE IN APPLE® FINAL CUT PRO? At the time of writing, importing 3Play’s MPEG-2 files into Final Cut requires a few extra steps. There are several approaches – pick the one that suits your need best. -
Page 176: Avoid The Error
NewTek 3Play™ generates metadata attributes for media files for internal use. This metadata is only retained when you export to storage formatted as NTFS. That being said, the metadata is automatically regenerated if you use the files with NewTek 3Play™ again later, so its loss poses no issue. -
Page 177: Install Virus Protection
Restore function to completely rehabilitate your system. A.5.5 INSTALL MY FAVORITE SOFTWARE (OR CODEC)? NewTek 3Play™ is not a ‘general purpose’ computer. The installed software suite is finely tuned to provide reliable performance and amazing features. Anything you install apart from official updates places these important goals at risk. -
Page 178: Restore The System To Original 'As-Shipped' Condition
A.5.6 RESTORE THE SYSTEM TO ORIGINAL ‘AS-SHIPPED’ CONDITION? We firmly expect you will never need it, but isn’t it good to know that a complete 3Play™ Restore function is available in the event of an unforeseen problem? You can use one of two methods to restore your system, depending on your situation. -
Page 179: Registration And Tech Support
NewTek products, including FAQs for all products. It also lists the Technical Support Department’s hours of operation and contact details. A.6.3 FIND HARDWARE/FIRMWARE REVISION NUMBERS? Click the Help icon and select About 3Play™ in Startup. Doing this opens an information panel that lists significant version numbers (at the bottom). A.7 M ISCELLANEOUS A.7.1 SET UP REMOTE DESKTOP CONTROL OF 3PLAY? -
Page 180: Access Windows
3. Click the Exit to Windows link at right (and confirm the warning dialog). A.7.4 RETURN TO THE STARTUP SCREEN FROM THE WINDOWS™ DESKTOP Double-click the 3Play™ icon on the Windows™ desktop to return to 3Play’s Startup screen. A.8 M... -
Page 181: Why Are My Clip Duration And Countdown Times Different
SUPPLEMENTARY QUESTION: Q: Where can I obtain replacement or spare Power Supply modules? A: Contact NewTek Sales for purchase information for spare components. A.8.2 WHY ARE MY CLIP DURATION AND COUNTDOWN TIMES DIFFERENT? At times, the duration shown for a clip in the Clips List may not perfectly match the HUDs countdown timecode. -
Page 183: Bkeystroke Shortcuts
KEYSTROKE SHORTCUTS Previous row (Clips List and Play List) Up arrow Next row (Clips List and Play List) Down arrow Previous table cell (Clips List and Play List) Left arrow Next table cell (Clips List and Play List) Right arrow One page up in table (Clips List and Play List) Page Up One page down in table (Clips List and Play List) -
Page 185: Creliability Testing
For this reason, all NewTek products undergo rigorous reliability testing to ensure they meet our exacting test standards. For NewTek 3Play™, the following standards are applicable:... -
Page 187: Index
INDEX Add Media Location, 120, 160 Filter, 121 Menus, 121 3Play Memo, 43, 125 Register, 17, 165 Navigation, 43 Play indicator, 128 Playback speed, 127 Activate Windows. See Windows™ Re-order, 126 Add, 45 Selection, 128 Apple® Final Cut Pro, 159, 161... - Page 188 Audio, 33 Clipping, 89 EDL, 139 Genlock, 81, 82, 83 Eject, 54, 154 Proc Amp, 12, 52, 87 EULA. See 3Play: Register Video Input, 31, 83 Event, 6, 124 Connection Type, 84 Cut, Copy, Paste, 45, 126 Video Output, 28, 75 Marking.
- Page 189 Navigation. See Control Surface and Clips List Network, 10, 16, 34, 65 Record, 6, 7, 12, 40, 41, 54, 107 Network Output, 25 Register. See 3Play: Register NTSC. See Video Standard Rename Input, 71 Render. See Play List Replay Desktop, 8, 28, 69 Dual Displays, 72 Open Session.
- Page 190 Defragment, 59, 162 Restore 3Play, 164 UPS, 16 Update 3Play, 162 Storage (external), 154 Support, 165 Video Standard, 20, 55 Virus Checker, 163 VU Meters, 88, 103 Tally Lights. See Connections:Tally Lights Technical Support, 165 Timecode, 21, 88, 90, 97, 111, 121, 124, 125, 134 Configure, 89 Windows™...
-
Page 191: Credits
Wisniewski, Bob Peene, Greg Heine, Dan Fletcher, Anthony Louviere, Jan Uribe, Jeremy Brosius, Michael Joiner, Jarrod Davis, Ryan Hansberger, Naveen Jayakumar, Todd Bryant Design Consultants: Kris Gurrad Additional thanks to: NewTek Marketing and Sales NewTek Customer Support NewTek Business Development This product uses the following libraries, licensed under the LGPL license (see link below). - Page 192 TriCaster DUO, iVGA, SpeedEDIT, 3PLAY, 3PLAY 820, 3PLAY 425, 3PXD820, 3PXD425, LiveText, DataLink, LiveSet, LiveMatte, TimeWarp, VT, V[T5], Video Toaster, Toaster, 3D Arsenal, Aura, LightWave, LightWave 3D and LightWave CORE are trademarks of NEWTEK. All other brand names, product names, or trademarks belong to their respective holders.
- Page 194 Copyright © 2013 NewTek. In. All rights reserved.
Need help?
Do you have a question about the 3Play and is the answer not in the manual?
Questions and answers