Table of Contents
Advertisement
Quick Links
Packing Check List
Package 1
Package 2
INSTRUCTION BOOKLET MUST BE LEFT WITH THE USER
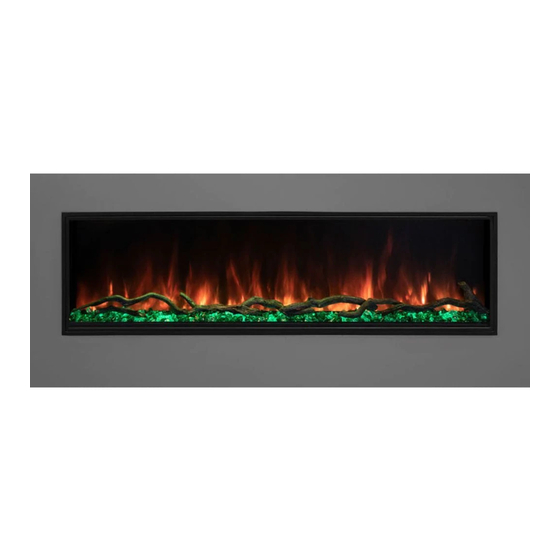
Ambiance Wall Hung Electric Fires
1 x Electric Fire
1 x Glass Face
1 x Remote Control Handset
2 x AAA Batteries
1 x Instructions Booklet
1 x Wall Fixing Plate
1 x Fasteners Package
1 x Fire Face (Stone Face Models only)
Advertisement
Table of Contents

Related Manuals for Modern Flames AL 38


Summary of Contents for Modern Flames AL 38
- Page 1 Ambiance Wall Hung Electric Fires Packing Check List Package 1 1 x Electric Fire 1 x Glass Face 1 x Remote Control Handset 2 x AAA Batteries 1 x Instructions Booklet 1 x Wall Fixing Plate 1 x Fasteners Package Package 2 1 x Fire Face (Stone Face Models only) INSTRUCTION BOOKLET MUST BE LEFT WITH THE USER...
-
Page 2: Installation Instructions
Ambiance Wall Hung Electric Fires INSTALLATION INSTRUCTIONS This Electric Fire must be installed by a qualified, competent installer. Location The fire must not be in contact with any combustible materials. The heater, which is located at the base of the fire, must be a minimum of 16 inches away from any combustible material. - Page 3 Installation PLEASE READ THROUGH THE INSTALLATION INSTRUCTIONS BEFORE BEGINNING THE INSTALLATION. Figure 1 Select the position of the fire on the wall to which it is to be mounted. Draw a level horizontal line on the wall at the required height. This line will correspond to the top of the appliance so it is important to allow for the extra height of the fire front.
- Page 4 The mounting plate has four location pins, one at each corner of the plate. See Figure 1. Lift the fire and place the keyhole slots situated on the back of the fire (Figure 2) to the location pins on the mounting plate. A gentle downward pressure should be applied.
- Page 5 Electrical Work THIS PRODUCT MUST BE GROUNDED 1. A standard electrical outlet must be close to the fire. If the electric outlet is required to be concealed, it can be located above or on the right hand side of the fire and behind the face.
- Page 6 Attaching The Face 1. On each side of the fire are two locating studs (Figure 5). 2. On the back of the face there are two brackets which hook over these studs. 3. Lift the face up to the fire. Two people may be required to carry out this installation. Then lower the face into place so that the brackets on the rear of the face locate either side of the studs on the fire.
-
Page 7: Control Panel On Fire
Ambiance Wall Hung Electric Fires OPERATING INSTRUCTIONS Please read these instructions carefully before attempting to use the appliance and retain for future use. CAUTIONS: When the fire is in operation certain areas of the fire will get hot. Caution must be taken to avoid being burned. -
Page 8: Remote Control
Remote Control DIMMER ON/OF Infrared Window On/Off Switch Flame Effect Dimmer Heater Maximum Heat Heater Low Heat Prior to use, the remote control handset requires installation of 2 x AAA batteries, as supplied. (Figure 8) Remove the cover on the rear of the remote handset by sliding backwards. Install the batteries as shown and then slide the cover back into the original position. -
Page 9: Technical Specification
Indicator Lamps will verify current condition. If you are unsure if heat is on or off check the lamps on the control panel. If the function is on the indicator lamp will light above the function switch. Modern Flames Wall Hung Electric Fires TECHNICAL SPECIFICATION Model... -
Page 10: Maintenance Instructions
Modern Flame Wall Hung Electric Fires MAINTENANCE INSTRUCTIONS To Change A Light Bulb Disconnect power supply before beginning any maintenance. Light bulbs need to be replaced when you notice a dark section of the flame or when clarity and detail of the coal effect disappears. Unscrew the locking nut on the side of the brackets and then remove the face. -
Page 11: Warranty
This limited warranty does not apply to products that have been repaired (except by Modern Flames or its authorized service representatives) or otherwise altered. This warranty does further not apply to defects resulting from misuse, abuse, accident, neglect, incorrect installation, water damage, improper maintenance or handling, or operation with an incorrect power source.
Need help?
Do you have a question about the AL 38 and is the answer not in the manual?
Questions and answers