
Related Manuals for Ruckus Wireless ZoneFlex 2925


Summary of Contents for Ruckus Wireless ZoneFlex 2925
-
Page 1: Access Point
Ruckus Wireless ® ZoneFlex 2925/2942/7942/7962 ® Access Point User Guide Part Number 800-70212-001 Published March 2009 www.ruckuswireless.com... -
Page 3: Table Of Contents
ZoneFlex 2925 ........ - Page 4 1. Choose a Location for the Access Point ......34 2. Connect the Access Point to a Power Source and the Network ... 34 Troubleshooting Installation .
- Page 5 Enabling Logging and Sending Event Logs to a Syslog Server....75 Sending a Copy of the Log File to Ruckus Wireless Support....76 Saving a Copy of the Current Log to Your Computer .
-
Page 7: About This Guide
Most user guides and release notes are available in Adobe Acrobat Reader Portable Document Format (PDF) or HTML on the Ruckus Wireless Support Web site at: http://support.ruckuswireless.com/... -
Page 8: Related Documentation
Documentation Feedback Ruckus Wireless is interested in improving its documentation and welcomes your comments and suggestions. You can email your comments to Ruckus Wireless at: docs@ruckuswireless.com When contacting us, please include the following information: Document title ■... -
Page 9: Introducing The Zoneflex Access Point
......14 Overview of the ZoneFlex Access Point Congratulations on your purchase of the Ruckus Wireless ZoneFlex Access Point! ZoneFlex Access Points are the industry’s first centrally-managed Wi-Fi access points that are capable of extending wireless signals two to four times farther than a conventional access point. -
Page 10: Unpacking The Zoneflex Access Point
Getting to Know the Access Point Features This section identifies the physical features of each ZoneFlex Access Point model that is discussed in this guide. Before you begin the installation process, Ruckus Wireless recommends that you become familiar with these features. -
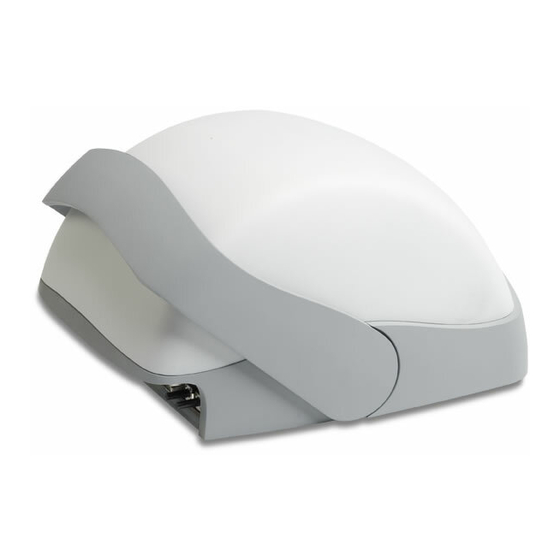
Page 11: Zoneflex 2925
The following illustrations and tables describe the physical features of ZoneFlex 2925. Front Panel Figure 1 shows the front view of a ZoneFlex 2925 AP, highlighting the four LED indicators that can be used to assess both device and network status. Refer to Table for information on what the LEDs indicate. - Page 12 Refer to Table 4 below for all possible LED states and what they indicate. Table 3. ZoneFlex 2925 LED behavior Description • Off: No power is available, or the AP is not connected to a power source. • Green: The AP is connected to a power source.
- Page 13 Introducing the ZoneFlex Access Point Getting to Know the Access Point Features Rear Panel Features Figure 2 shows the rear panel of ZoneFlex 2925. For a description of each rear panel part, refer to Table Figure 2. ZoneFlex 2925 rear panel Table 4.
-
Page 14: Zoneflex 2942/7942
Introducing the ZoneFlex Access Point Getting to Know the Access Point Features ZoneFlex 2942/7942 The side panel of ZoneFlex 2942/7942 features four LED indicators that can be used to assess both device and network status. The rear view displays the connector panel, which includes the LAN ports and the optional external antenna connection. - Page 15 Introducing the ZoneFlex Access Point Getting to Know the Access Point Features Table 5 lists all possible LED states on ZoneFlex 2942/7942 and describes what each LED state means. It also describes how to use the HARD RESET button and other elements on the side panel.
- Page 16 Introducing the ZoneFlex Access Point Getting to Know the Access Point Features Table 5. ZoneFlex 2942/7942 side panel elements Number LED/Button Name Description WLAN LED • Green: The wireless LAN (WLAN) service is up and at least one wireless client is associated with it. If mesh networking is enabled, there are no downlink MAPs connected to this Access Point.
- Page 17 Introducing the ZoneFlex Access Point Getting to Know the Access Point Features Rear Panel Features Figure 4 shows the rear panel of ZoneFlex 2942/7942. For a description of each rear panel part, refer to Table Figure 4. ZoneFlex 2942/7942 rear panel features WARNING: For units with Power over Ethernet (PoE).These products and all inter- connected equipment must be installed indoors within the same building, including the associated LAN connections, as defined by Environment A of the IEEE 802.3af...
- Page 18 Introducing the ZoneFlex Access Point Getting to Know the Access Point Features Table 6. ZoneFlex 2942/7942 rear panel elements Number Item Name Description Power Adapter Plug Connect the power adapter to this socket. (Input 110-240V AC, Output 12V 1.0A DC). Power can also be supplied via 10/100 POE port.
-
Page 19: Zoneflex 7962
Introducing the ZoneFlex Access Point Getting to Know the Access Point Features ZoneFlex 7962 The physical features of ZoneFlex 7962 are very similar to ZoneFlex 2942/7942. It uses the same dome-type chassis with the sliding door and Kensington lock on the side panel. - Page 20 Introducing the ZoneFlex Access Point Getting to Know the Access Point Features Table 7. ZoneFlex 7962 side panel elements Number LED/Button Name Description OPT LED Not used in this model DIR LED • Off: The Access Point is not being managed by ZoneDirector (standalone mode).
- Page 21 110-240V AC, Output 12V 1.0A DC). Power can also be supplied via the 10/100/1000 POE port. Lock Hasp The lock hasp works with a cable or Ruckus Wireless mounts. The recommended lock type is Masterlock 120 series (D, T, Q, KAD types).
-
Page 22: If Your Ap Is Part Of A Wireless Mesh Network
A wireless mesh network is a peer-to-peer, multi-hop wireless network wherein participant nodes cooperate to route packets. In a Ruckus Wireless mesh network, the routing nodes (that is, the Ruckus Wireless APs forming the network), or “mesh nodes”, form the network's backbone. Clients (for example, laptops and mobile devices) connect to the mesh nodes and use the backbone to communicate with one another, and, if permitted, with nodes on the Internet. - Page 23 • At least one mesh downlink exists, and; • No client is associated with the AP Figure 7. WLAN/Wireless Device Association LED on ZoneFlex 2942/7942 (left) and ZoneFlex 2925 (right) Air/Signal Quality LED Table 10. Air/Signal Quality LED behavior LED Color/Behavior...
- Page 24 Introducing the ZoneFlex Access Point If Your AP is Part of a Wireless Mesh Network Figure 8. Air/Signal Quality LED on ZoneFlex 2942/7942 (left) and ZoneFlex 2925 (right)
-
Page 25: Installing The Access Point
Installing the Access Point In This Chapter Before You Begin ........... 17 Step 1: Preconfigure the Access Point. -
Page 26: Perform A Site Survey
Installing the Access Point Before You Begin Perform a Site Survey Before installing the Access Point, perform a site survey to determine the optimal Access Point placement or maximum range, coverage, and network performance. When performing a site survey, consider the following factors: Data rates: Range is generally inversely proportional to data rates. -
Page 27: Determine The Optimal Mounting Location And Orientation
Orientation The location and orientation that you choose for the Access Point play a critical role in the performance of your wireless network. In general, Ruckus Wireless recommends installing the Access Point away from obstructions and sources of interference and ensuring that the Access Point’s dome is pointing in the general direction of its wireless... - Page 28 Installing the Access Point Before You Begin Figure 10. Recommended orientation for maximum vertical plane coverage Excellent Reach Limited Good Reach Reach Excellent Reach...
-
Page 29: Step 1: Preconfigure The Access Point
Installing the Access Point Step 1: Preconfigure the Access Point Figure 11. Recommended orientation for maximum mesh coverage Limited Limited Reach Reach Excellent Excellent Excellent Reach Reach Reach Good Good Reach Reach Step 1: Preconfigure the Access Point The procedure for completing the Access Point’s essential configuration depends on whether you want it to be managed by either ZoneDirector or FlexMaster or to operate as a standalone access point. -
Page 30: What You Will Need
1. Connect one end of an Ethernet cable to a LAN (RJ-45) port on the rear panel of the Access Point. NOTE: If you are using ZoneFlex 2925 AP, make sure you connect the Ethernet cable to one of the four LAN ports (not the WAN port). -
Page 31: Configuring For Standalone Operation Or For Management By Flexmaster
Management by FlexMaster This section describes the steps you need to complete to set up the AP in standalone mode or to be managed by Ruckus Wireless FlexMaster, if you have one installed on the network. What You Will Need... - Page 32 Installing the Access Point Step 1: Preconfigure the Access Point 2. When the Network Connections window appears, right-click the icon for Local Area Connection, and then click Properties. NOTE: Make sure that you configure the Local Area Connection properties, not the Wireless Network Connection properties.
- Page 33 Installing the Access Point Step 1: Preconfigure the Access Point Figure 12. Sample configuration in the Internet Protocol (TCP/IP) Properties dialog box 2. Connect the Access Point to the Administrative Computer 1. Connect one end of an Ethernet cable to an Ethernet port on the Access Point, and then connect the other end to the administrative computer’s Ethernet port.
-
Page 34: Configure The Wireless Settings
Installing the Access Point Step 1: Preconfigure the Access Point Figure 13. The ZoneFlex Access Point login page 5. In User name, type super. 6. In Password, type sp-admin. 7. Click Log In. The Web interface appears, displaying the Device page. 8. - Page 35 Installing the Access Point Step 1: Preconfigure the Access Point Configure Common Wireless Settings 1. On the left menu of the Web interface, click Configuration > Wireless. The Common page appears. NOTE: ZoneFlex 7962 AP has two radios (2.4GHz and 5GHz) that need to be configured separately on the Web interface.
- Page 36 4. Clear the SSID box, and then type a unique and descriptive name that you want to call this wireless network. For example, you can type Ruckus Wireless AP. This SSID is the name that will help users identify this wireless network in their wireless network connection application.
- Page 37 Installing the Access Point Step 1: Preconfigure the Access Point Figure 15. The Configuration > Wireless > Wireless 1 tab (Optional) Set the FlexMaster Server Address If you have a FlexMaster server installed on the network and you intend to use FlexMaster to manage the Access Point, you can set the FlexMaster server address at this point.
- Page 38 Installing the Access Point Step 1: Preconfigure the Access Point 5. Click Update Settings to save your changes. You have completed setting the FlexMaster server address on the Access Point. Figure 16. Type the FlexMaster server URL NOTE: Instructions on how to verify that the Access Point and FlexMaster can communicate with each other are provided in “Check the TR069 Status (FlexMaster Management Only)”...
-
Page 39: Step 2: Verify Access Point Operation
You are now ready to connect the Access Point to your network. Step 2: Verify Access Point Operation Before deploying the Access Point to your environment, Ruckus Wireless strongly recommends that you verify that the Access Point is operating correctly. To do this,... -
Page 40: Check The Leds
Ruckus Wireless Web site through the Access Point. If you do not have Ruckus Wireless ZoneDirector on the network, the DIR LED is ■ off. This indicates that the Access Point is operating in standalone mode. If there is a ZoneDirector device on the network, the DIR LED is green. -
Page 41: Associate A Wireless Client With The Access Point
“Configure Wireless # Settings” page 28. For example, if you set the SSID to Ruckus Wireless AP, click the wireless network named Ruckus Wireless AP. 4. Click Connect. Your wireless client connects to the wireless network. After the wireless client connects... -
Page 42: Step 3: Deploy The Access Point
Installing the Access Point Step 3: Deploy the Access Point Step 3: Deploy the Access Point In this step, you will place the Access Point in a suitable location on the network and connect it to a power source and to your network environment. 1. -
Page 43: Troubleshooting Installation
Installing the Access Point Troubleshooting Installation 4. Connect one end to a LAN port on the AP, and then connect the other end to your network’s router, switch, or hub. 5. Verify that the power LED on the Access Point is green. Congratulations! You have completed setting up the Access Point on your network. - Page 44 Installing the Access Point Troubleshooting Installation...
-
Page 45: Navigating The Web Interface
........38 Logging Into the ZoneFlex Web Interface If you need to manage your AP, you do it with the features of the Ruckus Wireless Web interface (which you already used to set up the AP for use). -
Page 46: Navigating The Web Interface
Navigating the Web Interface Navigating the Web Interface Navigating the Web Interface You manage the Access Point through a Web browser-based interface that you can access from any computer that is on the same subnet as the Access Point. Table 14 lists the Web interface features that are identified in Figure Figure 17. -
Page 47: If You Are Using Zoneflex Ap 7962
Navigating the Web Interface If You Are Using ZoneFlex AP 7962 If You Are Using ZoneFlex AP 7962 If your ZoneFlex AP model is 7962, note that elements on the Web interface menu are slightly different from the other ZoneFlex AP models (and what this guide shows). ZoneFlex 7962 AP has one 2.4GHz radio (for 802.11b/g/n clients) and one 5GHz radio (for 802.11a/n clients). - Page 48 Navigating the Web Interface If You Are Using ZoneFlex AP 7962...
-
Page 49: Configuring The Access Point
Configuring the Access Point In This Chapter Configuring the System Settings ........41 Configuring Network Settings . -
Page 50: Configuring Network Settings
Configuring the Access Point Configuring Network Settings Figure 19. The Configuration > Device page Configuring Network Settings This section describes how to view and configure the AP’s network settings. Topics discussed include: Default IP Addressing Behavior By default, the AP is configured to automatically obtain an IP address from a DHCP server on the network. -
Page 51: Changing The Network Connection Type
Configuring the Access Point Configuring Network Settings Figure 20. The Configuration > Internet page To review and modify the network configuration 1. Go to Configuration > Internet. The Internet page appears. 2. Verify that Connection Type is set to Static IP. 3. -
Page 52: Configuring The L2Tp Settings
Configuring the Access Point Configuring Network Settings To change the connection type (DHCP or Static IP) 1. Go to Configuration > Internet. The Configuration > Internet page appears. 2. In Connection Type, click the type of connection that your Internet service provider (ISP) is using. -
Page 53: Renewing Or Releasing Dhcp
Configuring the Access Point Configuring Network Settings Renewing or Releasing DHCP This task should be performed only with guidance from your ISP. It serves as a troubleshooting technique when DHCP addresses to one or more networked devices prove to be unusable or in conflict with others. 1. -
Page 54: Configuring Common Wireless Settings
Configuring the Access Point Configuring Common Wireless Settings Configuring Common Wireless Settings Common wireless settings are settings that are applied to all WLANs. The settings include the wireless mode, wireless channel, and country code. To configure the wireless settings common to all WLAN 1. -
Page 55: Reviewing The Advanced > Common Options
If you purchased the AP in the United States, you do not need to manually set the country code. Ruckus Wireless APs that are sold in the US are preconfigured with the correct country code and this setting cannot be changed. - Page 56 Configuring the Access Point Configuring Common Wireless Settings NOTE: If you are using ZoneFlex 7962 AP, go to Configuration > Radio 2.4G or Configuration > Radio 5G. 2. Configure the advanced settings listed in Table 16 as required. Table 16. Advanced > Common options Option Description Transmit Power...
-
Page 57: Setting Threshold Options
Configuring the Access Point Configuring Common Wireless Settings Figure 23. The Configuration > Wireless > Advanced > Common page Setting Threshold Options The following options allow you to fine-tune the “Protection Mode” behavior, set previously on the Wireless > Common page. After activating a Protection Mode, you can open each Wireless tab and customize the threshold settings, that determine what is put in effect and when. - Page 58 Configuring the Access Point Configuring Common Wireless Settings 4. Review the options listed in Table 17, and then make any needed changes. Table 17. Threshold options Option Description Beacon Interval (The default value is 100.) The value indicates the frequency interval of the beacon in millisecond.
-
Page 59: Configuring Wlan Settings
Configuring the Access Point Configuring WLAN Settings Figure 24. Threshold settings Configuring WLAN Settings This section describes how to configure WLAN-specific settings, such as wireless availability, SSID, encryption, and authentication. To configure WLAN settings 1. Go to Configuration > Wireless. The Configuration :: Wireless :: Common page appears. - Page 60 Configuring the Access Point Configuring WLAN Settings 3. Review the WLAN options listed in Table 18, and then make changes as required. Table 18. Wireless # options Option Description Wireless Availability This option controls whether or not the wireless network is available to users (Off or On).
-
Page 61: Using Wep
Configuring the Access Point Configuring WLAN Settings Figure 25. WLAN settings Using WEP Do not customize these options unless you are an experienced network CAUTION: administrator or are under the guidance of an IT/support professional. To configure WLAN-specific WEP encryption settings 1. - Page 62 Configuring the Access Point Configuring WLAN Settings 4. Review the encryption settings listed in Table 19, and then make changes as required. Table 19. WEP settings Encryption Setting Description Authentication Mode Your options include: • Open: No security measure is enforced. •...
-
Page 63: Using Wpa
Configuring the Access Point Configuring WLAN Settings Figure 26. WEP settings Using WPA Do not customize these options unless you are an experienced network CAUTION: administrator or are under the guidance of an IT/support professional. Use of WPA PSK allows automatic key generation based on a single passphrase. WPA- PSK provides very strong security, but may not be supported on older wireless devices. - Page 64 Configuring the Access Point Configuring WLAN Settings 2. Click the Wireless # tab that you want to configure. The Configuration :: Wireless :: Wireless[#] page appears. 3. Click the Encryption Method menu, and then click WPA. An additional set of WPA-specific encryption options appear on this page.
-
Page 65: Customizing 802.1X Settings
Configuring the Access Point Configuring WLAN Settings 6. Click Go back to Wireless Configuration to reopen the previous page. Figure 27. WPA settings Customizing 802.1x Settings Do not customize these options unless you are an experienced network CAUTION: administrator or are under the guidance of an IT/support professional. If you choose “WPA”... - Page 66 Configuring the Access Point Configuring WLAN Settings NOTE: If you are using ZoneFlex 7962 AP, go to Configuration > Radio 2.4G or Configuration > Radio 5G. 2. Click a Wireless # tab to configure. The Configuration :: Wireless :: Wireless[#] page appears.
-
Page 67: Controlling Access To The Wireless Network
Configuring the Access Point Controlling Access to the Wireless Network Controlling Access to the Wireless Network Access Control give you control over which stations are allowed to join (associate with) your WLAN networks. There are “tab” entries for each available WLAN. Changing the Access Controls for a WLAN 1. -
Page 68: Removing Mac Addresses From The List
Configuring the Access Point Controlling Access to the Wireless Network Figure 29. Access control settings Removing MAC Addresses from the List Simply check the box under the Remove column for the MAC address entry you want to remove from the table, and then click Update. The page refreshes and the MAC address that you removed disappears from the list. -
Page 69: Allowing Only Stations Explicitly Listed In The Access Controls Table
Configuring the Access Point Controlling Access to the Wireless Network Allowing Only Stations Explicitly Listed in the Access Controls Table If you select Allow only stations listed in the Access Controls Table, then stations entered into the access-controls table are allowed but all others are disallowed. To add MAC addresses, see “Changing the Access Controls for a WLAN”... -
Page 70: Configuring Vlan Settings
Configuring the Access Point Configuring VLAN Settings Configuring VLAN Settings The VLAN page is used to configure the virtual LAN (VLAN) parameters of the AP. Traffic never uses VLAN tags over wireless links, but traffic originating on or destined for WLAN stations can be differentiated by a VLAN identifier as it travels over other links, such as Ethernet, DSL or Cable Internet, etc., thus given the appropriate priority as it traverses the Internet. - Page 71 Configuring the Access Point Configuring VLAN Settings NOTE: If two rows (two networks) are assigned the same VLAN ID, then they are considered to be the same network. VLAN tagging: Each RJ45 port can be configured to use VLAN tagging. By ■...
-
Page 72: Changing A Vlan Id
Configuring the Access Point Configuring VLAN Settings Update Settings (test): When you click Update Settings (test), if any configura- ■ tion settings changed, a connectivity-test will be run; this lasts approximately 30 seconds. If the browser and the AP/Router can communicate with the new VLAN settings, then they will remain set. -
Page 73: Changing An Rj45 Port's Vlan Tagged State
Configuring the Access Point Configuring VLAN Settings Changing an RJ45 Port’s VLAN Tagged State This task should be performed by an experienced network administrator or are under the guidance of an IT/support professional. 1. Go to Administrator > VLAN. The Administrator :: VLAN page appears. 2. - Page 74 Configuring the Access Point Configuring VLAN Settings...
-
Page 75: Viewing Associated Wireless Clients
......70 Sending a Copy of the Log File to Ruckus Wireless Support ....76 Enabling Logging and Sending Event Logs to a Syslog Server . - Page 76 Managing the Access Point Viewing Associated Wireless Clients Figure 33. The Status > Wireless page...
-
Page 77: Managing The Access Point
The default user name is super and the default password is sp-admin. To prevent unauthorized users from logging in to the Web interface using these default admin- istrator login settings, Ruckus Wireless recommends that you change the default Web interface password immediately after your first login. -
Page 78: Enabling Other Management Access Options
HTTP, Telnet, and SSH. In addition to these management access options, you can also view and set up the connection to the Ruckus Wireless FlexMaster under the TR-069/SNMP Manage- ment Choice options. If your ZoneFlex device is to be managed by FlexMaster, then the FlexMaster information (server URL and contact interval) is preconfigured before you receive your ZoneFlex device. - Page 79 Managing the Access Point Enabling Other Management Access Options Figure 36. The Administration > Management page To enable other management access options 1. Go to Administration > Management. The Management page appears. 2. Review the access options listed in Table 21, and then make changes as needed.
- Page 80 Table Table 22. TR-069 and SNMP Management Options Option Description Auto Enables the ZoneFlex device to connect to either SNMP server, Ruckus Wireless ZoneDirector, or Ruckus Wireless FlexMaster. SNMP only Only allow SNMP management FlexMaster only Only allow FlexMaster management...
- Page 81 Managing the Access Point Enabling Other Management Access Options Table 22. TR-069 and SNMP Management Options Option Description Associated-Clients When enabled, the AP monitors the association Monitoring Mode and disassociation activities of wireless clients and sends this information to FlexMaster. Available options include: •...
-
Page 82: Viewing Flexmaster Management Status
Managing the Access Point Enabling Other Management Access Options Viewing FlexMaster Management Status If you configure the AP to be managed by FlexMaster, you can check the TR-069 Status section on the Administration > Management page. Figure 37. TR-069 status information Table 23 lists the TR-069 status information that the AP provides. -
Page 83: Pointing The Ap To Flexmaster
Managing the Access Point Enabling Logging and Sending Event Logs to a Syslog Server Table 23. TR-069 status information Status Information Description Current time Shows the current date and time as known to the AP. This timestamp is accurate is an NTP server is configured on the AP. -
Page 84: Sending A Copy Of The Log File To Ruckus Wireless Support
Managing the Access Point Sending a Copy of the Log File to Ruckus Wireless Support • Syslog Server Port: By default, the syslog port number is 514. If the syslog server is using a different port, enter that port number in this field. -
Page 85: Saving A Copy Of The Current Log To Your Computer
• Automate a regularly scheduled update • Run a one-time manual update right now. By default, the automatic upgrade option is active, and will check the Ruckus Wireless update server every 12 hours. To get started with upgrading the firmware, go to Maintenance > Upgrade. When the Maintenance >... - Page 86 Managing the Access Point Upgrading the Firmware...
-
Page 87: Upgrading Manually Via The Web
Managing the Access Point Upgrading the Firmware Upgrading Manually via the Web 1. In the Upgrade Method options, click Web. 2. Click the Web Options URL field, and then type the URL of the download Web site. Remember to start the URL with “http://”. 3. -
Page 88: Rebooting The Access Point
Managing the Access Point Rebooting the Access Point • Click Save parameters only. The clock starts right away, and the actual upgrade will occur at the first effective interval. After you click one of these two options, a status bar appears during the upgrade process. -
Page 89: Resetting The Access Point To Factory Default
WARNING: DO NOT reset the Access Point to factory default, unless you are directed to do so by Ruckus Wireless support staff or by a network administrator. Do this only if you are able to immediately reconnect the restored AP to your computer, to reconfigure it for Wi-Fi network use —... - Page 90 Managing the Access Point Running Diagnostics Figure 41. Pinging ruckuswireless.com Figure 42. Running traceroute on ruckuswireless.com...
-
Page 91: Where To Find More Information
Where to Find More Information Where to Find More Information If you have questions that this User Guide does not address, visit the Ruckus Wireless Support Portal at http://support.ruckuswireless.com/. The Support Portal hosts the latest versions of user documentation. You can also find answers to frequently asked... - Page 92 Managing the Access Point Where to Find More Information...
- Page 93 Index Numerics IP address , 42 802.1x , 57 Kensington lock , 12 administrative login , 69 associated clients , 67 L2TP , 44 local services , 69 location , 19 BeamFlex lock hasp , 13 broadcast SSID , 52 logout , 38 country code...
- Page 94 , 52 wireless channel , 46 wireless mode , 46 wireless security 802.11x , 57 , 53 , 55 WLAN settings , 51 workspace , 38 , 55 WPA-Auto , 56 ZoneDirector , 21 ZoneFlex 2925 front panel rear panel...
Need help?
Do you have a question about the ZoneFlex 2925 and is the answer not in the manual?
Questions and answers