Table of Contents
Advertisement
Quick Links
TLP Pro 720C • Setup Guide
Overview
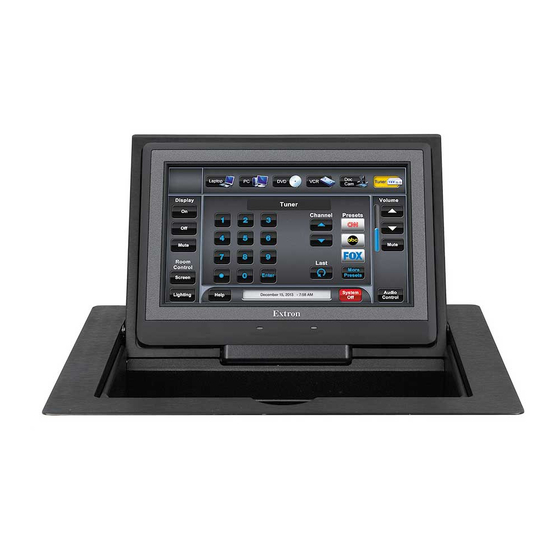
The Extron TLP Pro 720C is a 7 inch Cable Cubby touchpanel with a flip-up, 800x480 LCD touchscreen with 18-bit color depth.
It is ideal for any AV application requiring a full-size, Cable Cubby touchpanel with a customizable interface. This guide provides
instructions for experienced installers to mount and install a TLP Pro 720C touchpanel. For more complete instructions, see the
TLP Pro 720C User Guide, at www.extron.com.
Setup Checklist
Get Ready
…
Download and install the latest version of the following software:
Global Configurator Professional or Global Configurator Plus — for setting up and configuring the control processor and
touchpanel.
GUI Designer — for designing layouts for Extron TouchLink
Both software programs are available from www.extron.com.
…
Obtain the following network information from your network administrator:
DHCP status (on or off). If DHCP is off, you will also require
…
…
IP address
…
User name — by default these are either admin or user.
Passwords — by default these are either extron (for admin) or the field is left blank (for user).
…
Make a note of the touchpanel MAC address.
…
…
Make sure you are familiar with all the included parts and have all the
cubby.
Included Parts
AC Power Module*
Pass-through AAPs
†
Blank AAPs
1-position bracket kit
2-position bracket kit
3-position bracket kit
NOTES:
*
Inside the US, the TLP Pro 720C can be purchased with or without an AC power module. Outside the US, see
www.extron.com
Active or Passive AAPs must be purchased separately (see www.extron.com).
†
…
Subnet mask
1
0
3
3
TLP Pro 720C
6
6
0
1
3
4
1
1
to find an AC power module for your country.
Pro touchpanels and third party touch interfaces.
®
…
Gateway
necessary tools
(see page 2) for installing the cable
Table Clamps
AC Power Module*
Zip Ties
Extron
Removal Tool
Product Category
Pass-thru AAPs
Blank AAPs
1 Pos
2 Pos
3 Pos
AAP Shelf Bracket Kits
(2 brackets/kit)
#4−40 Screws
and Nuts
1
Advertisement
Table of Contents

Related Manuals for Extron electronics TLP Pro 720C


Summary of Contents for Extron electronics TLP Pro 720C
-
Page 1: Included Parts
Overview The Extron TLP Pro 720C is a 7 inch Cable Cubby touchpanel with a flip-up, 800x480 LCD touchscreen with 18-bit color depth. It is ideal for any AV application requiring a full-size, Cable Cubby touchpanel with a customizable interface. This guide provides instructions for experienced installers to mount and install a TLP Pro 720C touchpanel. -
Page 2: Tools Required For Installation
ATTENTION: Do not power on the touchpanels or control processors until you have read the Attention in the Power Supply section of the TLP Pro 720C User Guide or the IPL Pro User Guide. ATTENTION: Ne branchez pas les écrans tactiles ou les contrôleurs avant d’avoir lu la mise en garde dans la section « sources d’alimentation »... - Page 3 If using a CNC wood router, use the exact cut-out dimensions (see Using a CNC wood cutter below). If using a reciprocating saw or jigsaw use the paper cut-out template (available under the Downloads tab on the TLP Pro 720C page at www.extron.com). Step 2 — Cut the Surface CAUTION: Risk of personal injury: Wear safety glasses when operating power equipment.
- Page 4 TLP Pro 720C • Setup Guide (Continued) Step 3 — Run all Cables Run all cables necessary to support the AC connector, the cables stored in the cubby, and all planned AAP connectors. Run the Step 2. Leave enough slack in the cables to connect or route them cables below the table and through the hole that was cut in before the cubby is installed in the table.
- Page 5 Product Category Step 7 — Install the AAP Assembly From under the table, push the first AAP assembly through the bottom of the enclosure. The holes in the rear bracket must align with the bottom row of holes on the rear face of the enclosure. TIP: Ensure there is enough space above the AAP assembly for the lid to close completely without...
- Page 6 • If a 12 VDC and a PoE power supply are both connected to the TLP Pro 720C, the PoE injector takes precedence. If a PoE power loss is detected, the touchpanel switches seamlessly to the 12 VDC supply without needing a system reboot.
- Page 7 (see page 8). Bezel attachment point — The TLP Pro 720C has eight attachment points (two on each side, two on the top edge, and two on the bottom edge). LCD screen — the TLP Pro 720C has a 7 inch screen with a 800x480 resolution Reset LED—...
-
Page 8: Setup Menu
+86.21.3760.1566 FAX +971.4.299.1880 FAX +82.2.3444.1575 FAX +31.33.453.4040 +91.80.3055.3777 +1.714.491.1500 +1.919.850.1000 +31.33.453.4050 FAX +91.80.3055.3737 FAX +1.714.491.1517 FAX +1.919.850.1001 FAX © 2014 Extron Electronics All rights reserved. All trademarks mentioned are the property of their respective owners. www.extron.com 68-2406-50 Rev. A 04 14...
Need help?
Do you have a question about the TLP Pro 720C and is the answer not in the manual?
Questions and answers