
Related Manuals for Automatic Technology GDO-9


Summary of Contents for Automatic Technology GDO-9
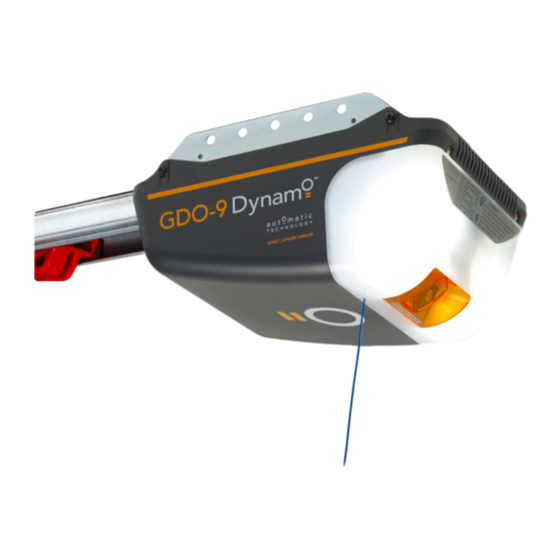
- Page 1 GDO-9 Overhead Garage Door Opener ™ Featuring TrioCode Technology Technical Document Installation Manual 1.01 14 Dec 2011 English Part # 13214 (Manual) INSTALLATION INSTRUCTIONS | OWNERS COPY...
- Page 2 Automatic Technology (Australia) Pty Ltd Garage Door Opener in accordance with these installation instructions.
-
Page 3: Table Of Contents
GDO-9 Overhead Garage Door Opener Important Safety Instructions Features Enduro™ Controls Dynamo™ Controls Kit Contents Installation C-Rail Attachment Accessories Determine Door Type Mounting - Track Type Door Photo Electric Beam Installation Auto-Close Setup Mounting - Spring Loaded Door SmartSolar™ Installation Mounting Door Bracket &... -
Page 4: Important Safety Instructions
Beam. In most countries PE Beams are mandatory on all garage doors fi tted with automatic openers. For a small additional outlay Automatic Technology recommends that Photo Electric Beams be installed with the automatic opener ensuring additional safety and peace of mind. - Page 5 If the power supply cord is damaged, it must be replaced by an Automatic Technology service agent or suitably qualifi ed person. Make sure that the door is fully open before driving in or out of the garage and fully closed before leaving the driveway.
-
Page 6: Features
Features Thank you for purchasing the Automatic Technology GDO-9 Overhead Garage Door Opener. Designed to suit sectional overhead and one piece tilt up doors, the components and materials used ensure this opener will provide years of smart, simple and secure operation. Listed below are some... - Page 7 This allows for manual operation of the door. To re-engage the opener, pull the string handle away from the door. Owner Installation Instructions GDO-9...
-
Page 8: Enduro™ Controls
JP1 SOLAR CONNECTOR onto this the shunt must be fi tted for solar operation. PROG INPUT is used to connect the Automatic Technology Handheld Programmer “PG-3” for editing control and receiver functions, accessing diagnostic tools, and activating special features and operating modes. - Page 9 fi g Owner Installation Instructions GDO-9...
-
Page 10: Dynamo™ Controls
JP1 SOLAR CONNECTOR onto this the shunt must be fi tted for solar operation. PROG INPUT is used to connect the Automatic Technology Handheld Programmer “PG-3” for editing control and receiver functions, accessing diagnostic tools, and activating special features and operating modes. - Page 11 fi g Owner Installation Instructions GDO-9...
-
Page 12: Kit Contents
Kit Contents Drive Unit 1 x GDO-9 drive unit (Fig. 03) 1 x TrioCode™ Transmitter pack (Fig. 03) (Pack includes two keyring transmitters and batteries) 1 x Wall mount transmitter with battery (Fig. 03) 2 x Door attachment arms (Fig. 03) fi... -
Page 13: C-Rail Attachment
Rail’s sprocket (Fig. 05). Fix the two track brackets with four screws supplied in accessory pack (Fig. 06). fi g Locate shaft into sprocket Hex fl ange screw taptite ‘S’ M4 x 10 Track bracket (x2) fi g Owner Installation Instructions GDO-9... -
Page 14: Determine Door Type
fi g Highest point of travel One piece door with track For a one-piece door without tracks (on springs) (Fig. 09) proceed with the installation from Step 7. Door fi g One piece door without track GDO-9 Owner Installation Instructions... -
Page 15: Mounting On A Track Type Door
Connect the drive unit to the ceiling mounted perforated angle with M8x20mm screws and nuts. Strips should not extend more than 18mm below centre of drive unit mounting holes. fi g Go to Step 11 on page 17. Owner Installation Instructions GDO-9... -
Page 16: Mounting - Spring Loaded Door
Step 10.1 - Alternative Mounting Option The opener can be fastened to the roof by driving a bolt Aluminium rail through the C-Rail into a structural timber support. The Shuttle VP2 assembly bolt head’s height must not exceed 6mm (Fig. 17). GDO-9 Owner Installation Instructions... -
Page 17: Mounting Door Bracket & Arms
If installing on a door with a bad wave action, lengthening the arm will assist in reducing this effect. fi g IMPORTANT NOTE: Adjust the length of the cord so that its toggle is no more than 1.8m from the ground. Owner Installation Instructions GDO-9... -
Page 18: Programming The Opener
To reset the limits, press and hold the MINUS (-) button for 6 seconds until the CLOSE LIMIT LED fl ashes quickly. If no action is taken within 30 seconds, the opener will return to normal operating mode and restore the original settings. GDO-9 Owner Installation Instructions... -
Page 19: Setting Travel Limits - Transmitter
Programming The Opener Setting Travel Limits : Via Transmitter The GDO-9 has the alternate ability to set travel limits using the transmitter, allowing free movement around the garage to better assess the desired limit positions. Step 14.1 - Code a Transmitter for Limit Setting Ensure the opener is powered up. -
Page 20: Safety Obstruction Forces
DANGER! If the door fails these tests, put the opener into manual mode, only operate the door by hand and call for service. GDO-9 Owner Installation Instructions... -
Page 21: Adjusting Safety Obstruction Forces
(4) times (depending fi g on the position of the door and the power up condition). A single beep will be heard once the process is complete. Test the force again as per Steps 15.1 and 15.2. Owner Installation Instructions GDO-9... -
Page 22: Coding Transmitters
(2) seconds, pause for two (2) seconds, then press the same button again for two (2) seconds. Release the DOOR CODE button. Press the transmitter button to test. To change the default pet (pedestrian) door opening position, refer Step 24. GDO-9 Owner Installation Instructions... -
Page 23: Courtesy Light
Press one of the four buttons on the transmitter for fi g two (2) seconds, pause for two (2) seconds, then press the same button again for two (2) seconds. Release the LIGHT CODE button. Press the transmitter button to test. Owner Installation Instructions GDO-9... -
Page 24: Remotely Coding Transmitters
These LED’s will turn off and the CODING LED will illuminate. Release the DOOR CODE BUTTON. All stored codes will now be deleted. Confi rm this pressing buttons on any previously coded transmitters - the opener should not respond. GDO-9 Owner Installation Instructions... -
Page 25: Accessories
OPEN LIMIT LED will fl ash to indicate that Auto- Close mode is operational. Break the PE Beam’s path momentarily to initialise Auto-Close. When the door reaches the fully opened position, the door will pause for the set Auto-Close time and then close. Owner Installation Instructions GDO-9... -
Page 26: Smartsolar™ Installation
Refi t the light diffuser and main cover. Step 21.4 - Re-setup and Test the Opener Setup travel limits and code transmitters as per the GDO-9 instruction manual. Press either the OPERATE button or use a transmitter to operate the opener. -
Page 27: Battery Backup Installation
Connect mains power and allow the result of a residual charge in the batteries. batteries to charge. This may take 24 - 48 hours to reach maximum charge capacity. Connect battery harnesses item 5 and 10 together (Fig 45). Reconnect power. Owner Installation Instructions GDO-9... -
Page 28: Final Setup
Press and hold the SET Button (Fig 48). fi g Turn power on while holding the SET button. Continue to hold until all the LED’s are off. This will not erase transmitter codes stored in memory. GDO-9 Owner Installation Instructions... -
Page 29: Default Settings & Specifi Cations
Non-linear encryption Non-linear encryption algorithm algorithm Transmitter battery CR 2032, 3 Volts CR 2032, 3 Volts Courtesy light Festoon style 24 volts 15 24 volts LED Module watts lamp Controller fuse 10A slow blow 10A slow blow Owner Installation Instructions GDO-9... -
Page 30: Door Status Indicators
Deletes all transmitter storage memory are off SET & DOOR CODE (the power on) and hold until all Deletes all control parameters and transmitter LED’s are off storage memory. Re-initialises the Opener to re-calculate force margin GDO-9 Owner Installation Instructions... -
Page 31: Troubleshooting Guide
In such an instance please contact your Automatic Technology dealer for an alternative frequency replacement kit. As this is not a warrantable situation but an environmental issue. Charges may apply for the changeover. -
Page 32: Maintenance
Maintenance Yearly Whilst your opener does not require any periodic Automatic Technology suggests you contact your maintenance, the door that it is fi tted to, does. installer to perform an annual door service. Your garage door is a large, heavy, moving object... -
Page 33: Parts Listing Enduro
Enduro™ Parts Listing fi g Owner Installation Instructions GDO-9... -
Page 34: Parts Listing Dynamo
Dynamo™ Parts Listing fi g GDO-9 Owner Installation Instructions... -
Page 35: Warranty
Pty Ltd (ABN 11 007 125 368) (ATA), 6-8 Fiveways Boulevard, the door manually to the open or closed position; Keysborough 3173, 1300 133 944, sales@ata-aust.com.au (i) the door surface area exceeding 18m2 for GDO-9 Enduro™ and 2. The Competition and Consumer Act 2010 (including the 16.5m2 for GDO-9 Dynamo™,... - Page 36 © December 2011 Automatic Technology (Australia) Pty Ltd. All rights reserved. TrioCode™, Dynamo™ and Enduro™ are trademarks of Automatic Technology (Australia) Pty Ltd. No part of this document may be reproduced without prior permission. In an ongoing commitment to product quality we reserve the right to change specifi cation without notice. E&OE.
Need help?
Do you have a question about the GDO-9 and is the answer not in the manual?
Questions and answers
What does it mean if the unit is flashing and beeping when the roller door opens. Is this normal or does it mean the unit needs a service.
If the Automatic Technology GDO-9 unit is flashing and beeping when the roller door opens, it may indicate that the opener requires servicing. The manual suggests that beeping and flashing could be a sign that a service is needed. For more details, refer to section 10.5 of the manual or contact a dealer for service.
This answer is automatically generated