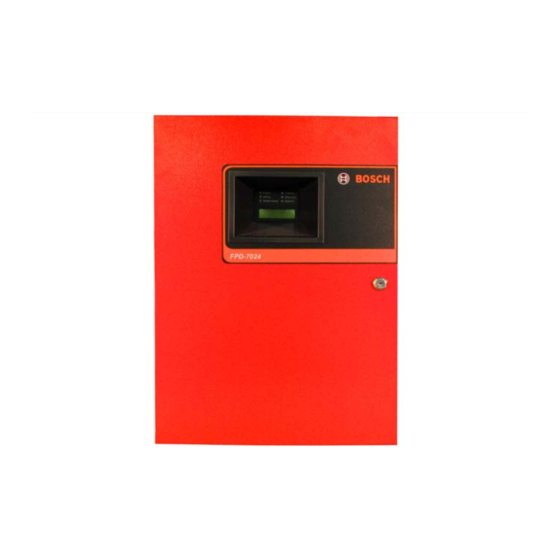
Bosch FPD-7024 Operation And Installation Manual
Fire alarm control panel
Hide thumbs
Also See for FPD-7024:
- Operating instructions (2 pages) ,
- Operating instructions (2 pages) ,
- Operating instructions (2 pages)
Table of Contents
Advertisement
Quick Links
Advertisement
Table of Contents

Related Manuals for Bosch FPD-7024


Summary of Contents for Bosch FPD-7024
- Page 1 FPD-7024 Operation and Installation Guide Fire Alarm Control Panel...
-
Page 2: Fcc Compliance Notice
FPD-7024 | Operation and Installation Guide | FCC Compliance Notice You will be informed of your right to file a complaint FCC Compliance Notice with the FCC. The telephone company might make changes in its facilities, equipment, operations, or This equipment was tested and found to comply... - Page 3 FPD-7024 | Operation and Installation Guide | Trademarks Trademarks ® ® ® Microsoft , Windows , Windows NT are either registered trademarks or trademarks of Microsoft Corporation in the United States and/or other countries. ® CYCOLOY is a registered trademark of General Electric Company.
-
Page 4: Table Of Contents
FPD-7024 | Operation and Installation Guide | Contents 3.3.2 FMR-7033 Keypad ..........26 Contents Testing...............26 3.4.1 Walk Test ............26 Overview............7 3.4.2 Communicator Test.........26 System Overview..........7 3.4.3 Call for Remote Programming .......27 Components ............8 3.4.4 Test Battery/NAC Circuits ......27 1.2.1 On-board Conventional Points ......8 3.4.5... - Page 5 FPD-7024 | Operation and Installation Guide | 1.0 Overview 5.4.3 Point Copy ............52 Appendix D: Programming........93 PROG OUTPUTS..........53 Defaults List ..............93 5.5.1 Programming NACs ........53 Appendix E: Phone Monitor Troubleshooting ..97 5.5.2 Programming Relays ........55 Specifications ...............98 PROG ACCOUNTS ........58 Index ..............99...
- Page 6 FPD-7024 | Operation and Installation Guide | Contents Figures Table 20: Pre-Assigned Zone Quick Reference..56 Table 21: Pre-Assigned Zone Quick Reference..57 Figure 1: FPD-7024 Control Board......7 Table 22: Phone Number Control Characters ..59 Figure 2: Supplemental Reporting......10 Table 23: Phone Number Assistance Keys ...59 Figure 3: Enclosure Installation.......16...
-
Page 7: 1.0 Overview
V1.00 or later software. • UL Listed, CSFM, MEA Approved The FPD-7024 Fire Alarm Control Panel is a fully When the D7039 Multiplex Expansion Module is integrated hard-wire fire alarm system. It can installed, these additional features are available: support four input points (expandable to 255 using •... -
Page 8: Components
FPD-7024 | Operation and Installation Guide | 1.0 Overview 1.2.2 Off-board Addressable Points (with Components D7039 Multiplex Expansion Module) 1.2.1 On-board Conventional Points The D7039 Multiplex Expansion Module adds: All on-board points and points implemented with • Two Class B, Style 4 or one Class A, Style 6... -
Page 9: Communicator
FPD-7024 | Operation and Installation Guide | 1.0 Overview Table 2: LED Assignments for LED Annunciators 4 and 8 D7030X Zones Shown on Shown on COMMENTS Covered 7030X D7032 (if attached) 1 to 16 1 to 8 9 to 16... -
Page 10: Users
FPD-7024 | Operation and Installation Guide | 1.0 Overview Phone Line and Phone Number/IP Selection: To Supplemental Reporting: While two independent ensure the delivery of critical reports, the fire panel phone lines are required for UL864 Central Station has two phone lines and two phone numbers or IP service, the FACP can be configured with one addresses that can be used for reporting. -
Page 11: 1.2.10 Backup Battery Calculation
The 24 VDC existing requirements for the D7030X, FMR-7033 and D7035 are shown at 75% of the 12 VDC level shown on the specification sheets for these models. The FPD-7024 regulates 24 VDC power from the battery to 12 VDC for these accessories. -
Page 12: 1.2.11 Standby Existing Load
FPD-7024 | Operation and Installation Guide | 1.0 Overview The units shown in Table 5 are Amp hours (Ah), and the figures include a 20% derating factor. Table 5: Required Battery Size Calculation Grand Total Standby Existing (in amps) Total Hours of Standby Required (usually 24 or 60):... -
Page 13: Table 7: Alarm Load Battery Size (Ah)
FPD-7024 | Operation and Installation Guide | 1.0 Overview Table 7: Alarm Load Battery Size (Ah) Alarm Load Battery Size Chart Capacity Capacity Capacity Capacity Capacity Required for 5 Required for 10 Required for 15 Required for 30 Required for 45... -
Page 14: Compatible Devices
FMM-7045 Mux Pull UL Listed fire alarm initiating device. Station D7044 Mux Single Input Connects a contact device to the multiplex bus of the FPD-7024 with a supervised local Fire loop. The D7044 draws operating power from the FPD-7024. D7044M Mux Mini... -
Page 15: Table 9: Address Restrictions For The D7042, D7052, And D7053
Overview Table 8: Compatible Devices (continued) D7052 Mux Dual Input Connects to the multiplex bus of the FPD-7024 and provides two supervised input zones Fire for connecting conventional normally-open inputs. The D7052 draws operating power from the FPD-7024. D7053 Mux I&O Module... -
Page 16: Parts List
FPD-7024 | Operation and Installation Guide | 1.0 Overview Parts List Figure 3: Enclosure Installation • One FPD-7024 Control/Communicator in static-resistant bag • One enclosure with transformer • One hardware pack • One enclosure lock, washer, and keys • Six end-of-line (EOL) resistors... -
Page 17: Installing Optional Equipment
FPD-7024 | Operation and Installation Guide | 1.0 Overview 3. Slide the top of the control panel onto the Press the [#/Enter] key to confirm the installation of retainer tabs (the slots under the top of the the device and automatically set it up for frame). -
Page 18: 2.0 Control Panel Terminal Connections
FPD-7024 | Operation and Installation Guide | 2.0 Control Panel Terminal Connections 2.0 Control Panel Terminal Connections Figure 5: FPD-7024 Control Panel Terminal Connections NC 3 unsupervised Relay 3 COM 3 NO 3 Incorrect connections may result in damage to the unit and personal injury. -
Page 19: Power Supply Connections
FPD-7024 | Operation and Installation Guide | 2.0 Control Panel Terminal Connections Power Supply Connections Use wire nuts to connect the primary side of the transformer (black and white wires) to the Place a wire nut over the unused black or unswitched 120 V, 60 Hz or (yellow and white yellow wire. -
Page 20: Table 10: Option Bus Wiring Guidelines
FPD-7024 | Operation and Installation Guide | 2.0 Control Panel Terminal Connections Table 10: Option Bus Wiring Guidelines Device Model Number Wiring Run Maximum Allowed Cable Length Current Draw (for reference) to Last Device (#18 Wire) Number D7030 LED Annunciator... -
Page 21: 3.0 System Operation
FPD-7024 | Operation and Installation Guide | 3.0 System Operation Figure 7: Option Bus Cable Length vs Current Draw 2500 2000 1500 1000 Current Draw (mA) 3.1.2 Supervisory 3.0 System Operation When a Supervisory condition occurs, Supervisory (XXX), XXX indicates the number of supervisory Modes of Operation conditions. -
Page 22: Fire Silence/Reset
FPD-7024 | Operation and Installation Guide | 3.0 System Operation The [Reset] key clears the system alarm status, 3.1.5 Fire Silence/Reset and briefly turns off power to the detectors to reset During a fire alarm, exit from the them. This command is required after any fire premises immediately. -
Page 23: After A Main Menu Item Is Selected
FPD-7024 | Operation and Installation Guide | 3.0 System Operation press the corresponding key. For example, to 3.2.6 Drill select TEST, press the [TEST] button. The drill command activates all NACs and no relays. It creates a history log entry and as an option can The [PROG] and [ENTER] keys are not exclusive, but shared with other characters. -
Page 24: Table 12: History Event Abbreviations
FPD-7024 | Operation and Installation Guide | 3.0 System Operation Table 12: History Event Abbreviations Abbreviation Meaning Abbreviation Meaning ALRM Alarm OFFNORM Off Normal at Test ARST Alarm Restore Phone Line 1 AUTOTST Auto Test Phone Line 2 BATT:LOW Battery Low... -
Page 25: Keypads
FPD-7024 | Operation and Installation Guide | 3.0 System Operation Keypads 3.3.1 Built-in Keypad The keypad built into the control/communicator is an alphanumeric LCD keypad. It has a two-line by 16- character display to provide information on various control panel functions. Usually, the first line shows the off- normal condition, while the second line describes specific details that might be relevant to the existing system status. -
Page 26: Fmr-7033 Keypad
FPD-7024 | Operation and Installation Guide | 3.0 System Operation 3.3.2 FMR-7033 Keypad The FMR-7033 Keypad is an alphanumeric LCD keypad. Up to four of these keypads can be mounted apart from the main control panel to provide additional locations for system status and control. -
Page 27: Call For Remote Programming
FPD-7024 | Operation and Installation Guide | 3.0 System Operation When this test mode is selected, the system asks Terminating the communicator test which bus to test, 1 or 2. Select 1 to test points 9 to function (with the [*/Back] key) resets the 128 and select 2 to test points 129 to 255. -
Page 28: Sensitivity Test
FPD-7024 | Operation and Installation Guide | 3.0 System Operation Input points: Smoke detectors, pull stations, and Missing device - the device cannot be found so on. on the loop. Unless a device was programmed into the system (such as using... -
Page 29: Figure 10: Mapping, Inputs, Zones, And Outputs
FPD-7024 | Operation and Installation Guide | 3.0 System Operation Figure 10: Mapping, Inputs, Zones, and Outputs Input Point 1 is assigned to Zone 1, mapped to NAC Point 1. Input Point 2 is assigned to Zone 2, mapped to NACs 1 and 2. -
Page 30: Personal Identification Numbers
FPD-7024 | Operation and Installation Guide | 3.0 System Operation Personal Identification Numbers The personal identification number (PIN) is the four User Number 00 is designated as a Programmer’s digit code users enter at the keypad to gain access Code. It can be used to silence alarms, reset, to the system. -
Page 31: Communicator Operation
FPD-7024 | Operation and Installation Guide | 4.0 Programming Communicator Operation 4.0 Programming The FPD-7024 contains an integrated communicator that can be optionally enabled to After any programming change, and send reports to a monitoring station. When especially after remote programming... -
Page 32: Programming Features
FPD-7024 | Operation and Installation Guide | 4.0 Programming Programming Features Table 15: Programming Features for UL864 Program Feature or Permitted in UL864 Possible Settings Settings Permitted in Option (Yes/No) UL864 Auto Test Frequency 1) 4 HOURS 1) 4 HOURS... -
Page 33: Point Programming
FPD-7024 | Operation and Installation Guide | 4.0 Programming For example, you might determine that you have Point Programming the following functions: Each of the points in the system can be Refer to Table 16 for the characteristics that programmed with its own characteristics. Point correlate with each function. -
Page 34: Alpha Programming
FPD-7024 | Operation and Installation Guide | 4.0 Programming Alpha Programming When programming the point descriptions, the A different character is entered each time numeric keys are used to enter alphanumeric a numeric key is pressed. For example, information similar to the way telephone keys are pressing [2/▲] repeatedly enters A, B, C,... -
Page 35: Format Programming
FPD-7024 | Operation and Installation Guide | 4.0 Programming Additionally, 18 system events can each be Figure 11: Essential Keys for Alpha programmed with a unique two-digit code. Events Programming that can be programmed this way include, for example: System Silence, Fire Drill, Phone 1 Trouble, and Phone 2 Restoral. -
Page 36: Program Menu Tree
FPD-7024 | Operation and Installation Guide | 4.0 Programming Program Menu Tree Level 1 Level 2 Level 3 Level 4 Level 5 (Main Menu) ENTER/# 1- TEST TIME 1- PROG TIME 1- SYSTEM 2- TEST FREQ 2 - AUTO TEST... - Page 37 FPD-7024 | Operation and Installation Guide | 4.0 Programming Level 1 Level 2 Level 3 Level 4 Level 5 (Main Menu) 1- NAC # 1 1- (RESERVED) SAME OPTIONS 2 - CONFIGURATION 2- NAC # 2 AS NAC # 1...
-
Page 38: Shortcuts
FPD-7024 | Operation and Installation Guide | 4.0 Programming Shortcuts You can use shortcuts to reduce repetition and Level 3 provides the third set of options that branch provide speedy instructions for programming the from Level 2 (Figure 12). The third number in the control panel. -
Page 39: Remote Programming
FPD-7024 | Operation and Installation Guide | 4.0 Programming When remote programming is disabled, you can Remote Programming still connect to the control panel for diagnostics and The system operates during remote programming view the existing programming (except PIN so that new alarms end the remote programming numbers). -
Page 40: 5.0 Control Panel Programming
FPD-7024 | Operation and Installation Guide | 5.0 Control Panel Programming 5.0 Control Panel Programming Main Menu: SYSTEM NORMAL SELECT: PROG/0 SELECT: ENTER/# SELECT: TEST SELECT: HISTORY SELECT: DISABLE SELECT: DRILL Programming Menu: PROG/0 1- PROG TIME 2- SECURITY 3- PROG SYSTEM... -
Page 41: Daylight Saving Time
FPD-7024 | Operation and Installation Guide | 5.0 Control Panel Programming Press [1] to select Test Time. The following window appears: AUTO TEST TIME HHMM:________ Enter the time followed by the [#/Enter] key. Test Frequency Shortcut: 0- , 1- , 2-... -
Page 42: Authority
FPD-7024 | Operation and Installation Guide | 5.0 Control Panel Programming The following window appears: PROGRAM PINS 1- PROGRAMR PIN 2- USER PINS Press [1] for programmer PIN. The following window appears: USER 0 ENTER PIN:____ Enter the PIN and press [#/Enter]. After you have programmed the programmer PIN, the previous window appears. -
Page 43: Prog System
FPD-7024 | Operation and Installation Guide | 5.0 Control Panel Programming Enter the user for whom you want to program the authority level and press [#/Enter]. The following window appears and scrolls through the following choices: USER 1 ATHRY ( ) - Page 44 FPD-7024 | Operation and Installation Guide | 5.0 Control Panel Programming The display scrolls through the TIMERS options. Press [2] for AC FAIL DELAY. The following window appears: AC FAIL DELAY WAIT FOR DC ENTER TIME The wait for DC function causes the AC fail report to be sent when the battery is 25% depleted, based on the measured voltage of the battery.
-
Page 45: Ac Line Synch
FPD-7024 | Operation and Installation Guide | 5.0 Control Panel Programming The display scrolls through the TIMERS options. Press [5] for DISPLAY RATE. The following window appears: DSPLY RATE (__) .25 X (1-16): ___ Enter desired value and press [#/Enter]. The existing setting is shown in parentheses on the first line. After you program the display rate, the previous window appears. -
Page 46: Pin Required
FPD-7024 | Operation and Installation Guide | 5.0 Control Panel Programming This feature tells the system how many keypads to supervise. It automatically performs an update bus operation as it completes. OPTION BUS UPDATE BUS SETUP KEYPDS Press [2] to set up keypads. The following window appears:... -
Page 47: Remote Programming
FPD-7024 | Operation and Installation Guide | 5.0 Control Panel Programming 5.3.5 Remote Programming Shortcut: 0- , 3- , 7- PROG PROG SYSTEM REMOTE PGM Remote programming allows the panel to be called from a remote site by phone to reconfigure any of the programmable options. - Page 48 FPD-7024 | Operation and Installation Guide | 5.0 Control Panel Programming Assigning Point Functions Shortcut: 0- , 4- , 1- PROG PROG INPUTS POINT NUMBER This feature assigns each point to one point function. A point function is a set of characteristics that you can assign to selected points.
- Page 49 FPD-7024 | Operation and Installation Guide | 5.0 Control Panel Programming Verification Shortcut: 0- , 4- , 1- PROG PROG INPUTS POINT NUMBER This feature resets the detector once to determine if the alarm recurs before annunciating or sending a signal.
-
Page 50: Point Function
FPD-7024 | Operation and Installation Guide | 5.0 Control Panel Programming 5.4.2 Point Function Shortcut: 0- , 4- , 2- PROG PROG INPUTS POINT FUNCTION There are 16 point functions, each of which has programmable features for: configuration (fire, waterflow, and so on), local only operation, silencing, and loop response. - Page 51 FPD-7024 | Operation and Installation Guide | 5.0 Control Panel Programming ACTVTN TYPE (__) FIRE WATERFLOW SUPERVISORY (reserved) RESET SILENCE AC FAULT Press the number key that corresponds to your selection. (The existing setting is shown in parentheses on the first line.) The previous window appears.
-
Page 52: Point Copy
FPD-7024 | Operation and Installation Guide | 5.0 Control Panel Programming RESPNS TIME (___) FAST (.5 sec) PRGRMMD* * Refer to Table 15 on page 32. Press the number key that corresponds to your selection (the existing setting is displayed in parentheses on the first line). -
Page 53: Prog Outputs
PROG OUTPUTS NACs The main control panel includes two local NACs (NAC 1 and NAC 2). The FPD-7024 can also support up to four FPP-RNAC-8A-4C Remote NAC Power Supplies, which offers a total of 16 remote NACs (four NACs per RNAC). -
Page 54: Table 19: Pre-Assigned Zone Quick Reference
FPD-7024 | Operation and Installation Guide | 5.0 Control Panel Programming • Temporal: Output turns on and off to implement the ANSI standard evacuation pattern (Temporal code 3). • Wheelock: Output is configured to support Wheelock devices with synchronization capability, including the ability to silence the horn of a combination horn strobe. -
Page 55: Programming Relays
PROG OUTPUTS RELAYS The main control panel includes three on-board relays (Relay 1, Relay 2, and Relay 3). The FPD-7024 can also support up to two D7035 Octal Relay Modules (Remote Relay 1 and Remote Relay 2), that offer a total of 16 remote relays (eight relays per module). -
Page 56: Table 20: Pre-Assigned Zone Quick Reference
FPD-7024 | Operation and Installation Guide | 5.0 Control Panel Programming ONBOARD RELAY (1-3): Enter the number corresponding to the relay to be programmed and press [#/Enter]. The display asks you to enter four zones to activate this output: OUTPUT ZONE A:___ (00 - 63):___ Enter the first zone (00 to 63) you want to assign to this output and press [#/Enter]. -
Page 57: Table 21: Pre-Assigned Zone Quick Reference
FPD-7024 | Operation and Installation Guide | 5.0 Control Panel Programming Table 21: Pre-Assigned Zone Quick Reference Zone Pre-Assigned Condition General Fire Alarm (non-silencing) General Fire Alarm, (silencing) Ground Start General Supervisory, (silencing) General Waterflow, (silencing) Communication Trouble General Supervisory Alarm (non-silencing) -
Page 58: Prog Accounts
FPD-7024 | Operation and Installation Guide | 5.0 Control Panel Programming PROG ACCOUNTS PROG ACC’NTS PHONE / IP NUMS PHON CONTROL RPT STEERING RING COUNT COMM. TRIES MACH. BYPASS ALT.COMM SERIAL/NETWORK 5.6.1 Phone Numbers/IP Addresses Shortcut: 0- , 6- , 1- PROG PROG ACC’NTS... -
Page 59: Table 22: Phone Number Control Characters
FPD-7024 | Operation and Installation Guide | 5.0 Control Panel Programming Table 22: Phone Number Control Characters Press Action [TEST] 1 Touch Tone “*” [TEST] 2 Touch Tone “#” [TEST] 3 Three-second delay [TEST] 4 > Wait for dial tone Several keys assist when you enter phone or IP numbers (refer to Table 23 on page 59). -
Page 60: Table 24: Ip Address Digit Or Bit Location
FPD-7024 | Operation and Installation Guide | 5.0 Control Panel Programming Table 24: IP Address Digit or Bit Location Digit 1 Digit 2 Digit 3 Digit 4 Digit 5 Digit 6 Digit 7 Digit 8 0 = Alt. Comm. Digit 9... -
Page 61: Table 25: Phone Reporting
FPD-7024 | Operation and Installation Guide | 5.0 Control Panel Programming Table 25: Phone Reporting Attempt Primary Phone Line (Phone 1) Secondary Phone Line (Phone 2) phone number phone number phone number phone number phone number phone number phone number... - Page 62 FPD-7024 | Operation and Installation Guide | 5.0 Control Panel Programming Refer to the DX4020 Installation Guide (P/N: F01U045288) for more information about using Netcom communications. Format Shortcut: 0- , 6- , 1- PROG PROG ACC’NTS PHONE/IP NUMS Use this feature to select which communication format to use or to disable communication for the phone or IP number.
- Page 63 FPD-7024 | Operation and Installation Guide | 5.0 Control Panel Programming Tone Shortcut: 0- , 6- , 1- PROG PROG ACC’NTS PHONE/IP NUMS The FREQ (_) programming items (refer to window below) modify the reporting format when 3/1 or 4/2 tone burst reporting is selected for the format.
-
Page 64: Phone Control
FPD-7024 | Operation and Installation Guide | 5.0 Control Panel Programming 5.6.2 Phone Control Shortcut: 0- , 6- , 2- PROG PROG ACC’NTS PHONE/IP CONTROL In addition to features associated with each phone and IP number, each phone line has associated features. -
Page 65: Report Steering
FPD-7024 | Operation and Installation Guide | 5.0 Control Panel Programming 5.6.3 Report Steering Shortcut: 0- , 6- , 3- PROG PROG ACC’NTS RPT STEERING Different classes of reports can be directed to different phone numbers. Non-supervisory alarms include fire alarms and waterflow alarms. -
Page 66: Ring Count
FPD-7024 | Operation and Installation Guide | 5.0 Control Panel Programming 5.6.4 Ring Count Shortcut: 0- , 6- , 4- PROG PROG ACC’NTS RING COUNT Set to 0 the number of phone rings before the control panel seizes the line to attempt remote programming. -
Page 67: Alt. Comm
FPD-7024 | Operation and Installation Guide | 5.0 Control Panel Programming 5.6.7 ALT. Comm Shortcut: 0- , 6- , 7- PROG PROG ACC’NTS ALTER COMM This prompt is used with the DX4020 or DX4010. If using the DX4020 select 0 network and if using the DX4010 select 1-serial. -
Page 68: 4/2 Report Codes
FPD-7024 | Operation and Installation Guide | 5.0 Control Panel Programming Pressing [9] retrieves the second digit options (point numbers). The following window appears: 4/2 ZONE RPT POINT 1 D2 POINT 2 D2 POINT 3 D2 POINT 4 D2 POINT 5 D2... -
Page 69: Bfsk Report Codes
FPD-7024 | Operation and Installation Guide | 5.0 Control Panel Programming 4/2 RPT CODS SYSTM IN TST SYS TEST RST SILENCE FIRE DRILL FIRE DRL RST OPEN RST RPT LOW BATTERY LOW BATT RST AC FAILURE MORE Pressing [9] allows programming additional reports:... -
Page 70: History Defaults
FPD-7024 | Operation and Installation Guide | 5.0 Control Panel Programming BFSK RPT CDS OFF NORM TEST OPEN/RESET SILENCE FIRE DRILL FR DRIL RSTR Press the number key that corresponds to your report code selection. A window allowing entry of two hex digits appears. -
Page 71: Alternate 4/2 Codes
FPD-7024 | Operation and Installation Guide | 5.0 Control Panel Programming 5.8.3 Alternate 4/2 Codes Shortcut: 0- , 8- PROG HSTRY DEFLTS, 3- ALT 4/2 DEVICES You can set all of the programming for 4/2 codes to an alternative set of default reports, as described in Appendix D on page 93. -
Page 72: Mux Program
FPD-7024 | Operation and Installation Guide | 5.0 Control Panel Programming Press the number that corresponds with the device you are adding or press [0/Prog] if you are removing a device. When the device type is selected, the following window appears:... -
Page 73: Mux Bus Type
Refer to the D7039 Multiplex Expansion Module’s Installation Guide (P/N: 38685) for more information regarding Class A and Class B wiring instructions. Refer to Figure 13 on page 74 for mounting locations inside the FPD-7024’s enclosure for the D7039 and its I/O module. -
Page 74: Auto Program
PROG PROGRAM MUX 4- AUTO PROGRAM This option provides a convenient way for the installer to configure the FPD-7024 to operate with the existing devices on the multiplex buses by scanning the buses for missing or new multiplex devices. The following display appears:... - Page 75 FPD-7024’s site-specific memory area. If missing devices are detected, the FPD-7024 shows the following menu (where xxx is the address of the first point of the missing device):...
-
Page 76: Table 26: Auto Programming Error Messages
(Zone 63). This can be changed when auto programming completes by using the output-programming menu. The FPD-7024 performs some basic error checks when new devices are added. The following errors can be shown during the process of adding a device:... -
Page 77: Removing Mux Devices
FPD-7024 | Operation and Installation Guide | 5.0 Control Panel Programming When the point adding operation completes, the FPD-7024 shows for five seconds the total number of points that were added to the control panel. Confirm that the number of devices added matches the expected number. - Page 78 FPD-7024 | Operation and Installation Guide | 5.0 Control Panel Programming After the device is successfully deleted, you return to the Device Type (MUX Edit) sub-menu. An unsuccessful deletion results in an error message (see below) followed by the Device Type (MUX Edit) sub- menu.
-
Page 79: Installation Guide For Ul Listed Systems
FPD-7024 | Operation and Installation Guide | 6.0 Installation Guide for UL Listed Systems 6.3.1 Commercial Fire Alarm (Central Station 6.0 Installation Guide for UL [DACT] and Local) Required Accessories Listed Systems At least one Bosch Security Systems, Inc. Model... -
Page 80: Figure 14: Wiring The D132B-Smoke Power Reversing Module
FPD-7024 | Operation and Installation Guide | 6.0 Installation Guide for UL Listed Systems also works with Class A or Class B initiating Notification Appliance Circuits (NACs). Refer to the circuits. An alarm latch connection is provided to D132B Installation Guide (P/N: 40895) for detailed allow an initiating loop to be held in alarm after the installation instructions for the D132B module. -
Page 81: D185 Reverse Polarity Module
FPD-7024 | Operation and Installation Guide | 6.0 Installation Guide for UL Listed Systems The module can signal alarm, trouble, and D185 Reverse Polarity Module supervisory conditions. Refer to the D185 The D185 Reverse Polarity Module is a UL Listed Installation Manual (P/N: 32906] for details. -
Page 82: 7.0 Fire Safety
FPD-7024 | Operation and Installation Guide | 7.0 Fire Safety 7.1.2 Installing Family Residences 7.0 Fire Safety Providing a Fire Warning System: Most fire deaths occur in the home, especially during sleeping hours. The minimum level of protection requires smoke detectors to be installed outside of... -
Page 83: Having And Practicing An Escape Plan
FPD-7024 | Operation and Installation Guide | 7.0 Fire Safety Having and Practicing an Escape Plan A fire warning can be wasted unless the personnel planned in advance for a rapid and safe exit from the building. Draw a floor plan of the entire building showing two exits from each sleeping area and two from the building. -
Page 84: Appendix A: Abbreviations On Control Panel Display
FPD-7024 | Operation and Installation Guide | Appendix A: Abbreviations on Control Panel Display Appendix A: Abbreviations on Control Panel Display Table 27: Abbreviations on Control Panel Display Abbreviation Definition Abbreviation Definition 3/1 Tone Burst (reporting format) KPAD, KYPAD, KYPD... -
Page 85: Appendix B: Control Panel Display Descriptions
FPD-7024 | Operation and Installation Guide | Appendix B: Control Panel Display Descriptions Appendix B: Control Panel Display Descriptions Table 28: Control Panel Display Descriptions FPD-7024 Panel Display Panel Display Message Definition Message ® FIRE DIRTY PT XX A smoke detector with the Chamber Check feature indicates a dirty chamber. -
Page 86: Appendix C: Reporting Summary For Fire Communicator
FPD-7024 | Operation and Installation Guide | Appendix C: Reporting Summary for Fire Communicator Appendix C: Reporting Summary for Fire Communicator Table 29: Reporting Summary for Fire Communicator Default Values Alternate Default Report 4/2 digit 4/2 digit 4/2 digit 4/2 digit... - Page 87 FPD-7024 | Operation and Installation Guide | Appendix C: Reporting Summary for Fire Communicator FIRE DRILL 1 607 00 000 refer to Table 28 FIRE DRILL RESTORE 3 607 00 000 refer to Table 28 SYSTEM RESET ORuu 1 305 00 uuu...
-
Page 88: Table 30: Modem Iiia Reporting
FPD-7024 | Operation and Installation Guide | Appendix C: Reporting Summary for Fire Communicator When the Modem IIIa reporting format is used with a Bosch Security Systems, Inc. receiver, refer to Table 30 for information about the receiver output. Table 30: Modem IIIa... - Page 89 FPD-7024 | Operation and Installation Guide | Appendix C: Reporting Summary for Fire Communicator Table 30: Modem IIIa Reporting (continued) Report Index Receiver Output POINT SUPERVISORY RESTORE dd/dd tt:tt ql ACCT aaaa FIRE ALM RESTOR +++ ACCT aaaa AREA=1 POINT=zzz...
- Page 90 FPD-7024 | Operation and Installation Guide | Appendix C: Reporting Summary for Fire Communicator Table 30: Modem IIIa Reporting (continued) Report Index Receiver Output FIRE DRILL RESTORE dd/dd tt:tt ql ACCT aaaa FIRE WALK END +++ ACCT aaaa AREA=1 ID=uuu...
- Page 91 FPD-7024 | Operation and Installation Guide | Appendix C: Reporting Summary for Fire Communicator Table 30: Modem IIIa Reporting (continued) Report Index Receiver Output SMOKE POWER RESTORE dd/dd tt:tt ql ACCT aaaa EQUIP RESTORAL +++ ACCT aaaa SDI=001 COND=3 REMOTE PROGRAMMING FAIL...
-
Page 92: Table 31: History Log
FPD-7024 | Operation and Installation Guide | Appendix C: Reporting Summary for Fire Communicator When the Modem IIIa , SIA or Contact ID reporting formats are used, an additional numeric identifier is sent with system trouble messages that provide a specific indication of the particular fault. This identifier is also recorded in the history log. -
Page 93: Appendix D: Programming
FPD-7024 | Operation and Installation Guide | Appendix D: Programming Defaults List Appendix D: Programming Defaults List PROG TIME Point Function 7 = 7 SYSTEM: Last date in EE 0000 Point Function 8 = 8 AUTO TEST Point Function 9 - 255 = 10... - Page 94 FPD-7024 | Operation and Installation Guide | RNAC 1 LOCAL RELAY #3 Outputs 1, 2, 3, 4 Zone A: Configuration: Steady Zone B: Zone Assignment: Zone C: Zone A: Zone D: Zone B: Zone C: REMOTE 1 (D7035) Zone D:...
- Page 95 FPD-7024 | Operation and Installation Guide | REPORT STEERING OFF NORM TST: ALL SUB-MENU Phone 2 Back-up PHONE 1 TRBL: ITEMS: PN 1 TRB RST: RING COUNT: PHONE 2 TRBL: COMM TRIES: PN 2 TRB RST: MACH BYPASS: SYSTEM TROUB:...
- Page 96 FPD-7024 | Operation and Installation Guide | FIRE DRILL: FIRE DRL RST: OPEN RST RPT: LOW BATTERY: LOW BATT RST: AC FAILURE: AC FAIL RST: TEST REPORT: OFF NORM TST: PHONE 1 TRBL: PN 1 TRB RST: PHONE 2 TRBL...
-
Page 97: Appendix E: Phone Monitor Troubleshooting
FPD-7024 | Operation and Installation Guide | Appendix E: Phone Monitor Troubleshooting Appendix E: Phone Monitor NFPA 72 requirements mandate a dedicated phone line for fire reporting. Troubleshooting COMM FLT/DATA LOST If the devices cannot be removed, ensure they are wired so that the control panel’s... -
Page 98: Specifications
Input Power: 220 V 50 Hz or 120 V, 60 Hz, 2.2 A Notification Appliance Circuit (NAC) Power: Each NAC has 24 VDC nominal, unfiltered power with up to 2.5 A capacity (but limited by overall 4.0 A capacity). Refer to FPD-7024 NAC Compatibility List (P/N: F01U010791) for compatible NAC devices. -
Page 99: Index
FPD-7024 | Operation and Installation Guide | Index Index MUX Bus Type..............73 MUX Edit................71 MUX Program ..............72 AC Fail Delay.................43 Normal Programming............72 AC Line Synch...............45 Program MUX ..............71 Alarm/Trouble Status............48 Removing MUX Devices ..........77 Alternate 4/2 Codes..............71 Appendix B Panel Display Descriptions..........85... - Page 100 FPD-7024 | Operation and Installation Guide | Index Program Timers..............43 Smoke Reset .................43 Relays Test Local Relays ..............55 Automatic Test ..............40 Multiplex Relays..............57 Test Frequency..............41 Programming Relays ............55 Test Time ................40 Remote Relays ..............56 Remote Programming Computer Phone...............58 Enable/Disable..............47 Verification................49 Security ...................41...
- Page 101 FPD-7024 | Operation and Installation Guide | Index Notes Bosch Security Systems, Inc. | 1/10 | F01U008458-03...
- Page 102 Bosch Security Systems, Inc. 130 Perinton Parkway Fairport, NY 14450-9199 (800) 289-0096 © 2010 Bosch Security Systems, Inc. F01U008458-03...
Need help?
Do you have a question about the FPD-7024 and is the answer not in the manual?
Questions and answers
How I can program a new device?