Sam4s ER-180 Operation And Programming Manual
Electronic cash register
Hide thumbs
Also See for ER-180:
- Operation manual (35 pages) ,
- Service manual (67 pages) ,
- Quick setup manual (2 pages)

Related Manuals for Sam4s ER-180


Summary of Contents for Sam4s ER-180
-
Page 1: Programming Manual
ER-180 Electronic Cash Register AU Operation and Programming Manual All specifications are subject to change without notice JK68-60181A Rev. 1.12 (Oct 11) From ER-180 v1.000 to v1.001... - Page 2 ATTENTION The product that you have purchased contains a rechargeable Ni-MH battery. This battery is recyclable. At the end of its useful life, under various state and local laws, it may be illegal to dispose of the battery into the municipal waste system. Check with your local solid waste officials for details concerning recycling options or proper disposal WARNING This is a Class A product.
-
Page 3: Safety Precautions
Precaution Statements Follow these safety, servicing and ESD precautions to prevent damage and to protect against potential hazards such as electrical shock. Safety Precautions 1. Be sure that all built-in protective devices are 6. Observe the original lead dress, especially near the replaced. - Page 4 Servicing Precautions WARNING: First read the-Safety Precautions-section of this manual. If some unforeseen circumstance creates a conflict between the servicing and safety precautions, always follow the safety precautions. WARNING: An electrolytic capacitor installed with the wrong polarity might explode. 5. Check the insulation between the blades of the AC 1.
-
Page 5: Table Of Contents
Contents Getting Started About the ER-180 ........................1 Unpacking..........................1 Installing Batteries ........................2 Installing the Paper ........................3 How to Replace the Ink Roller ....................5 Basic Feature ..........................6 Control Lock ....................... 6 Control Keys ....................... 6 Display ........................7 Keyboard ........................ - Page 6 Setting the Percent (%) Key.....................36 Setting the Machine Number ....................36 Receipt Print / Journal Print.....................37 Rounding Option ........................37 Training Mode .........................38 System Options ........................39 Setting the Date........................40 Currency Conversion Rate.......................40 System Balancing ........................41 Maintenance..........................41 ii • Contents ER-180 Electronic Cash Register AU...
-
Page 7: Getting Started
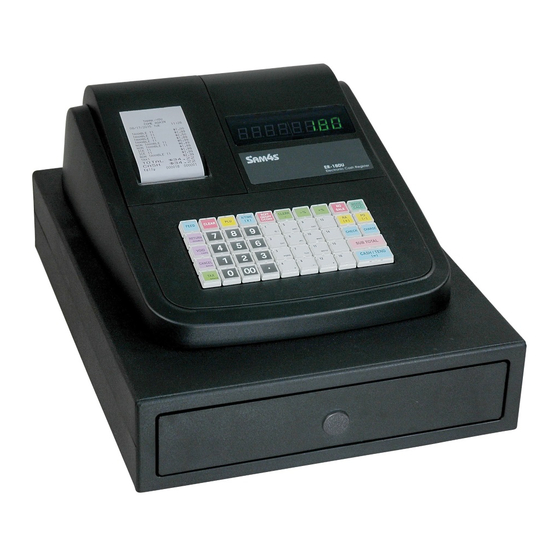
Getting Started About the ER-180 The Sam4S ER-180 features a 48-position keyboard with traditional raised keys. This keyboard accommodates 16 Departments and works best in retail stores, or shop where it is not necessary to place a large number of preset price items on the keyboard. -
Page 8: Installing Batteries
6. Repeat step 3 to 5 for the second and the third battery, then replace the battery cover. 7. If batteries are not installed correctly, an “E Lo 0.00” will appear on the display after power adaptor is plugged in. 2 • Getting Started ER-180 Electronic Cash Register AU... -
Page 9: Installing The Paper
NOTE: If the paper does not feed through the printer, make sure the paper was entered properly, insert end of paper tape. FOR RECEIPT ONLY... 6. Pass the paper through the receipt window of the printer cover. Replace over printer compartment (K) and (L). Getting Started • 3 ER-180 Electronic Cash Register AU... - Page 10 7. Press FEED key to adventace paper. 8. Route paper over top of paper guide insert in the slot of the take-up spool (G) ~ (J). 9. Replace printer cover (K) (L). 4 • Getting Started ER-180 Electronic Cash Register AU...
-
Page 11: How To Replace The Ink Roller
Do not re- ink. When the print becomes faint, replace the ink roller as Lever follows. 1. Remove the old roller by lifting of it. 2. Fit the new ink roller completely. Getting Started • 5 ER-180 Electronic Cash Register AU... -
Page 12: Basic Feature
Before performing any operations in Register Mode a clerk must be signed on. See “Clerk Sign- On/Sign-Off” for a description of clerk operations. Control Keys The ER-180 includes two sets of keys that may be used to access the following control lock positions. Positions Accessible VOID √... -
Page 13: Display
Display The ER-180 comes with 8 digit florescent display on both front and rear. Both displays offer supplemental descriptors, which appear in the first two display positions (as shown). These descriptors help the operator and customer by supplying additional information while operating the register, and may be accompanied by an error tone. -
Page 14: Keyboard
Error Conditions System Error – Please see your dealer Keyboard RCPT X/TIME FEED CLEAR CALC ON/OFF SALE C/CONV RETURN VOID CHECK CHARGE CLERK SUB TOTAL • CASH / TEND 8 • Getting Started ER-180 Electronic Cash Register AU... -
Page 15: Key Functions
To start calculation mode in REG MODE. To add (In the calculation mode). X/TIME To multiply (In the calculation mode). To subtract (In the calculation mode). CASH To Calculate and display result (In the calculation mode). Getting Started • 9 ER-180 Electronic Cash Register AU... -
Page 16: Memory Clear - Ram All Clear
NOTE: This is a one time only procedure to be performed after the battery is installed. DO NOT CLEAR RAM AFTER THE CASH REGISTER IS PROGRAMMED. TO DO SO WOULD CAUSE ALL PROGRAMS AND TOTALS TO BE LOST. 10 • Getting Started ER-180 Electronic Cash Register AU... -
Page 17: Operating Instruction
02-01-10___14-30 1•00 1•00 2•00 2•00 3•00 3•00 6•00 1•00 1•00 0•04 0•04 2•00 2•00 0•12 0•11 3•00 3•00 0•24 0•22 6•40 001-00 001-00 • Following example are based on VAT version. Operating Instruction • 11 ER-180 Electronic Cash Register AU... -
Page 18: Clerk Sign On/Sign Off
To sign the clerk off, Enter 0 (Zero) and press the CLERK key. CLERK Receipt On and Off On ER-180, the receipt printer can be switched ON/OFF in REG Mode. All reports in X/Z Mode will still print even the receipt printer has been turned off. To switch receipt printer ON/OFF, RCPT ON/O FF 1. -
Page 19: Calculator Function
Calculator Function You can use the ER-180 to perform simple addition, subtraction and multiplication calculator functions outside of a sale. Turn the mode key to REG Mode and press CALC key. To exit from Calculator mode, press CLEAR key or turn the mode key to other modes. -
Page 20: No Sale Key Operation
SAMPLE RECEIPT 1. Enter the number you wish to record, 02-01-10___14-30 for example enter: 12•34 # …continuous with item(s) registeration 2. Press #/NS: SALE 3. Register the items you wish to sell. 14 • Operating Instruction ER-180 Electronic Cash Register AU... -
Page 21: Item Registrations
Item Registrations Item registrations on ER-180 are made into Open or Preset Price with Departments and PLUs. • All Departments are located on the keyboard for directly access. • All PLUs are only accessed by entering the PLU code number, then pressing PLU function key on the keyboard. -
Page 22: Department Entry - Open Price Multiplication
For example, enter 4 on the numeric key 2•99 pad and press the X/TIME key: 11•96 X/TIME 11•95 11•96 2. Press a Department key. 1•09 007-00 For example, press DEPT1: DE PT5 16 • Operating Instruction ER-180 Electronic Cash Register AU... -
Page 23: Plu Entry - Open Price
3. Press the PLU key again. PLU Entry - Preset Price SAMPLE RECEIPT 1. Enter the PLU number; press the PLU 02-01-10___14-30 key. For example, enter: 2•99 3•00 2•99 0•27 009-00 Operating Instruction • 17 ER-180 Electronic Cash Register AU... -
Page 24: Plu Entry - Open Price Multiplication
2. Enter an amount on the ten key pad. Do 1•09 not use the decimal key. 011-00 For example, for $1.99, enter: 3. Enter the PLU number; press the PLU key. For example, enter: 18 • Operating Instruction ER-180 Electronic Cash Register AU... -
Page 25: Minus (−) Key Operation
For example, enter 4 on the numeric key 0•45 pad and press the X/TIME key: 013-00 X/TIME 3. Enter an amount on the ten key pad. Do not use the decimal key. For example, for $0.50 discount, enter: Operating Instruction • 19 ER-180 Electronic Cash Register AU... -
Page 26: Percent Operation (-% And +%)
Percent Operation (-% and +%) ER-180 equiped with both -% and +% function keys. The -% can be used as discount and +% is for surcharge. This section is using -% (discount) as example, +% is operating in same way, but is adding amount as surcharge. -
Page 27: Merchandise Return Operation
2. Enter the price of the item you wish to -2•00 return, and then press the Department -2•00 key where it was registered originally. -0•18 DEP T2 016-00 3. Total the sale with CASH, CHECK, or a CHARGE function. Operating Instruction • 21 ER-180 Electronic Cash Register AU... -
Page 28: Voiding Entries (Void)
1. Register the item(s) for the transaction. 02-01-10___14-30 2. To void previous item, enter the price of the item going to be voided. 1•00 2•00 ••••••••_ 3. Then press VOID key. -1•00 VOID 2•00 2•00 0•18 018-00 22 • Operating Instruction ER-180 Electronic Cash Register AU... -
Page 29: Tendering Operation
For example, for $5.00 enter: 5•00 2•00 2•99 0•27 3. Press CASH: 020-00 CASH 4. The display will indicate the total amount of the cash tendered and the change due, if any. Operating Instruction • 23 ER-180 Electronic Cash Register AU... -
Page 30: Amount Tendered On Check
1. Register the item(s) for the transaction. 02-01-10___14-30 2. To total a cash sale, press CHARGE: 2•99 CHARGE 3•00 2•99 3. The display will indicate the total amount 0•27 of the cash sale. 023-00 24 • Operating Instruction ER-180 Electronic Cash Register AU... -
Page 31: Amount Tendered On Charge
4. Enter the amount of check tendered by the customer. For example, enter $2.00 and press CHECK: CHECK 5. When the total tendered equals or exceeds the total due, the receipt will print and the transaction is complete. Operating Instruction • 25 ER-180 Electronic Cash Register AU... -
Page 32: Received On Account (Ra) Operation
3. Enter amount of foreign currency, then 0•45 press CASH, 1•00 0•09 CAS H 028-00 4. The transaction will be finalised, drawer open and home currency change amount shown on the display. 26 • Operating Instruction ER-180 Electronic Cash Register AU... -
Page 33: Receipt On And Off
Receipt On and Off On ER-180, the receipt printer can be switched ON/OFF in REG Mode. All reports in X/Z Mode will still print even the receipt printer has been turned off. To switch receipt printer ON/OFF, RCPT ON/OFF 1. Press the RECEIPT ON/OFF key once to turn the receipt off. -
Page 35: X/Z Mode Reporting
Period-to-Date Financial X or Z CHECK CHARGE Department X or Z Clerk X or Z CLERK S UB ••••• TOTAL Cash in Drawer U p to 8 digits number for amount X/Z Mode Reporting • 29 ER-180 Electronic Cash Register AU... -
Page 36: Financial Daily Report
Financial Z2 Report SAMPLE RECEIPT DATE -> 02-01-10___14-30 REPORT COUNTER, X or Z MODE -> NET SALES TOTAL -> 188•26 CUSTOMER COUNTER -> 198•00 RECEIPT NUMBER, MACHINE NO. CLERK -> 028-00 NUMBER___ 30 • X/Z Mode Reporting ER-180 Electronic Cash Register AU... -
Page 37: P-T-D Grand Total Report
NET SALES OF CLERK 2 , CLERK 2 -> 30•00 NET SALES OF CLERK 3 , CLERK 3 -> 59•00 NET SALES OF CLERK 4 , CLERK 4 -> 100•00 RECEIPT NUMBER, MACHINE NO. CLERK -> 029-00 NUMBER___ X/Z Mode Reporting • 31 ER-180 Electronic Cash Register AU... -
Page 38: Cash In Drawer Declaration
After this declaration, you can not take any registering operation, if not reporting in X mode or Z mode. SAMPLE RECEIPT 02-01-10___14-30 TOTAL ENTERED BY KEY-INPUT -> 180•00 TOTAL IN CASH DRAWER -> 184•26 DIFFERENCE -> -4•26 029-00 32 • X/Z Mode Reporting ER-180 Electronic Cash Register AU... -
Page 39: Program Mode Programming
Tax, Decimal Point Information The features involved in this programming on the ER-180 have been preset for Australia use (Bold Font). If change is needed, please refer to the table below; find out the best option for both N1 and N2 from the table below, then, 1. -
Page 40: Tax Rate
Tax Rate The tax rate on the ER-180 has been preset to 10% Tax1 (VAT or add-on) as GST (Bold Font). If change is needed, please refer to the table below, then, 1. Turn mode key to PGM mode, 2. Enter the tax rate up to 5 digits number (Do Not Use Decimal Point!), 3. -
Page 41: Status And Preset Price Of Plu & Department
Status and Preset Price of Plu & Department The features involved in this programming on the ER-180 have been preset Open Price and non Single, tax1 (Bold Font) for Australia use. If change is needed, please determine preset price amount for N1 to N7, then refer to the table on next page;... -
Page 42: Setting The Percent (%) Key
Setting the Percent (%) Key The percent (%) rate on the ER-180 has been preset to open (Bold Font). If a preset value is needed, please refer to the table below (For example: for 10%, enter 10000; for 5.55%, enter 05550; for 99.999%, enter 99999.), then,... -
Page 43: Receipt Print / Journal Print
Receipt Print / Journal Print The features involved in this programming on the ER-180 have been preset to Taxable, tax amount print and Receipt Mode (Bold Font). If change is needed, please refer to the table below; find out the best option for both N1 and N2 from the table below, then, 1. -
Page 44: Training Mode
1. Turn mode key to PGM mode, 2. Enter the number of your option of N1, 3. Press CHARGE key to finalise the programming. CHARGE VALUE COMMENTS Normal Mode Training Mode 38 • Program Mode Programming ER-180 Electronic Cash Register AU... -
Page 45: System Options
GRAND TOTAL RESET NOT RESET RESET AFTER Z REPORT Z COUNTER RESET AFTER RESET NOT RESET Z REPORT CONSECUTIVE NUMBER NOT RESET RESET AFTER Z REPORT DATE PRINT NOT PRINT PRINT Program Mode Programming • 39 ER-180 Electronic Cash Register AU... -
Page 46: Setting The Date
Setting the Date Use this program to set the clock and calendar on your ER-180. The date changes automatically. After initial setting, time changing will probably be required only for beginning and ending daylight savings time. 1. Turn mode key to PGM mode, 2. -
Page 47: System Balancing
2. Be certain that AC cord is inserted firmly in the outlet, and that cord poses no danger of accidental tripping. 3. Use no chemicals or abrasives while cleaning cabinet or keyboard. 4. Do not pull or hold paper while the register is printing. Program Mode Programming • 41 ER-180 Electronic Cash Register AU... - Page 48 JK68-60181A Rev. 1.12 (Oct 11) From ER-180 v1.000 to v1.001 42 • Program Mode Programming ER-180 Electronic Cash Register AU...
Need help?
Do you have a question about the ER-180 and is the answer not in the manual?
Questions and answers