
Subscribe to Our Youtube Channel
Related Manuals for Teltonika RUT600


Summary of Contents for Teltonika RUT600
- Page 1 RUT600 3G Wireless-N Router User Manual v1.00 4Gon www.4Gon.co.uk info@4gon.co.uk Tel: +44 (0)1245 808295 Fax: +44 (0)1245 808299...
-
Page 2: Legal Notice
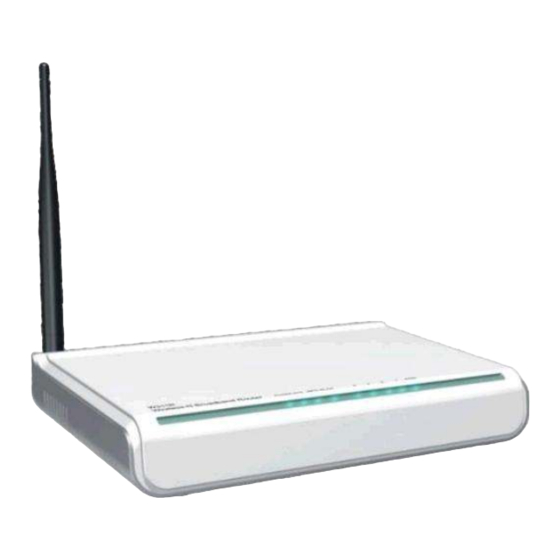
Dear Customer, Thank you for choosing Teltonika! RUT600 is a high speed Wireless Router, which complies with the latest standards and provides high wireless receiving and transmitting rates. It enhances your connectivity freedom wherever you are - in the office, at home or at the remote location. - Page 3 The device is not water-resistant. Keep it dry. The device requires 230V AC voltage. Be careful! Please use cable and the adapter provided with RUT600 device. Teltonika is not responsible for any harm caused by using wrong cable or wrong adapter for connection Any operation during a lightning storm is under your own risk and responsibility.
-
Page 4: Table Of Contents
Table of Content CHAPTER 1: PRODUCT OVERVIEW..................6 ..............................6 NTRODUCTION ............................6 ACKAGE ONTENTS CHAPTER 2: RUT600 HARDWARE, LED'S, CONNECTIONS AND FEATURES ....6 LED I ....................6 NDICATOR AND ESCRIPTION ............................8 RODUCT EATURES CHAPTER 3: HARDWARE INSTALLATION ................9 CHAPTER 4: ROUTER CONFIGURATION ................ - Page 5 5.11 .............................. 29 YSTEM OOLS Time Settings ..............................29 DDNS ................................29 Backup/Restore Settings ........................... 30 Restore to Factory Default Settings ........................30 Firmware Upgrade ............................30 Reboot the Router .............................. 31 Password Change .............................. 31 System Log................................ 31 5.12 .................................
-
Page 6: Chapter 1: Product Overview
Chapter 1: Product overview 1.1 Introduction Teltonika 3G Wireless-N Router provides WAN connectivity to wired and wireless clients using the 3G and Ethernet data network. 3G Wireless Router is extremely useful for mobile work teams or emergency crews that need access to the broadband Internet but have no permanent base. - Page 7 • USB Always ON indicates successfully connected USB device; Blinking indicates data transmission through USB port. • WLAN Wireless signal LED indicator. Blinking indicates that wireless function is enabled. • WAN Wide area network LED indicator. Always ON indicates successfully connected Ethernet device;...
-
Page 8: Product Features
LAN (4, 3, 2, 1) Ethernet switch, Ethernet router and NIC card can be connected to these 4 10/100Mbps Ethernet ports. Wi-Fi Protected Setup button. Press it for 1 second to enable WPS. 2.2 Product Features Includes Wireless AP, Router, 4-Port Switch and Firewall in one WPS (Wi-Fi Protected Setup) encryption method IEEE 802.11b/g/n, IEEE 802.3, IEEE 802.3u standards 64/128-bit WEP, WPA, WPA2, WPA&WPA2 encryption methods... -
Page 9: Chapter 3: Hardware Installation
Chapter 3: Hardware Installation After you unpack the box, please follow the steps below to connect the device. For better wireless performance, please put the device in the middle of wireless coverage area. Please use the included power adapter to power on the Router. ! (IMPORTANT: Use of a wrong power adapter could cause damage and void the warranty for this product). - Page 10 If you are provided with the wired broadband by your ISP to access the Internet, please connect the Router's WAN port to the Internet access line. If you are provided with the wireless broadband by your ISP to access the Internet or you want to amplify wireless signals, please set the Router's wireless WAN feature.
-
Page 11: Chapter 4: Router Configuration
• Assign static IP address manually within 192.168.0.2 – 192.168.0.254 range Step 2 Choose the wireless network (RUT600 by default) from the list of available wireless networks. Step 3 Open the Web browser and type the IP address of the router (Default: 192.168.0.1) and enter Router administrator login details to access the Web... -
Page 12: Chapter 5: Web Configuration Page Interface Structure
Chapter 5: WEB configuration page interface structure After the successful login you will see the WEB configuration page with the following structure: System Status WAN Medium Setup Wizard Advanced Settings LAN Settings WAN Settings MAC Address Clone DNS Settings WLAN Settings Basic Settings Security Settings Advanced Settings... -
Page 13: Wan Medium Type
5.1 WAN Medium Type The Router provides three access medium types. If you are provided with the 3G broadband by your ISP to access the Internet, you can connect the 3G USB modem card to the Router's USB port and select 3G WAN to set the device. If you are provided with the wired WAN access broadband such as ADSL Modem, Cable Modem or ISP broadband access line, you can connect the access line directly to the WAN port on the Router's rear panel. -
Page 14: Wireless Broadband Connection (Wireless Wan)
3. Wireless Broadband Connection (Wireless WAN) If you are provided with the wireless broadband by your ISP to access the Internet or you want to amplify wireless signals, please select “Wireless WAN” in “WAN Medium” page after you enter the Router's setup page. Please enter the wireless SSID, Mac address, channel, security mode parameters provided by your Wi-Fi ISP. -
Page 15: Mac Address Clone
Connect Automatically: Connect automatically to the Internet after rebooting the system or on connection failure. Connect Manually: Connect to the Internet manually. Connect on Demand: Re-establish your connection to the Internet after the specific time (Max Idle Time). Zero means your Internet connection is ON all the time. -
Page 16: Dns Settings
MAC Address: The MAC address to be registered with your Internet service provider. Clone MAC Address: Register your MAC address. Restore Default MAC Address: Restore to the default hardware MAC address. 4. DNS Settings DNS (Domain Name System (or Service)) – is an Internet service that translates domain names into IP addresses which are provided by your Internet Service Provider. -
Page 17: Wlan Setting
5.4 WLAN Setting 1. Basic Settings Enable Wireless: Check to enable the Router’s wireless features; uncheck to disable it. Network Mode: Select one mode from the following. The default is 11b/g/n mode. 11b mode: Allows the wireless client equipment to be connected to the device in 11b mode at the maximum speed of 11Mbps. -
Page 18: Security Settings
Extension Channel: To increase data throughput of wireless network, the extension channel range is used in 11n mode. Channel Bandwidth: Select the channel bandwidth to improve the wireless performance. 2. Security Settings These settings are used to configure the AP’s network security. Select SSID: Select the SSID (main SSID or minor SSID) to configure security settings from the drop-down menu. -
Page 19: Advanced Settings
WPA- Enterprise / WPA2-Enterprise This security mode is based on Radius authentication server and WPA/WPA2 encryption method. This security mode is used when a RADIUS server is connected to the device. WPA Algorithms: Provides TKIP [Temporal Key Integrity Protocol] or AES [Advanced Encryption Standard]. -
Page 20: Wps Settings
BG protection Mode: the default value is “Auto”. It is used for 11b/g wireless client equipment to connect to 11n wireless network smoothly in a complicated wireless area. Basic Data Rates: Depending on requirements, you can select one of the suitable Basic Data Rates. -
Page 21: Wds Settings
WPS Auth. Mode: The authorization mode deployed by WPS. WPS Encryption Type: The encryption type used by WPS. WPS key: The key generated by AP automatically. AP PIN KEY: The PIN code used by default. Reset OOB: When this button is pressed, the WPS client will be in the idle state, and WPS indicator will be turned off. -
Page 22: Connection Status
7. Connection Status This page shows wireless client equipment connection status, including MAC address, Channel bandwidth, etc. MAC Address: Shows current MAC addresses of the hosts connected to the Router. Bandwidth: Shows current frequency bandwidth the wireless client equipment uses. 5.5 DHCP Server 1. -
Page 23: Virtual Server
5.6 Virtual Server 1. Single Port Forwarding The Router can be configured as a virtual server on behalf of local services behind the LAN port. The remote requests will be re-directed to the local servers via the virtual server. This section deals with the single port forwarding. The Single Port Forwarding allows you to set up public services such as web servers, ftp, e-mail and other special Internet applications on your network. -
Page 24: Alg Service Settings
3. ALG Service Settings ALG (Application Layer Gateway): An application layer gateway (ALG) allows customized NAT traversal filters to be applied on the gateway to support address and port translation for certain application layer protocols such as FTP, BitTorrent, SIP, RTSP, file transfer applications, etc. -
Page 25: Traffic Control
5.7 Traffic Control 1. Traffic Control Traffic control is used to limit communication speed over the LAN. Up to 20 entries can be supported to control a maximum of 254 PCs'. Enable Traffic Control: Is used to enable or disable the internal IP bandwidth control. -
Page 26: Url Monitor
5.8 URL Monitor 1. URL Monitor This feature is used to track users’ Internet activity. Enable URL Monitor: After checking this feature, the Router will record LAN computer’s URL information, including the visited Websites, LAN IP addresses and time. The Router can store up to 500 entries. After 500 entries, the counter will clear all the records and will restart the URL tracking again. -
Page 27: Url Filter Settings
Port No.: Enter the port range based on the protocol for access policy. Protocol: Select the desired protocol (TCP/UDP/Both) from the drop-down menu. Time: Select the time range for client filter to be enabled. Days: Select the day(s) to run the access policy on. 2. -
Page 28: Remote Web Management
Prevent Network Attack: Check to enable the Attack Prevention. 5. Remote Web Management This section allows the network administrator to manage the router remotely. If you want to access the router remotely, please select the “Enable”. Enable: Check to enable remote web management. Port: The management port has to be open for external access. -
Page 29: System Tools
Destination LAN IP: The address of the remote host with which you want to make a static route. Subnet Mask: The logically visible subdivision of the Destination IP network. Gateway: The gateway of the next hop, usually the Router or host’s IP address. 5.11 System Tools 1. -
Page 30: Backup/Restore Settings
3. Backup/Restore Settings The device provides backup/restore settings, so you need set a directory to keep these parameters. Backup Settings: Click “Backup” button to back up the Router’s settings. Select the path to save the configuration file to. Click “Save” to save the configuration file. Restore Settings: Press “Browse”... -
Page 31: Reboot The Router
6. Reboot the Router Router reboot makes the newly applied settings to go into effect, also it can be used to restart the Router in case of operational failure. Reboot the router: Press this button to reboot the device. 7. Password Change This section is used to set a new username and password to better secure your router and network. -
Page 32: Chapter 6: Troubleshooting
This section provides answers to frequently asked questions. If your problems are not on the list, please contact your reseller or send your e-mail request to support@teltonika.eu. 1. I am unable to login to the Web-interface of the Router after entering the IP address in the address field. - Page 33 Step 1: setup the internal server, make sure local network users are able to access this server and know the service port used. For example: Web server port is 80; FTP is 21; SMTP is 25 and POP3 is 110. Step 2: go to Router Web-Interface and enter “Virtual Server”...
- Page 34 9. How do I decrease 3G Internet expenses? a. 3G ISP will charge you based either on traffic used or the time connected. It is recommended to remove your 3G Modem or turn the Router off if you do not use 3G Internet connection.
-
Page 35: Chapter 7: Compatible 3G Modems List
Chapter 7: Compatible 3G Modems list Brand Model Brand Model TELTONIKA UM5100 HUAWEI EC169 D-LINK DWM_162U5 HUAWEI EC1260 D-LINK DWM_162 HUAWEI EC1261 DCWL HUAWEI ET128 STAR-NET EV2000 HUAWEI E1750 GXZG GX100C HUAWEI EC226 MACAO CTM H21 HUAWEI E1630 Tmobile WEWINS...
Need help?
Do you have a question about the RUT600 and is the answer not in the manual?
Questions and answers