Table of Contents
Advertisement
Quick Links
Advertisement
Table of Contents

Related Manuals for Teltonika RUT750 LTE


Summary of Contents for Teltonika RUT750 LTE
- Page 1 USER MANUAL...
-
Page 2: Legal Notice
Copyright © 2014 TELTONIKA Ltd. All rights reserved. Reproduction, transfer, distribution or storage of part or all of the contents in this document in any form without the prior written permission of TELTONIKA Ltd is prohibited. The manufacturer reserves the right to modify the product and manual for the purpose of technical improvement without prior notice. -
Page 3: Table Of Contents
Table of Contents Legal notice ..................................2 Attention .................................... 2 SAFETY INFORMATION ..............................5 Device connection ................................. 6 Introduction ..................................7 Key features ................................... 7 Specifications ................................. 7 LTE ....................................7 UMTS ..................................7 GSM/GPRS/EDGE ............................... 7 LAN and Wi-Fi ................................8 Electrical, Mechanical &... - Page 4 Static Routes ................................37 Diagnostics ................................38 Services ..................................39 PING Reboot ................................39 SMS Reboot ................................40 Status via SMS ................................40 NTP ................................... 41 Dynamic DNS................................42 Wireless hotspot ..............................43 OpenVPN .................................. 45 IPsec ..................................47 GRE Tunnel ................................49 System ..................................
-
Page 5: Safety Information
SAFETY INFORMATION In this document you will be introduced on how to use the router safely. We suggest you to adhere to the following recommendations in order to avoid personal injuries and or property damage. You have to be familiar with the safety requirements before using the device! To avoid burning and voltage caused traumas, of the personnel working with the device, please follow these safety requirements. -
Page 6: Device Connection
Device connection... -
Page 7: Introduction
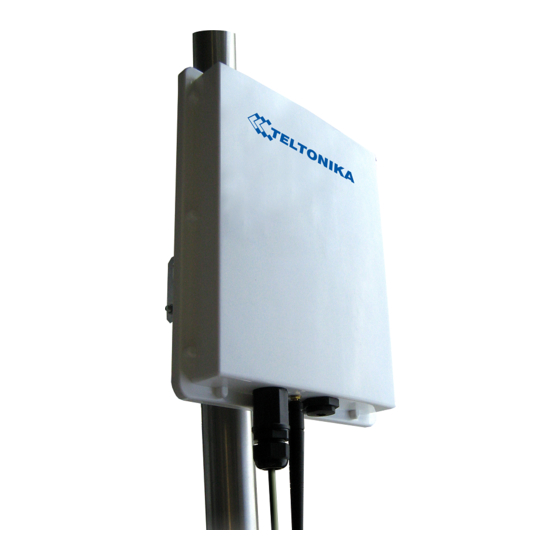
Thank you for purchasing a RUT750 LTE router! Internal LTE modem can Teltonika RUT750 is outdoor LTE router with high speed wireless and Ethernet connections. reach download rate of up to 100Mbps . Router supports the latest IEEE802.11n as well as IEEE802.11b/g standards and provides wireless receiving and transmitting rate of up to 150 Mbps. -
Page 8: Lan And Wi-Fi
LAN and Wi-Fi High performance 320 MHz CPU with 256 Mbits SDRAM IEEE 802.11b/g/n, IEEE 802.3, IEEE 802.3u standards IEEE 802.3af-2003 compliant POE 64/128-bit WEP, WPA, WPA2, WPA&WPA2 encryption methods 1x LAN 10/100Mbps Ethernet port ... -
Page 9: Applications
Applications Device can provide internet connection by either Wi-Fi or Ethernet cable. Ethernet switch can be used to provide more Ethernet ports and to be able to connect several devices. -
Page 10: Setting Up Your Router
Setting up your router Installation After you unpack the box, follow the steps, documented below, in order to properly connect the device. Connectors 1. SIM card 2. Wi-Fi antenna connector 3. Ethernet connector Inserting the SIM card Remove the hex cap which is protecting the SIM holder ... -
Page 11: Connecting The Device
Plug the PoE power supply adapter into an AC socket Connect to the using Ethernet cable or wirelessly (SSID: Teltonika) Find the best signal location and secure the router on a pole Note: Device position and angle has a big impact on the performance. By monitoring the Status window in the WebUI try to find a location with the best signal quality. - Page 12 network connections”, wait for the results to pop up. 2. Type in “ Click “View network connections” 4. Then right click on your wireless device that you use to connect to other access points (It is the one with the name “Wireless Network Connection”...
- Page 13 5. Select Internet Protocol Version 4 (TCP/IPv4) and then click Properties 6. By default the router is going to have DHCP enabled, which means that if you select “Obtain an IP address automatically” and “Obtain DNS server address automatically”, the router should lease you an IP and you should be ready to login.
- Page 14 Right click on the Wireless network icon and select Connect / Disconnect. A list should pop up with all available wireless networks. Select “Teltonika” and click connect. Launch your favorite browser and enter the routers IP into the address field:...
-
Page 15: Operation Modes
Enter the default password, which is “admin01” into the “Password” field and then either click Login with your mouse or press the Enter key. You have now successfully logged into the router and should see the Status page. From here on out you can configure almost any aspect of your router. Operation Modes The router supports various operation modes. -
Page 16: Function Explanations
Sample value Explanation 1. Router Name Teltonika Name of the router (hostname of the routers system). 2. Router Model Teltonika RUT750 Routers model. 3. Firmware RUT750_T_00.00.436 Shows the version of the firmware that is currently loaded in the Version router. Newer versions might become available as new features are added. -
Page 17: Network Information
Memory Field Name Sample Value Explanation Total Available 14416/29964 Shows how much memory is available to maintain routers functionality. Free 1476/29964 The amount of memory that is completely free. Should this rapidly decrease or get close to 0, it would indicate that the router is running out of memory, which could cause crashes and unexpected reboots. - Page 18 Statistics on the routers WAN connection. Field Name Sample Value Explanation Interface Specifies through what medium the router is connecting to the internet. This can either be Wired, 3G or Wi-Fi. Type DHCP Specifies the type of connection. This can either be static, DHCP, PPPoE or LTE.
- Page 19 Wireless Wireless can work in two modes, AP or Client. AP is when the wireless radio is used to create an Access Point that other devices can connect to. Client is when the radio is used to connect to an Access Point via WAN. Client Field Name Sample Value...
- Page 20 6. Encryption WPA2 PSK The type of encryption that the router will use to authenticate, establish and (CCMP) maintain a connection. 7. Bit rate 1.0 MBit/s The bitrate will be shared between all devices that connect to the routers wireless network. 8.
-
Page 21: Routes
Routes Shows the routers active ARP table. An ARP table contains recently cached MAC addresses of every immediate device that was communicating with the router. Active IPv4-Routes Shows the routers routing table. The routing table indicates where a TCP/IP packet, with a specific IP address, should be directed to. -
Page 22: Network
Network Here you can configure the LTE specific settings which are used when connecting to your local LTE network. The configuration is simple and straightforward. Here we will gloss over all the fields: Field name Possible values Explanation 1. LTE connection Use pppd mode Pppd mode uses dialing number to establish data connection. -
Page 23: Wan
automatic. (2G), UMTS (3G) and LTE (4G) you can specify to which network you wish to connect. E.g.: if you choose GSM (2G), the router will connect to a GSM (2G) network, so long as it is available, otherwise it will connect to a LTE (4G) network. - Page 24 General This area is dedicated for protocol specific options. Static: This is the configuration setup for when you select the static protocol. Filed name Sample Explanation IPv4 address 192.168.99.162 Your routers address on the WAN network IPv4 netmask 255.255.255.0 A mask used to define how “large” the WAN network is IPv4 gateway 192.168.99.254 Address where the router will send all the outgoing traffic...
- Page 25 PPPoE. This protocol is mainly used by DSL providers: This is the configuration setup for when you select PPPoE protocol. Filed name Sample Explanation PAP/CHAP username test Your username and password that you would use to connect to your PAP/CHAP password your_password carriers network.
- Page 26 address (i.e. that IP will only work with your computer). In this field you can enter your computers MAC address and fool the gateway in thinking that it is communicating with your computer. Override MTU 1500 Maximum transmission unit – specifies the largest possible size of a data packet.
- Page 27 IP Aliases IP aliases are a way of defining or reaching a subnet that works in the same space as the regular network. As you can see, the configuration is very similar to the static protocol; only in the example a 55’th subnet is defined. Now if some device has an IP in the 55 subnet (192.168.55.xxx) and the subnets gateway metric is “higher”...
-
Page 28: Lan
Should you be asked enter the secret Encryption Key and click Submit. Now you should be transported to the Wireless Station page. Click Save and wait until all the settings are applied. The configuration is complete and you should now be able to access the internet. This page is used to configure the LAN network, where all your devices and computers that you connect to the router will reside. - Page 29 Field Name Sample value Explanation Disable Checked/unchecked Check to DISABLE the DHCP server. Start The starting address of the range that the DHCP server can use to give out to devices. E.g.: if your LAN IP is 192.168.2.1 and your subnet mask is 255.255.255.0 that means that in your network a valid IP address has to be in the range of [192.168.2.1 –...
-
Page 30: Wireless
4. DHCP-Options 6,192.168.2.1,192.168.2.2 Additional options to be added for this DHCP server. For example with 26,1470 '26,1470' or 'option:mtu, 1470' you can assign an MTU per DHCP. option:mtu, 1470 Your client must accept MTU by DHCP for this to work. Wireless On this page you can configure your wireless settings. - Page 31 Advanced Here you can configure more advanced parameters: Field name Sample value Explanation 1. Mode Auto, b, g, g+n Different modes provide different throughput and security options. 2. Country Code Any ISO/IEC 3166 Selecting this will help the wireless radio configure its internal alpha2 country code parameters to meet your countries wireless regulations.
- Page 32 Security Encryption – There are many modes of encryption, though two distinctive classes have to be pointed out. Enter the keys that will be used as passphrase for connecting computers and then specify which key will be preferred above the remaining. It’s sufficient to enter one key and then specify it as the preferred one. Length is important as well: 10 or 26 characters in length in hex mode OR 5 or 13 in ASCII mode.
-
Page 33: Backup Wan
MAC-Filter Filter – you can define a rule for what to do with the MAC list you’ve defined. You can either allow only the listed MACs or allow ALL, but forbid only the listed ones. Client Client mode is nearly identical to AP, except for the fact that most for the options are dictated by the wireless access point that the router is connecting to. - Page 34 amount of failed or passed health checks has to be reached before the state changes completely. This delay is instituted so as to mitigate “spikes” in connection availability, but it also extends the time before the backup link can be brought up or down.
-
Page 35: Firewall
If you witness the above sequence, your backup link is working! Firewall In this section we will look over the various firewall features that come with the router. General Settings The routers firewall is a standard linux iptables package, which uses routing chains and policies to facilitate control over inbound and outbound traffic. - Page 36 By enabling DMZ for a specific internal host (for e.g.: your computer), you will expose that host and its services to the routers WAN network (i.e. - internet). Port Forwarding Here you can define your own port forwarding rules. You can use port forwarding to set up servers and services on local LAN machines. The above picture shows how you can set up a rule that would allow a website that is being hosted on 192.168.99.156, to be reached from the outside by entering http://routersExternalIp:12345/ .
-
Page 37: Static Routes
Traffic Rules The traffic rule page contains a more generalized rule definition. With it you can block or open ports, alter how traffic is forwarded between LAN and WAN and many more things. Field name Sample Value Explanation 1. Name “ruleName”... -
Page 38: Diagnostics
Additional note on Target & Netmask: You can define a rule that applies to a single IP like this: Target - some IP; Netmask - 255.255.255.255. Furthermore you can define a rule that applies to a segment of IPs like this: Target – some IP that STARTS the segment;... -
Page 39: Services
Services PING Reboot PING Reboot function will periodically send PING command to server and waits for echo receive. If no echo is received router will try again sending PING command defined number times, after defined time interval. If no echo is received after the defined number of unsuccessful retries, router will reboot. -
Page 40: Sms Reboot
SMS Reboot It is possible to reboot router via SMS text message. This function is useful when router does not respond and it is difficult to manually restart router by hand. Common configuration Field name Description Notes 1. Enable SMS Reboot This check box will enable and SMS reboot is disabled by default. -
Page 41: Ntp
Sender phone number must contain country code. You can check sender phone number format by reading the details of old SMS text massages you receiving usually. Hostname, Network Time Protocol (NTP) and time zone configuration settings is needed to periodically update router local time. -
Page 42: Dynamic Dns
Dynamic DNS Dynamic DNS (DDNS) is a domain name service allowing to link dynamic IP addresses to static hostname. To start using this feature firstly you should register to DDNS service provider. You are provided with add/delete buttons to manage and use different DDNS configurations at the same time! Field name Description Enable... -
Page 43: Wireless Hotspot
Wireless hotspot Wireless hotspot provides essential functionality for managing an open access wireless network. In addition to standard RADIUS server authentication there is also the ability to gather and upload detailed logs on what each device (denoted as a MAC address) was doing on the network (what sites were traversed and so on…). General Settings Picture above illustrate a sample configuration of the general section. - Page 44 Logging and FTP settings The above picture illustrates a sample configuration of the Logging and FTP settings portion of the page. Field name Explanation Logging enabled Check this box if you want to enable wireless traffic logging. This feature will produce logs which contain data on what websites each client was visiting during the time he was connected to your hotspot.
-
Page 45: Openvpn
OpenVPN VPN (Virtual Private Network) is a method for secure data transfer through unsafe public network. This section explains how to configure OpenVPN, which is implementation of VPN supported by the router. A picture above demonstrates default OpenVPN configurations list, which is empty, so you have to define a new configuration to establish any sort of OpenVPN connection. - Page 46 You can set custom settings here according to your VPN needs. Below is summary of parameters available to set: Field name Explanation Enabled Switches configuration on and off. This must be selected to make configuration active. TUN/TAP Selects virtual VPN interface type. TUN is most often used in typical IP-level VPN connections, however, TAP is required to some Ethernet bridging configurations.
-
Page 47: Ipsec
IPsec The IPsec protocol client enables the router to establish a secure connection to an IPsec peer via the Internet. IPsec is supported in two modes - transport and tunnel. Transport mode creates secure point to point channel between two hosts. - Page 48 Phase 1 and Phase 2 must be configured accordingly to the IPSec server configuration. Remote Network Secure Group – Set the remote network (Secure Policy Database) information. Field name Explanation Tunnel keep alive Allows sending ICMP echo request (ping utility) to the remote tunnel network. This function may be used to automatically start the IPSec tunnel.
-
Page 49: Gre Tunnel
GRE Tunnel GRE (Generic Routing Encapsulation RFC2784) is a solution for tunneling RFC1812 private address-space traffic over an intermediate TCP/IP network such as the Internet. GRE tunneling does not use encryption it simply encapsulates data and sends it over the WAN. In the example network diagram two distant networks LAN1 and LAN2 are connected. -
Page 50: System
System Configuration Wizard The configuration wizard provides a simple way of quickly configuring the device in order to bring it up to basic functionality. The wizard is comprised out of 4 steps and they are as follows: Step 1 (Password change) First, the wizard prompts you to change the default password. - Page 51 Step 3 (LAN) Next, you are given the chance to configure your LAN and DHCP server options. For a detailed explanation see LAN under Network. Step 4 (Wi-F i)
-
Page 52: Administration
The final step allows you to configure your wireless settings in order to set up a rudimentary Access Point. When you’re done with the configuration wizard, press Finish. Administration Administration properties Administration password Field name Explanation 1. Password Enter your new administration password. 2. -
Page 53: Backup And Firmware
Remote SSH access If check box is selected users can access the router via SSH from the outside (WAN). When check box is not selected users can access the router only from LAN. Note: The router has 2 users: „admin“ for webUI and „root“ for SSH. When loging in via SSH use „root“. Web Access control Field name Explanation... -
Page 54: Reboot
Leaving “Keep settings” check box unselected before upgrade process will change IP address of router to default value 192.168.1.1 and you may need to configure router again (please read chapter “Logging in” at page 9) Warning: Do not ever remove router power supply and do not press reset button during upgrade process! This will totally damage your router and it won’t be accessible.
Need help?
Do you have a question about the RUT750 LTE and is the answer not in the manual?
Questions and answers