Table of Contents
Advertisement
Quick Links
Advertisement
Table of Contents
Troubleshooting

Related Manuals for KitchenAid KSBP25FKSS00


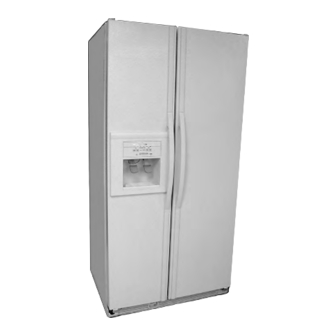
Summary of Contents for KitchenAid KSBP25FKSS00
- Page 1 KAR-12 TECHNICAL EDUCATION MODELS: KSBP25FKSS00 KSBS25FKBL00 KSBS25FKBT00 KSBS25FKWH00 KSCS25FKSS00 KSFS25FKBL00 KSFS25FKBT00 KSFS25FKWH00 2001 K MODEL COUNTER DEPTH SIDE-BY-SIDE REFRIGERATOR WITH VARIABLE CAPACITY COMPRESSOR JOB AID 4317290A...
- Page 2 FORWARD This Job Aid, “KitchenAid 2001 K Model Counter Depth Side-By-Side Refrigerator With Variable Capacity Compressor” (Part No. 4317290A), provides the technician with information on the installation and service of the Side-By-Side Refrigerator. It is to be used as a training Job Aid and Service Manual.
-
Page 3: Table Of Contents
TABLE OF CONTENTS Page GENERAL ..........................1-1 Safety First ......................... 1-1 Electrical Power Supply & Grounding Requirements ........... 1-1 Electrostatic Discharge (ESD) Sensitive Electronics ............ 1-2 Model & Serial Number Designations ................1-3 Model & Serial Number Label And Tech Sheet Locations..........1-4 Specifications ........................ - Page 4 Page DIAGNOSIS & TROUBLESHOOTING ................... 6-1 Diagnosis ........................... 6-1 Pre-Diagnostics Checks ....................6-1 Diagnostics Mode ......................6-1 Water Filter Input (WFI) Test ..................6-2 Troubleshooting Chart ....................... 6-3 WIRING DIAGRAMS & STRIP CIRCUITS ................7-1 Wiring Diagram ........................7-1 Strip Circuits ........................7-2 - iv -...
-
Page 5: General
GENERAL SAFETY FIRST Your safety and the safety of others is very important. We have provided many important safety messages in this Job Aid and on the appliance. Always read and obey all safety messages. This is the safety alert symbol. This symbol alerts you to hazards that can kill or hurt you and others. -
Page 6: Electrostatic Discharge (Esd) Sensitive Electronics
ELECTROSTATIC DISCHARGE (ESD) SENSITIVE ELECTRONICS ESD problems are present everywhere. ESD may damage or weaken the electronic control assembly. The new control assembly may ap- pear to work well after repair is finished, but failure may occur at a later date due to ESD Electrical Shock Hazard stress. -
Page 7: Model & Serial Number Designations
MODEL & SERIAL NUMBER DESIGNATIONS MODEL NUMBER MODEL NUMBER K SB S 25 F K WH PRODUCT GROUP K = KitchenAid Brand PRODUCT IDENTIFICATION BR = Bottom Freezer Reversible Door SB = Counter Depth Factory Installed Trim SC = Counter Depth Architect Style... -
Page 8: Model & Serial Number Label And Tech Sheet Locations
MODEL & SERIAL NUMBER LABEL AND TECH SHEET LOCATIONS The Model/Serial Number Label and Tech Sheet locations are shown below. Model & Serial Number Location (Refrigerator Compartment) Base Grille Screw Screw Tech Sheet Location (Behind Base Grille) -
Page 9: Specifications
SPECIFICATIONS KSBP25FKSS KSBS25FKBL KSBS25FKBT Model Number KitchenAid Counter Depth Factory KitchenAid Counter Depth Black KitchenAid Counter Depth Biscuit Installed SS Panel Black Dispenser Dispensing Trim Model Dispensing Trim Model Model Description 25' Counter Depth 25' Counter Depth 25' Counter Depth... - Page 10 KSFS25FKBT KSFS25FKWH Model Number KitchenAid Counter Depth Biscuit KitchenAid Counter Depth White Freestanding Dispensing Freestanding Dispensing Model Description 25' Counter Depth 25' Counter Depth Size-Configuration 71 1/2 71 1/2 Cabinet Height (Floor To Top Of Cabinet) (in) 71 3/4 71 3/4...
-
Page 11: Refrigerator Warranty
SECOND THROUGH FIFTH YEAR LIMITED WARRANTY In second through fifth years from the date of purchase, KitchenAid will pay for replacement or repair of the re- frigerator/freezer cavity liner (including labor costs) if the part cracks due to defective materials or workmanship. - Page 12 — NOTES —...
-
Page 13: Installation Information
INSTALLATION INFORMATION LEVELING THE REFRIGERATOR Use a 1/2″ (12.70 mm) socket wrench to adjust the leveling bolts. Turn the leveling IMPORTANT: All four leveling legs must con- bolt to the right to raise that side of the tact the floor to support and stabilize the full refrigerator, or turn the leveling bolt to the weight of the refrigerator. - Page 14 — NOTES —...
-
Page 15: Theory Of Operation
THE ELECTRONIC CONTROL PANEL OVERVIEW NOTE: The illustration above shows the actual temperature that is associated with each corre- The KitchenAid Counter Depth Refrigerator sponding LED. Constant Flow Temperature Management Sys- Freezer temperatures can be set from 8°F to tem uses two thermistors to monitor tempera- –5°F (–13°C to –21°C). - Page 16 TEMPERATURE CONTROL Freezer Temperature Control — Temperature Decreasing The electronic control checks the resistance of When the freezer temperature begins to de- the thermistors, and compares it to both the crease, the process will reverse. The compres- customer temperature settings and the last sor speed decreases, followed by the evapo- thermistor reading taken.
- Page 17 COMPRESSOR COMPRESSOR PROTECTION The main control board supplies a 5 vdc, peak- To protect the compressor and maintain effi- to-peak square wave, at 54 to 150 Hz, to the ciency, minimum compressor off time is pro- inverter board. A standard VOM will read ap- grammed into the control.
- Page 18 The refrigerator temperature determines the POWER INTERRUPTION opening of the air door. When the refrigerator After a power interruption, the following events requires cooling, if the evaporator fan motor is will occur: already running for the freezer, the air door •...
- Page 19 Freezer Thermistor AIR CIRCULATION If the control senses an open or a shorted In order to ensure the proper refrigerator and thermistor, the compressor and the evaporator freezer compartment temperatures, air must fan motor will begin to operate on a timed on be able to flow between the two sections.
- Page 20 — NOTES —...
-
Page 21: Component Access
COMPONENT ACCESS This section instructs you on how to service each component inside the refrigerator/freezer. The components and their locations are shown below. COMPONENT LOCATIONS Touch Control Assembly Refrigerator Door Freezer Door Switch & Motorized Air Door Switch Ice Maker (Behind Cover) Auger Motor Refrigerator... -
Page 22: Removing The Touch/Display Board, The Insert And Overlay, & The Motorized Air Door
REMOVING THE TOUCH/DISPLAY BOARD, THE INSERT AND OVERLAY, & THE MOTORIZED AIR DOOR Remove the light shield. To do this, place your finger into the half-moon slot at the bottom of the shield and pull out, then pull down to disengage the corners from the control box. - Page 23 Disconnect the two wires from the light To remove the insert and overlay, press socket and the 3-wire connector from the the locking clips, and push the insert and touch/display board, and remove the touch overlay out of the touch control housing control assembly.
-
Page 24: Removing A Thermistor
REMOVING A THERMISTOR Remove the hex-head screw from the thermistor cover. Pull the cover forward at the screw end, and unhook the tab from the slot at the other end of the thermistor cover. Screw Electrical Shock Hazard Disconnect power before servicing. Refrigerator / Freezer Replace all panels before operating. -
Page 25: Removing A Door Switch
REMOVING A DOOR SWITCH Use a small-bladed screwdriver and pry the door switch out of the freezer/refrig- erator liner opening. Straight Side Faces Front Electrical Shock Hazard Disconnect power before servicing. Replace all panels before operating. Failure to do so can result in death or electrical shock. -
Page 26: Removing A Light Socket
REMOVING A LIGHT SOCKET Remove the light shield. Remove the bulb from the socket. Grasp the light socket by the rounded portion and pull out on the narrow end, while pressing the locking arm (see the photo below) with a screwdriver blade. Pull out on the socket until it disengages Electrical Shock Hazard from the opening. -
Page 27: Removing The Water Reservoir
REMOVING THE WATER RESERVOIR Open the refrigerator and freezer doors and remove the two screws from the base grille and remove the grille from the front of the unit. Electrical Shock Hazard Disconnect power before servicing. Replace all panels before operating. Screw Screw Base Grille... - Page 28 Pull the unit out of its mounting location so Pull the ends of the water reservoir tubing you can access the unit compartment through the condenser fan motor bracket. cover. Remove the crisper and bottom shelves At the rear of the unit, remove the hex- from the refrigerator compartment.
-
Page 29: Removing The Ice Maker And The Auger Motor & Crush/Cube Solenoid
REMOVING THE ICE MAKER AND THE AUGER MOTOR & CRUSH/CUBE SOLENOID To remove the ice maker: a) Remove the bottom screw from the ice maker bracket. Electrical Shock Hazard Disconnect power before servicing. Replace all panels before operating. Failure to do so can result in death or electrical shock. - Page 30 To remove the auger motor or crush/ d) To remove the auger, unscrew the drive cube solenoid: coupler (left-hand threads) and remove it from the motor shaft. a) Remove the light shield and the bulb e) Remove the three auger motor hex- from the socket.
-
Page 31: Removing The Evaporator Fan Motor, The Bimetal, The Defrost Heater, & The Evaporator
REMOVING THE EVAPORATOR FAN MOTOR, THE BIMETAL, THE DEFROST HEATER, & THE EVAPORATOR Remove the light shield and bulb from the freezer light. Remove the phillips screw from each of the two top rear shelf support studs and remove the studs. Remove the eight hex-head screws from the evaporator cover. - Page 32 Lift and unhook the two evaporator cover To remove the evaporator fan motor: tabs, then lower the cover until the top a) Pull the fan blade off the motor shaft. edge clears the air duct, and slide the b) Unclip the motor. cover up and out of the freezer.
- Page 33 To remove the bimetal: b) Disconnect the two defrost heater wires and the main terminal connector. a) Unclip the bimetal from the evaporator c) Unclip the bimetal from the evaporator inlet tubing. inlet tubing. b) Follow the instructions that were sup- d) Remove the two top hex-head screws plied with the replacement bimetal to and loosen the bottom screw on the...
- Page 34 g) Pull the bottom of the evaporator to- 10. To remove the evaporator: ward the front of the unit and remove a) Remove the defrost heater from the the two hangers from the defrost heater. evaporator (see page 4-13). b) Access the sealed system and dis- charge the refrigerant into an approved recovery system.
-
Page 35: Removing The Condenser Fan Motor
REMOVING THE CONDENSER FAN MOTOR Remove the speed nut from the condenser fan blade and remove the blade. Nut Side Electrical Shock Hazard Disconnect power before servicing. Replace all panels before operating. Failure to do so can result in death or electrical shock. -
Page 36: Removing The Compressor
REMOVING THE COMPRESSOR Compressor Terminal Cover Electrical Shock Hazard Disconnect power before servicing. Remove the power connector and green Replace all panels before operating. ground wire from the compressor termi- Failure to do so can result in death or nals. electrical shock. -
Page 37: Removing The Inverter Assembly
REMOVING THE INVERTER ASSEMBLY Remove the compressor terminal cover (see step 5 on page 4-16 for the proce- dure). Disconnect the inverter output 3-wire con- nector and ground wire from the compres- sor. Green Ground Wire Electrical Shock Hazard Compressor Disconnect power before servicing. -
Page 38: Removing The Main Control Board Assembly
REMOVING THE MAIN CONTROL BOARD ASSEMBLY Disconnect the 3-, 9-, and 12-pin connec- tors, as shown below. Remove the hex-head screw from the green ground wire. 3-, 9-, & 12 Pin Connectors Electrical Shock Hazard Disconnect power before servicing. Screws Replace all panels before operating. - Page 39 Remove the main control board from the five standoffs. Press in on the locking tab on each standoff to release the board. Press In On Tab To Remove Board From Standoffs Electrical Shock Hazard Connect green ground wire to ground screw. Failure to do so can result in death or electri- cal shock.
-
Page 40: Removing The Water Dispenser Fill Tube
REMOVING THE WATER DISPENSER FILL TUBE Position the drip tray upside down under the ice & water dispenser control panel, and pry the bottom edge of the panel out at the two small slots with a large-bladed screwdriver. Electrical Shock Hazard Disconnect power before servicing. - Page 41 Disconnect the three wire connectors and Disconnect the water dispenser fill tube the green ground wire from the switch from the union, slide the nut off the end of subpanel. the tube, and allow the water to drain into the container. Remove the two hex-head screws from the switch subpanel and remove the panel.
-
Page 42: Removing The Water Valve
REMOVING THE WATER VALVE Remove the hex-head screws from the water valve bracket. Electrical Shock Hazard Disconnect power before servicing. Replace all panels before operating. Failure to do so can result in death or electrical shock. NOTE: Sharp edges may be present. Water Valve Unplug the refrigerator or disconnect the Bracket Screws... -
Page 43: Removing The Freezer Door Handles & Freezer Door
REMOVING THE FREEZER DOOR HANDLES & FREEZER DOOR b) Similarly, slide down and remove the bottom handle trim. c) Remove the four hex-head screws and remove the handle from the door. 2 Screws Electrical Shock Hazard Disconnect power before servicing. Replace all panels before operating. - Page 44 b) Place a container near the base grille to f) Close the freezer door to hold it in catch the water in the next step. place. c) Disconnect the water dispenser fill tube g) Remove the three Torx screws from from the union, slide the nut off the end the top hinge and remove the hinge.
-
Page 45: Removing A Roller
REMOVING A ROLLER Remove the T-40 Torx bolt from the bot- tom frame. Cabinet Bottom Electrical Shock Hazard Disconnect power before servicing. Replace all panels before operating. Failure to do so can result in death or electrical shock. NOTE: Sharp edges may be present. Unplug the refrigerator or disconnect the power. - Page 46 — NOTES — 4-26...
-
Page 47: Component Testing
COMPONENT TESTING • Check all connections before replacing com- Before testing any of the components, perform ponents, looking for broken or loose wires, the following checks: failed terminals, or wires not pressed into • The most common cause for control failure is connectors far enough. -
Page 48: Evaporator Fan Motor
Electrical Shock Hazard Disconnect power before servicing. Replace all panels before operating. Failure to do so can result in death or electrical shock. CONDENSER FAN MOTOR EVAPORATOR FAN MOTOR 1 2 3 4 Refer to page 4-11 for the procedure for servic- 1 2 3 4 ing the evaporator fan motor. -
Page 49: Compressor & Inverter
Electrical Shock Hazard Disconnect power before servicing. Replace all panels before operating. Failure to do so can result in death or electrical shock. COMPRESSOR & INVERTER Pins check P7-3 and P7-8 on the main con- trol board for 3 to 6 volts DC. If the volt- age is not present, replace the main control board. -
Page 50: Motorized Air Door
Electrical Shock Hazard Disconnect power before servicing. Replace all panels before operating. Failure to do so can result in death or electrical shock. DEFROST HEATER & BIMETAL MOTORIZED AIR DOOR Refer to page 4-2 for the procedure for servic- Refer to page 4-11 for the procedure for servic- ing the motorized air door. -
Page 51: Main Control Board
Electrical Shock Hazard Disconnect power before servicing. Replace all panels before operating. Failure to do so can result in death or electrical shock. MAIN CONTROL BOARD Refer to page 4-18 for the procedure for servicing the main control board. NOTE: See the chart for the main control board test specifications. INPUTS THERMISTORS OUTPUT... -
Page 52: Crush/Cube Solenoid
Electrical Shock Hazard Disconnect power before servicing. Replace all panels before operating. Failure to do so can result in death or electrical shock. ICE MAKER AUGER MOTOR CRUSH/CUBE SOLENOID Refer to page 4-9 for the procedure for servic- ing the crush/cube solenoid. Refer to page 4-9 for the procedure for servic- Unplug the refrigerator or disconnect the ing the ice maker auger motor. -
Page 53: Water Valve Solenoid
Electrical Shock Hazard Disconnect power before servicing. Replace all panels before operating. Failure to do so can result in death or electrical shock. WATER VALVE SOLENOID DOOR SWITCH Refer to page 4-22 for the procedure for servic- ing the water valve. Unplug the refrigerator or disconnect the power. -
Page 54: Diagnosis & Troubleshooting
DIAGNOSIS & TROUBLESHOOTING DIAGNOSIS Warmer Warmer Water Filter Cooler Cooler Power On/Off Freezer Refrigerator PRE-DIAGNOSTICS CHECKS Both the Power On/Off and the Water Filter Reset keys must be functional. The refrigera- • Confirm the refrigerator and freezer tem- tor LEDs will show the step number, with the peratures before beginning other checks. -
Page 55: Diagnostics Chart
DIAGNOSTICS CHART Step Component Tested Result* Comment Green Thermistor is within normal range. Freezer Thermistor. Thermistor is open or less than –20°F. Thermistor is shorted or greater than 115°F. Green Thermistor is within normal range. Refrigerator Thermistor. Thermistor is open or less than 10°F. Thermistor is shorted or greater than 115°F. -
Page 56: Troubleshooting Chart
TROUBLESHOOTING CHART PROBLEM POSSIBLE CAUSE TEST PROCEDURE-ACTION No DC control voltage from main See "Component Testing" section for main PCB test procedure. PCB to the inverter board. Condenser fan runs Control voltage wires loose or Check connections and repair as needed. but the compressor reversed. - Page 57 — NOTES —...
-
Page 58: Wiring Diagrams & Strip Circuits
WIRING DIAGRAMS & STRIP CIRCUITS WIRING DIAGRAM... -
Page 59: Strip Circuits
STRIP CIRCUITS THE COOLING CIRCUITS The Compressor Compressor Inverter Board RD/WH P7-3 P7-8 Electronic P5-2 P5-3 Control Board Thermistor The Condenser Fan Motor Condenser Fan Motor Electronic P6-1 WH/RD P5-2 Control Board... - Page 60 The Evaporator Fan Motor Electronic Control P5-2 P5-3 Board P7-9 P7-10 P7-4 P7-5 YL/RD WH/VT YL/BK YL/BU Evaporator Fan Motor THE DEFROST CYCLE The Defrost Heater Bimetal Defrost Heater Electronic P5-2 P6-4 Control Board...
- Page 61 — NOTES —...
-
Page 62: Product Specifications
WARRANTY INFORMATION SOURCES IN THE UNITED STATES: FOR PRODUCT SPECIFICATIONS AND WARRANTY INFORMATION CALL: FOR WHIRLPOOL PRODUCTS: 1-800-253-1301 FOR KITCHENAID PRODUCTS: 1-800-422-1230 FOR ROPER PRODUCTS: 1-800-447-6737 FOR TECHNICAL ASSISTANCE WHILE AT THE CUSTOMER’S HOME CALL: THE TECHNICAL ASSISTANCE LINE: 1-800-253-2870...
Need help?
Do you have a question about the KSBP25FKSS00 and is the answer not in the manual?
Questions and answers