Table of Contents
Advertisement
Advertisement
Table of Contents

Related Manuals for Fisher & Paykel Titan AeroTech OD302-B


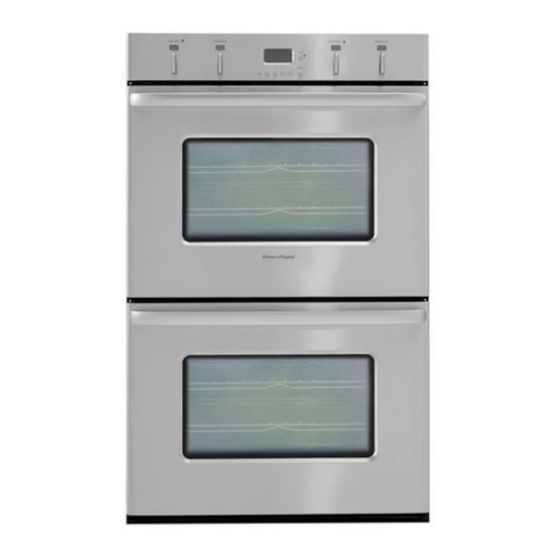
Summary of Contents for Fisher & Paykel Titan AeroTech OD302-B
- Page 1 ™ Model OD302–B Model OS302–B Service Version B USA/CANADA 599337A...
- Page 3 Service Manual 599337A: 302B Series Titan Oven July 2006 Manual 599337A – July 2006 The specifications and servicing procedures outlined in this manual are subject to change without notice. The latest version is indicated by the date and letter and replaces any earlier editions. Model Service version Description...
-
Page 4: Table Of Contents
Service Manual 599337A: 302B Series Titan Oven July 2006 Contents SERVICING REQUIREMENTS ............................7 & S ................................7 EALTH AFETY 1.1.1 Electrical Safety ..............................7 1.1.2 Electrostatic Discharge ............................7 1.1.3 Good Working Practices ............................7 1.1.4 Insulation Test ................................7 1.1.5 Sheet Metal Edges ..............................7 .................................8 PECIALISED OOLS... - Page 5 Service Manual 599337A: 302B Series Titan Oven July 2006 3.12 S .................................25 HORT LERT 3.13 T ..................................25 3.14 S ..................................25 LOCK 3.15 L ..................................26 ANGUAGE 3.16 O ...................................26 ESET DIAGNOSTICS ................................27 & T .......................27 NTERING THE ALES ECHNICIAN ...........................27 XITING THE ECHNICIAN ...........................27 ECHNICIAN...
- Page 6 Service Manual 599337A: 302B Series Titan Oven July 2006 7.18 O .................................57 AVITY 7.19 F ..................................57 HROUD 7.20 R ..................................58 UNNERS 7.21 O ..................................58 7.22 O – D ............................58 ISASSEMBLY 7.23 M ..............................61 ROBE OCKET 7.24 O ............................62 SSEMBLY 7.25 C ............................63 OMPONENT OCATION...
-
Page 7: Servicing Requirements
Service Manual 599337A: 302B Series Titan Oven July 2006 1. Servicing Requirements 1.1 Health & Safety Note: When servicing the Titan Aerotech™ oven, health and safety issues must be considered at all times. Specific safety issues are listed below with their appropriate icon. -
Page 8: Specialised Tools
Service Manual 599337A: 302B Series Titan Oven July 2006 1.2 Specialised Tools 1.2.1 Anti-Static Strap An anti-static strap is to be used as E.S.D. protection when replacing or handling electronic components. 1.2.2 Fisher & Paykel Smart Tool Handheld computer supplied in protective case with F&P diagnostics software and service information loaded: P/N 813140 (includes light pen P/N 425930). -
Page 9: Technical Overview
Service Manual 599337A: 302B Series Titan Oven July 2006 2. Technical Overview 2.1 Oven Weights OS302 Weight: 190 lbs. (86 Kg) OD302 Weight: 340 lbs. (154 Kg) 2.2 Power Rating Single Supply Voltage Rating Double Supply Voltage Rating 3wire 120/240v 5.1kW 3wire 120/240v 9.2kW... -
Page 10: Serial Number
Service Manual 599337A: 302B Series Titan Oven July 2006 2.6 Serial Number The serial number consists of three letters and six digits and contains the following information: Example: M 123456 Sequential Serial Number Manufacturing Plant Code FISHERPAYKUL Code indicates month of manufacture CUMBERLAND Code indicates year of manufacture Cumberland Code Letter C... -
Page 11: Oven Cavity Fan (Convection Fan)
Service Manual 599337A: 302B Series Titan Oven July 2006 2.7 Oven Cavity Fan (Convection Fan) The oven cavity fan will turn on eight seconds after the mode is selected. The fan should always operate when the fan element is on. Operational Modes: True Aero Aero Bake... -
Page 12: Active Vent Fan (Exhaust Fan)
Service Manual 599337A: 302B Series Titan Oven July 2006 Cooling Fan Speeds Cooling Fan Oven Mode Speed* Bake Aero Bake Warm True Aero Maxi Broil / Grill Broil / Grill Aero Broil / Grill Pastry Bake Aero Pastry Roast (Aero Broil / Grill 1 20 min) Roast (Bake for remainder) -
Page 13: Inner Broil / Grill Element
Service Manual 599337A: 302B Series Titan Oven July 2006 2.11 Inner Broil / Grill Element The inner broil / grill element will turn on eight seconds after the mode is selected. Operational Modes: Broil / Grill Maxi Broil / Grill Aero Broil / Grill Roast (first 20 minutes only) Self-Clean... -
Page 14: Smoke Eliminator Element (Catalytic Converter)
Service Manual 599337A: 302B Series Titan Oven July 2006 2.14 Smoke Eliminator Element (Catalytic Converter) (This is a non-serviceable part) The smoke eliminator element is designed to neutralise gases produced during cooking. Operational Modes: Broil / Grill Aero Broil / Grill Maxi Broil / Grill Self clean Bake... -
Page 15: Door Lock Motor
Service Manual 599337A: 302B Series Titan Oven July 2006 Door Lock Motor 2.19 The door lock will only operate during the Self-Clean Cycle and is designed to stop the oven door being opened when very high temperatures and potentially dangerous fumes are produced in the oven cavity. -
Page 16: Power Module
Service Manual 599337A: 302B Series Titan Oven July 2006 2.25 Power Module Figure 2.25 The power module is a Fisher & Paykel specific P.C.B. that drives oven lights, fans, elements and lock motors. It also monitors the sensors and micro-switches and provides power to the control panel. -
Page 17: Thermal Limiters
Service Manual 599337A: 302B Series Titan Oven July 2006 2.28 Thermal Limiters If a thermal limiter has tripped there will be no continuity across its contacts. Limiter Locations Figure 2.28a Note: TL = Thermal Limiter MTL = Microtemp limiter Double ovens have thermal limiters TL1 & TL2 and a microtemp limiter MTL. -
Page 18: Isolating Relay
Service Manual 599337A: 302B Series Titan Oven July 2006 MTL (Microtemp Limiter) This is a non-resettable thermal limiter positioned to detect electronics area over temperature caused by a cooling fan failure. It will cut power to the power transformers, disabling the oven when tripped. Capacity Rating: 25 Amps at 240 VAC. -
Page 19: Self-Clean Pyrolytic Cycle
Service Manual 599337A: 302B Series Titan Oven July 2006 2.32 Self-Clean Pyrolytic Cycle Duration: 3hrs Pyro Temp: 925°F (500°C) Heat-up time: 50 minutes approx. Holding time: 100 minutes approx. Cool-down time: 30 minutes If a Self-Clean Cycle will not start, check that there are no meat probes inserted and that the control knobs of the cavity that is not being cleaned (in a double oven) are in the ‘OFF’... -
Page 20: Oven Mode Element And Fan Profiles
Service Manual 599337A: 302B Series Titan Oven July 2006 2.33 Oven Mode Element and Fan Profiles If the oven door is opened during use the oven fan and elements will turn off until it is closed again. Oven Cool Broil/Grill Broil/Grill Oven Vent... -
Page 21: Use & Care Of The Oven
Service Manual 599337A: 302B Series Titan Oven July 2006 3. Use & Care of the oven 3.1 Setting the Clock The clock has a default 12-hour display and a minute timer function. ‘ 12:00’ will show and the colon will flash when the oven has been turned on at the wall. While the colon is flashing, rotate the PUSH TO CLEAR knob until the correct time of day is displayed. -
Page 22: Active Vent And Cooling Fans
Service Manual 599337A: 302B Series Titan Oven July 2006 • Warm. This is a constant low heat of 75 degrees C (165 degrees F) the oven fan circulates heat from the upper outer and the bake elements. • Roast. This is a two step program where, during the first stage, the complete broil / grill element and the oven fan come on to sear the meat. -
Page 23: Minute Timer
Service Manual 599337A: 302B Series Titan Oven July 2006 3.6 Minute Timer To set the timer: 1. Press TIMER. ‘Timer’ and the colon will flash in the clock display. 2. Rotate the PUSH TO CLEAR button to select the time needed. 3. -
Page 24: Set Automatic Stop Cooking
Service Manual 599337A: 302B Series Titan Oven July 2006 3.8 Set Automatic Stop Cooking To set Automatic Stop Cooking: 1. Press the STOP TIME button and turn the PUSH TO CLEAR knob to display the time the oven is to switch off. 2. -
Page 25: Temperature Scale
Service Manual 599337A: 302B Series Titan Oven July 2006 3.11 Temperature Scale The temperatures can be displayed as either Fahrenheit or Celsius. To change the temperature display: 1. Enter the User Select mode. 2. Turn the oven mode dial until ‘Temp Scale’ appears in the display. 3. -
Page 26: Language
Service Manual 599337A: 302B Series Titan Oven July 2006 3.15 Language This can be set to display the various settings in either American English (US), English (EN), French (FR) or Spanish (SP). To change the language setting: 1. Enter the User Select mode. 2. -
Page 27: Diagnostics
Service Manual 599337A: 302B Series Titan Oven July 2006 4. Diagnostics 4.1 Entering the Sales Mode & Technician Mode 1. Ensure all oven modes and temperature displays are set to OFF. 2. Ensure no cooking auto functions are set. 3. Enter the User Select mode by pressing and holding the TIMER button and then the CLOCK button, hold for approx. - Page 28 Service Manual 599337A: 302B Series Titan Oven July 2006 Oven Mode Oven Mode Knob Description Display Position (clockwise) Broil/Grill Element Inner. INNER Broil/Grill Element Outer. OUTER Fan Element and Oven Fan. ELEMNT Oven Cavity Fan. OVEN Throat Element. THROAT ELEMNT Bake element.
-
Page 29: Accessing Technical Data Log
Service Manual 599337A: 302B Series Titan Oven July 2006 Note: To clear a fault code from the log push ‘CLEAR’ when it is displayed in the temperature display. 4.4 Accessing Technical Data Log 1. Enter Technician Mode. (refer to Section 4.1) 2. -
Page 30: Fault Diagnostics
Service Manual 599337A: 302B Series Titan Oven July 2006 5. Fault Diagnostics 5.1 SYMPTOM: Oven electrical components are unresponsive POSSIBLE CAUSES: Clock not set after powering up Blown fuse Faulty supply wiring or connections Faulty power transformer Tripped microtemp limiter Faulty power module DIAGNOSIS: If the clock colon: is flashing, push the clock button to set the time. -
Page 31: Symptom: Control Buttons Or Clock Display Not Operating Correctly Or Unresponsive
Service Manual 599337A: 302B Series Titan Oven July 2006 5.2 SYMPTOM: Control Buttons or Clock Display not operating correctly or unresponsive POSSIBLE CAUSES: Loose connection to the power module Faulty clock module assembly Lens has come loose from adhesive Faulty power module DIAGNOSIS: If one of the clock display segments is flashing or is showing a warning then refer to the user guide for warning identification. -
Page 32: Symptom: Faulty Temperature Or Oven Mode L.c.d. Modules
Service Manual 599337A: 302B Series Titan Oven July 2006 5.5 SYMPTOM: Faulty Temperature or Oven Mode L.C.D. Modules POSSIBLE CAUSES: Loose connection to the clock module Faulty temperature or oven mode L.C.D. module DIAGNOSIS: If the fault is that one segment of the display is always on or always off, replace the L.C.D. -
Page 33: Symptom: Oven Under Cooking
Service Manual 599337A: 302B Series Titan Oven July 2006 5.7 SYMPTOM: Oven Under Cooking POSSIBLE CAUSES: Incorrect oven use Incorrect temperature scale used Faulty temperature sensor Faulty oven element Faulty oven cavity fan Blown thermal limiter Faulty power module DIAGNOSIS: Check that the oven is being operated correctly. -
Page 34: Symptom: Baking Burns On The Bottom
Service Manual 599337A: 302B Series Titan Oven July 2006 5.9 SYMPTOM: Baking burns on the bottom POSSIBLE CAUSES: Incorrect oven use Incorrect temperature scale used Faulty temperature sensor Faulty oven element Faulty oven cavity fan Faulty power module DIAGNOSIS: Check that the oven is being operated correctly. (check the oven Use & Care Guide for troubleshooting tips) Ensure the correct temperature scale has been set (°F or °C ) Check that the correct oven mode has been selected. -
Page 35: Symptom: Oven Heats Slowly Or Fails To Reach Preset Temperature
Service Manual 599337A: 302B Series Titan Oven July 2006 5.11 SYMPTOM: Oven heats slowly or fails to reach preset temperature POSSIBLE CAUSES: Incorrect oven use Faulty door switch Low supply voltage Faulty temperature sensor Faulty oven element / fan Faulty power module DIAGNOSIS: Ensure the oven door closes and seals correctly. -
Page 36: Symptom: Fault Code F1 Displayed In Tech Select Only
Service Manual 599337A: 302B Series Titan Oven July 2006 5.13 SYMPTOM: Fault Code F1 displayed in Tech Select only (Refer to 4.0 Diagnostics) CAUSE: Maximum allowable temperature (185°F, 85°C) around electronics was exceeded. DIAGNOSIS: Check for cooling fan faults or vent blockages. (refer to Section 5.19) 5.14 SYMPTOM: Fault Code F2 displayed CAUSE: Maximum allowable cavity temperature was exceeded during Self-Clean Cycle. -
Page 37: Symptom: Fault Code F5 Displayed
Service Manual 599337A: 302B Series Titan Oven July 2006 5.17 SYMPTOM: Fault Code F5 displayed CAUSE: A communications error occurred between the clock module and the power module. DIAGNOSIS: Check the connections between the power module and clock module. If the fault code re-occurs, replace the power module. (refer to Servicing Instructions Section 7.9) 5.18 SYMPTOM: Fault Code F7 displayed CAUSE:... -
Page 38: Tracing Oven Cavity Fan Faults
Service Manual 599337A: 302B Series Titan Oven July 2006 5.20 Tracing oven cavity fan faults (Refer to Technical Overview Section 2.7) PROCEDURE: If oven cavity fan will not operate 1. Enter Technician Mode diagnostics to test the oven cavity fan operation. (refer to Diagnostics Section 4.3) 2. -
Page 39: Tracing Element Faults
Service Manual 599337A: 302B Series Titan Oven July 2006 5.22 Tracing element faults (Refer to Technical Overview Section 2.10-2.15 & 2.33) PROCEDURE: If the element does not turn off (element run-away) Note: In normal operation the element will cycle (turn on & off) when the cavity temperature has reached the set point. -
Page 40: Tracing Oven Temperature Sensor Faults
Service Manual 599337A: 302B Series Titan Oven July 2006 5.23 Tracing oven temperature sensor faults (Refer to Technical Overview Section 2.16) PROCEDURE: 1. Enter the Technician Mode diagnostics to view the cavity temperature reading. (refer to Diagnostics Section 4.3) 2. Record the cavity temperature reading and substitute the oven temperature sensor with a new sensor. -
Page 41: Tracing Oven Door Switch And Door Lock Switch Faults
Service Manual 599337A: 302B Series Titan Oven July 2006 5.25 Tracing oven door switch and door lock switch faults (Refer to Technical Overview Section 2.31) PROCEDURE: Oven Door Switch 1. Push the door switch plunger in and out to ensure it is operating correctly. 2. -
Page 42: Determining Which Power Module Is Faulty In A Double Oven (F4 Or F5 Fault Codes)
Service Manual 599337A: 302B Series Titan Oven July 2006 5.26 Determining which power module is faulty in a double oven (F4 or F5 Fault Codes) (Refer to Technical Overview Section 2.25) Set up the double oven as if it were a single oven so that the faulty power module can be eliminated. -
Page 43: Wiring Diagrams
Service Manual 599337A: 302B Series Titan Oven July 2006 6. Wiring Diagrams 6.1 Double Oven USA Wiring Schematic... -
Page 44: Single Oven Usa Wiring Schematic
Service Manual 599337A: 302B Series Titan Oven July 2006 6.2 Single Oven USA Wiring Schematic... -
Page 45: Service Procedures
Service Manual 599337A: 302B Series Titan Oven July 2006 7. Service Procedures In order to service components of the oven, certain procedures must be followed. These procedures are as follows: To avoid stripping screws do not over tighten when reassembling parts. If using a screw gun have the torque setting on low. -
Page 46: Components In Back Panel Area
Service Manual 599337A: 302B Series Titan Oven July 2006 7.3 Components in Back Panel Area 1. Remove the oven from the joinery cavity. (refer to Section 7.1) 2. Remove the six rear-most screws on the top panel. 3. Remove the two screws fixing the cable connector panel to the back panel. 4. -
Page 47: Function And Temperature Switch Modules
Service Manual 599337A: 302B Series Titan Oven July 2006 7.6 Function and Temperature Switch Modules Location: Control Panel Removal 1. Follow the general servicing instructions for components around the control panel area. (refer to Section 7.2) 2. Remove the temperature/oven mode knobs and the clock twist button. Note: To best work on the control panel turn it face down and place blocks of polystyrene under the ends to elevate it off the working surface. -
Page 48: Clock Module Or Buttons
Service Manual 599337A: 302B Series Titan Oven July 2006 L.C.D Lenses: Removal 1. Follow the procedure for removal of L.C.D modules above to step 4. 2. Remove the damaged lens and clean the old adhesive strip area. 3. Remove the adhesive tape backing strip from the replacement lens. 4. -
Page 49: Power Module
Service Manual 599337A: 302B Series Titan Oven July 2006 7.9 Power Module Location: Under the service panel Removal 1. Follow the general servicing instructions for components around the service panel area. (refer to Section 7.4) 2. Remove all wires and wire harnesses and transfer them to the replacement power module. - Page 50 Service Manual 599337A: 302B Series Titan Oven July 2006 Figure 7.9c Figure 7.9d...
-
Page 51: Power Transformer
Service Manual 599337A: 302B Series Titan Oven July 2006 7.10 Power Transformer Location: Under the service panel Removal 1. Follow the general servicing instructions for components around the service panel area. (refer to Section 7.4) 2. Remove the top panel. 3. -
Page 52: Oven Lamp Glass And Bulb
Service Manual 599337A: 302B Series Titan Oven July 2006 Follow the reassembly procedure. (refer to Section 7.5) 7.13 Oven Lamp Glass and Bulb Location: Oven cavity back corners and top of the oven cavity opening. Removal 1. Remove the glass cover by swivelling the Flat head retaining tab upward to clear the edge of Screwdriver... - Page 53 Service Manual 599337A: 302B Series Titan Oven July 2006 For Front Lamp Assembly Removal 1. Follow the general servicing instructions for components in the control panel area. (refer to Section 7.2) 2. Remove the lamp cover and bulb. (refer to Section 7.13) 3.
-
Page 54: Oven Elements
Service Manual 599337A: 302B Series Titan Oven July 2006 7.15 Oven Elements Broil / Grill Element Location: Top of the oven cavity Removal 1. Remove the fan shroud. (refer to Section 7.19) 2. Remove the screws securing the Broil / Grill element to the top of the oven cavity and the support frame to the cavity roof. - Page 55 Service Manual 599337A: 302B Series Titan Oven July 2006 Bake element Location: Under the oven cavity Removal 1. Follow the general servicing instructions for components in Largest the back panel area. (refer to Section 7.3) Ducting 2. Remove the two largest vent ducting sections. Sections For Single Ovens and Double Oven Lower Cavity 1.
-
Page 56: Cooling Fan
Service Manual 599337A: 302B Series Titan Oven July 2006 7.16 Cooling Fan Location: Back and top panel areas Removal Follow the general servicing instructions for components in the back panel area. (refer to Section 7.3) For single ovens and upper cooling fan on double ovens. 1. -
Page 57: Oven Cavity Fan
Service Manual 599337A: 302B Series Titan Oven July 2006 4. Remove the vent fan wires and transfer them to the replacement fan. 5. Separate the vent fan from the vent tube. Reassembly Refit in reverse manner. Follow the reassembly procedure. (refer to Section 7.5) 7.18 Oven Cavity Fan Location: Back panel area Removal... -
Page 58: Runners
Service Manual 599337A: 302B Series Titan Oven July 2006 7.20 Runners Location: Side walls of oven cavity Removal 1. Lift the clip at the front of the runners. 2. Lift the front of the runners away from the side wall. 3. - Page 59 Service Manual 599337A: 302B Series Titan Oven July 2006 Door Inner Assembly Figure 7.22a Glass Pane removal 1. Remove the four screws securing the top retaining bracket. (no. 1) 2. Loosen the five screws on the insulation retainer panel. (no. 7) 3.
- Page 60 Service Manual 599337A: 302B Series Titan Oven July 2006 Door Outer Assembly Figure 7.22b Handle removal 1. Remove the four handle retaining screws in the top corners of the outer door assembly. (no’s 9&11) Reassembly Refit in reverse manner. Glass Pane removal 1.
-
Page 61: Meat Probe Socket
Service Manual 599337A: 302B Series Titan Oven July 2006 Door Hinge removal 1. Remove the heat reflective glass pane. (no. 1, refer previous) 2. Loosen the two inner screws on the outer door glass bracket and remove the three screws down the side of the bracket. (no. 5) 3. -
Page 62: Oven Door Lock Assembly
Service Manual 599337A: 302B Series Titan Oven July 2006 7.24 Oven Door Lock Assembly Location: Left hand side panel If the door lock is engaged and the door cannot be opened, refer to the following procedure. 1. Remove the oven from the joinery cavity. (refer to Section 7.1) 2. -
Page 63: Component Location Guide
Service Manual 599337A: 302B Series Titan Oven July 2006 7.25 Component Location Guide For US Products Isolating Relay Clock Module Power L.C.D./Switch Transformer Modules Power Module Microtemp Limiter (93°C) XY- Capacitor Broil/Grill Vent Fan Elements Figure 8a Cooling Fan Door Lock Assy Thermal Limiter Fan Element... -
Page 64: N O T E S
Service Manual 599337A: 302B Series Titan Oven July 2006 8. N O T E S...