
Subscribe to Our Youtube Channel
Related Manuals for Ekofires eko 5510


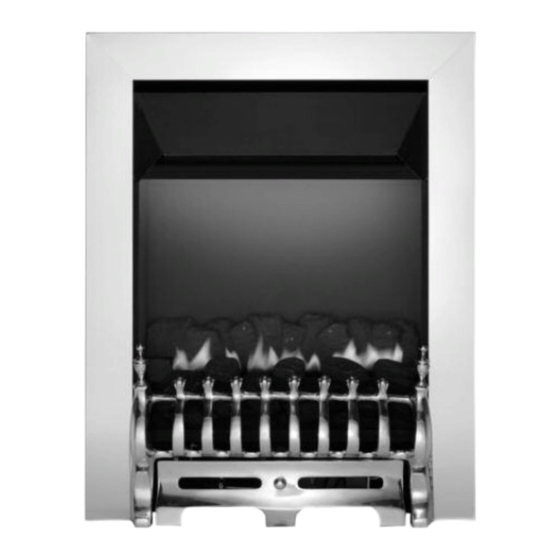
Summary of Contents for Ekofires eko 5510
- Page 1 All instructions must be handed to user for safekeeping Revision B - 08/11 Country(s) of destination - GB/IE eko 5510 eko 5520 eko 5530 high efficiency flueless gas fire...
- Page 2 Eko 5510 Eko 5520 Eko 5530 © 2009 Focal Point Fires plc.
-
Page 3: Table Of Contents
I N S T A L L A T I O N I N S T R U C T I O N S Section Contents Page No. Section Contents Page No. Important Notes 7.1 Cable Fixing Appliance Data 7.2 Checking the Burner & Spark Gap Installation Requirements 7.3 Fitting the Fuel Bed (Euphoria models) 10 3.1 Room Sizing... -
Page 4: Appliance Data
APPLIANCE DATA All Models G20 Natural Gas CAT I2H Gas Group 20 mbar Inlet Pressure (± 2.0mbar) Regulator Pressure 2.3 kW Max Energy Input (Gross) 2.07 kW Max Energy Input (Net) 0.23 m 3 /h Max Gas Rate 1.3 kW Min Energy Input (Gross) 1.17 kW Min Energy Input (Net) -
Page 5: Installation Method
SITE REQUIREMENTS (continued) ‘b’ Basic opening sizes (all dimensions in mm) The basic opening dimensions for the appliance are as follows; Dimension: Eko 5510 & Eko 5520 Eko 5530 ‘a’ minimum ‘a’ maximum ‘b’ minimum ‘ a’ ‘b’ maximum ‘c’ minimum ‘c’... - Page 6 SITE REQUIREMENTS (continued) Clearances to non-combustibles Non combustible surfaces are defined as brick, metal, marble, concrete etc. and also a number of man- made materials impervious to flame. If in doubt refer to the material manufacturer for further information before proceeding with installation. The wall/back panel for the opening must always be non-combustible.
-
Page 7: Ventilation
Cable fixing kit Screw pack including fibre rawlplugs Eko 5530 models screw pack consists of: No. 8 pozi self tapping screws Eko 5510 & Eko 5520 screw pack consists of: No. 8 pozi self tapping screws M5 x 7 screws APPLIANCE INSTALLATION Note: Ensure that the gas supply is isolated before commencing installation of the appliance. -
Page 8: Gas Supply Routes
GAS SUPPLY ROUTES Following preparation of the fixing method, the concealed gas supply (if required), can now be installed. When the opening is ready for installation the gas supply can be routed. If the gas pipe has been sleeved the ends of the sleeving must be sealed. The end of the 8mm pipe should be temporarily sealed to prevent the ingress of debris during fixing. -
Page 9: Installation Method 2
INSTALLATION METHOD 2 (recessing into a non-combustible wall) This method allows for installation of the appliance with the rear of the firebox recessed into the inner leaf of a cavity wall. This should enable a standard fire surround and back panel/hearth set to be fitted to the wall with the fire presented naturally in a flush fitted manner. -
Page 10: Installation Method 3
INSTALLATION METHOD 3 (timber framed buildings) Where removal of any part of a timber frame is undertaken the structural integrity of the wall must be retained. The advice of your local building control officer should be sought. If the property is under any NHBC warranty it is also advised that their advice on this kind of modification is sought. -
Page 11: Final Fitting
Eko 5510 & Eko 5520 models : If the appliance is to be wall mounted then the entire base of the appliance must be supported by a non-combustible shelf. The dimensions of such a shelf are given in section 4.0 (site requirements). -
Page 12: Checking The Burner & Spark Gap
CHECKING THE BURNER AND SPARK GAP Non-coal effect models : There are no imitation fuel bed components to install. The appliance features a ribbon burner which is designed to produce a continuous band of flame over it’s length. The burner should be visually inspected to ensure it is free from any foreign matter. -
Page 13: Fitting Decorative Hood/Frame
The appliance is supplied with a decorative frame and hood. Attach the hood using two M6 screws as shown in figure 16. Figure 16 Eko 5510 & Eko 5520 models : Remove all protec- tive film from the frame. The frame is retained by four magnets on the front face of the firebox. -
Page 14: Setting Pressure
SETTING PRESSURE Figure 20 The pressure test point is located on the left hand side of the appliance, on the main burner pipe, next to the brass restrictor/connector. Release the setting pressure test point screw (shown in figure 20), and attach a pressure gauge. Light the fire on the HIGH setting. -
Page 15: Cleaning The Coals
CLEANING THE CERAMICS Remove the frame and front/facia and place to one side. Remove the hood. Remove the glass door assem- bly. Remove the ceramic components. Gently clean in the open air with a soft brush. Be careful not to cre- ate dust from the ceramics. -
Page 16: Catalyst
CATALYST It is recommended that the catalytic converter is inspected for signs of damage and dirt during routine serv- icing procedures. The expected life of the catalyst is in excess of 11,000 hours (10 years of normal use). After this time the catalytic converter should be replaced. If there are any deposits of dirt or soot on the catalyst they should be cleaned with a soft brush and a vac- uum cleaner. -
Page 17: Troubleshooting Guide
10.0 TROUBLESHOOTING GUIDE Fire sparks but pilot does not light • No gas to fire, check isolators are open and gas supply is on. • Pipework blockage, clean out. • Air not fully purged, re purge supply or wait longer. •... - Page 18 U S E R I N S T R U C T I O N S Section Contents Page No Important Notes Fire Front/Facia Clearances to Combustibles Ventilation and Room Size Operating Instructions Combustion Monitoring System Fitting the Fuel Bed Cleaning Servicing 10.0...
-
Page 19: Clearances To Combustibles
FIREFRONT/FACIA This fire is supplied with a particular style of fire front. Use of the fire front will ensure an adequate air- flow under the firebox for the correct functioning of this appliance. Compliance with safety standards can- not be guaranteed when another style of front is used. CLEARANCES TO COMBUSTIBLES Clearances to non-combustibles Non combustible surfaces are defined as brick, metal, marble, concrete etc. -
Page 20: Operating Instructions
VENTILATION AND ROOM SIZE Purpose provided ventilation of 100cm is required for this appliance. An openable window or equivalent is also required. Any ventilation fitted must comply with BS 5871 part 4 and BS 5440 part 2. Ventilation fit- ted under, or within immediate vicinity of the appliance must not be used as it may adversely effect per- formance of the combustion monitoring system (ODS) system. - Page 21 Hood (Eko 5530) F550234 Hood (Eko 5510 & Eko 5520 models) F820191 Silver Decorative facia assembly (Eko 5530 models) F820190 Silver Decorative frame (Eko 5510 & Eko 5520 models) Please enquire Firefront (Eko 5510 & Eko 5520 models) F730041 Gas Valve F730069...
Need help?
Do you have a question about the eko 5510 and is the answer not in the manual?
Questions and answers