Table of Contents
Advertisement
Quick Links
Advertisement
Table of Contents

Subscribe to Our Youtube Channel
Related Manuals for Ekofires eko 3050


Summary of Contents for Ekofires eko 3050
- Page 1 All instructions must be handed to user for safekeeping Revision B - 03/11 Country(s) of destination - GB/IE eko 3030 eko 3035 eko 3040 eko 3050 eko 3060 eko 3065 eko 3080 eko 3085 eko 3090 eko 3095...
- Page 2 Eko 3030 Eko 3040 Eko 3060 Eko 3050 Please note : Except where otherwise stated, all rights, including copyright in the text, images and layout of this booklet is owned by Focal Point Fires plc. You are not permitted to copy or...
- Page 3 These instructions cover all control options, and all fuel effect options. See the relevant sections of these instructions for further details. Manufactured by : Focal Point Fires plc. Christchurch, Dorset BH23 2BT Tel: 01202 588 638 Fax: 01202 588 639 www.ekofires.co.uk e-mail: sales@ekofires.co.uk © 2011 Focal Point Fires plc.
-
Page 4: Table Of Contents
Section Contents Page Section Contents Page No. Important Notes 11.2 Fitting the Burner Unit Appliance Data 12.0 Fuel Bed Layout Installation Requirements 12.1 Replacing the battery (slide control models) Site Requirements 13.0 Fitting the Firefront / Frame Debris Collection Space 13.1 Gas Connection Ventilation... -
Page 5: Appliance Data
GC1, as regulations allow. Eko 3030, Eko 3035, Eko 3040, Eko 3050, Eko 3080, Eko 3085, Eko 3090, Eko 3095 models only : This appliance has been tested for use in a pre-cast block flue complying with BS 1289. In accordance with BS 1289 part 1, pre-cast flues built with directly plastered faces (front or rear) are not correctly installed as to ensure proper operation with any type of gas fire. -
Page 6: Site Requirements
125mm (5in) minimum diameter lined brick or stone. 125mm (5in) minimum diameter twin wall flue conforming to BS 715. Pre-cast block flue complying with BS 1289. (Eko 3030, Eko 3035, Eko 3040, Eko 3050, Eko 3080, Eko 3085, Eko 3090, Eko 3095 models only) Any existing under grate draught device must be sealed off. -
Page 7: Debris Collection Space
Eko 3030, Eko 3035 - Eko 3050 - Eko 3080, Eko 3085, Eko 3090, Eko 3095 models : 375mm min opening width The firebox, base of the flue box, and hearth... -
Page 8: Unpacking The Appliance
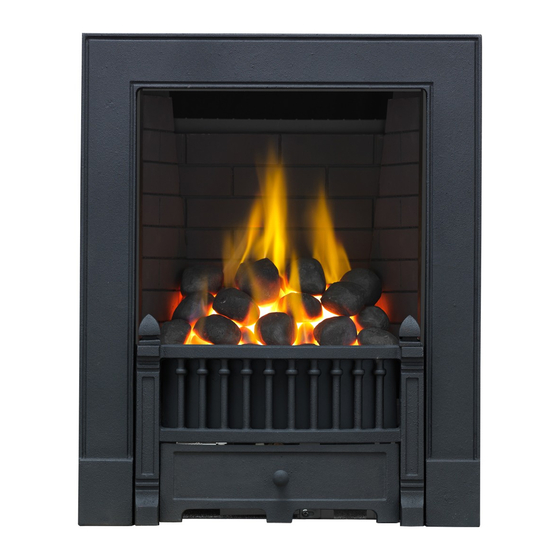
DESCRIPTION Firebox and burner tray assembly Decorative cast frame, front and control cover (Eko 3050 & Eko 3080, Eko 3085, Eko 3090, Eko 3095 models only) Decorative extruded frame with detachable control cover (Eko 3040 models only) One piece decorative trim (Eko 3030, Eko 3035 & Eko 3060, Eko 3065 models only) Cast firefront (Eko 3030, Eko 3035 &... -
Page 9: Preparing The Opening
PREPARING THE APPLIANCE Eko 3030, Eko 3035, Eko 3040, Eko 3050, Eko 3085, Eko 3085, Eko 3090, Eko 3095 models (continued) SPIGOT RESTRICTOR (All models): If installing the fire into a Class 1 or good Class 2 flue, simply bend up (stitch bend join) the spigot restrictor into position in the flue outlet of the fire. -
Page 10: Fitting The Firebox
Eko 3040, Eko 3050 and Eko 3085, Eko 3085, Eko 3090, Eko 3095 models : If an over hearth supply rout- ing is necessary, then the supply pipe may be routed beneath the control cover. -
Page 11: Fitting The Burner Unit
Eko 3050 & 3080, Eko 3085 models, Eko 3090, Eko 3095 ; Remove the decorative frame from it’s protective pack- aging.Eko 3050 : The frame is retained onto the firebox with three mounting brackets, on at the top of the frame and one on each leg of the frame. -
Page 12: Operating The Fire (Remote Control)
14.2 OPERATING THE FIRE (remote control models) The pilot is visible through the left hand side of the front ceram- ic strip. Turn the main burner control (shown on left hand side of control valve) knob fully anti-clockwise. Turn ignition knob (shown on right hand side of control valve) slightly left towards the ignition position until reaching the stop, press down and hold for 5 seconds (only pilot gas is flowing) Continue pressing down the knob while turning further to the left... -
Page 13: Flue Spillage Monitoring System
1. Lay out the dust sheet and tools. 2. Carefully remove the ceramic components. 3. Remove the cast front fret (Eko 3030, Eko 3035 models), or remove the combined frame and firefront (Eko 3040 and Eko 3050 models). © 2011 Focal Point Fires plc. - Page 14 16.0 SERVICING (continued) 4. Remove the two screws that retain the data/control plate. 5. Disconnect the gas supply, and remove the two securing screws in the tray legs. 6. Remove the burner tray. 7. Remove firebox as described. 8. Check the fireplace opening for rubble accumulation and remove. If debris is excessive, initiate remedial work on the flue.
-
Page 15: Troubleshooting Guide
17.0 TROUBLESHOOTING GUIDE Fire sparks but pilot does not light No gas to fire, check isolators are open. Pipework blockage, clean out. Air not fully purged, repurge supply or wait longer. Spark earthing to metal work, reset gap correctly. Blocked pilot, clean out internally. Pilot lights but then goes out Severe restriction in gas supply, clear obstruction. - Page 16 USER INSTRUCTIONS Section Contents Page No. Important Notes Firefront Clearances to Combustibles Ventilation Fuel Bed Layout (coal versions) Fuel Bed Layout (pebble versions) Fuel Bed Layout (log versions) Servicing Operating Instructions Flue Spillage Monitoring System Cleaning 10.0 Cleaning the Ceramics 11.0 List of spare parts IMPORTANT NOTES...
- Page 17 CLEARANCES TO COMBUSTIBLES A combustible shelf may be fixed to the wall above the fire, providing that it complies with the dimensions given below. Maximum depth of shelf Minimum distance from finished hearth surface to underside of shelf 100mm (4in) 745mm (29 1/4 in) 150mm (6in) 845mm (33 1/4 in)
- Page 18 FUEL BED LAYOUT (coal effect models) - continued 3. Open the bag of 16 moulded coals. All of the coals are the same. Take five coals and place them as shown. Care should be taken to ensure that the coals bridge the gap between the front coal and the four coal supports at the front of the matrix.
- Page 19 FUEL BED LAYOUT (continued) 2. Open the bag of 16 ceramic pebbles. All of these pebbles are the same size. Take five pebbles and place them as shown. Care should be taken to ensure that the pebbles bridge the gap between the front strip and the four supports at the front of the matrix.
- Page 20 FUEL BED LAYOUT - (Log effect option) - (Eko 3030, Eko 3035, Eko 3080, Eko 3085, continued Eko 3090, Eko 3095 models only) 2. Open the bag of 9 moulded ceramic logs. All of the logs except two are the same. Take the largest log (numbered 16) and place it as shown.
- Page 21 OPERATING THE FIRE (manaul control models) The pilot is visible through the left hand side of the front ceramic strip. Rotate the coals or pebbles for good viewing. Push in and turn the control knob to the SPARK position, and hold there for a few seconds. Continue turning anti-clockwise through the spark click to the PILOT light position, ensuring the pilot has lit.
- Page 22 FLUE SPILLAGE MONITORING SYSTEM This fire is fitted with a flue spillage safety device (ODS). If the fire shuts down during use for no apparent reason then several reasons may be suspected. If a door or window has been opened creating a draught, then pilot disturbance could be the problem, and removal of the draught should resolve this.
Need help?
Do you have a question about the eko 3050 and is the answer not in the manual?
Questions and answers