Brother S-6200A Instruction Manual
Single needle straight lock stitcher with thread trimmer
Hide thumbs
Also See for S-6200A:
- Parts manual (54 pages) ,
- Product information (2 pages) ,
- Manual (2 pages)

Related Manuals for Brother S-6200A


Summary of Contents for Brother S-6200A
- Page 1 S-6200A INSTRUCTION MANUAL Please read this manual before using the machine. Please keep this manual within easy reach for quick reference. SINGLE NEEDLE STRAIGHT LOCK STITCHER WITH THREAD TRIMMER...
- Page 2 Thank you very much for buying a BROTHER sewing machine. Before using your new machine, please read the safety instructions and the explanations given in the instruction manual. With industrial sewing machines, it is normal to carry out work while positioned directly in front of moving parts such as the needle and thread take-up, and consequently there is always a danger of injury that can be caused by these parts.
-
Page 3: Safety Instructions
) indicates something that you must do. The picture inside the circle indicates the · · · · · nature of the thing that must be done. (For example, the symbol at left means “you must make the ground connection”.) S-6200A... - Page 4 Contact your Brother dealer or a qualified electrician for any electrical work that may need to Secure the table so that it will not move when tilting be done.
-
Page 5: Maintenance And Inspection
If the table moves, it may crush your feet or cause other injuries. Ask your Brother dealer or a qualified electrician to carry out any maintenance and inspection of the Use both hands to hold the machine head when electrical system. - Page 6 The following warning labels appear on the sewing machine. Please follow the instructions on the labels at all times when using the machine. If the labels have been removed or are difficult to read, please contact your nearest Brother dealer. Touching areas where high voltages are present can Be careful not to get your hands result in severe injury.
-
Page 7: Table Of Contents
7-2. Sewing start and end backtack stitches ..33 7-3. Sewing continuous backtack stitches..... 34 7-4. Sewing fixed stitches ........35 7-5. Sewing name labels ........36 7-6. Sewing pleat presser stitches......37 7-7. Using the lower thread counter ...... 38 S-6200A... -
Page 8: Machine Specifications
5 mm Lifting lever Presser foot height Knee lifter 13mm Feed dog height 0.8 mm 1.2 mm Needle (DB x 1, DP x 5) #11 - #18 #19 - #22 Motor AC servo motor (4-pole, 450W) Control circuit Microprocessor S-6200A... -
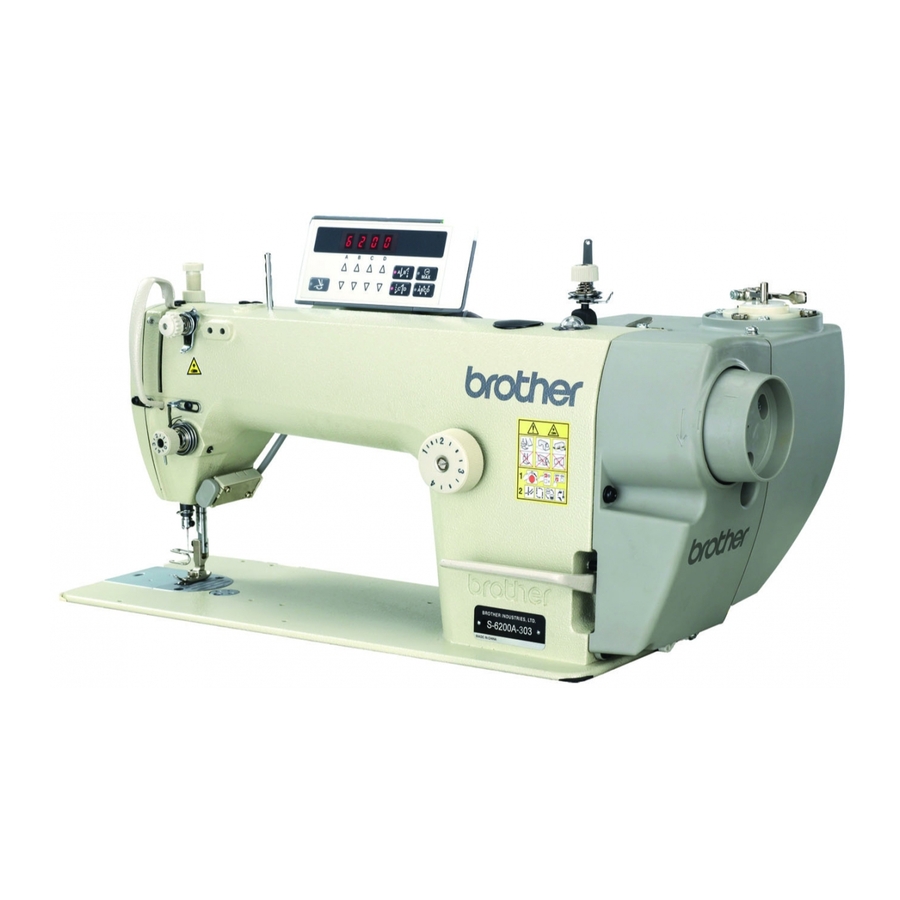
Page 9: Names Of Major Parts
(9) Lifting lever (10) Machine pulley (11) Reverse lever (12) Stitch length dial (13) Actuator switch (14) Operation panel (15) Cotton stand (16) Control box Safety devices (17) Finger guard (18) Thread take-up cover (19) Pulley cover (20) Motor cover S-6200A... -
Page 10: Installation
If the table moves, it may crush your feet or cause other injuries. Contact your Brother dealer or a qualified electrician for any electrical work that may need to be done. Use both hands to hold the machine head when tilting it back or returning it to its original position. -
Page 11: Installation
1956B 3-2. Installation 1. Control box (1) Control box (2) Bolts [3 pcs] (3) Nuts [3 pcs] (4) Spring washers [3 pcs] (5) Washers [3 pcs] 2. Connecting rod (6) Connecting rod (7) Nut 1957B S-6200A... -
Page 12: Oil Pan
(1) Rubber cushions [2 pcs] (2) Nails [4 pcs] 5. Knee lifter complying bar (3) Knee lifter complying bar 3830M 6. Machine head (1) Hinges [2 pcs] (2) Machine head * Bind the cords together and pass them through the cord hole. 1958B S-6200A... -
Page 13: Operation Panel
(5) is at the desired position within a distance of 13 mm of the needle plate when the knee liter plate (1) is fully pressed. 9. After adjustment is completed, securely tighten the nut (9). Within 13 mm 3878M S-6200A... - Page 14 Figure [A], and then securely tighten it with the four screws (4). * Fit the end of the pulley cover (5) into the grooves in the motor cover (3) (in 3 places) as shown in Figure [B]. 1961B S-6200A...
-
Page 15: Lubrication
Use only the lubricating oil (Nippon Oil Corporation Sewing Lube 10N; VG10) specified by Brother. * If this type of lubricating oil is difficult to obtain, the recommended oil to use is <Exxon Mobil Essotex SM10;... -
Page 16: Connecting The Cords
Touching areas where high voltages are present can result in severe injury. CAUTION Contact your Brother dealer or a qualified electrician When securing the cords, do not bend the cords for any electrical work that may need to be done. -
Page 17: Connecting The Cords
(2) using the repeat cable tie (1), otherwise vibration from the sewing machine may cause the cords <Securing> to become disconnected, which can cause problems with the operation of the control box. Cords <Closing the cover> 4141M S-6200A... -
Page 18: Other Cords
<Seen from underneath table> Take care when tapping in the staples (3) to make sure that they do not pierce the cords. extension cords, otherwise machine operation problems may result. Control box Green and yellow wire (ground wire) 2129B S-6200A... - Page 19 NOTE: Take care when tapping in the staples (5) to make sure that they do not pierce the cords. extension cords, otherwise machine operation problems may result. Green and yellow wire (ground wire) 1965B S-6200A...
- Page 20 NOTE: Take care when tapping in the staples (7) to make sure that they do not pierce the cords. extension cords, otherwise machine operation problems may result. Green and yellow wire (ground wire) 1967B S-6200A...
-
Page 21: Test Operation (Operating The Treadle)
NOTE: If the sewing machine operates when the treadle (1) is depressed while the machine head is tilted back, the safety switch is probably faulty. Contact the place of purchase. S-6200A... -
Page 22: Adjusting The Treadle Operation
(6) from the position in figure A to the position in figure B. The treadle stroke will then be increased by approximately 27 %. At this time, the treadle forward and backward depression sensitivity will change, so readjust if necessary. 4260M S-6200A... -
Page 23: Preparation Before Sewing
* There is an anti-spin spring (3) inside the bobbin case. The anti-spin spring (3) prevents the bobbin from racing at times such as during thread trimming. * Use bobbins (2) made of light alloy as specified by BROTHER. For thick materials 2121M... -
Page 24: Winding The Lower Thread
* Loosen the screw (5) and move the bobbin presser (6) to adjust the amount of thread wound onto the bobbin. NOTE: The amount of thread wound onto the bobbin should be a maximum of 80 % of the bobbin capacity. More thread Less thread 4154M 2124M S-6200A... -
Page 25: Installing The Bobbin Case
(2), and then pull it out from the thread guide (3). 4. Check that the bobbin turns clockwise when the thread is pulled. 2132B 5. Hold the latch (4) on the bobbin case and insert the bobbin case into the rotary hook. 2133B S-6200A... -
Page 26: Threading The Upper Thread
The machine may operate if the treadle is depressed by mistake, which could result in injury. Turn the machine pulley and raise the thread take-up (1) before threading the upper thread. This will make threading easier and it will prevent the thread from coming out at the sewing start. 1970B S-6200A... -
Page 27: Adjusting The Stitch Length
If this is done, the thread wiper (2) will operate after the thread is trimmed. 1972B 4-8. Using the knee lifter The presser foot (2) can be raised by pressing the knee lifter plate (1). 1973B S-6200A... -
Page 28: Using The G1A Operation Panel (Basic Operations)
If the thread trimming lock has been set, the thread wiper key (6) will be disabled. (For details on the thread trimming lock, refer to “6-4. Thread trimming lock”.) If thread trimming lock is set when the indicator of this key is illuminated, the indicator of the thread wiper key (6) will switch off. 4174M S-6200A... -
Page 29: Sewing Start And End Backtack Stitches
If the treadle is depressed backward before sewing of the set number of start backtack stitches is complete, end backtacking will not be carried out. If thread trimming lock is set, the sewing machine will stop in the needle up position 2160M without thread trimming being carried out. S-6200A... -
Page 30: Sewing Continuous Backtack Stitches
If the treadle is depressed again, operation will resume from the point where it was interrupted. If thread trimming lock is set, the sewing machine will stop in the needle up position without thread trimming being carried out. 2159M S-6200A... -
Page 31: Using The G1A Operation Panel (Advanced Operations)
4204M 2138M 2139M The setting will be stored and the display will (Setting item) return to the setting item. 4205M Setting mode will be exited and normal operation will be possible. 4206M S-6200A... -
Page 32: Slow Start
4208M 2138M 2139M The setting will be stored and the display will (Setting item) return to the setting item. 4209M Setting mode will be exited and normal operation will be possible. 4206M S-6200A... -
Page 33: Correction Sewing
4208M 2138M 2139M The setting will be stored and the display will (Setting item) return to the setting item. 4211M Setting mode will be exited and normal operation will be possible. 4206M S-6200A... -
Page 34: Thread Trimming Lock
4208M 2138M 2139M The setting will be stored and the display will (Setting item) return to the setting item. 4213M Setting mode will be exited and normal operation will be possible. 4206M S-6200A... -
Page 35: Setting The Maximum Sewing Speed
While the indicator of the MAX key is illuminated, all keys other than the keys for the A and B columns will be disabled. If the MAX key is pressed once more, the indicator of the MAX key will switch off and normal key operations can then be carried out. S-6200A... -
Page 36: Adjusting The Needle Up Stop Position
1974B 2138M 2139M The setting will be stored and the display will return (Setting item) to the setting item. 4220M Normal sewing machine operation will then be possible. 4206M * For details on other adjustment items, refer to the Service Manual. S-6200A... -
Page 37: Lock Function
“in.AL” will appear in the display (1). press the power ON switch.) Once initialization is complete, the “in.AL” appearing in the display (1) will disappear and normal sewing machine operation will then be possible. 4206M (Press for 2 seconds or more) S-6200A... -
Page 38: Using The G5A Operation Panel (Basic Operations)
A, B, C and D, the thread is trimmed automatically. 4163M Fixed stitch key When this key is pressed so that the indicator illuminates, the number of stitches (0-1999) in the E stitch number display is sewn, and then the sewing machine stops automatically. 4164M S-6200A... - Page 39 (18) is disabled. If you press the thread trimming lock key (13) so that its indicator illuminates while the indicator of the thread wiper key (18) is illuminated, the indicator of the thread wiper key (18) will switch off. 4174M S-6200A...
-
Page 40: Sewing Start And End Backtack Stitches
If the treadle is depressed backward before sewing of the set number of start backtack stitches is complete, end backtacking will not be carried out. If the indicator of the thread trimming lock key is illuminated, the sewing machine will stop in the needle up position without thread trimming being carried out. 2160M S-6200A... -
Page 41: Sewing Continuous Backtack Stitches
When the AUTO key is pressed to turn on the automatic sewing function, operation will be carried out automatically from continuous backtack sewing through to thread trimming just by depressing the treadle once, without needing to keep it depressed continuously. S-6200A... -
Page 42: Sewing Fixed Stitches
If changing the number of end backtack stitches in C and D, press the fixed stitch key to temporarily turn off the fixed stitch function before making the change. (The CD display will show the number of stitches and the setting can then be changed.) S-6200A... -
Page 43: Sewing Name Labels
If changing the number of start and end backtack stitches in A, B, C and D, press the name label stitch key to turn off the name label function before making the change. (The ABCD display will show the number of stitches and the settings can then be changed.) S-6200A... -
Page 44: Sewing Pleat Presser Stitches
If changing the number of end backtack stitches indicated in C and D, press the pleat presser sewing key to turn off the pleat presser sewing function before making the change. (The CD display will show the number of stitches and the setting can then be changed.) S-6200A... -
Page 45: Using The Lower Thread Counter
If you press the RESET key (2), the warning icon (1) will disappear and sewing will be possible when the treadle is depressed. 4. If you press and hold the RESET key (2) for 2 seconds or more, the display will return to the initial value. S-6200A... -
Page 46: Using The G5A Operation Panel (Advanced Operations)
When the needle up icon (24) is illuminated, the needle bar stops in the up position. When the needle down icon (25) is illuminated, the needle bar stops in the down position. 4188M 2207M 2208M S-6200A... -
Page 47: Adjusting The Needle Up Stop Position
10° for the upper shaft. Becomes higher Becomes lower 2044B 2138M 2139M The setting values will be memorized. 4192M Normal sewing machine operation will then be possible. 4193M * For details on other adjustment items, refer to the Service Manual. S-6200A... -
Page 48: Lock Key
This key is used to make settings for various functions. ENTER key (4) This key is used to accept function settings. MAX key (5) This key is used to change the maximum sewing speed. * Refer to the Service Manual for details on using these keys. 4194M S-6200A... -
Page 49: Resetting All Settings To Their Defaults
“ init SEW ” Initializes programs 4196M 2138M 2139M Once initialization is complete, the main display will return to green. (Press for 2 seconds or more) 4192M Initialization mode will be exited and normal sewing machine operation will then be possible. 4193M S-6200A... -
Page 50: Sewing
When it is released, the feed direction will return to normal. < Actuator switch rotation function > Additionally, the actuator switch (2) can be rotated 90 degrees as shown in the illustration. Select the position that is easier to use. 1976B S-6200A... -
Page 51: Thread Tension
After the lower thread tension has been adjusted, adjust the upper thread tension so that a good, even stitch is obtained. 1. Lower the presser foot. 2. Adjust by turning the tension nut (2). Becomes weaker Becomes stronger 3853M S-6200A... -
Page 52: Adjusting The Presser Foot Pressure
If the tension of the pretension (1) is increased, the lengths of the threads trailing from the needle tips will be reduced; if the tension is reduced, the lengths will be increased. Adjust by turning the pretension (1). Shorter Longer 1978B S-6200A... -
Page 53: Cleaning
8. Remove the bobbin from the bobbin case (4) and clean the bobbin case (4) with a cloth. 9. Insert the bobbin into the bobbin case (4), and then place the bobbin case (4) back into the machine. 2184M (Continued on next page) S-6200A... - Page 54 (Refer to page 8.) Use only the lubricating oil (Nippon Oil Corporation Sewing Lube 10N; VG10) specified by Brother. If this type of lubricating oil is difficult to obtain, the recommended oil to use is <Exxon Mobil Essotex SM10;...
-
Page 55: Replacing The Fixed Knife And Movable Knife
Turn off the power switch and disconnect the power cord from the wall outlet before replacing any parts, otherwise the machine may operate if the treadle is pressed by mistake, which could result in injury. Use only the proper replacement parts as specified by Brother. <Fixed knife>... -
Page 56: Standard Adjustments
Ask your Brother dealer or a qualified electrician to depressed by mistake, which could result in injury. carry out any maintenance and inspection of the When carrying out inspection, adjustment and electrical system. -
Page 57: Adjusting The Thread Take-Up Spring
When sewing thick material, move arm thread guide R (1) to the left. (The thread take-up amount will become greater.) When sewing thin material, move arm thread guide R (1) to the right. (The thread take-up amount will become less.) 3860M S-6200A... -
Page 58: Adjusting The Presser Foot Height
6. Replace the oil cap (5). 7. Adjust the presser foot pressure using the adjustment screw (4), and then tighten the nut (3). * After adjusting, check that the needle moves down into the Needle center of the groove in the presser foot. 1257M S-6200A... -
Page 59: Adjusting Of The Feed Dog Height
5. Securely tighten the set screws (4). * The height of the feed dog (1) will change after the angle has been adjusted, so it will be necessary to re-adjust the Standard height of the feed dog (1). Lower the front Raise the front 3865M S-6200A... -
Page 60: Adjusting The Needle Bar Height
<A>, it may cause the needle to break. 3. After adjusting, securely tighten the set screws (5) and (7). 4. Replace the rubber cap (3). Needle timing is Standard Needle timing advanced is retarded 3868M S-6200A... -
Page 61: Adjusting The Needle And Rotary Hook Timing
(3) with the center of the needle (4). The distance between the tip of the rotary hook (3) and the needle (4) should be approximately 0 - 0.05 mm. 3. Securely tighten the set screws (5). 3869M S-6200A... -
Page 62: Adjusting The Rotary Hook Lubrication Amount
“Checking the lubrication amount” above. * Turn the adjusting screw (3) and check the lubrication amount repeatedly until the lubrication amount is correct. 4. Check the lubrication amount again after the sewing machine has been used for approximately two hours. 3895M S-6200A... -
Page 63: Troubleshooting
Is the thread take-up spring too weak? Adjust the tension of the thread take-up spring. Is the needle and rotary hook timing correct? Adjust the height of the needle bar. Adjust the clearance between the needle and the tip of the rotary hook. 0470M S-6200A... - Page 64 Gradually reduce the maximum sewing speed (G1A operation panel) Use the sewing speed control keys to gradually reduce the sewing speed. (G5A operation panel) Is the angle of the feed dog correct? Tilt the front of the feed dog down slightly. 0978M S-6200A...
- Page 65 Attach the anti-spin spring. Is the bobbin turning smoothly? If the bobbin is not turning smoothly, replace the bobbin. Is a bobbin other that the light-alloy bobbins specified by Brother being used? Use only bobbins which are specified by Brother.
- Page 66 Insert connector 12, 13 securely. operation panel connector inside the control box disconnected? Insert connector securely. 4264M Are the connector of the drive PCB and P3 on the main PCB inside the control box disconnected? Insert the connector securely. S-6200A...
-
Page 67: Error Code Displays
Was the actuator switch being pressed when the power ON switch was pressed? E066 Press the power OFF switch and check that the actuator switch is not being pressed There is a problem with the actuator switch. Replace the actuator switch. S-6200A... - Page 68 Replace the motor or the control box. Problem with motor. E132 Replace the motor. Problem with Problem with drive PCB. motor operation. Replace the control box. Motor reverse operation was detected. E140 Replace the motor. Motor reverse operation. S-6200A...
- Page 69 Is the 6-pin head detector unit connector inside the control box disconnected? E452 Press the power OFF switch, and then check that the 6-pin head detector unit Head detector unit connector is connected to connector P8 on the main PCB. connection error. S-6200A...
- Page 70 Press the power OFF switch and set DIP switch No. 4 to OFF. If an error code that is not listed above appears or if carrying out the specified remedy does not solve the problem, contact the place of purchase. S-6200A...
-
Page 71: Segment Display
15. 7-SEGMENT DISPLAY 15. 7-SEGMENT DISPLAY 4268M S-6200A... -
Page 72: Instruction Manual
INSTRUCTION MANUAL © 2009 Brother Industries, Ltd. All Rights Reserved. S-6200A SB0777-001 E 2009.06. B (1)
Need help?
Do you have a question about the S-6200A and is the answer not in the manual?
Questions and answers