
Related Manuals for Akai MWF-18CRN1-QC1G


Summary of Contents for Akai MWF-18CRN1-QC1G
- Page 1 FOR THE USER Model Number MWF-18CRN1-QC1G Window or Wall Mounted Air Conditioner - Cooling only Instruction manual After Sales Support TEL: 1300 886 649...
-
Page 2: Table Of Contents
Contents Specifications Safety rules and recommendations for the user Parts list Controls Operating Instructions Remote control Features LCD Display on Remote Control Remote Control Operating Instructions Replacing the batteries Cooling/Fan only operation Drying operation Timer operation Example of Timer Setting Combined Timer Setting the clock Automatic Operation... -
Page 3: Specifications
Specifications Dimension 520 X340 X 560mm Minimum nominal cross-sectional area of conductors: Rated current of appliance Nominal cross-sectional area >3 and <6 0.75 >6 and <10 >10 and <16 >16 and <25 Suggested Minimum Wire Size (AWG: American Wire Gage): Appliance Amps AWG Wire Size Cooling... -
Page 4: Safety Rules And Recommendations For The User
Safety rules and recommendations for the user • Ventilate room before operating air conditioner if there is a gas leakage from another appliance. • Cleaning and maintenance must be carried out by specialised technical personnel. In any case disconnect the appliance from the mains electricity supply before carrying out any cleaning or maintenance. - Page 5 • Do not climb onto or place any heavy or hot objects on top of the appliance. • Do not leave windows or doors open for long when the air conditioner is operating. • Do not direct the airflow onto plants or animals. •...
-
Page 6: Parts List
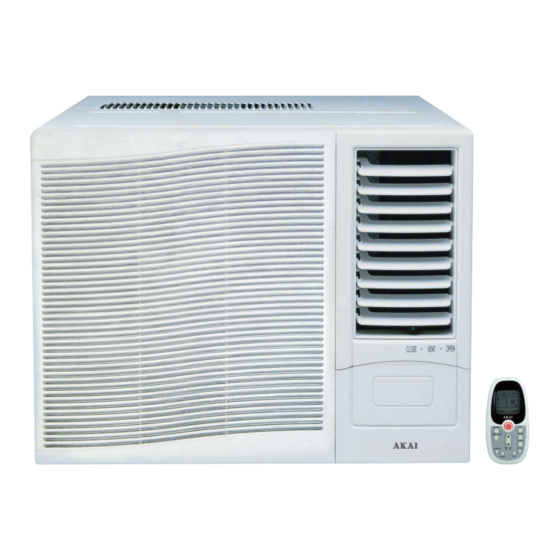
Parts list 1 Front panel 2 Air filter 3 Frame 4 Cabinet 5 Air inlet grille (outdoor side) 6 Air outlet grille 7 Electronic control keypad 8 Power supply cord 9 Remote control 1. Power cord conductors are distinguished according to colour as follows (see Fig.1) 2. -
Page 7: Controls
Controls Vent Control The vent control is located above the control knobs. The operation method is different on different models (see the following figures). For maximum cooling efficiency, CLOSE the vent. This will allow internal air circulation. OPEN the vent to discharge stale air. After Sales Support 1300 886 649... -
Page 8: Operating Instructions
Operating Instructions Power: Press the POWER keypad to turn the unit on/off. (The TIMER keypad controls the auto start/stop feature of the unit.) Mode: Press the “MODE” keypad to select the appropriate operating mode. Select the operating mode from COOLING, FAN and DRY. The green indicator light beside the “MODE”... - Page 9 Dry: In the Dry mode, the air conditioner will generally operate in the form of a dehumidifier. Since the conditioned space is a closed or sealed area, some degree of cooling will continue. Cooling: The temperature settings are adjustable between 16°C to 31°C . Cooling begins automatically when the room temperature is 1°C above the set point, and stops when the room temperature is 1°C below the set point.
- Page 10 Failure Indicator Display: Indicates a malfunction of the indoor room temperature sensor. Indicates a malfunction of the evaporator temperature sensor. Indicates a malfunction of the outdoor condenser temperature sensor. Note: When one of the above malfunctions occurs, turn off the unit, and check for any obstructions.
-
Page 11: Remote Control Features
Remote Control Features 1. ON/OFF Button: Push this button to start operation, push the button again to stop operation. 2. MODE Select Button: Each time you push the button, a mode is selected in a sequence that goes from AUTO COOL DRY and FAN, as the following figure indicates: 3. - Page 12 10. CLOCK Button: Use to set the time. 11. LED Button: Press this button to clear the digit display in the air conditioner, press it again to activate it. 12. LOCK Button: When you press the LOCK button, all current settings are locked in and the remote controller does not accept any operation except that of the LOCK.
-
Page 13: Lcd Display On Remote Control
LCD Display on Remote Control After Sales Support 1300 886 649... -
Page 14: Remote Control Operating Instructions
Remote Control Operating Instructions Location of the remote controller Keep the remote controller where its signals can reach the receiver of the unit (a distance of 8m is allowed). When you select the timer operation, the remote controller automatically transmits a signal to the indoor unit at the specified time. If you keep the remote controller in a position that hinders proper signal transmission, a time lag of up to 15 minutes may occur. -
Page 15: Cooling/Fan Only Operation
Cooling/Fan only operation START Ensure unit is plugged and power is available. The OPERATION lamp on the display panel of the indoor unit starts flashing. 1. Mode select button (MODE) Press to select COOL, or FAN ONLY. 2. TEMP/TIME button Set the desired temperature, the most comfortable temperature is between 21 C°/70°F to 28°C/83°F. -
Page 16: Timer Operation
STOP ON/OFF button Push this button again to stop the air conditioner. Note: The fan speed cannot be adjusted when the unit is in AUTO and DRY mode. Timer operation 1. TIMER button Press the TIMER button, the remote displays 0.0 alongside either the TIMER ON or TIMER OFF indicator, and will flash. -
Page 17: Example Of Timer Setting
Example of Timer Setting Timer On (Timer Start Operation) The TIMER ON feature is useful when you want the unit to turn on automatically before say when you return home. The air conditioner will automatically start operating at the set time. IMPORTANT: The time will be registered within a 3 second period (after pressing the TEMP/TIME button), so you should continue pressing the button until the desired time is... -
Page 18: Combined Timer
Combined Timer Timer On TIMER OFF - TIMER ON (On - Stop - Start operation) This feature is useful when you want to stop the air conditioner after you go to bed, and start it again in the morning when you wake up or when you return home. Example: To start the air conditioner in 8 hours. -
Page 19: Setting The Clock
Setting the clock Before you start operating the air conditioner, set the clock of the remote controller using the procedures given in this section. The clock panel on the remote controller will display the time regardless of whether the air conditioner is in use or not. Initial Setting of the Clock After batteries are inserted in the remote controller, the clock panel will display "12:00". -
Page 20: Automatic Operation
Automatic Operation When you set the air conditioner in AUTO mode, it will automatically select cooling, or fan only operation depending on what temperature you have selected and the room temperature. Once you select the operating mode, the operating conditions are saved in the unit's microcomputer memory. -
Page 21: Air Flow And Air Filter
Air flow and air filter Vertical air flow adjustment (manually) To adjust vertical air flow direction, adjust any one of the horizontal louvre blades. When adjusting the horizontal louver blades up or down, always keep the top or bottom blades horizontal. This can effectively prevent water droplets condensing on the front panel of the unit. -
Page 22: Troubleshooting
Troubleshooting Normal Operation • You may hear a pinging noise caused by water being picked up and thrown against the condenser on rainy days or when the humidity is high. This design feature helps remove moisture and improve efficiency. • You may hear the thermostat click when the compressor cycles on and off. •... - Page 23 Notes After Sales Support 1300 886 649...
- Page 24 Tempo (Aust) Pty Ltd ABN 70 106 100 252 AKAI Authorised Distributor PO Box 6056 Frenchs Forest NSW 2086 Customer Help Line : 1300 886 649 (AU) | 0800 836 761 (NZ) Email: info@tempoaustralia.com.au | www.tempoaustralia.com.au After Sales Support 1300 886 649...
Need help?
Do you have a question about the MWF-18CRN1-QC1G and is the answer not in the manual?
Questions and answers