Table of Contents
Advertisement
Advertisement
Table of Contents

Related Manuals for Akai AUS-12H53R150P9


Summary of Contents for Akai AUS-12H53R150P9
- Page 1 3.50kW INVERTER Reverse Cycle Split System Air Conditioner AUS-12H53R150P9(De3) FOR THE USER Instruction Manual PROTECT YOUR WARRANTY This unit must be installed by a registered, licensed installer as required by Government regulations. AFTER SALES SUPPORT NZ: 0800 836 761 N13275...
-
Page 3: Table Of Contents
Contents Safety rules and recommendations for the Installer Safety rules and recommendations for the User Safety rules and prohibitions Part descriptions - Indoor unit and Outdoor unit - Display - LED indicator - Emergency operation - Horizontal louvre blade - Remote controller - Timer operation Operating Modes - Auto Mode... -
Page 4: Safety Rules And Recommendations For The Installer
Safety rules and recommendations for the Installer Please keep this instruction manual in a safe place, along with the warranty card, purchase receipt and carton for future reference. • Read this guide before installing and using the appliance. • During the installation of the indoor and outdoor units, access to the working area should be forbidden to children. -
Page 5: Safety Rules And Recommendations For The User
from the power supply. • The appliance must be installed 2.5m above the floor Safety rules and recommendations for the User Please keep this instruction manual in a safe place, along with the warranty card, purchase receipt and carton for future reference. •... - Page 6 legislation and insert a thermomagnetic circuit breaker. • Unhook the automatic switch if you foresee not to use the device for a long time. The airflow direction must be properly adjusted. • The flaps must be directed downwards in the heating mode and upwards in the cooling mode.
-
Page 7: Safety Rules And Prohibitions
Safety rules and prohibitions • Do not bend, tug or compress the power cord as this could damage it. Electrical shocks or fire are usually due to a damaged power cord. Only specialised technical personnel must replace a damaged power cord. •... -
Page 8: Part Descriptions
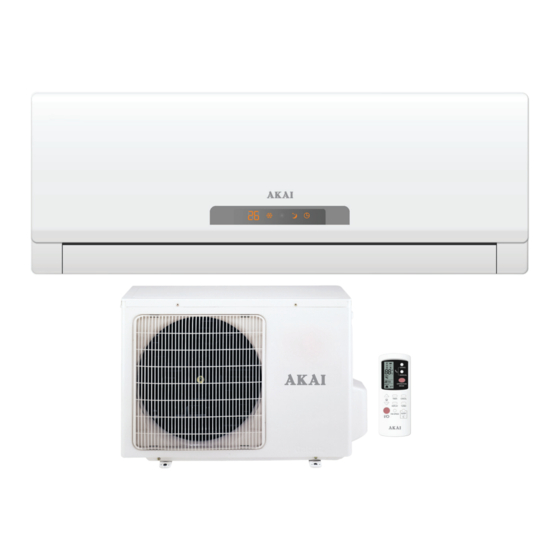
Part descriptions 1. Indoor unit and Outdoor unit NOTE: The figures of the Indoor and Outdoor units (left) and the figures of the Displays Filter Front panel Air inlet (below) are only intended to be a simple diagram of the appliance and may not Display correspond to the appearance of the units that have been... -
Page 9: Led Indicator
3. LED indicator Setting temperature HEAT PUMP MODE and timer display indicator lamp Sleep indicator Timer indicator COOL MODE indicator lamp lamp lamp... - Page 10 Part descriptions continued 4. Emergency operation switch In case the batteries in the remote controller are worn out or the remote controller is at faulty, use the Emergency operation switch ( ). Emergency Operation switch Every time the switch is pressed, it changes in this sequence: COOL -->...
-
Page 11: Remote Controller
6. Remote controller OPERATION DISPLAY SWING button Displays air conditioner’s Press to change up/down air flow current settings direction. The deflector will automatically swing up and down. Press the button again to stop the deflector swinging TIMER SET button SWING Please see “Timer Operation”... -
Page 12: Timer Operation
Part descriptions continued 7. Timer Operation Setting the ON/OFF timer operation When the unit is on, press the Timer button once to start timer off function and “1” will be shown on the display. Every press of this button increases the AUTO- OFF time by 1 hour (24 hours at most). -
Page 13: Operating Modes
Operating Modes AUTO Mode In this mode, the air conditioner can automatically adjust the room temperature to decide the most suitable temperature. At the start of operation, the air conditioner will automatically select the operation mode according to the room temperature. The following table shows the conditions which are set at start up. -
Page 14: Heat Mode
Operating Modes continued Heat Mode • Press the Manual Swing button or Swing button to change the air flow direction. • Press the Fan Speed button to change the fan speed of the indoor unit. • Press the Temperature Adjustment button to change the set temperature. Sleep Mode Normal Mode: Whilst the air conditioner is in Cool and Dry mode... - Page 15 The unit will continue to operate at the set temperature. When set to 19˚C≥st≥25˚C: During the 2 hours after Sleep mode 1 start up, the set temperature will decrease by 1˚C every hour. The unit will continue operating at 2˚C below the set temperature. 8 hours later, the set temperature will increase 2˚C;...
- Page 16 Operating Modes continued When set to 26˚C≥st≥31˚C: During the 3 hours after Sleep mode 2 start up, the set temperature will decrease by 1˚C every hour. The unit will continue operating at 3˚C below the set temperature. 7 hours later, the set temperature will increase 1˚C; the unit will then continue operating at this temperature.
-
Page 17: Cleaning And Maintenance
Cleaning and Maintenance IMPORTANT: Clean the front grille and air filters at least once in every two weeks. Before cleaning, be sure to stop operating the air conditioner and turn off the breaker. NOTE: The illustrations shown below are only for descriptive purposes. Please always refer the actual product purchased while using these instructions. - Page 18 Cleaning and Maintenance continued If you have not used the air conditioner for a long time Clean filters and replace them to the original position. Clean the indoor and outdoor units with a clean, soft cloth. Insert the power plug and make sure the earth wire not be loose. Put the batteries into the remote controller.
-
Page 19: Troubleshooting
Troubleshooting The following fault cases are served as a guide to assess a problem and take correct action on it. Problem Possible Solutions Air conditioner does not operate - Is it a power failure? - Has the power plug been unplugged? - Has the circuit breaker or fuse shut off? - Are there any obstacles or disturbance supply oscillators in the room to disturb... - Page 20 Troubleshooting continued Problem Possible Solution Indoor unit fan stops - The air conditioner is deicing and it takes during heating 10 minutes at most. (It freezes when the outdoor temperature is low and humidity is high.) It automatically resumes operation about 10 minutes later Cracking sounds can be heard - The friction sounds are caused by expansion...
- Page 21 IMPORTANT: If you find one of the following symptoms, please turn the breaker off quickly and call the After Sales Support line for assistance. NZ: 0800 836 761 AU: 1300 886 649 Only qualified and trained professionals should carry out any servicing needed on the air conditioner.
- Page 22 Notes...
- Page 23 Notes...
- Page 24 Warranty We pride ourselves on producing a range of quality home appliances that are both packed with features and completely reliable. We are so confident in our products, we back them up with a full 2 year replacement warranty. Now you too can relax knowing that you are covered. Customer Helpline NZ: 0800 836 761 AU: 1300 886 649 This Product is covered by 2 year replacement warranty when...
Need help?
Do you have a question about the AUS-12H53R150P9 and is the answer not in the manual?
Questions and answers