
Related Manuals for Akai MWF-18CRN1-QC1G


Summary of Contents for Akai MWF-18CRN1-QC1G
- Page 1 FOR THE INSTALLER INSTALLATION AND SERVICE Model Number MWF-18CRN1-QC1G Window or Wall Mounted Air Conditioner - Cooling only Instruction manual After Sales Support TEL: 1300 886 649...
-
Page 2: Table Of Contents
Contents 1. Precaution 2. Features and panel 3. Unit dimension 4. Disassembly instructions 5. Installation 6. Refrigerant cycle diagram 7. Operation limits 8. Wiring diagram 9. Protection function 10. Troubleshooting 11. Characteristic of temperature sensor After Sales Support 1300 886 649... -
Page 3: Precaution
1. Precaution 1.1 Safety precaution • To prevent injury to the user or other people and property damage, the following instructions must be followed. • Incorrect operation due to ignoring instruction will cause harm or damage. • Before service unit, be sure to read this service manual at first. 1.2 Warning •... -
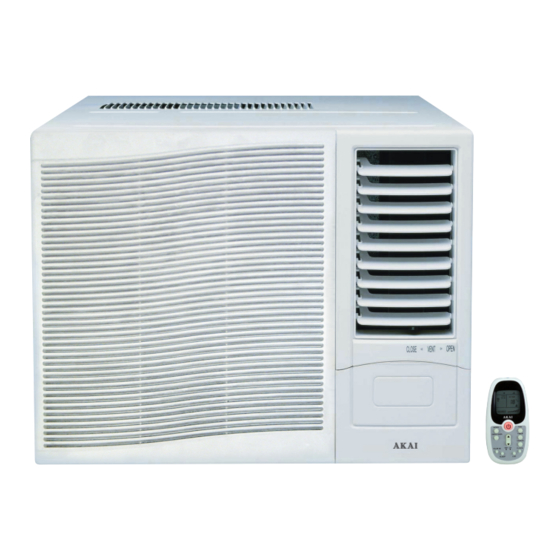
Page 4: Features And Panel
2. Features and panel 2.1 Features • Powerful cooling. • Slide-in and slide-out chassis for the simple installation and service. • Side air-intake, side cooled-air discharge. • Washable one-touch filter and easy removed panel. • Super compact design. • Reliable and efficient rotary compressor is equipped. •... - Page 5 Capacity ≥ 9000Btu/h (F Panel) Capacity < 9000Btu/h (E1 Panel) Capacity ≥ 9000Btu/h (E1 Panel) After Sales Support 1300 886 649...
- Page 6 2.2.3 POWER • Press the power keypad to turn the unit on/off.(The timer keypad controls the auto Start/stop feature of the unit.) 2.2.4 Mode • Press the mode keyboard to select the operating mode. 2.2.5 Temperature up and down • Press the keyboard to increase the set(operating) temperature of the units.
-
Page 7: Unit Dimension
3. Unit dimension Model A (mm) B (mm) C (mm) MWF-05CRN1-QC1G MWF-07CRN1-QC1G MWF-07HRN1-QC1G MWF-09CRN1-QC1G MWF-09HRN1-QC1G MWF1-12CRN1-QC1G MWF-12HRN1-QC1G MWF-16CRN1-QC1G MWF-16HRN1-QC1G MWF-18CRN1-QC1G MWF-18HRN1-QC1G MWF-21CRN1-QC1G MWF-21HRN1-QC1G After Sales Support 1300 886 649... -
Page 8: Disassembly Instructions
4. Disassembly instructions 4.1 Unplug the power cord and move the unit to open place. 4.2 How to disassemble front panel. You should unplug the power cord (see 1 step). First, pull the front panel from bottom side. Second, open left and right side slots, lift the front panel up at the same time. slot After Sales Support 1300 886 649... - Page 9 4.3 How to remove the filter. 4.3.1 You should unplug the power cord (see 1 step). 4.3.2 You should disassemble the front panel (see 2 step) Pull the knob to remove the filter. knob 4.4 How to disassemble front panel. 4.4.1 You should unplug the power cord (see 1 step).
- Page 10 4.5 How to pull the refrigerant system from unit cabinet. 4.5.1 You should unplug the power cord (see 1 step). 4.5.2 You should disassemble the front panel (see 2 step). 4.5.3 You should remove the filter (see 3 step). 4.5.4 You should disassemble the front frame (see 4 step). First, remove left and right screws (2) and back screws (2) as following pictures.
- Page 11 4.6 How to disassemble the Electrical Box. 4.6.1 You should unplug the power cord (see 1 step). 4.6.2 You should disassemble the front panel (see 2 step). 4.6.3 You should remove the filter (see 3 step). 4.6.4 You should disassemble the front frame (see 4 step). 4.6.5 You should pull the refrigerant system from unit cabinet (see 5step).
- Page 12 Third, snip the tighten strip as following and pull the Electrical Box. Tighten strip Fourth, remove the Electrical Box’s front plastic cover. Fifth, remove the screws and open the Electrical Box. After Sales Support 1300 886 649...
- Page 13 4.7 How to disassemble the centrifugal fan (indoor). 4.7.1 You should unplug the power cord (see 1 step). 4.7.2 You should disassemble the front panel (see 2 step). 4.7.3 You should remove the filter (see 3 step). 4.7.4 You should disassemble the front frame (see 4 step). 4.7.5 You should pull the refrigerant system from unit cabinet (see 5 step).
- Page 14 4.8 How to disassemble outdoor axial fan (outdoor). 4.8.1 You should unplug the power cord (see 1 step). 4.8.2 You should disassemble the front panel (see 2 step). 4.8.3 You should remove the filter (see 3 step). 4.8.4 You should disassemble the front frame (see 4 step). 4.8.5 You should pull the refrigerant system from unit cabinet (see 5 step).
- Page 15 Fourth, remove the condenser, disassemble the axial fan. 4.9 How to disassemble fan motor. 4.9.1 You should unplug the power cord (see 1 step). 4.9.2 You should disassemble the front panel (see 2 step). 4.9.3 You should remove the filter (see 3 step). 4.9.4 You should disassemble the front frame (see 4 step).
-
Page 16: Installation
5. Installation 5.1 Select the best location 1. To avoid vibration and noise, make sure the unit is installed securely and firmly. 2. Install the unit where the sunlight does not shine directly on the unit. If the unit receives direct sunlight, build an awning to shade the cabinet. 3. -
Page 17: How To Drain
5.2 Check off installation • The setting conditions must be checked prior to initial starting. The under mentioned items are especially important checking points when the installation is finished. • Grounding wire (yellow/Green) is provided in the power cord. The wire must be grounded. -
Page 18: How To Install
5.4 How to install 5.4.1 Installation of the housing Step1 Remove the air conditioner from it's packaging, remove fixing screws and slide the air conditioner out of it's housing (Refer to Installation Steps) Step2 Prepare the hole in the wall so that the bottom of the housing is well supported, the top has minimum clearance and the air inlet louvers have clearance as shown below in options A and B. - Page 19 5.4.2 Installation of the unit into the housing • Slide the unit into the housing until it is firmly against the rear of the housing. Care is required to ensure the foam sealing strips on the housing remain in position. •...
- Page 20 5.4.2 Installation of the unit into the housing Step 1. Remove the front panel and the air filter. Hold the slot under the front panel, then uplift it outwards, and remove the front panel (See Fig.1). Pinch the handle under the air filter and make the air filter arched, remove it from the slot from underside to upside (See Fig.2).
- Page 21 Step 4. Install the frame. Install the frame making sure not to interfere with the temperature sensor cable (See Fig.9). Fix the screws on the frame (See Fig.3). Step 5. Install the air filter and front panel. Install the air filter into the frame's slot from upside to underside (See Fig.2). Hang the front panel on the frame's buckle, then press the front panel into the frame's slot until you hear a click (See Fig10).
-
Page 22: Refrigerant Cycle Diagram
6. Refrigerant cycle diagram The figure below is a brief description of the important components and their function in what is called the refrigeration system. This will help to understand the refrigeration cycle and the flow of the refrigerant in the cooling cycle. -
Page 23: Operation Limits
7. Operation limits 7.1 Cooling operation Outdoor air temp. °C DB Indoor air temp. °C DB Note: The chart is the result from the continuous operation under constant air temperature conditions. However, excludes the initial pull-down stage. After Sales Support 1300 886 649... -
Page 24: Wiring Diagram
8. Wiring diagram 8.1 MWF-05CRN1-QC1G; MWF-07CRN1-QC1G 8.2 MWF-07HRN1-QC1G After Sales Support 1300 886 649... - Page 25 8.3 MWF-09CRN1-QC1G; MWF1-12CRN1-QC1G MWF-16CRN1-QC1G; MWF-18CRN1-QC1G 8.4 MWF-09HRN1-QC1G; MWF-12HRN1-QC1G After Sales Support 1300 886 649...
- Page 26 8.5 MWF-16HRN1-QC1G 8.6 MWF-18HRN1-QC1G After Sales Support 1300 886 649...
- Page 27 8.7 MWF-21CRN1-QC1G 8.8 MWF-21HRN1-QC1G After Sales Support 1300 886 649...
-
Page 28: Protection Function
9. Protection function 9.1 Proper symbols and their meaning • T1: Indoor ambient temperature • T2: Indoor evaporator temperature • T3: Outdoor condenser temperature • Ts: Setting temperature through the remote controller 9.2 Protection Function 9.2.1 Three minutes delay at restart for compressor. 9.2.2 Anti-freezing protection at cooling or dry mode. - Page 29 9.2.4 Auto-defrosting function in heating mode. • If T3 (condenser pipe temperature) has been lower than 0°C for 40 minutes, the function will be activated. • The compressor will be ON while reverse valve and fan motor are OFF. • If T3 (condenser pipe temperature gets over 20°C) or the defrosting time gets to 10 minutes, the function will be cancelled.
-
Page 30: Troubleshooting
10 Troubleshooting In general, possible trouble is classified in three kinds. One is called Starting Failure which is caused from an electrical defect, another is ineffective Air Conditioning caused by a defect in the refrigeration circuit and improper application, and the other is called the Structure Damage. Operation panel doesn't work. - Page 31 Display keeps showing "Ed". Check whether the evaporator frosts. Check whether the indoor air inlet is blocked. Check whether the indoor ambient temperature is too low. Check whether the indoor dust filter is too dirty. Check whether there is too much water on the chassis. Check the wiring of pipe temperature sensor.
- Page 32 Compressor doesn’t work. Check whether the indoor temperature is lower than 15°C or larger than. Check the power supply. Check whether the voltage is too high or too low. Check the wiring. Check whether the compressor is under overload protection. Check whether the relay of compressor in PCB works normally (Start the unit, after 3mins, and set the unit with cool mode and 17°C (62°F).
- Page 33 Cooling mode doesn't work or cooling not enough. Check the operation mode. Check the setting temperature. Check whether dust filter is too dirty. Start the unit with cool mode and check whether the temperature of compressor’s discharge pipe is smaller than 90°C. If no, recharge refrigerant. Replace the capillary.
- Page 34 The compressor operates run-stop frequently. Check whether the airflow passage is blocked. Check whether the fan motor doesn’t work. Check whether capacitor of compressor work normally. Check whether the relay of compressor on PCB works normally. Replace the PCB. Check whether the capillary is blocked. Replace the capillary.
- Page 35 Water drips from the unit. Check whether the ambient humidity is too high. Check whether the indoor outlet airflow foam is too wet, and louver drip. Check whether the unit is correctly installed. Check whether the air outlet foam install normally. Check whether the foam of evaporator base is damaged.
- Page 36 After Sales Support 1300 886 649...
- Page 37 Insufficient cooling. After Sales Support 1300 886 649...
- Page 38 After Sales Support 1300 886 649...
-
Page 39: Characteristic Of Temperature Sensor
11. Characteristic of temperature sensor After Sales Support 1300 886 649... - Page 40 Tempo (Aust) Pty Ltd ABN 70 106 100 252 AKAI Authorised Distributor PO Box 6056 Frenchs Forest NSW 2086 Customer Help Line : 1300 886 649 (AU) | 0800 836 761 (NZ) Email: info@tempoaustralia.com.au | www.tempoaustralia.com.au After Sales Support 1300 886 649...
Need help?
Do you have a question about the MWF-18CRN1-QC1G and is the answer not in the manual?
Questions and answers