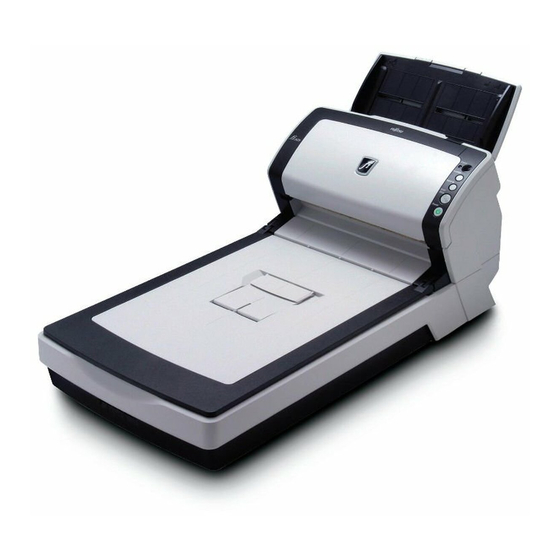
Fujitsu fi-6140 Operator's Manual
Image scanner
Hide thumbs
Also See for fi-6140:
- Getting started (23 pages) ,
- Getting started manual (20 pages) ,
- Specifications (2 pages)
Table of Contents
Advertisement
fi-6140 / fi-6240 Image Scanner Operator's Guide
fi-6140 / fi-6240 Image Scanner Operator's Guide
fi-6140 / fi-6240 Image Scanner Operator's Guide P3PC-2062-02ENZ2
file:////10.232.227.50/Manual/fi-6140_6240C-Lynx3/OG/R02/02_081030/contents/EN/index.htm [2008/10/30 12:40:47]
All Rights Reserved. Copyright 2007-2008 © PFU LIMITED
TROUBLESHOOTING
CONTENTS MAP
Advertisement
Table of Contents
Troubleshooting

Related Manuals for Fujitsu fi-6140


Summary of Contents for Fujitsu fi-6140
- Page 1 / fi-6240 Image Scanner Operator's Guide fi-6140 / fi-6240 Image Scanner Operator's Guide TROUBLESHOOTING CONTENTS MAP fi-6140 / fi-6240 Image Scanner Operator's Guide P3PC-2062-02ENZ2 All Rights Reserved. Copyright 2007-2008 © PFU LIMITED file:////10.232.227.50/Manual/fi-6140_6240C-Lynx3/OG/R02/02_081030/contents/EN/index.htm [2008/10/30 12:40:47]...
-
Page 2: Table Of Contents
CONTENTS MAP fi-6140 / fi-6240 Image Scanner Operator's Guide TROUBLESHOOTING CONTENTS MAP CONTENTS MAP Back INTRODUCTION Chapter 6 TROUBLESHOOTING 6.1 Removing Jammed Documents Regulatory Information 6.2 Error Indications on the Operator Panel Trademarks 6.3 Remedying Typical Troubles Liability 6.4 Items to Check Before Contacting the Dealer Where You... -
Page 3: Contents Map
CONTENTS MAP Chapter 4 DAILY CARE 4.1 Cleaning Materials and Locations Requiring Cleaning 4.2 Cleaning the Flatbed [fi-6240 only] 4.3 Cleaning the ADF Chapter 5 REPLACING CONSUMABLES 5.1 Consumables and Replacement Cycles 5.2 How to Check and Reset the Comsumables Counters 5.3 Replacing the Brake Roller 5.4 Replacing the Pick Roller All Rights Reserved. -
Page 4: Troubleshooting
This document describes how to handle the fi-6140 / fi-6240 Duplex Color Image Scanner and basic operation methods. Before you start using the fi-6140 / fi-6240 Duplex Color Image Scanner be sure to thoroughly read this manual to ensure correct use. -
Page 5: Fcc Warning
Regulatory Information (1) fi-6140 / fi-6240 Image Scanner Operator's Guide TROUBLESHOOTING CONTENTS MAP Regulatory Information (1) FCC Declaration This equipment has been tested and found to comply with the limits for a Class B digital device, pursuant to Part 15 of the FCC Rules. - Page 6 Regulatory Information (2) fi-6140 / fi-6240 Image Scanner Operator's Guide TROUBLESHOOTING CONTENTS MAP Regulatory Information (2) International ENERGY STAR® Program As an ENERGY STAR® Partner, PFU LIMITED has determined that this product meets the ENERGY STAR® guidelines for energy efficiency.
- Page 7 Trademarks fi-6140 / fi-6240 Image Scanner Operator's Guide TROUBLESHOOTING CONTENTS MAP Trademarks Trademarks Microsoft, and Windows are registered trademarks of Microsoft Corporation in the United States and/or other countries. ISIS and QuickScan are trademarks or registered trademarks of EMC Corporation in the United States.
- Page 8 Liability fi-6140 / fi-6240 Image Scanner Operator's Guide TROUBLESHOOTING CONTENTS MAP Liability BEFORE USING THIS PRODUCT, PLEASE READ THIS MANUAL CAREFULLY. IF THIS PRODUCT IS NOT USED CORRECTLY, UNEXPECTED INJURY CAN OCCUR TO USERS OR BYSTANDERS. Keep this manual in a safe place so that it can be easily referred to during use of this product.
- Page 9 Conventions (1) fi-6140 / fi-6240 Image Scanner Operator's Guide TROUBLESHOOTING CONTENTS MAP Conventions (1) Safety Precautions This manual describes important details for ensuring the safe and correct use of this product. Thoroughly read this manual before you start to use this product. In particular, be sure to read and fully understand the Safety Precautions described in this manual before you use this product.
-
Page 10: Screen Examples In This Manual
About Maintenance The user must not perform repairs on this scanner. Contact the store where you purchased the scanner or an authorized FUJITSU Image Scanner service provider to have repairs done on this product. All Rights Reserved. Copyright 2007-2008 © PFU LIMITED... - Page 11 Safety Precautions (1) fi-6140 / fi-6240 Image Scanner Operator's Guide TROUBLESHOOTING CONTENTS MAP Safety Precautions (1) WARNING Do not damage the AC cable. A damaged AC cable may cause fire or electric shock. Do not place heavy objects on AC cables, or pull, bend, twist, heat, damage or modify AC cables.
- Page 12 Then, contact the store where you bought the scanner or an authorized FUJITSU scanner service provider. Pay particular attention to this warning in households where there are small children.
- Page 13 Safety Precautions (3) fi-6140 / fi-6240 Image Scanner Operator's Guide TROUBLESHOOTING CONTENTS MAP Safety Precautions (3) CAUTION Do not install the scanner on unstable surfaces. Make sure that the scanner is installed on a flat, level surface and that none of its parts extend beyond the surface top, such as a desk or table.
- Page 14 Safety Precautions (4) fi-6140 / fi-6240 Image Scanner Operator's Guide TROUBLESHOOTING CONTENTS MAP Safety Precautions (4) CAUTION Protect the scanner from static electricity. Install the scanner away from strong magnetic fields and other sources of electronic noise. Also, protect the scanner against any static electricity, which can cause the scanner to malfunction.
-
Page 15: Names And Functions Of Parts
Chapter 1 NAMES AND FUNCTIONS OF PARTS fi-6140 / fi-6240 Image Scanner Operator's Guide TROUBLESHOOTING CONTENTS MAP Chapter 1 NAMES AND FUNCTIONS OF PARTS This chapter describes the scanner parts and their functions. All Rights Reserved. Copyright 2007-2008 © PFU LIMITED... -
Page 16: Checking The Contents Of The Scanner Package
Make sure it contains all the parts listed in the package contents list that is included in the package box. If any parts are missing or defective, contact the dealer where you purchased the scanner or an authorized FUJITSU scanner service provider. -
Page 17: Names And Functions Of Parts
1.2 Names and Functions of Parts fi-6140 / fi-6240 Image Scanner Operator's Guide TROUBLESHOOTING CONTENTS MAP 1.2 Names and Functions of Parts This section describes the scanner parts and their functions. Front Name Function Transports the document to the reading position (Automatic Document Feeder) automatically. - Page 18 Name: Black Document Pad (fi-624BK) ● Parts No.: PA03540-D801 ● Rear Name 1 Security Slot 2 EXT connector (for imprinter connection) [fi-6140 only] 3 SCSI connector 4 SCSI ID switch 5 USB connector 6 DC inlet file:////10.232.227.50/Manual/fi-6140_6240C-Lynx3/OG/R02/02_081030/contents/EN/01/c01_02_01.htm (2/3) [2008/10/30 12:41:26]...
-
Page 19: Removable Parts
1.2 Names and Functions of Parts Removable Parts Parts that can be removed from the scanner are displayed below. Name ADF paper chute Pick roller Brake roller Document cover [fi-6240 only] All Rights Reserved. Copyright 2007-2008 © PFU LIMITED file:////10.232.227.50/Manual/fi-6140_6240C-Lynx3/OG/R02/02_081030/contents/EN/01/c01_02_01.htm (3/3) [2008/10/30 12:41:26]... -
Page 20: Functions Of The Operator Panel
Turns the scanner ON and OFF. Lights when the scanner is turned ON. About the settings on the launcher, refer to FUJITSU TWAIN32 scanner driver help, which is included in the "Setup CD-ROM," and Appendix 1 "Before Using the [Scan] or [Send to] Button."... - Page 21 If this alarm occurs, turn the power off and on again. If the alarm continues after turning the power on again, contact the dealer where you bought the scanner or an authorized FUJITSU scanner service provider. All Rights Reserved. Copyright 2007-2008 © PFU LIMITED...
-
Page 22: Basic Scanner Operations
Windows XP. Also, when the FUJITSU TWAIN32 or FUJITSU ISIS scanner driver is updated the screens and operations noted in this chapter will differ slightly. In such case, refer to the relevant manuals or materials, which are to be supplied when updating the driver. -
Page 23: Turning The Scanner On
2.1 Turning the Scanner ON fi-6140 / fi-6240 Image Scanner Operator's Guide TROUBLESHOOTING CONTENTS MAP 2.1 Turning the Scanner ON This section describes how to turn the scanner ON. The following shows the procedure for turning the scanner ON. 1. Press the Power button on the Operator Panel. - Page 24 2.1 Turning the Scanner ON 3. Double-click the [Printer and Other Hardware] icon. The [Printer and Other Hardware] window appears. Double-click the [Scanners and Cameras] icon. The [Scanners and Cameras] window appears. 5. Select [fi-6140dj] or [fi-6240dj], and then select [Properties] from the menu. For Windows XP or Windows Server 2003;...
- Page 25 2.1 Turning the Scanner ON 6. Click the [Device Set] tab. 7. Click the [Power Control] button. file:////10.232.227.50/Manual/fi-6140_6240C-Lynx3/OG/R02/02_081030/contents/EN/02/c02_01_01.htm (3/5) [2008/10/30 12:41:31]...
- Page 26 2.1 Turning the Scanner ON The [Power Control] window appears. 8. Enable [Power Control]. Select [Enable power switch] to power on/off the scanner by pressing the Power button. Select [Disable power switch] to power on/off the scanner by connecting/disconnecting the AC cable. 9.
- Page 27 2.1 Turning the Scanner ON The Power Save mode keeps the scanner in a low-powered state after it has been turned ON. If no operation is performed on the scanner for 15 minutes, the scanner automatically switches to the Power Save mode. In the Power Save mode, the indication of the Function Number Display on the operator panel goes out, but the Power LED stays lit in green.
-
Page 28: Loading Documents On The Adf For Scanning
2.2 Loading Documents on the ADF for Scanning fi-6140 / fi-6240 Image Scanner Operator's Guide TROUBLESHOOTING CONTENTS MAP 2.2 Loading Documents on the ADF for Scanning HINT Refer to Chapter "7 ADF AND PAPER SPECIFICATION" for information about the required document sizes and paper quality for ensuring correct operation when scanning documents from the ADF. - Page 29 2.2 Loading Documents on the ADF for Scanning HINT Pull out the paper chute extensions to support the document when necessary. ● Paper chute extensions ID cards can be loaded either in vertical or holizontal orientation. ● ATTENTION This scanner can scan ID cards through the Automatic Document Feeder with the following precautions.
- Page 30 2.2 Loading Documents on the ADF for Scanning Thickness: 0.056 inches / 1.4 mm or less *: 0.05 inches / 1.25 mm or less when documents are scanned in landscape orientation in binary mode at 200 dpi (60 ppm) Material: PVC (Poly vinyl chloride) or PVCA (Polyvinyl chloride acetate) Note: Before scanning your card, test with a dummy card of the same material to see if it can be fed into the ADF properly.
- Page 31 2.2 Loading Documents on the ADF for Scanning When the document size to scan is A5 or longer in length When the document size to scan is A6 or longer in length and A5 or narrower in width (Do not force to open the stacker extension wider than the right angle.
-
Page 32: Loading Documents On Flatbed For Scanning
2.3 Loading Documents on the Flatbed for Scanning [fi-6240 only] fi-6140 / fi-6240 Image Scanner Operator's Guide TROUBLESHOOTING CONTENTS MAP 2.3 Loading Documents on the Flatbed for Scanning [fi-6240 only] 1. Lift up the document cover. 2. Load the document on the document bed with the scanning face down and the top left corner aligned with the reference point ( ). - Page 33 2.4 Scanning Documents fi-6140 / fi-6240 Image Scanner Operator's Guide TROUBLESHOOTING CONTENTS MAP 2.4 Scanning Documents This section describes how to scan documents using this scanner. The basic steps for scanning documents are as follows: 1. Load the document on the scanner's ADF paper chute or Flatbed.
- Page 34 2.4 Scanning Documents 4. In the application, invoke a scanner driver. 5. In the driver setup dialog box, configure settings for scanning. file:////10.232.227.50/Manual/fi-6140_6240C-Lynx3/OG/R02/02_081030/contents/EN/02/c02_04_01.htm (2/3) [2008/10/30 12:41:36]...
- Page 35 2.4 Scanning Documents 6. Scan the document. 7. Save the scanned document image files. HINT In this section, screenshots taken in ScandAll PRO are used as examples. ● Depending on the application you use, procedures and operations may differ from those examples herein.
-
Page 36: How To Use The Scanner Drivers
PRO." FUJITSU TWAIN 32 Scanner Driver The FUJITSU TWAIN 32 Scanner Driver is a driver for scanning documents with the scanner based on a TWAIN- compliant application. Usually, you can configure the scanner settings in the scanner driver’s setup dialog box, invoking a scanner driver via an application. -
Page 37: Image Mode
Configure the FUJITSU TWAIN 32 Scanner Driver settings in the dialog box above. Major setting items are listed below. * For details on each function, refer to "FUJITSU TWAIN 32 Scanner Driver Help." Resolution You can specify the resolution for scanning images. - Page 38 Clicking this button opens the [FUJITSU TWAIN 32 Scanner Driver Help] window. The window also opens by pushing the [F1] key. [About] Button Clicking this button opens an information window about the FUJITSU TWAIN 32 Scanner Driver's version. [Option] Button You can set options in the dialog box below.
- Page 39 Select this tab when setting cache mode, multifeed detection, blank page skipping, paper protection, etc. [Generic] Tab Select this tab to change the unit displayed in the Setting Window for the FUJITSU TWAIN 32 Scanner Driver. Select [mm], [inch], or [pixel].
- Page 40 For details of each function, refer to the "FUJITSU TWAIN 32 Scanner Driver Help." FUJITSU ISIS Scanner Driver The FUJITSU ISIS Scanner Driver is a driver software used to scan documents with a scanner from an ISIS- compliant application. Usually, you configure settings for scanning in the setup dialog box of the scanner driver, which is invoked from an application.
- Page 41 2.5 How to Use the Scanner Drivers You can selects a side or sides to scan. The marked checkbox side is targeted for scanning. When you mark only the Front Image checkbox, simplex scanning is performed. When you mark both the Front Image and Back Image checkboxes, duplex scanning is performed.
- Page 42 2.5 How to Use the Scanner Drivers Halftone You can select a halftone pattern. This setting is available when [Black and White] is selected under [Mode]. Dither Pattern 0 This setting is suitable for scanning highly-colored photographs. Dither Pattern 1 This setting is suitable for scanning highly-colored documents containing both text and photographs.
-
Page 43: Page Orientation
2.5 How to Use the Scanner Drivers Page Orientation You can select the page orientation (Portrait or Landscape). Page Size You can specify the paper size of documents to be scanned. Select a size from the drop-down list. Split Image You can split a scanned image into two. - Page 44 2.5 How to Use the Scanner Drivers [Image Processing] Tab Quick Set Some image-processing-related settings, which are commonly used, are readily available. Select a setting pattern, and you do not have to configure settings one by one. The following setting patterns are available (Selectable only when [Black and White] is selected under [Mode]): file:////10.232.227.50/Manual/fi-6140_6240C-Lynx3/OG/R02/02_081030/contents/EN/02/c02_05_01.htm (9/16) [2008/10/30 12:41:42]...
- Page 45 2.5 How to Use the Scanner Drivers Normal documents This setting pattern is suitable for scanning business documents often (default) handled in the office. Advanced DTC Any types of documents are binarized in good conditions. Even if you scan documents containing light text, text on the colored background, and color charts, which do not lend themselves to scanning based on the ordinary binarization, you can obtain high-quality images.
-
Page 46: Multifeed Detection
2.5 How to Use the Scanner Drivers Pre-pick Pre-picking is a function that prepares the next document for scanning, feeding it to the position at which the scanning starts beforehand. You can specify whether you want to enable Pre-picking or not from this drop-down list. - Page 47 2.5 How to Use the Scanner Drivers [Gamma] Tab Pattern You can configure gamma corrections. The gamma patterns include: Binary (black and white) specified Normal, Soft, Sharp, Custom, Download Grayscale/24-bit color specified Custom, Download Custom Properties You can specify custom properties (Gamma, Brightness, Contrast, Shadow, and Highlight) only when you select [Custom] as a Gamma pattern.
-
Page 48: Color Dropout
2.5 How to Use the Scanner Drivers Color Dropout Any of three primary colors (red-green-blue) can be dropped out from document images. For example, when scanning text in black with the red frame, selecting red color scans only text in black. This setting is available only when Black and White or Grayscale setting is selected. - Page 49 2.5 How to Use the Scanner Drivers JPEG Quality You can specify compression levels and image quality for scanning in Color or Grayscale mode. Sample Ratio You can specify one of the sample ratios, by which images are compressed, listed in the order of precedence from highest (listed first) to lowest as follows: YUV 4:4:4 <...
- Page 50 2.5 How to Use the Scanner Drivers [ON] Checkbox Marking this checkbox enables the Imprinter function. Format Template Characters typed in this box are printed on documents. You can enter the following characters (up to 43 characters): Alphabet A to Z, a to z (single-width) Numerics 0, 1 to 9 (single-width) Symbols...
- Page 51 2.5 How to Use the Scanner Drivers Initial Value Set the initial value of the counter. Field Width Select the number of digits from 3 to 8. Number Control Select the increment of the counter value. Top Margin You can set the distance between the top of the page and the top of the first line printed on the page with a numeric.
- Page 52 This scanner comes with two drivers, FUJITSU TWAIN 32 Scanner Driver and FUJITSU ISIS Scanner Driver, which you can use with this scanner. The following explains how to select a scanner driver with ScandAll PRO (how to switch between the FUJITSU TWAIN and ISIS scanner drivers).
- Page 53 HINT In ScandAll PRO, the default [Device Driver] is [TWAIN]. ● There is no functional difference between the FUJITSU TWAIN 32 and FUJITSU ISIS ● scanner drivers. You can use one of them according to your preferences. 1. From the [Tool] menu, select [Preferences].
- Page 54 When the driver is FUJITSU TWAIN 32, select [FUJITSU fi-6140dj] or [FUJITSU fi-6240dj], and then click the [Select] button. When the driver is FUJITSU ISIS, select [Fujitsu fi-6140] or [Fujitsu fi-6240], and then click the [Select] button. FUJITSU TWAIN 32...
-
Page 55: How To Scan Documents
2.6 How to Use ScandAll PRO For information about setting items you can configure, see Section "2.5 How to Use the Scanner Drivers." How to Scan Documents With ScandAll PRO, you can scan documents with a scanner, in either of two ways: Scan You have to configure settings, such as the file format, destination, and scanning parameters, every time you scan a document. - Page 56 2.6 How to Use ScandAll PRO Or, select the [Scan Settings] button ( ) on the toolbar. The [Scan Settings] dialog box appears. 3. In the [Scan Settings] dialog box, configure various settings for saving scanned document images. [Save to file] Checkbox file:////10.232.227.50/Manual/fi-6140_6240C-Lynx3/OG/R02/02_081030/contents/EN/02/c02_06_01.htm (5/14) [2008/10/30 12:41:47]...
-
Page 57: File Format
[Show TWAIN dialog before each batch scan process] Checkbox Marking this checkbox displays the setup dialog box at a scan when the TWAIN driver is used for scanning. (* When the FUJITSU ISIS Scanner Driver is used, this checkbox is not available.) 4. Click the [Scanner Setting] button. - Page 58 2.6 How to Use ScandAll PRO FUJITSU TWAIN 32 FUJITSU ISIS 6. When you finished setting, click the [OK] button in the dialog box (FUJITSU TWAIN 32 Scanner Driver/ FUJITSU ISIS Scanner Driver). You are returned to the [Scan Setting] dialog box.
- Page 59 2.6 How to Use ScandAll PRO HINT If you do not mark the [Save to file] checkbox in the [Scan Settings] dialog box, ● scanned document images are not saved. To save the files, from the [File] menu, select [Save As]. To scan the next document with the same settings, from the [Scan] menu, select ●...
- Page 60 2.6 How to Use ScandAll PRO The [Batch Scan Setting] dialog box appears. 2. Do the following as necessary: - To create a new profile: Click the [Add] button. A new profile appears in the [Profile Editor] dialog box. (Go to step 3.) - To create a new profile based on an existing profile: Select a profile you want to use as the basis from the profile list, and then click the [Copy] button.
- Page 61 2.6 How to Use ScandAll PRO [General] Tab You can type in a profile name and description, and select a profile type. [Scan] Tab You can configure settings for a scanner to use. Clicking the [Detail Scanner Settings] button displays the setup dialog box of the scanner driver. [File format and Name scheme] Tab You can specify various parameters for saving scanned document images.
-
Page 62: Scanning Documents
2.6 How to Use ScandAll PRO You are returned to the [Batch Scan Settings] dialog box. Added or copied profiles by using the [Add] or [Copy] button appear in the profile list. <Scanning Documents> A: From the menu (Method 1) 1. - Page 63 2.6 How to Use ScandAll PRO B: From the menu (Method 2) 1. Place the document on the scanner. For information about how to place documents, see Section "2.2 Loading Documents on the ADF for Scanning." 2. From the [Scan] menu, select [Batch Scan], and then select [a profile name you want to use].
- Page 64 2.6 How to Use ScandAll PRO C: From the toolbar 1. Place the document on the scanner. For information about how to place documents, see Section "2.2 Loading Documents on the ADF for Scanning." 2. From the [Select the Batch File] drop-down list on the toolbar, select a profile to use. 3.
- Page 65 2.6 How to Use ScandAll PRO All Rights Reserved. Copyright 2007-2008 © PFU LIMITED file:////10.232.227.50/Manual/fi-6140_6240C-Ly.../OG/R02/02_081030/contents/EN/02/c02_06_01.htm (14/14) [2008/10/30 12:41:47]...
- Page 66 The screens and operations provided herein may be different from actual ones if the operating system you are using is not Windows XP. Please take note that, when the FUJITSU TWAIN 32 scanner driver is updated, the screens and operations herein may also be slightly different.
-
Page 67: Scanning Both Sides Of Documents
Scanning." 2. Launch ScandAll PRO. From the [Start] menu, select [All Programs] → [Fujitsu ScandAll PRO] → [Fujitsu ScandAll PRO] in the order presented. Then, ScandAll PRO starts up. 3. From ScandAll PRO, display the setup dialog box of FUJITSU TWAIN 32. - Page 68 3.1 Scanning Both Sides of Documents For information about how to scan documents, see Section "2.6 How to Use ScandAll PRO." Scanned document images are displayed in the ScandAll PRO window. All Rights Reserved. Copyright 2007-2008 © PFU LIMITED file:////10.232.227.50/Manual/fi-6140_6240C-Lynx3/OG/R02/02_081030/contents/EN/03/c03_01_01.htm (2/2) [2008/10/30 12:41:50]...
-
Page 69: Scanning Books [Fi-6240 Only
3. Read the document on the document bed face down. 4. Launch ScandAll PRO. From the [Start] menu, select [All Programs] → [Fujitsu ScandAll PRO] → [Fujitsu ScandAll PRO] in the order presented. Then, ScandAll PRO starts up. file:////10.232.227.50/Manual/fi-6140_6240C-Lynx3/OG/R02/02_081030/contents/EN/03/c03_02_01.htm (1/2) [2008/10/30 12:41:51]... - Page 70 6. Select [Flat Bed] under [Scan Type]. 7. Click the [OK] button. Changes made on this dialog box are saved and the setup dialog box of FUJITSU TWAIN 32 closes. 8. From the ScandAll PRO window, perform a scan. For information about how to scan documents, see Section "2.6 How to Use ScandAll...
-
Page 71: Scanning Large Documents With Flatbed [Fi-6240 Only
3. Load the document on the document bed face down. 4. Launch ScandAll PRO. From the [Start] menu, select [All Programs] → [Fujitsu ScandAll PRO] → [Fujitsu ScandAll PRO] in the order presented. Then, ScandAll PRO starts up. 5. From ScandAll PRO, display the setup dialog box of FUJITSU TWAIN 32. - Page 72 6. Select [Flat Bed] under [Scan Type]. 7. Click the [OK] button. Changes made on this dialog box are saved and the setup dialog box of FUJITSU TWAIN 32 closes. 8. From the ScandAll PRO window, perform a scan. For information about how to scan documents, see Section "2.6 How to Use ScandAll...
-
Page 73: Scanning Documents Of Different Widths
3.4 Scanning Documents of Different Widths fi-6140 / fi-6240 Image Scanner Operator's Guide TROUBLESHOOTING CONTENTS MAP 3.4 Scanning Documents of Different Widths When you scan documents of different widths at one time from the ADF, some documents that are small in paper size may be skewed or may not be fed into the scanner. -
Page 74: Scanning Documents Longer Than A4/Letter Size
Scanning." 2. Launch ScandAll PRO. From the [Start] menu, select [All Programs] → [Fujitsu ScandAll PRO] → [Fujitsu ScandAll PRO] in the order presented. Then, ScandAll PRO starts up. 3. From ScandAll PRO, display the setup dialog box of FUJITSU TWAIN 32. - Page 75 3.5 Scanning Documents Longer Than A4/Letter Size 6. Click the [OK] button. Changes made on this dialog box are saved and the setup dialog box of FUJITSU TWAIN 32 closes. 7. From the ScandAll PRO window, perform a scan. For information about how to scan documents, see Section "2.6 How to Use ScandAll...
-
Page 76: Saving Scanned Images In Pdf Format
3.6 Saving Scanned Images in PDF Format fi-6140 / fi-6240 Image Scanner Operator's Guide TROUBLESHOOTING CONTENTS MAP 3.6 Saving Scanned Images in PDF Format You can create PDF files from the scanned document images by either of the following two ways: From ScandAll PRO ●... - Page 77 2. Launch ScandAll PRO. From the [Start] menu, select [All Programs] → [Fujitsu ScandAll PRO] → [Fujitsu ScandAll PRO] in the order presented. Then, ScandAll PRO starts up. 3. In ScandAll PRO, select [PDF File], [SinglePage PDF File], [PDF/A file], or [SinglePage PDF/A file] to save scanned document images.
- Page 78 3.6 Saving Scanned Images in PDF Format HINT [PDF file] and [SinglePage PDF file] are saved in format compatible with Adobe Acrobat 4.0 (PDF 1.3); [PDF/A file] and [SinglePage PDF/A file] are saved in PDF/A-lb format (format for an archive of digital documents based on PDF 1.4). [SinglePage PDF file] and [SinglePage PDF/A file] create one file per image;...
- Page 79 3.6 Saving Scanned Images in PDF Format Compression Rate Move the slider bar to change the compression rate. The compression rate can be changed in five levels from 1 to 5. (By default, the compression rate is set to 3.) Moving the slider bar to right increases the compression rate.
- Page 80 3.6 Saving Scanned Images in PDF Format [Add a Document Open Password to created PDF files] Checkbox You can set a "Document Open" password to PDF files. Up to 16 characters (single-width) can be used for a password. This checkbox is available only for Adobe PDF files. (For PDF/A files, passwords cannot be set.) If this checkbox is marked, the [Password] dialog box appears immediately after scanning.
- Page 81 3.6 Saving Scanned Images in PDF Format The [Acrobat Scan] dialog box appears. 4. Select [FUJITSU fi-6140dj] or [FUJITSU fi-6240dj] from the [Scanner] drop-down list, and then click the [Scan] button. file:////10.232.227.50/Manual/fi-6140_6240C-Lynx3/OG/R02/02_081030/contents/EN/03/c03_06_01.htm (6/10) [2008/10/30 12:42:00]...
- Page 82 3.6 Saving Scanned Images in PDF Format ATTENTION If scanned by using the default settings, images outputted may not be satisfactory. It is recommended the settings be changed, following the procedure below: 1. Clear the [Recognize Text Using OCR] checkbox. 2.
- Page 83 3.6 Saving Scanned Images in PDF Format 7. From the [File] menu, select [Save As] or [Save] to save the scanned images. For details on the operation of Adobe Acrobat, refer to Adobe Acrobat Help. HINT If you save scanned document images as described above, the file size may increase greatly. To reduce the file size, save images following the procedure below.
- Page 84 3.6 Saving Scanned Images in PDF Format 3. Click the [Properties] button. 4. Select the [Adobe PDF Settings] tab. 5. Select a desired setting from the [Default Settings] drop-down list. The following shows an example when [Smallest File Size] is selected. file:////10.232.227.50/Manual/fi-6140_6240C-Lynx3/OG/R02/02_081030/contents/EN/03/c03_06_01.htm (9/10) [2008/10/30 12:42:00]...
- Page 85 3.6 Saving Scanned Images in PDF Format 6. Click the [OK] button. 7. Click the [OK] button in the [Print] dialog box. 8. Enter a file name, and then click the [Save] button in the [Save PDF File As] dialog box. All Rights Reserved.
- Page 86 Example: When green is selected as a dropout color The following shows the procedure to change settings in the setup dialog box of the FUJITSU TWAIN 32 Scanner Driver. 1. From ScandAll PRO, display the setup dialog box of FUJITSU TWAIN 32.
- Page 87 3.7 Excluding a Color from Images (Dropout Color) The [Advance] dialog box appears. 3. Select a color you want to remove, from the [Dropout Color] drop-down list under [More]. For example, when you want to obtain only black text image from a document containing black text outlined in green, select [Green] from the list.
- Page 88 3.7 Excluding a Color from Images (Dropout Color) 4. Click the [OK] button. You are returned to the [TWAIN Driver] dialog box. 5. In the [TWAIN Driver] dialog box, click the [OK] button. Changes made are saved and the [TWAIN Driver] dialog box closes. Continue scanning in ScandAll PRO.
-
Page 89: Skipping Blank Pages
Configure the setting in the setup dialog box of the scanner driver. The following shows the procedure for skipping blank pages using the FUJITSU TWAIN 32 scanner driver: 1. From ScandAll PRO, display the setup dialog box of FUJITSU TWAIN 32. - Page 90 3.8 Skipping Blank Pages If this checkbox is marked, cache mode is automatically changed to [Ram cache]. 5. With the slider control under [Blank Page Skip], specify the Blank Page Skip degree. <In Binary/Halftone mode> For white pages, use the [Black Dots Ratio] slider bar to specify a degree of accuracy needed to skip blank pages. For black pages, use the [White Dots Ratio] scroll bar to specify a degree of accuracy needed to skip blank pages.
- Page 91 3.8 Skipping Blank Pages 7. In the [TWAIN Driver] dialog box, click the [OK] button. Changes made are saved and the [TWAIN Driver] dialog box closes. Continue scanning in ScandAll PRO. For information about how to scan documents, see Section "2.6 How to Use ScandAll PRO."...
-
Page 92: Detecting Multifeeds
"8.4 Multifeed Detection." The following shows the procedure to change settings in the FUJITSU TWAIN 32 Scanner Driver. From ScandAll PRO, display the setup dialog box of FUJITSU TWAIN 32. For information about how to display the setup dialog box of the scanner driver, see Section "2.6 How to Use ScandAll... - Page 93 3.9 Detecting Multifeeds The following are how to detect multifeeds: None Multifeed detection is not performed. Check overlapping The scanner monitors the thickness of fed documents. The scanner detects a multifeed based on an increased thickness when multiple sheets are fed simultaneously.
-
Page 94: Correcting Skewed Documents
Change the setting in the setup dialog box of the scanner driver. The following shows the procedure to change settings in the setup dialog box of the FUJITSU TWAIN 32 Scanner Driver. 1. From ScandAll PRO, display the setup dialog box of FUJITSU TWAIN 32. - Page 95 3.10 Correcting Skewed Documents HINT With the [Priority] slider control, you can change the accuracy of Automatic Page Size Detection. Move the slider to right to improve the detection accuracy. Note that the higher the accuracy, the longer the processing time, and the scanning speed becomes slower. When detecting paper sizes of index sheets or documents to which sticky notes or index tabs are attached, set the Priority to 2.
- Page 96 3.10 Correcting Skewed Documents ATTENTION If one of the following conditions is met, the Automatic Page Size Detection may not work properly. Paper is 52g/m or less in weight ● Documents are not rectangular ● The margin of pages is filled with dark color ●...
-
Page 97: Outputting Multi-Images
Example: When the color document is scanned with Multi Image Output being set The following shows the procedure to change settings in the setup dialog box of the FUJITSU TWAIN 32 Scanner Driver. 1. From ScandAll PRO, display the setup dialog box of FUJITSU TWAIN 32. - Page 98 3.11 Outputting Multi-Images The [Multi Image] dialog box appears. 3. Select [Multi Image Output] under [Output mode]. file:////10.232.227.50/Manual/fi-6140_6240C-Lynx3/OG/R02/02_081030/contents/EN/03/c03_11_01.htm (2/3) [2008/10/30 12:42:09]...
- Page 99 3.11 Outputting Multi-Images 4. Select the order to output multi-images under [Order (for Multi Image Output)]. Primary: Color/Grayscale - Secondary: Binary First, a Color or Grayscale image is output, and then a Black-and-White image. Primary: Binary - Secondary: Color/Grayscale First, a Black-and-White image is output, and then a Color or Grayscale image. 5.
-
Page 100: Color/Monochrome Auto Detection
Configure Multi Image settings using the scanner driver. The following shows the procedure to change settings in the setup dialog box of the FUJITSU TWAIN 32 Scanner Driver. 1. From ScandAll PRO, display the setup dialog box of FUJITSU TWAIN 32. - Page 101 3.12 Color/Monochrome Auto Detection 3. Select [Auto Color Detection] under [Output mode]. 4. Under [Select Current Image Setting], select a side, and then configure settings for each side in the [TWAIN Driver] dialog box. You need to configure both of the settings for [Color/Grayscale] detection and for [Binary] detection in advance. 5.
-
Page 102: Splitting A Page In Two Pages
Original Created image The following shows the procedure to change settings in the setup dialog box of the FUJITSU TWAIN 32 Scanner Driver. 1. From ScandAll PRO, display the setup dialog box of FUJITSU TWAIN 32. For information about how to display the setup dialog box of the scanner driver, see Section "2.6 How to Use ScandAll... - Page 103 3.13 Splitting a Page in Two Pages The [Option] dialog box appears. 3. Select the [Rotation] tab. 4. Mark the [Split Image] checkbox. file:////10.232.227.50/Manual/fi-6140_6240C-Lynx3/OG/R02/02_081030/contents/EN/03/c03_13_01.htm (2/3) [2008/10/30 12:42:13]...
- Page 104 3.13 Splitting a Page in Two Pages HINT When a double-sided document is scanned in Duplex mode, the scanned document image is output according to the [Flip Side Rotation] setting in the order presented below: Book: Upper half → Lower half ●...
-
Page 105: Removing Punch Holes From Images
Original Created image The following shows the procedure to change settings in the setup dialog box of the FUJITSU TWAIN 32 Scanner Driver. 1. From ScandAll PRO, display the setup dialog box of FUJITSU TWAIN 32. For information about how to display the setup dialog box of the scanner driver, see Section "2.6 How to Use ScandAll... - Page 106 3.14 Removing Punch Holes from Images The [Option] dialog box appears. 3. Select the [Rotation] tab. 4. Select [Automatic Page Size Detection] or [Black Background] from the [Automatic Size and Skew detection] drop-down list. If you select a setting other than [Automatic Page Size Detection] or [Black Background], [Hole Punch Removal] is not available.
- Page 107 3.14 Removing Punch Holes from Images Hole marks are not aligned along with the edge of the document. ● Hole mark sizes vary or hole marks appear at various intervals. (Punch hole marks at various intervals can be removed ● when [Priority] is set to 3.) The document is not rectangular.
-
Page 108: Scanning By Pressing The Scan Button On The Scanner
3.15 Scanning by Pressing the Scan Button on the Scanner fi-6140 / fi-6240 Image Scanner Operator's Guide TROUBLESHOOTING CONTENTS MAP 3.15 Scanning by Pressing the Scan Button on the Scanner With ScandAll PRO, you can perform batch scan at a press of the button, by assigning a Batch Scan profile to the [Scan] or [Send to] button. - Page 109 HINT To link another button, perform steps 3 to 7 again. 8. Launch ScandAll PRO. From the [Start] menu, select [All Programs]→[Fujitsu ScandAll PRO]→[Fujitsu ScandAll PRO], and then ScandAll PRO starts up. 9. From the [Tool] menu, select [Preferences]. file:////10.232.227.50/Manual/fi-6140_6240C-Lynx3/OG/R02/02_081030/contents/EN/03/c03_15_01.htm (2/4) [2008/10/30 12:42:17]...
- Page 110 3.15 Scanning by Pressing the Scan Button on the Scanner The [Setup] dialog box appears. 10. Select the [Event] tab. 11. Click the action of the Event you selected in step 5, and then select a profile from the list you want to use for scanning.
- Page 111 3.15 Scanning by Pressing the Scan Button on the Scanner HINT Use the [Send to] button, following the procedure below: 1. Press the [Function] button, and change a number displayed on the Function Number Display. 2. When the displayed number and the event number you have selected in step 5 (Send to 1 - 9) matches, stop pressing the [Function] button.
-
Page 112: Splitting Documents By Patch Code
Two sizes (A4 and Letter) of PDF files are provided as patch code sheets. Before using the job separation function with patch code sheets, select [Start]→[All Programs]→[Fujitsu ScandAll PRO]→[Patch Code (A4)] or [Patch Code (Letter)], and then print a PDF file of either "Patch Code (A4)" or "Patch Code (Letter)" as many as you need. - Page 113 3.16 Splitting Documents by Patch Code HINT To suppress scanning the patch code sheet images, check the [Remove separation ● sheet] checkbox. In duplex scan mode, you can disable scanning of the rear side of the patch code ● sheet by selecting the [Delete the next page of a separation sheet] checkbox. 5.
- Page 114 3.16 Splitting Documents by Patch Code HINT When storing each of the scanned documents, which are separated with patch-code sheets, in separate folders, change the settings in the [Name Rule] dialog box opened by clicking the [Name Rule] button on the [File format and Name scheme] tab in the [Profile Editor] dialog box.
- Page 115 3.16 Splitting Documents by Patch Code All Rights Reserved. Copyright 2007-2008 © PFU LIMITED file:////10.232.227.50/Manual/fi-6140_6240C-Lynx3/OG/R02/02_081030/contents/EN/03/c03_16_01.htm (4/4) [2008/10/30 12:42:19]...
-
Page 116: Scanning Using Barcodes
3.17 Scanning Using Barcodes fi-6140 / fi-6240 Image Scanner Operator's Guide TROUBLESHOOTING CONTENTS MAP 3.17 Scanning Using Barcodes ScandAll PRO supports a job separation function with barcode-printed sheets (hereinafter reffered to as the "barcode"). The barcode-based job separation function can divide multiple pages of scanned images into pre-determined unit and save them to different folders separetely without interruption. - Page 117 3.17 Scanning Using Barcodes 1. Create a new batch profile on ScandAll PRO, and open the [Profile Editor] window. For how to create a profile, see "Batch Scan" in Section "2.6 How to Use ScandAll PRO." 2. Click on the [Document separator] tab. 3.
- Page 118 3.17 Scanning Using Barcodes ATTENTION If scanning performance deteriorates when barcode is used, reduce the detected ● barcode types or narrow the barcode area to improve the scanning performance. If there are multiple barcodes in the barcode detecting area, the one recognized first ●...
- Page 119 3.17 Scanning Using Barcodes HINT When storing each of the scanned documents separated with barcode-printed sheets in separate folders, and naming the folders with barcode recognition result strings, change the settings in the [Name Rule] dialog box opened by clicking the [Name Rule] button on the [File format and Name scheme] tab.
- Page 120 3.17 Scanning Using Barcodes All Rights Reserved. Copyright 2007-2008 © PFU LIMITED file:////10.232.227.50/Manual/fi-6140_6240C-Lynx3/OG/R02/02_081030/contents/EN/03/c03_17_01.htm (5/5) [2008/10/30 12:42:21]...
-
Page 121: Not Detecting Multifeed For Fixed Format
3.18 Not Detecting Multifeed for Fixed Format fi-6140 / fi-6240 Image Scanner Operator's Guide TROUBLESHOOTING CONTENTS MAP 3.18 Not Detecting Multifeed for Fixed Format When sheets with glued photographs or sticky notes are scanned, the scanner can accidentally detect a multifeed error, and scanning is interrupted. - Page 122 3.18 Not Detecting Multifeed for Fixed Format Automode 1 When a Multifeed error Use this mode when Pages scanned before (Bypass by occurs, press [Send to] you scan many sheets errors are sent to combination of length and to eject sheet in the in a fixed format;...
- Page 123 3.18 Not Detecting Multifeed for Fixed Format How to Configure Settings with Software Operation Panel 1. Open the Software Operation Panel. For details, see Section "8.1 Scan Settings." 2. Select the [Device Setting 2] tab from the list on the left of the panel, and then select [Intelligent Multifeed Function].
- Page 124 Mark the [Enable Scanner Panel] and [Enable [Scan] Button] checkboxes on the [Startup] tab of the [Option] dialog box. [ISIS driver] Mark the [On] checkbox under [Multifeed Recovery] and set [Auto-cancel Timer] to 0 or any value (minutes) on the [Paper Handling] tab of the [Properties for Fujitsu fi-6140...] dialog box. file:////10.232.227.50/Manual/fi-6140_6240C-Lynx3/OG/R02/02_081030/contents/EN/03/c03_18_01.htm (4/6) [2008/10/30 12:42:24]...
- Page 125 3.18 Not Detecting Multifeed for Fixed Format Auto-cancel Timer: Scanning is not restarted for the set period of time (minutes) after a multifeed error. If scanning is not started after the set minutes, the application is notified of the error by the driver. Note that if the Auto- cancel Timer is set to 0, the application will never be notified of the error.
- Page 126 3.18 Not Detecting Multifeed for Fixed Format No sheets in the transport Multifeed error path "J" and "2" is indicated → A function number blinks alternately If no paper is glued on a sheet but a multifeed error is detected, press the [Scan] button or restart scanning by using the personal computer (in this case, do not press the [Function] button).
-
Page 127: Troubleshooting
Chapter 4 DAILY CARE fi-6140 / fi-6240 Image Scanner Operator's Guide TROUBLESHOOTING CONTENTS MAP Chapter 4 DAILY CARE This chapter describes how to clean the scanner. WARNING When operating the scanner, the ADF's glass becomes very hot. Before you clean inside the scanner, turn off its power and unplug the AC adapter from the outlet. - Page 128 24 sheets per pack (*1)(*2) Soft, dry cloth Commercially available. *1: For details on Cleaner F1, consult the agent where you bought your scanner or an authorized FUJITSU service provider. *2: Pre-moistened with Cleaner F1, Cleaning Wipes are used instead of moistened cloths. HINT It may take long before the cleaner vaporizes if a large quantity is used.
- Page 129 4.1 Cleaning Materials and Locations Requiring Cleaning ATTENTION The scanner must be cleaned more frequently when the following documents are used: Documents of coated paper ● Documents with printed text or graphics almost covering the entire surface ● Chemically treated documents such as carbonless paper ●...
- Page 130 4.2 Cleaning the Flatbed [fi-6240 only] fi-6140 / fi-6240 Image Scanner Operator's Guide TROUBLESHOOTING CONTENTS MAP 4.2 Cleaning the Flatbed [fi-6240 only] 1. Open the document cover. 2. Clean the following locations using a soft cloth moistened with Cleaner F1.
- Page 131 4.3 Cleaning the ADF fi-6140 / fi-6240 Image Scanner Operator's Guide TROUBLESHOOTING CONTENTS MAP 4.3 Cleaning the ADF As a Guideline, clean the ADF every 5,000 scanned sheets. Note that this guideline varies according to the type of documents you scan. For example, it may be necessary to clean the ADF more frequently if documents are scanned when the toner is not sufficiently fixed on the printout.
-
Page 132: Brake Roller
4.3 Cleaning the ADF Item Brake rollers (x 2) Feed rollers (x 2) Eject rollers (x 2) Glasses (x 2) Pick rollers (x 2) Plastic rollers (x 4) Ultrasonic sensors (x 2) ATTENTION To avoid damaging the document sensors, take care that the cloth does not get hooked into them when cleaning the inside of the ADF. -
Page 133: Ultrasonic Sensor
4.3 Cleaning the ADF Plastic roller Lightly clean the Plastic roller taking care not to damage the roller surface. Take particular care when cleaning this roller as black debris on it affects document pick performance. Be careful not to damage the sponges attached around the middle of the roller. - Page 134 4.3 Cleaning the ADF [Send to] Button [Scan] Button CAUTION In step 2, all the Feed rollers/Eject rollers turn at the same time. When cleaning the Feed rollers or Eject rollers, be careful not to touch the other rotating Feed rollers/Eject rollers. With the movie below, review the procedure to clean the Feed rollers/Eject rollers: 3.
- Page 135 The screens and operations may differ slightly if the OS that you are using is other than Windows XP. Also, when the FUJITSU TWAIN32 or FUJITSU ISIS scanner driver is updated the screens and operations noted in this chapter will differ slightly.
- Page 136 ATTENTION Use only the specified consumables to avoid document feeding trouble. To purchase the consumables, contact the FUJITSU scanner dealer where you purchased the scanner or an authorized FUJITSU scanner service provider. All Rights Reserved. Copyright 2007-2008 © PFU LIMITED...
- Page 137 5.2 How to Check and Reset the Consumables Counters fi-6140 / fi-6240 Image Scanner Operator's Guide TROUBLESHOOTING CONTENTS MAP 5.2 How to Check and Reset the Consumables Counters For confirming the abrasion of consumables and resetting the counters, use [Software Operation Panel] on your computer as shown below.
- Page 138 5.2 How to Check and Reset the Consumables Counters 3. From the list on the left of the panel, select [Device Setting]. You can confirm the following information in this panel: Total Page Count (ADF/FB) Total scanned sheets Brake Roller Number of sheets scanned since last replacement of the Brake roller Pick Roller Number of sheets scanned since last replacement of the Pick roller...
- Page 139 5.2 How to Check and Reset the Consumables Counters 2. Click the [OK] button on the displayed confirmation message. The counter is reset to 0. (The remaining ink indication (percentage) is reset to 100.) 3. If you want to close the [Software Operation Panel] dialog box, click the [OK] button. Consumables Replacement Message The following message may appear while using the scanner: file:////10.232.227.50/Manual/fi-6140_6240C-Lynx3/OG/R02/02_081030/contents/EN/05/c05_02_01.htm (3/4) [2008/10/30 12:43:18]...
- Page 140 5.2 How to Check and Reset the Consumables Counters Replace consumables when this message is displayed. When you click the [Ignore] button, this message disappears and scanning continues. You may be able to continue scanning for a while, however, it is recommended that you replace the consumable as soon as possible.
- Page 141 5.3 Replacing the Brake Roller fi-6140 / fi-6240 Image Scanner Operator's Guide TROUBLESHOOTING CONTENTS MAP 5.3 Replacing the Brake Roller 1. Remove any documents from the ADF paper chute. 2. Open the ADF by pulling the ADF open lever and turning the ADF to the front.
- Page 142 5.3 Replacing the Brake Roller 4. Remove the Brake roller from the shaft. 5. Attach a new Brake roller. Insert the shaft to the Brake roller aligning the shaft tab with the slot of the Brake roller. Brake roller's slot Shaft tab 6.
- Page 143 5.3 Replacing the Brake Roller With the movie below, review the procedure to replace the Brake roller. 8. Reset the Brake roller counter. For how to reset the Brake roller counter, see Section "5.2 How to Check and Reset the Consumables Counters."...
- Page 144 5.4 Replacing the Pick Roller fi-6140 / fi-6240 Image Scanner Operator's Guide TROUBLESHOOTING CONTENTS MAP 5.4 Replacing the Pick Roller 1. Remove any documents from the ADF paper chute. 2. Remove the ADF paper chute from the scanner. ADF paper chute 3.
- Page 145 5.4 Replacing the Pick Roller 1) Use the handle in the middle of the sheet guide to open it as shown below. Sheet guide 2) Rotate the Pick roller lever in the direction of the arrow. Lever 3) Slide the Pick roller in the direction of teh arrow, and then lift it up to remove the shaft from the hole. CAUTION Be careful not to touch the gear beside the lever of the Pick Roller as grease is applied to it.
- Page 146 5.4 Replacing the Pick Roller 5. Remove the Pick roller from the shaft. Remove the Pick roller from the shaft while lifting up the tab on the Pick roller. Pick roller Shaft CAUTION If you lift the pick roller tab with your fingernail, it may hurt your fingernail. Use a paper clip to lift the pick roller tab if you cannot do it with your finger.
- Page 147 5.4 Replacing the Pick Roller 2) Rotate the Pick roller lever in the direction of the arrow. Lever 3) Close the sheet guide. Make sure that both sides of the side guide are firmly locked. 8. Close the ADF. Press down on the center of the ADF to return it to its original position until the ADF open leverlocks.
- Page 148 5.4 Replacing the Pick Roller With the movie below, review the procedure to replace the Pick roller. 10. Reset the Pick roller counter. For how to reset the Pick roller counter, see Section "5.2 How to Check and Reset the Consumables Counters."...
- Page 149 Chapter 6 TROUBLESHOOTING fi-6140 / fi-6240 Image Scanner Operator's Guide TROUBLESHOOTING CONTENTS MAP Chapter 6 TROUBLESHOOTING This chapter describes how to remedy document jams, other troubles, items to check before contacting the agent where you bought the scanner, and how to check device labels.
- Page 150 6.1 Removing Jammed Documents fi-6140 / fi-6240 Image Scanner Operator's Guide TROUBLESHOOTING CONTENTS MAP 6.1 Removing Jammed Documents If a document jam occurred, follow the procedure below to remove the jammed documents. ATTENTION Take care not to get injured when removing jammed documents.
- Page 151 6.1 Removing Jammed Documents Press center of ADF ATTENTION Make sure that the ADF is completely closed. When it is not completely closed, ● feeding errors may occur. When the scanning is completed or canceled, the documents might remain inside the ●...
-
Page 152: Error Indications On The Operator Panel
6.2 Error Indications on the Operator Panel fi-6140 / fi-6240 Image Scanner Operator's Guide TROUBLESHOOTING CONTENTS MAP 6.2 Error Indications on the Operator Panel When any error occurs, the operator panel indicates [J] or [U] and a number alternately for temporary errors, or [E], [F], [C], [H], [A], or [L] and a number alternately for device alarms (permanent error). -
Page 153: Removing Jammed Documents
If the alarm is still displayed on the Function Number Display, record (fi-6240 only) the indicated error code, and contact the store where you purchased the scanner or an authorized FUJITSU scanner service provider. Optical system error (ADF front). When you encounter any alarm on the display, turn the scanner off and on. - Page 154 FUJITSU scanner service The lamp fuse has blown out. provider. The background switching motor fuse has blown out. Options (only when imprinter option is installed in fi-6140) ● [A] and a number are displayed alternately. Indication Meaning...
- Page 155 If the alarm is still displayed on the Function Number Display, record the indicated error code, and contact the store where you purchased the scanner or an authorized FUJITSU scanner service provider. All Rights Reserved. Copyright 2007-2008 © PFU LIMITED...
-
Page 156: Remedying Typical Troubles
"6.4 Items to Check Before Contacting the Dealer Where You Bought the Scanner" and then contact the dealer where you purchased the scanner or an authorized FUJITSU scanner service provider. Scanner cannot be turned On. Indication on Function No. display goes out. - Page 157 6.3 Remedying Typical Troubles fi-6140 / fi-6240 Image Scanner Operator's Guide TROUBLESHOOTING CONTENTS MAP 6.3 Remedying Typical Troubles Symptom: Scanner cannot be turned ON. Back Are the power cable and AC adapter correctly Connect the power cable and AC adapter connected? correctly.
- Page 158 6.3 Remedying Typical Troubles fi-6140 / fi-6240 Image Scanner Operator's Guide TROUBLESHOOTING CONTENTS MAP 6.3 Remedying Typical Troubles Symptom: Indication on Function No. display goes out. Back Does the display remain blank even after you have pressed any button on the Operator The scanner operation is normal.
- Page 159 6.3 Remedying Typical Troubles fi-6140 / fi-6240 Image Scanner Operator's Guide TROUBLESHOOTING CONTENTS MAP 6.3 Remedying Typical Troubles Symptom: The scanning does not start. Back Turn OFF the scanner and unlock the transport lock. Did you unlock the transport lock of the Flatbed? (fi-6240 only) (Refer to "2.1 Installing the Scanner in "fi-...
- Page 160 Section "6.4 Items to Check Before Contacting the Dealer Where You Bought the Scanner" and contact the dealer or an authorized FUJITSU scanner service provider. All Rights Reserved. Copyright 2007-2008 © PFU LIMITED file:////10.232.227.50/Manual/fi-6140_6240C-Lynx3/OG/R02/02_081030/contents/EN/06/c06_03/03.htm (2/2) [2008/10/30 12:41:01]...
- Page 161 6.3 Remedying Typical Troubles fi-6140 / fi-6240 Image Scanner Operator's Guide TROUBLESHOOTING CONTENTS MAP 6.3 Remedying Typical Troubles Symptom: Quality of scanned pictures or photos is not satisfactory when scanning in black and white. Back On the scanner driver, select "halftoning" or Did you select halftoning or dithering? "dithering"...
- Page 162 6.3 Remedying Typical Troubles fi-6140 / fi-6240 Image Scanner Operator's Guide TROUBLESHOOTING CONTENTS MAP 6.3 Remedying Typical Troubles Symptom: Quality of scanned text or lines is unsatisfactory. Back Clean the dirty locations. Are the upper/lower glasses and rollers inside the ADF or the document bed and document...
- Page 163 6.3 Remedying Typical Troubles fi-6140 / fi-6240 Image Scanner Operator's Guide TROUBLESHOOTING CONTENTS MAP 6.3 Remedying Typical Troubles Symptom: Images are distorted or blurred. Back Clean the dirty locations. Are the upper/lower glasses and rollers inside the ADF or the document bed and document holding pad...
- Page 164 6.3 Remedying Typical Troubles fi-6140 / fi-6240 Image Scanner Operator's Guide TROUBLESHOOTING CONTENTS MAP 6.3 Remedying Typical Troubles Symptom: Vertical lines appear in the scanned image. Back Clean the document bed of the Flatbed. Did you scan the document with the Flatbed?
- Page 165 6.3 Remedying Typical Troubles fi-6140 / fi-6240 Image Scanner Operator's Guide TROUBLESHOOTING CONTENTS MAP 6.3 Remedying Typical Troubles Symptom: The Function Number Display indicates alarm (with [E] or other alphabetical letter plus a number) after the scanner is turned ON.
- Page 166 6.3 Remedying Typical Troubles fi-6140 / fi-6240 Image Scanner Operator's Guide TROUBLESHOOTING CONTENTS MAP 6.3 Remedying Typical Troubles Symptom: Multifeed errors occur frequently. Back Use documents that satisfy the requirements. Do the documents satisfy the conditions described in Precautions in Section "7.2...
- Page 167 Section "6.4 Items to Check Before Contacting the Dealer Where You Bought the Scanner" and contact the dealer or an authorized FUJITSU scanner service provider. All Rights Reserved. Copyright 2007-2008 © PFU LIMITED file:////10.232.227.50/Manual/fi-6140_6240C-Lynx3/OG/R02/02_081030/contents/EN/06/c06_03/09.htm (2/2) [2008/10/30 12:41:09]...
- Page 168 6.3 Remedying Typical Troubles fi-6140 / fi-6240 Image Scanner Operator's Guide TROUBLESHOOTING CONTENTS MAP 6.3 Remedying Typical Troubles Symptom: Pickup errors occur frequently. Back Use documents that satisfy the requirements. Do the documents satisfy the conditions described in Precautions in Section "7.2...
- Page 169 6.3 Remedying Typical Troubles fi-6140 / fi-6240 Image Scanner Operator's Guide TROUBLESHOOTING CONTENTS MAP 6.3 Remedying Typical Troubles Symptom: Paper jams occur frequently. Back Use documents that satisfy the requirements. Do the documents satisfy the conditions described in Precautions in Section "7.2...
- Page 170 6.3 Remedying Typical Troubles fi-6140 / fi-6240 Image Scanner Operator's Guide TROUBLESHOOTING CONTENTS MAP 6.3 Remedying Typical Troubles Symptom: The scanned images are elongated when scanned from the ADF. Back Clean the dirty rollers. Are the rollers dirty? (For how to clean the rollers, see Section "4.3...
- Page 171 6.3 Remedying Typical Troubles fi-6140 / fi-6240 Image Scanner Operator's Guide TROUBLESHOOTING CONTENTS MAP 6.3 Remedying Typical Troubles Symptom: There is a shadow on the leading edge of the scanned images. Back Display the properties of the scanner that you are using on "Scanners and Cameras"...
- Page 172 6.4 Items to Check Before Contacting the Dealer Where You Bought the Scanner fi-6140 / fi-6240 Image Scanner Operator's Guide TROUBLESHOOTING CONTENTS MAP 6.4 Items to Check Before Contacting the Dealer Where You Bought the Scanner Check the following items before you contact the dealer where you bought the scanner.
- Page 173 6.4 Items to Check Before Contacting the Dealer Where You Bought the Scanner Installation or PC connection issues Problem at the time of personal computer connection Item Findings Windows Vista OS (Windows) Displayed error message Type of interface (Example) SCSI interface Interface controllers (Example) made by Adaptec.
- Page 174 6.4 Items to Check Before Contacting the Dealer Where You Bought the Scanner Imaging system trouble Item Findings Type and version of scanner driver Type of interface controller (Example) made by Adaptec. SCSI Card 2940AU OS (Windows) Windows Vista Application software (Example) ScandAll PRO, Acrobat Scan type...
- Page 175 6.5 Checking Labels on the Scanner fi-6140 / fi-6240 Image Scanner Operator's Guide TROUBLESHOOTING CONTENTS MAP 6.5 Checking Labels on the Scanner This section describes how to check the labels on the scanner. Positions of Labels on the Scanner The following shows where the two labels are located on the scanner.
-
Page 176: Adf And Paper Specification
Chapter 7 ADF AND PAPER SPECIFICATION fi-6140 / fi-6240 Image Scanner Operator's Guide TROUBLESHOOTING CONTENTS MAP Chapter 7 ADF AND PAPER SPECIFICATION This chapter describes the required document size and paper quality for ensuring correct operation when scanning documents on the ADF. - Page 177 7.1 Document Size fi-6140 / fi-6240 Image Scanner Operator's Guide TROUBLESHOOTING CONTENTS MAP 7.1 Document Size The following shows the size of documents that can be scanned on the ADF. Maximum Minimum 216 (8.5 in) 356 (14 in) 53 (2.1 in) 74 (2.9 in)
-
Page 178: Document Quality
7.2 Document Quality fi-6140 / fi-6240 Image Scanner Operator's Guide TROUBLESHOOTING CONTENTS MAP 7.2 Document Quality Document Type The following paper types are recommended for document use: Woodfree paper ● Wood containing paper ● When using documents of paper type other than the above, check whether or not the document can be scanned by test- scanning a few sheets before executing the actual document. - Page 179 7.2 Document Quality ATTENTION Carbonless paper contains chemical substances that may harm the Brake roller or ● paper-feeding rollers (e.g. Pick roller) when documents are fed. Pay attention to the following: Cleaning: If document jams occur frequently, clean the Brake roller and the Pick roller. For details on cleaning the Brake roller and the Pick roller, see Chapter "4.
- Page 180 7.2 Document Quality Dimensions: 3.4 inch (height) x 2.1 inch (width)/ 86 mm x 54 mm Thickness: 0.056 inches / 1.4 mm or less *: 0.05 inches / 1.25 mm or less when documents are scanned in landscape orientation in binary mode at 200 dpi (60 ppm) Material: PVC (Poly vinyl chloride) or PVCA (Polyvinyl chloride acetate)
-
Page 181: Maximum Document Loading Capacity
7.3 Maximum Document Loading Capacity fi-6140 / fi-6240 Image Scanner Operator's Guide TROUBLESHOOTING CONTENTS MAP 7.3 Maximum Document Loading Capacity The maximum number of sheets that can be loaded on the ADF paper chute is determined by the size and weight of the document. -
Page 182: Area Not To Be Perforated
7.4 Area Not to be Perforated fi-6140 / fi-6240 Image Scanner Operator's Guide TROUBLESHOOTING CONTENTS MAP 7.4 Area Not to be Perforated When using the ADF, document trouble might occur if there are punched holes in the shaded area in the following figure. -
Page 183: Multifeed Detection Conditions
7.5 Multifeed Detection Conditions fi-6140 / fi-6240 Image Scanner Operator's Guide TROUBLESHOOTING CONTENTS MAP 7.5 Multifeed Detection Conditions There are three multifeed detection modes: document overlapping, document length, and both document thickness and length. The following conditions must be satisfied in each of these detection modes. - Page 184 7.5 Multifeed Detection Conditions All Rights Reserved. Copyright 2007-2008 © PFU LIMITED file:////10.232.227.50/Manual/fi-6140_6240C-Lynx3/OG/R02/02_081030/contents/EN/07/c07_05_01.htm (2/2) [2008/10/30 12:42:36]...
-
Page 185: Scanner Settings
Chapter 8 SCANNER SETTINGS fi-6140 / fi-6240 Image Scanner Operator's Guide TROUBLESHOOTING CONTENTS MAP Chapter 8 SCANNER SETTINGS This chapter explains the how settings can be done for the scanner using the Software Operation Panel. All Rights Reserved. Copyright 2007-2008 © PFU LIMITED... - Page 186 8.1 Scanner Settings The Software Operation Panel (SOP) will be installed together with the scanner driver (TWAIN/ISIS). With this application, you can configure settings and functions for the fi-6140 and the fi-6240. Start up the Software Operation Panel 1. Confirm if the scanner is connected correctly to the PC, then power on the scanner.
-
Page 187: Power Saving Setting
8.1 Scanner Settings Settings Using the Software Operation Panel, you can configure the following settings for the scanner connected to the PC. [Device setting] Item Explanation Selectable parameter Default Page counter For evaluating the Pick roller/Brake roller/remaining ink — consumable replacement level (only for the imprinter option) (Consumables cycle. - Page 188 8.1 Scanner Settings Selecting each item displays detailed settings (parameters) in the right part of the dialog box. Item Explanation Selectable parameter Default Multifeed Select the method to detect None/Check Overlapping [Ultrasonic]/ Check Multifeed. (Check either of Check Length/Check Overlapping and overlapping overlapping or document Length.
- Page 189 8.1 Scanner Settings Document check area Selected range: This is Checking of selected range Do not check checked when limiting the specification for range of detecting Multifeed Detection multifeeds. You can Enable/Disable (when the selected Disable determine if mulfifeed range is checked) detection is enabled or disabled in the specified area.
- Page 190 Resets the current settings to the factory setting. [Save button Saves contents of various settings onto the computer. (Use this button to apply the same settings to other fi-6140 or fi-6240 scanners.) ATTENTION Saving outputs the EEPROM value currently written in the scanner. Click the [Apply] button first if you have changed the value immediately before saving.
- Page 191 8.2 Power Saving Setting fi-6140 / fi-6240 Image Scanner Operator's Guide TROUBLESHOOTING CONTENTS MAP 8.2 Power Saving Setting This scanner switches to Power saving mode automatically to save power consumption when it remains unused for a certain time. To configure the Power saving mode, do the following: 1.
-
Page 192: Offset/Scan Scale
8.3 Offset/Scan Scale fi-6140 / fi-6240 Image Scanner Operator's Guide TROUBLESHOOTING CONTENTS MAP 8.3 Offset/Scan Scale When the position of the scanned image is not correct or the image is elongated, use the following procedure to adjust the Offset and the Scan scale for correction. - Page 193 8.3 Offset/Scan Scale 3. Adjust the Offset/Scan scale as necessary. Offset Setting Target Select ADF front, ADF back, or FB as target. Horizontal Adjusts the horizontal Offset. Setting range -2 mm to +2 mm, in steps of 0.5 mm. Vertical Adjusts the vertical Offset.
-
Page 194: Multifeed Detection
8.4 Multifeed Detection fi-6140 / fi-6240 Image Scanner Operator's Guide TROUBLESHOOTING CONTENTS MAP 8.4 Multifeed Detection "Multifeed" is a feeding error that occurs when two or more sheets in the ADF paper chute are fed simultaneously into the scanner. If you continue scanning document without knowing this multifeed error, you could skip some of important data while scanning the document. - Page 195 8.4 Multifeed Detection 3. Select a detection option. None Does not detect multifeeds. Check Overlapping(Ultrasonic) Detects multifeeds by checking for document overlapping. When this option is selected, the following two more detection options can be set: You can specify the multifeed detection range by the length from the leading edge of document. ●...
- Page 196 8.4 Multifeed Detection 5. Speficy the detection range. Selected Range To specify the following detection range, you need to mark this checkbox first. Unit: mm Mark this checkbox to enable the settings configured in this dialog box. Otherwise, let the checkbox unmarked. Clearing this checkbox sets both the starting and ending positions to "0", making the whole range of the document to be checked for multifeeds.
- Page 197 8.4 Multifeed Detection Enable Enables the Multifeed Detection for the specified range. Start Specify the starting position of the detection range from the leading edge of the document. The configurable area is from 0 to 510 mm in 2 mm increments, where the starting position is less than the ending position.
- Page 198 8.4 Multifeed Detection HINT When [Check Overrapping(Ultrasonic)] is selected, the multifeed detection ratio may drop if the document sheet(s) are glued or electrostatically adhered to each other. Setting Example 3 (Bad Example) Selected Range=Enable, Start=100mm, End=102mm Unit: mm * Since the detection range (length) is less than the minimum value (5 mm), the Multifeed Detection cannot be performed correctly.
-
Page 199: Page Edge Filler
8.5 Page Edge Filler fi-6140 / fi-6240 Image Scanner Operator's Guide TROUBLESHOOTING CONTENTS MAP 8.5 Page Edge Filler Depending on the state of the documents, the shadow of the scanned document appears in the end portion of the output image and black thin lines may be generated. - Page 200 8.5 Page Edge Filler Top edge=0 to 15 mm Top edge=0 to 15 mm D: Bottom edge=–7 to 7 mm Bottom edge=0 to 15 mm R: Right edge=0 to 15 mm Right edge=0 to 15 mm Left edge=0 to 15 mm Left edge=0 to 15 mm (can be set in increments of 1 mm) (can be set in increments of 1 mm)
-
Page 201: Dropout Color
8.6 Dropout Color fi-6140 / fi-6240 Image Scanner Operator's Guide TROUBLESHOOTING CONTENTS MAP 8.6 Dropout Color By using the “Dropout Color” function, you can scan documents with the specified color removed from the light’s three primary colors, or red, green, blue. (This function is available for the binary black and white setting as well as the grayscale setting.) - Page 202 8.6 Dropout Color Red, Green, Blue Red, green, or blue is dropped out. None No color is dropped out. ATTENTION The Dropout Color setting can also be configured using the scanner driver setting ● window. (The scanner driver setting window is given a priority over Software Operation Panel.) When configuring the setting through Software Operation Panel, you cannot select other ●...
-
Page 203: Pre-Pick
8.7 Pre-Pick fi-6140 / fi-6240 Image Scanner Operator's Guide TROUBLESHOOTING CONTENTS MAP 8.7 Pre-Pick To scan documents consecutively, you can previously pick the document to be scanned next. This operation is called Pre-Pick. By enabling Pre-Pick, the time interval between the scanning of two separate documents can be shortened. - Page 204 8.7 Pre-Pick HINT By enabling Pre-Pick, faster scanning can be achieved. ● While Pre-Pick is valid, if you cancel scanning in process, you have to reload the ● document after ejecting all the pre-picked document. This setting is also available by scanner driver setting. (In this case scanner driver ●...
-
Page 205: Intelligent Multifeed Setting
8.8 Intelligent Multifeed Setting fi-6140 / fi-6240 Image Scanner Operator's Guide TROUBLESHOOTING CONTENTS MAP 8.8 Intelligent Multifeed Setting If two or more sheets of paper of the same size are sticked on the same position of the document, you can easily let the scanner memorize the size and/or position just not to detect multifeeds in that area. - Page 206 8.8 Intelligent Multifeed Setting 3. Select one of the following options and click the [OK] button. Refer to Section "3.18 Not Detecting Multifeed for Fixed Format." Manual mode In this mode, when the scanner detects a multifeed and stops document feeding, you can reload the document from the ADF paper chute and specify whether or not to bypass the Multifeed Detection.
-
Page 207: Paper Feeding Retry Times
8.9 Paper Feeding Retry Times fi-6140 / fi-6240 Image Scanner Operator's Guide TROUBLESHOOTING CONTENTS MAP 8.9 Paper Feeding Retry Times You can specify this feature to change the number of times paper feeding (picking) is to be retried. Configure the number of paper feeding retry times as follows. -
Page 208: Life Counter Setting
8.10 Life Counter Setting fi-6140 / fi-6240 Image Scanner Operator's Guide TROUBLESHOOTING CONTENTS MAP 8.10 Life Counter Setting This counter specifies the page count to ask the operator to replace the consumables. When the page count exceeds the value specified here, the background color of the counter becomes yellow (see Section "5.2 How to Check and Reset the... -
Page 209: Setting For Manual-Feed Timeout
8.11 Setting for Manual-Feed Timeout fi-6140 / fi-6240 Image Scanner Operator's Guide TROUBLESHOOTING CONTENTS MAP 8.11 Setting for Manual-Feed Timeout In Manual Feeding mode where you manually load documents sheet by sheet, you can scan multiple batches of documents continuously as a single file when you load the second stack of document before the timeout time after loading the first batch. - Page 210 8.11 Setting for Manual-Feed Timeout HINT When the manual-feed timeout is enabled, the scanner waits for the document to be loaded within the specified timeout period, even if scanning starts with no document loaded in the ADF paper chute. All Rights Reserved. Copyright 2007-2008 © PFU LIMITED file:////10.232.227.50/Manual/fi-6140_6240C-Lynx3/OG/R02/02_081030/contents/EN/08/c08_11_01.htm (2/2) [2008/10/30 12:42:54]...
-
Page 211: Power On/Off Control Setting
8.12 Power ON/OFF Control Setting fi-6140 / fi-6240 Image Scanner Operator's Guide TROUBLESHOOTING CONTENTS MAP 8.12 Power ON/OFF Control Setting You can select how to power the scanner on/off; by pressing the Power button, or by connecting/disconnecting the AC cable. - Page 212 8.12 Power ON/OFF Control Setting 3. To power on/off the scanner by pressing the Power button, select [Enable power switch]. To power on/off the scanner by connecting/disconnecting the AC cable, select [Disable power switch]. To power on/off the scanner in conjunction with the computer, select [Enable USB power feeding]. If [Enable USB power feeding] is selected while the scanner is connected through an SCSI cable, the scanner operation will be the same as when [Enable power switch] is selected.
-
Page 213: Paper Protection Setting
8.13 Paper Protection Setting fi-6140 / fi-6240 Image Scanner Operator's Guide TROUBLESHOOTING CONTENTS MAP 8.13 Paper Protection Setting The Paper Protection function detects any folded paper or nonstandard thin paper in the document and stops the scanning. Configure the settings for the Page Protection as follows: 1. - Page 214 8.13 Paper Protection Setting HINT You can configure the settings from the setup dialog box of the scanner driver. (In this case, the settings configured in the scanner driver are given a priority.) All Rights Reserved. Copyright 2007-2008 © PFU LIMITED file:////10.232.227.50/Manual/fi-6140_6240C-Lynx3/OG/R02/02_081030/contents/EN/08/c08_13_01.htm (2/2) [2008/10/30 12:42:56]...
-
Page 215: Paper Protection Detection Level Setting
8.14 Paper Protection Detection Level Setting fi-6140 / fi-6240 Image Scanner Operator's Guide TROUBLESHOOTING CONTENTS MAP 8.14 Paper Protection Detection Level Setting You can set the level of detecting paper jams occurred while feeding the document into the ADF. Configure the settings for the paper protection detection level as follows: 1. - Page 216 8.14 Paper Protection Detection Level Setting ATTENTION Specifying [Low] dampens the sensitivity of detecting paper jam at the ADF. Always select [Normal] or [High] for important documents that must not be torn or wrinkled. All Rights Reserved. Copyright 2007-2008 © PFU LIMITED file:////10.232.227.50/Manual/fi-6140_6240C-Lynx3/OG/R02/02_081030/contents/EN/08/c08_14_01.htm (2/2) [2008/10/30 12:42:58]...
-
Page 217: Autocrop Boudary
8.15 AutoCrop Boudary fi-6140 / fi-6240 Image Scanner Operator's Guide TROUBLESHOOTING CONTENTS MAP 8.15 AutoCrop Boundary Scanning documents using the "Automatic Paper Size Detection" function may produce incomplete image data; the edge of the image data may be lost, or shadows may be produced on the bottom or right edge of the data. To prevent or improve such a problem, use this "AutoCrop Boundary."... - Page 218 8.15 AutoCrop Boudary ATTENTION Some applications may display scanned image data incorrectly when [Optimize] is selected. In such a case, select [Normal]. All Rights Reserved. Copyright 2007-2008 © PFU LIMITED file:////10.232.227.50/Manual/fi-6140_6240C-Lynx3/OG/R02/02_081030/contents/EN/08/c08_15_01.htm (2/2) [2008/10/30 12:42:59]...
-
Page 219: Scanner Specification
Chapter 9 SCANNER SPECIFICATION fi-6140 / fi-6240 Image Scanner Operator's Guide TROUBLESHOOTING CONTENTS MAP Chapter 9 SCANNER SPECIFICATION This chapter lists the scanner specifications. All Rights Reserved. Copyright 2007-2008 © PFU LIMITED file:////10.232.227.50/Manual/fi-6140_6240C-Lynx3/OG/R02/02_081030/contents/EN/09/c09.htm [2008/10/30 12:43:00]... -
Page 220: Basic Specifications
9.1 Basic Specifications fi-6140 / fi-6240 Image Scanner Operator's Guide TROUBLESHOOTING CONTENTS MAP 9.1 Basic Specifications Item Specification Notice fi-6140 fi-6240 Scanner type ADF (Automatic Document ADF + Flatbed Feeder) fi-6140 fi-6240 Image sensor Color CCD x 2 (Front, Color CCD x 3 (Front, Back, Flatbed) - Page 221 USB2.0 / 1.1 (Note (*8)) B type JPEG compression Other function Imprinter Port (fi-6140 only) (Note (*9)) Name: Black document pad [fi-6240 only] Parts No.: PA03540-D801 (Note (*10)) Option The minimum size for scanning is A8 when using the ADF. When using the Flatbed (fi-6240 only) to scan the minimum scanning range is virtually unlimited.
-
Page 222: Installation Specifications
9.2 Installation Specifications fi-6140 / fi-6240 Image Scanner Operator's Guide TROUBLESHOOTING CONTENTS MAP 9.2 Installation Specifications Item Specification Dimensions Depth Width Height (fi-6140: Without ADF paper chute fi-6140: 160 mm fi-6140: 301 mm fi-6140: 158 mm and stacker) (6.4 in) (11.8 in) -
Page 223: External Dimensions
9.3 External Dimensions fi-6140 / fi-6240 Image Scanner Operator's Guide TROUBLESHOOTING CONTENTS MAP 9.3 External Dimensions The following shows the external dimensions: fi-6140 fi-6240 (Unit:mm) All Rights Reserved. Copyright 2007-2008 © PFU LIMITED file:////10.232.227.50/Manual/fi-6140_6240C-Lynx3/OG/R02/02_081030/contents/EN/09/c09_03_01.htm [2008/10/30 12:43:04]... - Page 224 APPENDIX 1 Before Using the [Scan] or [Send to] Button fi-6140 / fi-6240 Image Scanner Operator's Guide TROUBLESHOOTING CONTENTS MAP APPENDIX 1 Before Using the [Scan] or [Send to] Button By setting the link of the application software to the [Scan] or [Send to] button, you can launch the linked application by simply pushing the button.
- Page 225 APPENDIX 1 Before Using the [Scan] or [Send to] Button The events available for this function are: Scan Button (Press the [Scan] button) ● Send to 1 to 9 (With a number from 1 to 9 displayed on the Function Number Display, press the [Send to] ●...
- Page 226 APPENDIX 1 Before Using the [Scan] or [Send to] Button 9. Click the [OK] button. HINT The window and operations may vary depending on your OS. Settings to Configure on the Scanner Function Number Display [Function] button [Secd to] button [Scan] button When using the [Scan] button ●...
Need help?
Do you have a question about the fi-6140 and is the answer not in the manual?
Questions and answers