Table of Contents
Advertisement
Advertisement
Table of Contents

Subscribe to Our Youtube Channel
Related Manuals for Martin RUSH MH 1 Profile


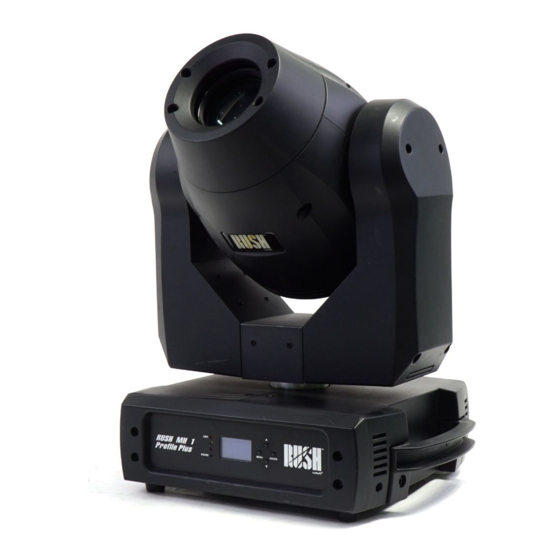
Summary of Contents for Martin RUSH MH 1 Profile
-
Page 1: User Manual
MH 1 Profile User Manual Professional Entertainment Technology... - Page 2 Martin Professional or its affiliates and subsidiaries are trademarks owned or licensed by Martin Professional or its affiliates or subsidiaries. Martin Professional • Olof Palmes Allé 18 • 8200 Aarhus N • Denmark • www.martin.com Manual: Revision E...
-
Page 3: Table Of Contents
Table of contents Safety information ......................4 Introduction ........................9 Before using the product for the first time ..............9 Physical installation ..................... 10 Fastening the fixture to a flat surface ............... 10 Mounting the fixture on a truss ................. 10 Securing with a safety cable .................. -
Page 4: Safety Information
Follow the safety precautions listed below and observe all warnings in this manual and printed on the product. Keep this user manual for future use. RUSH MH 1 Profile User Manual... - Page 5 Before using the fixture, check that all power distribution equipment and cables are in perfect condition and rated for the electrical requirements of all connected devices. Use only Neutrik PowerCon cable connectors to connect to power sockets. RUSH MH 1 Profile User Manual...
- Page 6 (185° F) during operation. Avoid contact by persons and materials. Allow the fixture to cool for at least 10 minutes before handling. Keep flammable materials well away from the fixture. Keep all combustible materials (e.g. fabric, wood, paper) at least 100 RUSH MH 1 Profile User Manual...
- Page 7 The secondary attachment must be approved by an official body such as TÜV as a safety attachment for the weight that it secures, must comply with EN RUSH MH 1 Profile User Manual...
- Page 8 Do not modify the fixture in any way not described in this manual or install other than genuine RUSH by Martin™ parts. Refer any service operation not described in this manual to a qualified technician. RUSH MH 1 Profile User Manual...
-
Page 9: Introduction
4. Before operating, ensure that the voltage and frequency of the power supply match the power requirements of the fixture. 5. Check the RUSH support pages on the Martin Professional website at www.martin.com for the most recent user documentation and technical information about the fixture. -
Page 10: Physical Installation
A. When installing the fixture hanging vertically, open-type clamps B can be used. When installing in any other orientation, half- coupler clamps C that completely encircle the truss chord must be used. RUSH MH 1 Profile User Manual... -
Page 11: Securing With A Safety Cable
Loop the safety cable through the cutout in the fixture’s baseplate (arrowed in illustration on right) and around a secure anchoring point. Martin™ can supply suitable safety cables and rigging clamps (see ‘Accessories’ on page 41). RUSH MH 1 Profile User Manual... -
Page 12: Ac Power
Yellow/green The fixture has an auto-ranging power supply that accepts AC mains power at 100-240 V at 50/60 Hz. Do not apply AC mains power at any other voltage or frequency to the fixture. RUSH MH 1 Profile User Manual... -
Page 13: Linking Fixtures To Power In A Chain
• Hold to exit the menus DOWN Go down a menu branch Go up a menu branch ENTER Confirm the selected function Press and hold the MENU button to exit the menu mode. RUSH MH 1 Profile User Manual... -
Page 14: Control Data Link
DMX channels. Fixtures that are required to behave identically can share the same DMX address and channels. To add more fixtures or groups of fixtures when the above limit is reached, add a DMX universe and another daisy-chained link. RUSH MH 1 Profile User Manual... -
Page 15: Tips For Reliable Data Transmission
ENTER, DOWN and UP buttons. Select any required menu option using the ENTER button. To return to the previous level in the menu structure without making a change, press the MENU button. To exit the menus, press and hold the MENU button. RUSH MH 1 Profile User Manual... -
Page 16: Dmx Function Settings
3. Use the UP and DOWN buttons to scroll through the DMX channels and press ENTER to select a channel. The fixture will display the DMX value it is receiving on that channel. 4. Press MENU to exit the viewer. RUSH MH 1 Profile User Manual... -
Page 17: Show Settings
2. Use the DOWN and UP buttons to select FOCUS 1 or FOCUS 2 (corresponding to wheel 1 (rotating) or wheel 2 (fixed)) and press ENTER to confirm. 3. Use the DOWN and UP buttons to change the focus point from 0…255. RUSH MH 1 Profile User Manual... -
Page 18: Fixture Settings
INVERSE and press ENTER to confirm. 3. Use the DOWN and UP buttons to select YES (inversion) or NO (normal). 4. Press ENTER to confirm (or press MENU to exit without saving any changes). RUSH MH 1 Profile User Manual... -
Page 19: Display Settings
2. Use the DOWN and UP buttons to select DISPLAY INVERSE and press ENTER to confirm. 3. Use the DOWN and UP buttons to select YES (invert) or NO (normal). 4. Press ENTER to confirm (or press MENU to exit without saving any changes). RUSH MH 1 Profile User Manual... -
Page 20: Fixture Test
Fixture functions can be tested or controlled manually: 1. Select FIXTURE TEST and press ENTER to confirm. 2. Use the DOWN and UP buttons to select MANUAL TEST and press ENTER to confirm. 3. Press MENU to exit. RUSH MH 1 Profile User Manual... -
Page 21: Fixture Information
1. In the menu structure, hold the ENTER button down for approx. 3 seconds to enter the OFFSET MENU. 2. Use the DOWN and UP buttons to choose the function that needs to be adjusted. Press ENTER to select it. RUSH MH 1 Profile User Manual... - Page 22 DOWN and UP buttons to adjust the home position of the function or effect. 4. Once the correct position has been reached, press ENTER to set this (or press MENU to exit without saving any changes). RUSH MH 1 Profile User Manual...
-
Page 23: Effects
The fixture can be set to automatically blackout during gobo changes. Iris The fixture provides an adjustable iris, allowing the diameter of the projected beam to be adjusted. Motorized focus The focus of gobos projected onto a surface can be adjusted. RUSH MH 1 Profile User Manual... -
Page 24: Prism
The fixture incorporates two color wheels, each with seven colors plus open/white. These can be individually selected, or the wheels can be rotated at varying speeds, both clockwise and counter-clockwise. The fixture can be set to automatically blackout during color changes. RUSH MH 1 Profile User Manual... -
Page 25: Maintenance
Installation, on-site service and maintenance can be provided worldwide by the Martin Professional™ Global Service organization and its approved agents, giving owners access to Martin’s expertise and product knowledge in a partnership that will ensure the highest level of performance throughout the product’s lifetime. -
Page 26: Replacing The Primary Fuse
3. Reinstall the fuseholder cap before reapplying power. Gobo replacement It is possible to replace the rotating gobos with custom metal gobos of the following size: • Gobo diameter: 26.8 mm (1.1 in.) • Gobo image diameter: 22 mm (0.87 in.) RUSH MH 1 Profile User Manual... - Page 27 5. Reinstall the head cover and be ready for the head to move during a reset before reapplying power. RUSH MH 1 Profile User Manual...
-
Page 28: Dmx Protocol
Color wheel 2 Color 1 – Open 8-15 Color 2 – Pink 16-23 Color 3 – CTO 3200 K 24-31 Color 4 – Purple 32-39 Color 5 – Yellow 40-47 Color 6 – Green RUSH MH 1 Profile User Manual... - Page 29 Gobo 7 shake 128-189 Wheel rotation, clockwise, fast-slow 190-193 Stop 194-255 Wheel rotation, counter clockwise, slow-fast Gobo rotation (wheel 1) 0-127 Indexed position, 0°-360° 128-189 Clockwise rotation, fast-slow 190-193 Stop 194-255 Counter-clockwise rotation, slow-fast RUSH MH 1 Profile User Manual...
- Page 30 Clockwise rotation, fast-slow 190-193 Stop 194-255 Counter-clockwise rotation, slow-fast 0-255 Iris, maximum-minimum 0-255 Focus, close-distant Settings and fixture control 0-69 No function 70-79 Blackout during pan & tilt 80-89 Disable blackout during pan & tilt RUSH MH 1 Profile User Manual...
- Page 31 Color reset 160-169 Gobo reset 170-179 No function 180-189 Focus reset 190-199 No function 200-209 Reset all 210-219 Blackout during pan/tilt or color/gobo change 220-229 Disable blackout during pan/tilt or color/gobo change 230-255 No function RUSH MH 1 Profile User Manual...
-
Page 32: Control Menus
Show 1 show 1 Show settings Pre-programmed Show 2 show 2 Show Mode Pre-programmed Show 3 show 3 Pre-programmed Show 4 show 4 Focus setting for Focus 1 0-255 gobo wheel 1 (rotating gobos) RUSH MH 1 Profile User Manual... - Page 33 Menu Sub-menu Setting/value Explanation Focus setting for Focus 2 0-255 gobo wheel 2 (fixed gobos) Sound activation off Sound Trigger Sound activation on Sound activation Sound Sensitivity 0-100 microphone sensitivity (low-high) RUSH MH 1 Profile User Manual...
- Page 34 Information Light Use Hour Reset service Reset Time countdown timer Currently installed Firmware Version firmware version Pan & Tilt Yes/No Color Yes/No Gobo Yes/No Reset Functions Prism Yes/No Iris Yes/No Focus Yes/No Yes/No RUSH MH 1 Profile User Manual...
-
Page 35: Offset Menu
-128...127 Color 2 -128...127 Gobo 1 -128...127 Wheel with rotating gobos R Gobo 1 -128...127 Rotating gobos Offset Gobo 2 -128...127 Wheel with fixed gobos Iris 0-255 Prism 0-255 R prism -128...127 Focus 0-255 RUSH MH 1 Profile User Manual... -
Page 36: Error Messages
Tilt Reset Error to sensors or components. If error persists, Tilt Encode Error contact Martin support. Shutter Reset Fail Dimmer Reset Fail Color Reset Fail Gobo Reset Fail RUSH MH 1 Profile User Manual... -
Page 37: Troubleshooting
DMX setup or DMX link See next section. channels is fault. unresponsive or only Damaged step motor or Contact your RUSH by responds cable connection Martin authorized intermittently. between head and body. distributor or service center for assistance. RUSH MH 1 Profile User Manual... - Page 38 Check that all components on DMX link use standard DMX polarity. Attempt to control the fixture with another DMX control device. Move or shield link if it is close to an unshielded high-voltage installation. RUSH MH 1 Profile User Manual...
-
Page 39: Specifications
............ rotation with variable direction and speed Rotating gobo wheel......7 gobos plus open, wheel rotation, .............. gobo indexing, rotation and shake Static gobo wheel ....8 gobos plus open, wheel rotation and shake RUSH MH 1 Profile User Manual... - Page 40 DMX data in/out ........... 3-pin & 5-pin locking XLR Electrical AC power ............100-240 V nominal, 50/60 Hz Power consumption ................350 W Fuse ....................T 6.3 A Power supply unit ......Auto-ranging electronic switch mode RUSH MH 1 Profile User Manual...
- Page 41 Power relay cable, 14 AWG, SJT, 1.5 mm , H05VV-F, with PowerCon connectors, 3.25 m (10.7 ft.) ....... P/N 11541511 Power connectors Neutrik PowerCon NAC3FCA power input connector, cable mount, blue ......P/N 05342804 RUSH MH 1 Profile User Manual...
- Page 42 Safety wire, safe working load 50 kg ........P/N 91604003 Related Items RUSH Software Uploader 1™ ..........P/N 91611399 Ordering Information RUSH MH 1 Profile™ in cardboard box ....... P/N 90280000 Specifications are subject to change without notice. For the latest product specifications, see www.martin.com Disposing of this product RUSH by Martin™...
- Page 45 Innovation Quality Performance...
Need help?
Do you have a question about the RUSH MH 1 Profile and is the answer not in the manual?
Questions and answers