Table of Contents
Advertisement
Quick Links
Download this manual
See also:
User Manual
Advertisement
Table of Contents

Related Manuals for Martin MH 1 Profile


Summary of Contents for Martin MH 1 Profile
-
Page 1: User Manual
MH 1 Profile User Manual Professional Entertainment Technology... - Page 2 The Martin logo, the RUSH by Martin logo, the RUSH by Martin name, the Martin name and all other trademarks in this document pertaining to services or products by Martin Professional A/S or its affiliates and subsidiaries are trademarks owned or licensed by Martin Professional A/S or its affiliates or subsidiaries.
-
Page 3: Table Of Contents
Table of contents Safety information ..................... 5 Introduction ....................... 9 Before using the product for the first time............9 Physical installation ..................10 Fastening the fixture to a flat surface............10 Mounting the fixture on a truss..............10 AC power ......................11 Fixture overview.................... - Page 4 Control menus....................30 Error messages....................33 Troubleshooting ....................34 Specifications....................36...
-
Page 5: Safety Information
If you have questions about how to operate the fixture safely, please contact your Martin™ dealer or call the Martin 24-hour service hotline at +45 70 200 201. Protection from electric shock Shut down power to the fixture before carrying out any installation or maintenance work. - Page 6 At less than this distance, the LED emission can cause eye injury or irritation. At distances of 8.3 meters (27 ft. 3 inches) and above, light output is harmless to the naked eye provided that MH 1 Profile user manual...
- Page 7 Do not lift or carry the fixture by its head. Always ensure that the fixture is supported by its base. In the event of an operating problem, stop using the fixture immediately and disconnect it from power. Do not attempt to use MH 1 Profile user manual...
- Page 8 Do not modify the fixture or install other than genuine RUSH by Martin™ parts. Refer any service operation not described in this manual to a qualified technician. MH 1 Profile user manual...
-
Page 9: Introduction
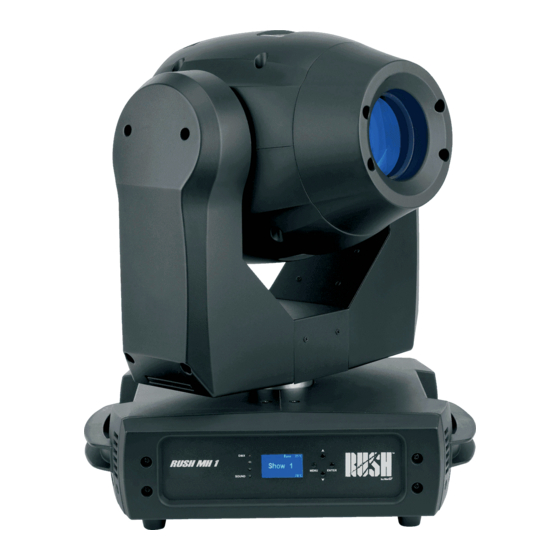
Introduction The MH 1 Profile is a small, powerful profile fixture incorporating a single 180 W long-life LED. It provides two gobo wheels, the first with seven rotating gobos and the second with eight fixed gobos. The fixture has two color wheels, each with eight colors (including white), smooth electronic dimming, rotating prism effects, a mechanical focus and iris, as well as strobe effects. -
Page 10: Physical Installation
5. Secure the fixture against clamp failure with a secondary attachment such as an approved safety cable that is rated for the weight of the fixture. 6. Check that the head will not collide with other fixtures or objects. MH 1 Profile user manual... -
Page 11: Ac Power
Do not connect more than 4 RUSH MH 1 fixtures to power in a chain at 100-120 V. Do not connect more than 8 RUSH MH 1 fixtures to power MH 1 Profile user manual... -
Page 12: Fixture Overview
The T 10A fixture fuse can be found under the cover next to the power input/output connectors. 6 - Mains power input A blue Neutrik PowerCon socket is provided to connect the fixture to mains power. MH 1 Profile user manual... -
Page 13: Control Data Link
Standard pin-out is pin 4 = data 2 cold (-) and pin 5 = data 2 hot (+). To split the link into branches, use a splitter such as the Martin 4-Channel Opto-Isolated RS-485 Splitter/Amplifier. Terminate the link by installing a DMX termination plug in the output socket of the last fixture. -
Page 14: Connecting The Dmx Data Link
XLR DMX input connector. 2. Connect the first fixture’s DMX output to the DMX input of the next fixture and continue connecting fixtures output to input. Terminate the last fixture on the link with a DMX termination plug. MH 1 Profile user manual... -
Page 15: Fixture Setup
2. Use the UP and DOWN buttons to select DMX ADDRESS and press the ENTER button to confirm. The present address will blink on the display. 3. Use the UP and DOWN buttons to select a new address. MH 1 Profile user manual... -
Page 16: Show Settings
For the shows, the focus index can be set for each of the two gobo wheels, 1 (rotating gobos) and 2 (fixed gobos). To set the focus for a gobo wheel: 1. Select SHOW SETTINGS and press the ENTER button to confirm. MH 1 Profile user manual... -
Page 17: Fixture Settings
These settings are useful for symmetrical effects with multiple fixtures, or when coordinating the movement of fixtures that are floor mounted and rigged upside down. To adjust the pan inversion settings: MH 1 Profile user manual... - Page 18 3. Use the DOWN and UP buttons to select the YES (blackout during movement or change) or NO (normal) mode. 4. Press the ENTER button to confirm (or, to return to the higher level of the menu structure without any change press the MENU button). MH 1 Profile user manual...
-
Page 19: Display Settings
Automatic tests of all functions, or manual test of individual functions can be run from the control menus. Auto test To perform a complete test of all of the fixture functions: 1. Select FIXTURE TEST and press the ENTER button to confirm. MH 1 Profile user manual... -
Page 20: Fixture Information
3. Use the DOWN and UP buttons to select YES and press the ENTER button to confirm (or to return to a higher level of the menu structure without any change press the MENU button). MH 1 Profile user manual... -
Page 21: Reset Factory Default Settings
DOWN and UP buttons to adjust the home position of the function or effect. 4. Once the correct position has been reached, press the ENTER button to set this (or to return to a higher level of the menu structure without any change press the MENU button). MH 1 Profile user manual... -
Page 22: Effects
2. Remove the fixture head cover using a Phillips screwdriver. 3. The rotating gobos sit in blades that slot into the rotating gobo wheel. Lift out the blade that contains the gobo that is to be replaced. MH 1 Profile user manual... -
Page 23: Iris
The fixture incorporates two color wheels, each with eight colors (including open/white). These can be individually selected, or the wheels can be rotated at varying speeds, both clockwise and counter-clockwise. The fixture can be set to automatically blackout during color changes. MH 1 Profile user manual... -
Page 24: Maintenance
This procedure will allow you to assess cleaning requirements in your particular situation. If in doubt, consult your RUSH by Martin dealer about a suitable maintenance schedule. Use gentle pressure only when cleaning, and work in a clean, well-lit area. Do not use any product that contains solvents or abrasives, as these can cause surface damage. -
Page 25: Service And Repairs
Never try to repair the fixture by yourself as this may result in damage, malfunction and it may potentially void your product warranty. The equipment must only be serviced or repaired by an authorized RUSH by Martin service technician. Installation, on-site service and maintenance can be provided worldwide by the Martin Professional Global Service organization and its approved agents, giving owners access to Martin’s expertise and product knowledge in a... -
Page 26: Dmx Protocol
64-127 Indexing 128-189 Clockwise, fast-slow 190-193 Stop 194-255 Counter-clockwise, slow-fast Color wheel 2 Color 1 – Open 8-15 Color 2 – Off white 16-23 Color 3 – Pastel pink 24-31 Color 4 – Mint green MH 1 Profile user manual... - Page 27 119-127 Gobo 7 shake 128-189 Wheel rotation, clockwise, fast-slow 190-193 Stop 194-255 Wheel rotation, counter clockwise, slow-fast Gobo rotation (wheel 1) 0-127 Indexed position, 0°-360° 128-189 Clockwise rotation, fast-slow 190-193 Stop 194-255 Counter-clockwise rotation, slow-fast MH 1 Profile user manual...
- Page 28 Focus, close-distant Function 0-69 No function 70-79 Blackout during pan & tilt 80-89 Disable blackout during pan & tilt 90-99 Blackout during color change 100-109 Disable blackout during color change 110-119 Blackout during gobo change MH 1 Profile user manual...
- Page 29 Color reset 160-169 Gobo reset 170-179 No function 180-189 Focus reset 190-199 No function 200-209 Reset all 210-219 Blackout during pan/tilt or color/gobo change 220-229 Disable blackout during pan/tilt or color/gobo change 230-255 No function MH 1 Profile user manual...
-
Page 30: Control Menus
Focus 1 0-255 gobo wheel 1 (rotating gobos) Focus setting for Focus 2 0-255 gobo wheel 2 (fixed gobos) Sound activation off Sound Trigger Sound activation on Sound activation Sound Sensitivity 0-100 microphone sensitivity (low-high) MH 1 Profile user manual... - Page 31 Currently installed Firmware Version firmware version Reset Functions Pan & Tilt Yes/No Color Yes/No Gobo Yes/No Prism Yes/No Iris Yes/No Focus Yes/No Yes/No Special Return all settings to Factory Settings Yes/No Functions factory defaults MH 1 Profile user manual...
-
Page 32: Offset Menu
Color 1 -128...127 Color 2 -128...127 Gobo 1 -128...127 Wheel with rotating gobos Gobo 1 R -128...127 Rotating gobos Gobo 2 -128...127 Wheel with fixed gobos Iris 0-255 Prism 0-255 R prism -128...127 Focus 0-255 MH 1 Profile user manual... -
Page 33: Error Messages
Lamp On Over 700 Hour The fixture has been on for more than 700 hours. Turn the fixture off. Memory Initial Fail Damaged memory IC (contact Martin support). CPU-B Error, CPU-C Error, Board P.C or fixture wiring is damaged CPU-D Error (contact Martin support). -
Page 34: Troubleshooting
One of the control Damaged step motor or Contact your RUSH by channels is cable connection Martin authorized unresponsive or only between the head and distributor or service center responds body. for assistance. intermittently. MH 1 Profile user manual... - Page 35 DMX network. Attempt to control the fixture with another DMX control device. Move the fixture if it is being operated very close to an unshielded high- voltage installation. MH 1 Profile user manual...
-
Page 36: Specifications
Color wheel 2 ........ 7 colors (incl. 1 x UV, 2 x CTC) plus open, rotation with variable direction and speed Rotating gobo wheel ........7 gobos plus open, wheel rotation, gobo indexing, rotation and shake Static gobo wheel...... 8 gobos plus open, wheel rotation and shake MH 1 Profile user manual... - Page 37 AC power input ..............Neutrik PowerCon AC power throughput............Neutrik PowerCon DMX data in/out ............3-pin & 5-pin locking XLR Electrical AC power .................100-240 V, 50/60 Hz Power consumption ................350 W Fuse ......................T10A Power supply unit........Auto-ranging electronic switch mode MH 1 Profile user manual...
-
Page 38: Included Items
Specifications are subject to change without notice. For the latest product specifications, see www.martin.com Disposing of this product RUSH by Martin™ products are supplied in compliance with Directive 2002/96/EC of the European Parliament and of the Council of the European Union on WEEE (Waste Electrical and Electronic Equipment), as amended by Directive 2003/108/EC, where applicable. - Page 40 I n n o v a t i o n Q u a l i t y P e r f o r m a n c e...
Need help?
Do you have a question about the MH 1 Profile and is the answer not in the manual?
Questions and answers