Table of Contents
Advertisement
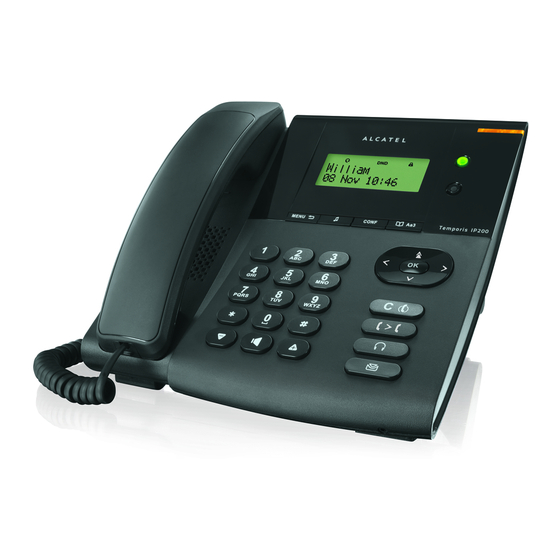
Temporis IP 200 phone is
business environment use. Its wide interoperability guarantees seamless integration
with a large number of IP PBX and VoIP providers.
Please read through this guide for a better knowledge on available functionalities and
configuration capabilities you can have access to with Temporis IP200.
Declaration of Conformity
Hereby, it's declared that this phone is in conformity with the essential
requirements and other relevant provisions of the CE, FCC.
CE Mark Warning
This is a class B device, in a domestic environment; this product may cause radio
interference, in which case the user may be required to take adequate measures.
WEEE Warning
To avoid the potential effects on the environment and human health as
a result of the presence of hazardous substances in electrical and
electronic equipment, end users of electrical and electronic equipment
should understand the meaning of the crossed-out wheeled bin symbol.
Do not dispose of WEEE as unsorted municipal waste and have to collect
such WEEE separately.
Temporis IP 200 Administrator Guide
TEMPORIS IP 200
ADMINISTRATOR'S GUIDE
a full-featured, qualitative SIP solution dedicated to
ed 1.0
- 1 - / 109
Advertisement
Table of Contents

Related Manuals for Alcatel TEMPORIS IP 200


Summary of Contents for Alcatel TEMPORIS IP 200
- Page 1 TEMPORIS IP 200 ADMINISTRATOR’S GUIDE Temporis IP 200 phone is a full-featured, qualitative SIP solution dedicated to business environment use. Its wide interoperability guarantees seamless integration with a large number of IP PBX and VoIP providers. Please read through this guide for a better knowledge on available functionalities and configuration capabilities you can have access to with Temporis IP200.
-
Page 2: Table Of Contents
Table of Contents Getting Started ..........- 7 - Packing List ................... - 7 - Assembling Temporis IP 200 ..............- 7 - Configuration and Registration .............. - 10 - Basic Configuration via Web Page ............. - 10 - Basic Configuration using phone keypad ........... - 12 - Overview ............ - Page 3 DND ..................... - 56 - Call Forward .................. - 57 - DND/FWD Synchronisation .............. - 58 - Intercom ..................- 59 - Auto Answer .................. - 60 - Temporis IP 200 Administrator Guide ed 1.0 - 3 - / 109...
- Page 4 PC Port Setting ................- 75 - Advanced Network Settings ............. - 76 - LLDP ..........................- 76 - VLAN ..........................- 77 - HTTPS ..........................- 78 - 802.1X ..........................- 79 - Temporis IP 200 Administrator Guide ed 1.0 - 4 - / 109...
- Page 5 URL Record ........................- 94 - Shared Line ........................- 95 - Conference ........................- 95 - Forward ..........................- 96 - Transfer ..........................- 96 - Hold ..........................- 97 - Temporis IP 200 Administrator Guide ed 1.0 - 5 - / 109...
- Page 6 Trouble shooting .......... - 104 - Appendix A........... - 106 - Line Key configuration menu ..............- 106 - Memory Key configuration menu ............- 108 - Temporis IP 200 Administrator Guide ed 1.0 - 6 - / 109...
-
Page 7: Getting Started
This section introduces how to assemble the phone with the components in the packing list: Attach the foot stand or wall mount accessories; Connect Handset; Connect Network and Power. Temporis IP 200 Administrator Guide ed 1.0 - 7 - / 109... - Page 8 Footstand 2. Slide up this part and phone include some dots to guide you do this. 3. Install wall mount fittings Connect Handset and Headset, as shown below: Temporis IP 200 Administrator Guide ed 1.0 - 8 - / 109...
- Page 9 The phone can also share the network connection with other network devices such as PCs. Connect the phone’s PC port and computer’s network port together using an Ethernet cable. Temporis IP 200 Administrator Guide ed 1.0 - 9 - / 109...
-
Page 10: Configuration And Registration
Press OK button on the keypad of the phone to enter the status page and find out your Temporis IP 200 IP address. Enter it (for example http://192.168.1.100) into the address bar of your web browser. The default administrator’s login name and password are admin/admin. - Page 11 Should the IP PBX (SIP registrar) require an authentication, a correct password is needed. Make sure you are using the appropriate input method or enter the password via the web user interface. Temporis IP 200 Administrator Guide ed 1.0 - 11 - / 109...
-
Page 12: Basic Configuration Using Phone Keypad
User Type menu, like this: <*user > Once you finish all admin related tasks you should go back to user mode with the same procedure, or simply reboot the phone. Temporis IP 200 Administrator Guide ed 1.0 - 12 - / 109... -
Page 13: Overview
Overview Keypad Temporis IP 200 Administrator Guide ed 1.0 - 13 - / 109... -
Page 14: Leds
Blinking amber When there is an incoming call or when a call is muted Slow blinking amber When network is not available or sip server failure in idle mode Temporis IP 200 Administrator Guide ed 1.0 - 14 - / 109... -
Page 15: Icons
Icons Temporis IP 200 displays different kinds of icons on its LCD, you can refer to the following table for their meanings: Icon Description Flashes when the internet is disconnected Missed calls Call in Call out Input Method: all letters and numbers... - Page 16 √ --Logs Setting √ Basic Phone Functions --Language √ --Time & Date √ √ --Ring Tone √ --Phone Volume √ Advanced Phone Functions --Accounts √ √ --Network √ Temporis IP 200 Administrator Guide ed 1.0 - 16 - / 109...
- Page 17 2) Some functions are password protected. In this case when you are prompted for a password make sure to introduce one in accordance with active User Type The default administrator password is admin. Temporis IP 200 Administrator Guide ed 1.0 - 17 - / 109...
-
Page 18: Customizing Your Phone
Open a web browser and input the IP Address of the phone. Enter login and password (default login and password are both “admin”). Status page will be shown directly. Temporis IP 200 Administrator Guide ed 1.0 - 18 - / 109... -
Page 19: Language
Web interface language depends on your computer Operative System. It will automatically match the language with your computer and browser, and fall back to English if needed. Temporis IP 200 Administrator Guide ed 1.0 - 19 - / 109... -
Page 20: Time And Date
3) If Automatic is chosen dates will be derived from the content of a table saved within your configuration. This table is named AutoDST.xml and can be changed via provisioning. Temporis IP 200 Administrator Guide ed 1.0 - 20 - / 109... -
Page 21: Maximum Number Of Calls
By default the time zone is +1 France. Daylight Saving Time is Automatic. Maximum number of Calls In some situations service providers want to limit the number of calls a subscriber is able to send or receive. Temporis IP 200 Administrator Guide ed 1.0 - 21 - / 109... -
Page 22: Keypad Lock
Press ->3.Settings->2.Advanced, enter the password, and then press OK button. Choose 3.Keypad Lock->OK. Use the left or right navigation keys to highlight the one you want to lock. Temporis IP 200 Administrator Guide ed 1.0 - 22 - / 109... - Page 23 3.Keypad Lock interface to disable this option. To enable keypad lock via Web interface: Choose Phone->Preference-> Keyboard Lock. Please refer to the instructions above for the different options. Temporis IP 200 Administrator Guide ed 1.0 - 23 - / 109...
- Page 24 1. The default password for lock/unlock is admin or user depending on the active User Type. 2. Users can make emergency calls when the phone is locked if an emergency number has been configured Temporis IP 200 Administrator Guide ed 1.0 - 24 - / 109...
-
Page 25: Logo Customization
If “enable” is selected you will be able to enter the text in the “Text Logo” field. Click Confirm button to save the change. Temporis IP 200 Administrator Guide ed 1.0 - 25 - / 109... -
Page 26: Audio Settings
To select Ring Tone Type via Phone interface: Press ->3.Settings->1.Basic->OK. Scroll to 3.Ring Tone, and press OK button. Use the up and down navigation keys to highlight your selection. The tone will be played. Temporis IP 200 Administrator Guide ed 1.0 - 26 - / 109... - Page 27 You can also delete a ring tone by clicking the Delete button. Note: System ring tones cannot be deleted. To upload a new Ring Tone via Web interface: Temporis IP 200 Administrator Guide ed 1.0 - 27 - / 109...
- Page 28 To specify ring tones for a specific account via Web interface: Choose Account->Basic->Ring Type option, and highlight the preferred one for the chosen account in the scroll-down menu, then click confirm button to update the change. Temporis IP 200 Administrator Guide ed 1.0 - 28 - / 109...
-
Page 29: Codec Selection
You can enable/disable the desired codecs via Web interface. Please contact your System Administrator for more details about the codecs. To enable/disable the codecs via web interface: Choose Account->Codecs. Temporis IP 200 Administrator Guide ed 1.0 - 29 - / 109... -
Page 30: Tone Settings
Your IP200 allows you to configure how the following tones used for subscriber signaling will sound like: • Dial • Ring Back • Busy • Congestion • Call Waiting • Dial Recall • Record Temporis IP 200 Administrator Guide ed 1.0 - 30 - / 109... -
Page 31: Voice
Voice activity detection (VAD), also known as speech activity detection or speech detection, is a technique used in speech processing in which the presence or absence of human speech is Temporis IP 200 Administrator Guide ed 1.0 - 31 - / 109... -
Page 32: Distinctive Ringing
Up to 10 distinctive ring tones can be set by configuring “Internal ringer text”. This field will have to be filled in with the expected content of the Alert-info header in the received “INVITE”. Temporis IP 200 Administrator Guide ed 1.0 - 32 - / 109... -
Page 33: Contact Management
4) Click Confirm button to save the changes. Contact Management Edit/Add/Delete Contacts Temporis IP200 features a 300 entries local phonebook and 10 additional speed dial keys. . With the local directory you can: - add, Temporis IP 200 Administrator Guide ed 1.0 - 33 - / 109... - Page 34 Use left/right navigation key to choose AddGroup, press OK button to enter to the Add Group page. Enter the group name and choose associated ring tone. Press OK button to save. Temporis IP 200 Administrator Guide ed 1.0 - 34 - / 109...
- Page 35 If you add a contact to the blacklist your phone will automatically reject all calls from this contact. Press ->6.Directory. Press OK button twice. Use the Up/Down navigation key to highlight the contact you want to move to blacklist, Temporis IP 200 Administrator Guide ed 1.0 - 35 - / 109...
- Page 36 Use the navigation keys to highlight a record, then press the key to enter the edit page. To add/delete/edit the Contact list via Web interface: Go to Contacts Local Phonebook. Fill in name and number and press Add Temporis IP 200 Administrator Guide ed 1.0 - 36 - / 109...
-
Page 37: Import/Export Contact List
OK button. Contact list will be searched for matching records. Import/Export Contact list Import/Export Contact List via Web interface: Choose Contacts->Local Phone Book. Temporis IP 200 Administrator Guide ed 1.0 - 37 - / 109... - Page 38 5) Import/Export Contact List can be only set via Web interface. 6) You can export your contact list to get a template you will later use to import Temporis IP 200 Administrator Guide ed 1.0 - 38 - / 109...
-
Page 39: Basic Call Functions
Dial a number and select the audio device (remember that if you have chosen headset, you will have to press OK) Go to Directory, use the navigation keys to select the desired contact, or Temporis IP 200 Administrator Guide ed 1.0 - 39 - / 109... - Page 40 Click- to-dial using web interface: Go to Contact->Local Phone Book/BlackList and click on the number you want to call. . The phone will dial out automatically. Default account will be used. Temporis IP 200 Administrator Guide ed 1.0 - 40 - / 109...
- Page 41 Outgoing Identity list. Then click the dial button to call out. Or choose Contact->Phone Call Info, click the number which you want to dial out from the call list, the phone will dial out using default account. Temporis IP 200 Administrator Guide ed 1.0 - 41 - / 109...
-
Page 42: Live Dialpad
This function can only be set via the Web interface, with admin/var rights: 1) Go to Phone->Preference->Live Dialpad. 2) Enable or disable it in the pull-down menu. 3) Click Confirm button to save the change. Temporis IP 200 Administrator Guide ed 1.0 - 42 - / 109... -
Page 43: Send Key Configuration
To set the send key via the IP phone interface: 1) Make sure active User Type is admin or var 2) Press ->2.Features->4.Send Key-and press OK button to enter the configuration page. Temporis IP 200 Administrator Guide ed 1.0 - 43 - / 109... -
Page 44: Password Dial
Password dial This feature is dedicated to environments in which a password or confidential billing code has to be dialed to access other extensions or external numbers. Temporis IP 200 Administrator Guide ed 1.0 - 44 - / 109... - Page 45 Choose phone->features->PswDial, in the pull-down menu, choose enable. Enter the password prefix in the PswPrefix field Enter the Length in the PswLength field. Click the confirm box to save the changes. Temporis IP 200 Administrator Guide ed 1.0 - 45 - / 109...
-
Page 46: Call Completion
3) Use left and right navigation keys to enable/disable the auto redial function. 4) Press down navigation key to set redial interval. It is measured in seconds. Temporis IP 200 Administrator Guide ed 1.0 - 46 - / 109... - Page 47 To set auto redial via the Web interface: 1) Go to Phone->Features->Auto Redial. 2) Choose Enabled or Disabled in the pull-down menu 3) Click Confirm button to save yourchanges or Cancel to discard. Temporis IP 200 Administrator Guide ed 1.0 - 47 - / 109...
-
Page 48: Hot Line
To set the Hot Line via the Web interface: Go to Phone->Features. Input the Hotline Number and Hotline Delay, and then click Confirm button to save your changes. Temporis IP 200 Administrator Guide ed 1.0 - 48 - / 109... -
Page 49: Anonymous Call
These services can be managed through both phone and Web interfaces ar To set Anonymous call via phone interface: 1) Press ->2.Features->5.Anonym button enter Call->OK configuration page. Temporis IP 200 Administrator Guide ed 1.0 - 49 - / 109... - Page 50 1) Go to Account-> Basic-> Anonymous Call and perform necessary changes. Please refer to the instructions above for details. 2) Click the Confirm button to save the changes, or Cancel to discard. Temporis IP 200 Administrator Guide ed 1.0 - 50 - / 109...
-
Page 51: Dial Plan
Dial plans can be used for least cost routing, dialing convenience or to prevent users from calling specific numbers or groups of numbers. Temporis IP 200 supports various types of elements related to dial plan: replace rules, dial now entries, area code management and forbidden numbers. All of them require admn or var privilege. -
Page 52: Replace Rule
Additionally Prefix content in () will be considered as a variable. In the Replace field, the first variable is expressed by $1, the second variable is expressed as $2, etc. Temporis IP 200 Administrator Guide ed 1.0 - 52 - / 109... -
Page 53: Dial Now
4) You can select a record to modify, then click Edit button to submit. 5) You can also delete a selected entry from the Dial Now list by pressing Del button. Temporis IP 200 Administrator Guide ed 1.0 - 53 - / 109... -
Page 54: Area Code
Confirm button to save. Forbidden Numbers (Block Out) Specific phone numbers or digit patterns can be forbidden to be called out from your phone. Temporis IP 200 Administrator Guide ed 1.0 - 54 - / 109... - Page 55 In the Account field, you can enter 1,2,3…, where “1” represents Account 1, “2” represents Account, etc 2 ……, if the account box is empty, this rule will be applicable to all accounts . Temporis IP 200 Administrator Guide ed 1.0 - 55 - / 109...
-
Page 56: Incoming Calls
2) Set the DND On Code and the DND Off Code by pressing up or down navigation keys, then press the OK button to save the changes. 3) When you select to enable/disable the DND function on the phone, it will send these Temporis IP 200 Administrator Guide ed 1.0 - 56 - / 109... -
Page 57: Call Forward
In this case forwarded calls will not be stored in the Call Log. 5) Press the OK button to save the changes. Notes: Temporis IP 200 Administrator Guide ed 1.0 - 57 - / 109... -
Page 58: Dnd/Fwd Synchronisation
To set Feature Key Synchronisation via the Web interface: 1) Go to Phone->Features-> Feature Key Synchronisation 2) Choose whether to enable this function from the pull-down menu. Temporis IP 200 Administrator Guide ed 1.0 - 58 - / 109... -
Page 59: Intercom
Web interfaces. To configure Intercom option via phone interface: 1) Go to ->2.Features->7.Intercom->OK to enter the configuration page. Press up or down navigation keys to display : Temporis IP 200 Administrator Guide ed 1.0 - 59 - / 109... -
Page 60: Auto Answer
Auto Answer option. 4) Use the left or right navigation keys to enable or disable the auto answer function. The default is Disable. Temporis IP 200 Administrator Guide ed 1.0 - 60 - / 109... -
Page 61: Call Log
2) Select Enabled or Disabled in the pull-down menu, click Confirm button to save the change. Call log Temporis IP200 can store up to 100 calls in its Call log. There are 5 different lists: • All calls Temporis IP 200 Administrator Guide ed 1.0 - 61 - / 109... -
Page 62: Accessing Call Log
You can also access this list by pressing Left navigation key to enter the Call Log, and then right navigation key four times as explained above. When you are in the Missed Calls list you should see icon on the screen. Temporis IP 200 Administrator Guide ed 1.0 - 62 - / 109... -
Page 63: Call List Items Management
Web interface: 1) Go to Account->Basic->Missed call log. 2) Choose Enabled or Disabled in the pull-down menu, click Confirm button to save the change. Temporis IP 200 Administrator Guide ed 1.0 - 63 - / 109... -
Page 64: During An Active Call
Press button during a conversation to mute the current call, the icon will be shown on the LCD, and the power indication LED will blink. Press again to Temporis IP 200 Administrator Guide ed 1.0 - 64 - / 109... -
Page 65: Call Hold
1) Accept the second call using the OK key. The first one will be put on hold automatically. Or 2) Reject the call using button Call Waiting Configuration Temporis IP 200 Administrator Guide ed 1.0 - 65 - / 109... - Page 66 5) Press OK button to save the changes, or MENU to return to the previous menu. To configure Call Waiting via Web interface: Go to Phone->Features->Call Waiting and perform necessary changes. Refer to previous paragraphs for parameter details. Temporis IP 200 Administrator Guide ed 1.0 - 66 - / 109...
-
Page 67: Call Transfer
To establish a conference via phone interface: 1) Once in line with 1 caller, press a line key, 1 caller is put on hold. Temporis IP 200 Administrator Guide ed 1.0 - 67 - / 109... -
Page 68: Network Conference
1) Go to Account->Account X->Advanced->Conference Type, there is a pull-down menu, choose network from the list. 2) Enter the Conference URI. 3) Press Confirm button to save the changes. To establish a conference: Temporis IP 200 Administrator Guide ed 1.0 - 68 - / 109... -
Page 69: Voicemail
2. To benefit from the MWI service in function of your system you may need to subscribe to it. This setting can only be done using the web interface. Contact your system administrator or your service provider for more details. Temporis IP 200 Administrator Guide ed 1.0 - 69 - / 109... -
Page 70: Retrieving Your Voicemail Messages
1) Press button directly. 2) You may be prompted to enter the password which is needed to connect to your VoIP telephony system. It depends on your system. Temporis IP 200 Administrator Guide ed 1.0 - 70 - / 109... - Page 71 2. If you have more than one account set on the phone, when pressing the key you will be calling the active account mailbox. Temporis IP 200 Administrator Guide ed 1.0 - 71 - / 109...
- Page 72 Temporis IP 200 Administrator Guide ed 1.0 - 72 - / 109...
-
Page 73: Advanced Functions
You can only configure these settings via Web interface: 1) Choose Account. 2) Select desired account. 3) Choose Advanced to do necessary settings. You can check with your system administrator or service provider for more information. Temporis IP 200 Administrator Guide ed 1.0 - 73 - / 109... -
Page 74: Tls
To set DNS-SRV via web interface: Go to Account->Basic-> choose Transport option, in the pull-down menu, you can choose the DNS-SRV option, and then click the Confirm button to save the change. Temporis IP 200 Administrator Guide ed 1.0 - 74 - / 109... -
Page 75: Network Settings
If you set the DHCP server on, the device connected to the PC port Server will get the IP address automatically between the start IP address and the end IP address. But if you select the bridge mode, the DHCP Temporis IP 200 Administrator Guide ed 1.0 - 75 - / 109... -
Page 76: Advanced Network Settings
(Synchronous with VLAN in switch) To configure LLDP settings via Web interface: Go to Network->Advanced->LLDP->Active option. In the pull-down menu, choose Enable. Then enter the corresponding Packet Interval in Packet Interval field. Temporis IP 200 Administrator Guide ed 1.0 - 76 - / 109... -
Page 77: Vlan
1) Make sure the active User Type is admin or var 2) Press ->3.Settings->2.Advanced. 3) Enter the password required, scroll to Network option, press ok button and select VLAN, then press OK to enter. Temporis IP 200 Administrator Guide ed 1.0 - 77 - / 109... -
Page 78: Https
Layer). Adding SSL layer under HTTP, in short, adds a security layer to HTTP. Admins can set this transmission mode via web page. To configure HTTPS settings via Web interface: Go to Network->Advanced, choose WebServer option, in the pull-down menu of Type Temporis IP 200 Administrator Guide ed 1.0 - 78 - / 109... -
Page 79: Other Settings
Local RTP Port Define the port range for voice transmission. WebServer Users can choose WebServer type: Disable, HTTP, HTTPS, or HTTPS & HTTP. Temporis IP 200 Administrator Guide ed 1.0 - 79 - / 109... -
Page 80: Maintenance Tasks
Administrator Mode Administrator mode grants unlimited access to the phone configuration on both Web and Phone interface. User Mode is not able to access the settings on the Phone Temporis IP 200 Administrator Guide ed 1.0 - 80 - / 109... -
Page 81: Administrator Mode
You should reboot the phone when you are asked to, e.g. after applying specific changes to phone configuration. To reboot via Web interface: 1) Go to Upgrade->Basic. 2) Click Reboot button. Temporis IP 200 Administrator Guide ed 1.0 - 81 - / 109... -
Page 82: Reset To Factory
You need to export the configuration first if you still want to import the old configurations after reset. Otherwise your phone will have to be configured manually unless mass provisioning is used Temporis IP 200 Administrator Guide ed 1.0 - 82 - / 109... -
Page 83: Configuration Export/Import
When the function is disabled, the phone will not reboot. Configure watchdog via web interface: Choose phone-> Preference->WatchDog, in the pull-down menu, choose enable or disable this function. Temporis IP 200 Administrator Guide ed 1.0 - 83 - / 109... -
Page 84: Action Url/Uri
The events that can be recorded include: Setup Completed, Log On, Log Off, Register Failed, Off hook, On hook…etc. To set Action URL via web interface: Choose Phone->Action URL Enter the Corresponding contents Click Confirm to save the changes. Temporis IP 200 Administrator Guide ed 1.0 - 84 - / 109... -
Page 85: Firmware Update And Autoprovisioning
To update the firmware manually via Web interface: Choose Upgrade->Basic->Browse; select the firmware file in your local computer. Click Upgrade button to update the new firmware. Please do not power off during the updating. Temporis IP 200 Administrator Guide ed 1.0 - 85 - / 109... -
Page 86: Decryption
3. The upgrade priority is PNP, Custom Option, DHCP options, preconfigured URL . Decryption Your Temporis IP 200 supports configuration file encryption for provisioning. In case encryption is used, AES key needs to be configured on the phone. Temporis IP 200 Administrator Guide ed 1.0... - Page 87 You can ask your system administrator for the decrypt password. Set AES Key via phone interface: Go to ->3.Settings->2.Advanced->6.Set AES Key->OK. Enter the Common AES and the MAC-oriented option. Press the OK button to save the changes. Temporis IP 200 Administrator Guide ed 1.0 - 87 - / 109...
-
Page 88: Zero-Active Interface
If no operation is done nor Cancel key is pressed the phone will revert into normal idle interface at the end of the countdown. If OK key is pressed prior to the end of the countdown, the phone will enter into a Temporis IP 200 Administrator Guide ed 1.0 - 88 - / 109... -
Page 89: System Log Export
Admins can set a specific button (“#” or “*”) as the send key. If this feature is enabled, once you’ve dialed the desired number, you can press this send key to call your correspondent immediately. Temporis IP 200 Administrator Guide ed 1.0 - 89 - / 109... -
Page 90: Programmable Keys
Transfer key: access to call forward This function can only be set via the Web interface: Choose Phone->Function Keys->Programmable Key. Choose and customize specific features for these keys. Temporis IP 200 Administrator Guide ed 1.0 - 90 - / 109... -
Page 91: Line Keys Configuration
URL Record Shared Line Conference Forward Transfer Hold Redial Call Return Pick Up Call Park Group Listening Voice Mail DTMF Public Hold Private Hold Group Pick up Paging Record Temporis IP 200 Administrator Guide ed 1.0 - 91 - / 109... -
Page 92: Prefix
212, press the BLF key, it will call out the *83 automatically to pick up the incoming call on 212. 2. Not all servers support BLF. Please check with your service provider or system administrator Temporis IP 200 Administrator Guide ed 1.0 - 92 - / 109... - Page 93 1) Choose Phone-> Function Keys -> Line Key, choose one of the keys on which you want to make the assignment, there is a pull-down menu in the Type field, choose Temporis IP 200 Administrator Guide ed 1.0 - 93 - / 109...
- Page 94 Choose Phone-> Function Keys -> Line Key, choose one of the keys on which you want to make the assignment, there is a pull-down menu in the Type field, choose URL Record from the list. Temporis IP 200 Administrator Guide ed 1.0 - 94 - / 109...
- Page 95 This key allows a user on a call to conference another party while remaining in the conference. To assign the key as Conference via web interface: Temporis IP 200 Administrator Guide ed 1.0 - 95 - / 109...
- Page 96 From the pull-down menu in the Type field select Transfer. 2) Enter the Number in the "Value" field. In this case, when you are on a conversation, Temporis IP 200 Administrator Guide ed 1.0 - 96 - / 109...
- Page 97 1) Choose Phone-> Function Keys -> Line Key. Choose one of the keys on which you want to make the assignment. From the pull-down menu in the Type field select Temporis IP 200 Administrator Guide ed 1.0 - 97 - / 109...
- Page 98 The “call park” feature is activated by pressing a preprogrammed button or a special sequence of buttons. When the conversation which is monitored was transferred to an unused extension number, you can press this key to retrieve the call. Temporis IP 200 Administrator Guide ed 1.0 - 98 - / 109...
- Page 99 2) Enter the number you want to set as the voice mail box in the Value field. 3) In the "Line" field, select a line for which to apply this key. 4) Press Confirm button to save the changes. DTMF Temporis IP 200 Administrator Guide ed 1.0 - 99 - / 109...
- Page 100 Type field, and choose Private Hold from the list. 2) Press Confirm button to save the changes. Temporis IP 200 Administrator Guide ed 1.0 - 100 - / 109...
- Page 101 By pressing Record key the server should start recording, and by pressing it again recording should stop. Please pay attention to the maximum recording time and frequency your server is able to handle.. Temporis IP 200 Administrator Guide ed 1.0 - 101 - / 109...
- Page 102 Please check with your service provider or PBX vendor for details. To use ACD: 1) Press line Key. A login box will pop up. Enter the User ID and Password and click Temporis IP 200 Administrator Guide ed 1.0 - 102 - / 109...
- Page 103 From the pull-down menu in the Type field choose Local PhoneBook. 2) In the Line field, choose a Group. 3) Press Confirm button to save the changes. Temporis IP 200 Administrator Guide ed 1.0 - 103 - / 109...
-
Page 104: Trouble Shooting
Consult the payload value with your service provider. Time and date are not correct Select the right time zone or enter the time information manually on the webpage or the phone. Temporis IP 200 Administrator Guide ed 1.0 - 104 - / 109... - Page 105 Make sure the firmware you choose is provided by your service provider, or the device will probably crash after the update. How to auto provision? Consult auto provision server address with your service provider and ask your technical support for details. Temporis IP 200 Administrator Guide ed 1.0 - 105 - / 109...
-
Page 106: Appendix A
Shared LIne URL Rec 2.Account ID 2.Account ID 2.Account ID 2.Account ID 2.Account ID 2.Account ID 2.URL 2.Account ID 3.Value 3.Value 3.User (R/O) 3.Value 3.Value 4.Server (R/O) 4.Extension Temporis IP 200 Administrator Guide ed 1.0 - 106 - / 109... - Page 107 2.Key 2.Key group Paging type: type: type: type: type: type: type: type: Pickup Record Local Conf Transfer Hold Redial Group 3.Account 3.Account 3.Local 3.Value 3.Value Group 4.Value 4.Value Temporis IP 200 Administrator Guide ed 1.0 - 107 - / 109...
-
Page 108: Memory Key Configuration Menu
Memory Key configuration menu 1.Type: 1.Type: 1.Type: Speed dial Intercom Key Event 2.Account 2.Account 2.Key type: 2.Key type: 2.Key type: Call Return Paging Redial 3.Value 3.Value 3.Account 4.Value Temporis IP 200 Administrator Guide ed 1.0 - 108 - / 109... -
Page 109: Temporis Ip 200 Administrator Guide Ed 1.0 - 2
The manufacturer reserves the right to modify the specifications of its products in order to make technical improvements or comply with new regulations. ALCATEL, TEMPORIS and ATLINKS are registered trademarks. The Alcatel logo and Alcatel name are trademarks of Alcatel and used under license by ATLINKS You can download the latest user manuals from our website: http://www.atlinks.com Temporis IP 200 Administrator Guide ed 1.0...
Need help?
Do you have a question about the TEMPORIS IP 200 and is the answer not in the manual?
Questions and answers