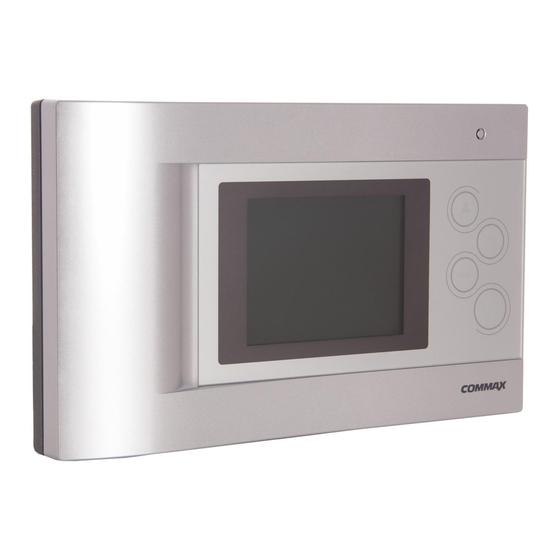
Commax CDV-43Q User Manual
Color video door phone
Hide thumbs
Also See for CDV-43Q:
- User manual (14 pages) ,
- User manual (14 pages) ,
- User manual (8 pages)
Table of Contents
Advertisement
User Manual
Color video door phone CDV-43Q
Thank you for purchasing COMMAX products.
Thank you for purchasing COMMAX products.
Please carefully read this User's Guide (in particular, precautions for safety) before using a product and follow
Please carefully read this User's Guide (in particular, precautions for safety) before using a product and follow
instructions to use a product exactly.
instructions to use a product exactly.
The company is not responsible for any safety accidents caused by abnormal operation of the product.
The company is not responsible for any safety accidents caused by abnormal operation of the product.
Advertisement
Table of Contents

Subscribe to Our Youtube Channel
Summary of Contents for Commax CDV-43Q
-
Page 1: User Manual
User Manual Color video door phone CDV-43Q Thank you for purchasing COMMAX products. Thank you for purchasing COMMAX products. Please carefully read this User’s Guide (in particular, precautions for safety) before using a product and follow Please carefully read this User’s Guide (in particular, precautions for safety) before using a product and follow instructions to use a product exactly. -
Page 2: Table Of Contents
Greetings Thank you for choosing COMMAX. Please read this manual carefully before you use the product. Table of contents Greetings ........................1 Contents table ......................1 1. Warnings and caution ...................2 2. Part names and functions ..................4 3. How to use the products ..................5 4. -
Page 3: Warnings And Caution
1. Warnings and caution Please follow the things described below in order to prevent any danger or property damage. Warning Prohibition. No disassembly It may cause a serious damage or injury if violated. No touch Caution Must follow strictly. Shows plugging out the power cord It may cause a minor damage or injury if violated. - Page 4 Warning Please don’ t disassemble, If an abnormal sound, burning Please don’t insert any Please use only the designated repair or rebuild this product smell or smoke is coming out metallic or burnable materials batteries for the products of arbitrarily (please contact the of the product, please plug out into the ventilation hole.
-
Page 5: Part Names And Functions
2. Part names and functions Contents Contents Contents Door release button Monitor MENU button Talk button / POWER LED Monitor button SELECT button External connections UP button Mike DOWN button Interphone button Power button Call Volume Speaker Tones Volume... -
Page 6: How To Use The Products
3. How to use the products 4-1. Visitor calls from entrance ① When a visitor presses CALL button at entrance, the chime melody rings and visitor image is shown on the screen. ② Press TALK button to talk with the visitor and you can open the door by pressing DOOR RELEASE button. -
Page 7: Settings
4. Settings You can adjust DOOR VIDEO SET, UTILITY and check INFORMATION(model name &version) with (UP) / (DOWN) button after pressing Menu button on the right of the product in video talk mode or stand-by mode. Products settings need the following 4 buttons on the right of product. * Start Menu / Exit : MENU button * Select and in-put : SELECT button * Move up / Move right :... - Page 8 ③ Select the mute sound or not with button. ④ To complete the set, press SELECT button. (2) SCREEN MODE : to set for screen ratio ① ZOOM: Zoon in(expansion) image maintaining actual ratio(4:3) is shown. (full of the screen) ②...
-
Page 9: Installation And Wiring
5. Installation and Wiring 1. Installation Method of camera monitor Caution Avoid the range of direct sunlight The suitable height is 1,450~1,500mm from the floor Avoid installing the product in the place with strong magnetism and much gas or humidity 2. -
Page 10: Wiring Diagram
6. Wiring Diagram Please install as the wiring diagram described below Polarity of Camera connector ① RED : VOICE ② BLUE : GND ③ YELLOW : POWER(+12V) ④ WHITE : VIDEO SIGNAL Wiring precautions Each device should be connected by separated cables. If you use UTP CABLE[CAT.5] for Camera1 and Camera2, 2 lines of UTP CABLE are required. - Page 11 INTERPHONE Wiring If you use UTP CABLE[CAT.5], connect the rest 4 lines to GND after connecting 4 lines between Monitor and interphone.
-
Page 12: Package Contents
7. Package Contents Monitor (CDV-43Q) Wall Bracket Manual (M)3 X 6mm (T)4 X 18mm 4P X 300(2EA) Monitor fixing Wall bracket Connector screw mounting screw (1EA) (4EA) -
Page 13: Caution In Use
1. Turn on the power switch. 2. Please contact your local agent for product maintenance when you have a problem in use of CDV-43Q 3. For your safety, power switch with a safety device must be used in your building. - Page 14 513-11, Sangdaewon-dong, Jungwon-gu, Seongnam-si, Gyeonggi-do, Korea Int’l Business Dept. Tel. : +82-31-7393-540~550 Fax. : +82-31-745-2133 Web site : www.commax.com PM0743Q00011 Printed In Korea / 2012.11.104...


Need help?
Do you have a question about the CDV-43Q and is the answer not in the manual?
Questions and answers