Advertisement
513-11, Sangdaewon-dong, Jungwon-gu, Seongnam-si, Gyeonggi-do, Korea
Int'l Business Dept. Tel. : +82-31-7393-540~550 Fax. : +82-31-745-2133
Web site : www.commax.com
Printed In Korea / 2011.08.104
User Manual
Video Door Phone CDV-40NM
Thank you for purchasing COMMAX products.
Thank you for purchasing COMMAX products.
Please carefully read this User's Guide (in particular, precautions for safety) before using a product and follow
Please carefully read this User's Guide (in particular, precautions for safety) before using a product and follow
instructions to use a product exactly.
instructions to use a product exactly.
The company is not responsible for any safety accidents caused by abnormal operation of the product.
The company is not responsible for any safety accidents caused by abnormal operation of the product.
Advertisement
Table of Contents

Related Manuals for Commax CDV-40NM


Summary of Contents for Commax CDV-40NM
-
Page 1: User Manual
Video Door Phone CDV-40NM 513-11, Sangdaewon-dong, Jungwon-gu, Seongnam-si, Gyeonggi-do, Korea Int’l Business Dept. Tel. : +82-31-7393-540~550 Fax. : +82-31-745-2133 Thank you for purchasing COMMAX products. Thank you for purchasing COMMAX products. Web site : www.commax.com Please carefully read this User’s Guide (in particular, precautions for safety) before using a product and follow Printed In Korea / 2011.08.104... -
Page 2: Parts And Function
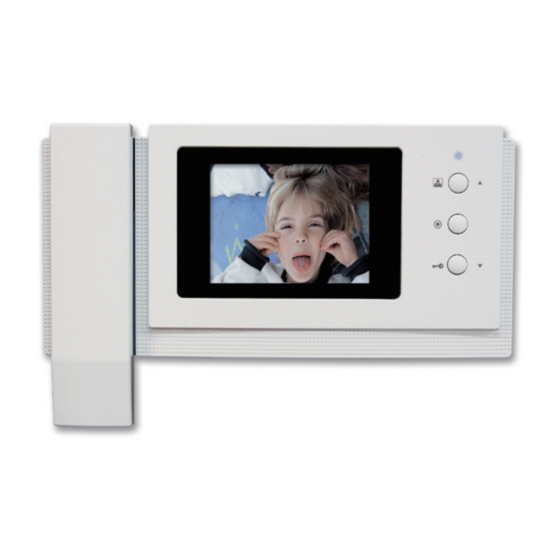
Parts and Function parts Description Button for MENU Screen when screen is screen saving mode (Screen MENU/BRIGHT button off) Button for control Screen color/Brightness. COLOR / SELECT button Set color / Select(Menu) button CONT / UP button Set Contrast / Cursor UP (Move cursor) RESET / DOWN button Reset / Cursor DOWN (Move cursor). - Page 3 1. Caution Please, do not turn on/off, insert or remove Micro SD card during saving, capture image or recording video. It might be caused of malfunction, harm or damage goods. (User may lose data in embedded memory and Micro SD card or it may be reason of malfunction) When memorized data exceed capacity of memory in external micro SD card, product erase automatically delete oldest data because of limitation of embedded memory capacity.
- Page 4 How to insert Micro SD [T-FLASH] Please, refer to bellow photo and pay attention to direction when Insert Micro SD card. When user inserts Micro SD card, please slide card until you feel a ‘ click’ .
-
Page 5: How To Use Product
2. How to use product After turning on power, screen shows booting screen with COMMAX logo and melody. 2-1. Call from door camera station. (Turning on time of screen is 30±5sec) ① When visitor push ‘ Call’ button in door camera station, Video phone sound dingdong and show visitor’... - Page 6 2-3. Open Door User can open door through ‘ Door open’ button while talk with visitor. When press ‘ Door open’ button, door is opened with sound. (Door locks which should be interfaced with door camera which has door open function) ※...
-
Page 7: Setup & Configuration
between video door phones, inter phone and door camera station. ② When user wants to call interphone from video door phone, hold hand set and press interphone button. Ring tone will make sound during press interphone button. User can communicate with receiver after he/she hold handset in interphone. - Page 8 3-1. Set screen (Brightness/Contrast/Color control) Configuring Screen BRIGHT CONT COLOR RESET * How to set Press Each function button which you want to set among Brightness, Contrast, and Color during Video Communication / Monitoring status. Each category is selected when setup menu is shown like as picture above.
- Page 9 Reset Screen * How to set Press Reset Button during Video Communication / Monitoring status Use △/▽ button and select ‘ YES’ . Push SELECT button for confirming reset.
- Page 10 3-2. Set up configuration Push Menu button in idle mode then press △/▽ button for moving category. Press select button for moving back category.. 3-2-1. MEDIA SET (Record and save video and still cut image) Still cut image can be saved up to 128 cuts. When memorized data exceed capacity of memory in external micro SD card, product erase automatically delete oldest data because of limitation of embedded memory capacity.
- Page 11 When user sets ‘ auto’ in set up configuration, video can be automatically saved. It is only activated during call / talk. If user doesn’ t receive call, time of recording video is 30 sec. If user receives call, time of recording video is 60 sec.
- Page 12 *** Folder and file management *** Create basic folder CDV-40NM\VIDEO\ ( Video saving folder ) CDV-40NM\PICTURE\ ( Still cut image folder ) When the icon is displayed please built in data or backup. The name of saved file and form 110516_130502_D1.jpg Still image 110516_130502_C2.jpg...
- Page 13 If you eliminate Micro SD Card, you can re-save in the memory. It will be displayed descending order. It is possible whole cancel and selection cancel The number of saving for capacity Internal Flash Micro SDHC Card Capacity 100 MByte 4 GByte 8 GByte 16 GByte...
- Page 14 4. INFO : It is possible check to actual memory capacity. (1) Data (video / still cut image) save , play back and eliminate Play back Eliminate Whole Eliminate Before screen * A method of setting ① It can be moved from the mode of environment (3-2) to disk icon, please press SELECT button and using the button △/▽...
- Page 15 (2) Setting of video and still image * A method of setting ① It can be moved from the mode of environment (3-2) to disk icon, please press SELECT button and use the button △/▽ you can move the FORMAT icon. ②...
- Page 16 (3) FORMAT (Data format):It can be formatted data that products video saved and image(CAPTURE). If not read the image saved, it can be making format. ( FAT of memory break down ) * A method of setting ① It can be moved from the mode of environment (3-2) to disk icon, please press SELECT button and using the button △/▽...
- Page 17 3-2-2. UITILITY 1. Time setting: Set the time of product. ( It will be used video and image saved ) CCTV activated : User can be settled until two CCTV. if not activate you can not connect CCTV. ===========================================================================...
- Page 18 (1). Time setting : Setting the time of the product. (It is used when you save movie or image.) How to set up ① In the configuration mode of 3-2, move to UTILITY icon and after press the SELECT(Unlocking button) button, move to Time setting icon with △/▽(Interphone button/Call button).
- Page 19 (2) CCTV setting : Users can set CCTV on or off up to 2, if not activating, CCTV can not be connected. How to set up ① In the configuration mode of 3-2, move to UTILITY icon and after press the SELECT(Unlocking button) button, move to CCTV activation icon with △/▽(Interphone button/Call button).
- Page 20 5. Wiring * CAMERA CONNECTOR POLARITY 1. RED : VOICE 2. BLUE : GND 3. YELLOW : POWER(+12V) 4. WHITE : VIDEO...
- Page 21 When the system is configuring, there should be connected the Monitor to CCTV, Camera, and Interphone by UTP(Cat.5) having 3-signal Lines and 5-grounds. But the Coaxial Cable is recommended to get the noise free video ▣ Caution on the Wiring Be sure to use a separate wiring for each connect UTP CABLE[CAT.5] is used for CAMERA No.
- Page 22 ▣ CCTV Camera Wiring ♠ CCTV CAMERA requires additional power supply . ♠ Please choose appropriate Coaxial Cable, depending on the distance. #1 : RED--(VIDEO) #2 : Blue-(GND) ♠ UTP CABLE WIRING If UTP CABLE[CAT.5] is used, please use 7 lines for GND line. Other wise, you may image quality related problem.
- Page 23 If UTP CABLE[CAT.5] is used, use 5 lines for GND line. INSTALLATION ▷ Monitor Installation Note 1. Avoid the range of direct sunlight 2. Recommended height is pertinent from 1450 ~ 1500mm 3. Avoid the installation near magnetic activity, humid temperatures and gas * Wiring caution 1.
-
Page 24: Part Lists
9. We recommend that NTSC and PAL types are not mixed. 10. Please turn it off and on when you connect the cameras again after the camera is disconnected Part lists 벽걸이 브라켓 사용설명서 PIN 2P SHUNT 본체 (CDV-40NM) PIN 2P SHUNT CDV-40NM Wall Bracket User Manual (A2095) -
Page 25: Specification
Specification CDV-40NM 100V-240V~, 50/60Hz Rating Voltage Power On stand-by : 4W On talk: 10W consumption Door camera 4wires (Polarity), interphone 4wires (polarity), Transmission way Monitor 10.16cm TFT / Digital LCD Full duplex (Hands-Free) Transmission way Door (Sol Mi Do) Call sound...
Need help?
Do you have a question about the CDV-40NM and is the answer not in the manual?
Questions and answers