
Related Manuals for SignaMax 065-7932


Summary of Contents for SignaMax 065-7932
- Page 1 Model: 065-7932 16-Port Gigabit Web Smart Switch with 4 Mini-GBIC (SFP) slots USER´S MANUAL...
-
Page 2: Table Of Contents
Flow Control and Backpressure Mirror VLAN Trunk (Aggregation) Quality of Service (QoS) SNMP Management guide Access the Switch Homepage System Port VLAN PVID Aggregation/ Trunk Configuration Quality of Service Mirror Rate Limit SNMP Discovery Statistics Overview Detailed Statistics Restart www.signamax.eu... - Page 3 Product Specifications Appendix – Command Line Interface Start-up and Terminal configuration Login/Logout Procedures Command Hierarchy Entering Commands Command Description System Commands Console Commands Port Commands VLAN Commands Aggregation Commands QoS Commands Mirror Commands IP Commands SNMP Commands Ratelimit Commands www.signamax.eu...
-
Page 4: Copyright
This is a Class A product. In a domestic environment, this product may cause radio interference in which case the user may be required to take adequate measures. Take special care to read and understand all the content in the warning boxes. www.signamax.eu... -
Page 5: Unpacking Information
Supports Rate Limit (ICMP Rate, Broadcast Rate, Multicast Rate and Ingress/Egress Rate) • Supports Jumbo frame 9K bytes • Supports 340K bytes buffer Memory • Supports Web-based management interface • Non-blocking wire-speed switching performance • Supports firmware upgrade, SNMP • FCC Class A, CE, VCCI. RoHS-compliant www.signamax.eu... -
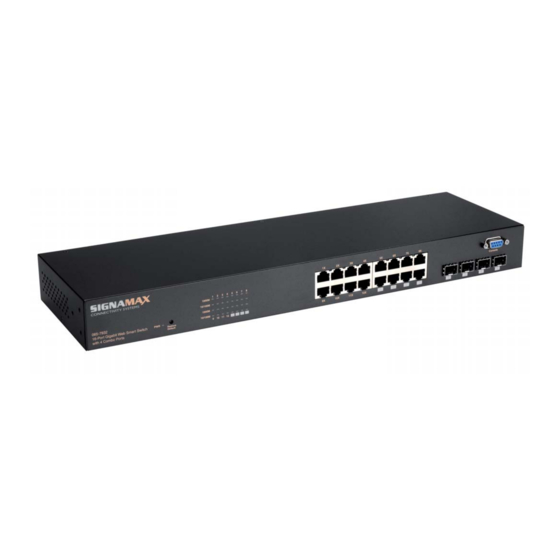
Page 6: The Front Panel
Restore Default Button You can use this button to reset the switch or restore it to its factory default settings. To reset the switch, press the button once. To restore factory default settings, press and hold the button for three seconds. www.signamax.eu... -
Page 7: The Rear Panel
4. Insert the screws and tighten them with a suitable screwdriver. 5. Repeat this for the other side of the unit. 6. Slide the unit into the rack and secure it with suitable screws. 7. Reconnect all the cables. www.signamax.eu... -
Page 8: Installing Network Cables
100 Mbps Category 5 UTP/STP (cooper) 1,000 Mbps Category 5, 5E UTP/STP The cable type differs according to the 1000 Mbps (fiber) 1,000 Mbps mini-GBIC you choose. Please refer to the mini-GBIC required instructions that came with your mini-GBIC. www.signamax.eu... -
Page 9: Description Of Switch Functions
This mechanism helps high-bandwidth demanding applications such as VoIP to get an unobstructed connection. SNMP The Switch supports SNMP (Simple Network Management Protocol). It allows the product to be monitored by an SNMP management station. www.signamax.eu... -
Page 10: Management Guide
To access the Web-based management interface, you should configure the management station with an IP address and subnet mask that is compatible with your switch. The factory defaults of the Switch: 192.168.0.254 Subnet Mask 255.255.255.0 Run your Web Browser and enter the appropriate IP address in the Address field: www.signamax.eu... -
Page 11: Homepage
Key in the user name and password. The factory default value of User Name and Password is “admin”. Homepage After successful log-in, the “SYSTEM Configuration” page appears (this is also the Homepage). You can click on the hyperlinks on the left side of each page to get access. to each management function. www.signamax.eu... -
Page 12: System
(see table under screenshot for details). To save the configuration of the system, click “Apply”. Note: After applying a new IP address, a new log-in page will appear automatically. Please log in again to proceed to other configurations. www.signamax.eu... -
Page 13: Port
This Port Configuration page shows the link status of each port and allows users to configure speed, flow control and maximum frame size for each port. To save the configuration of the system, click “Apply”. You can also click the “Refresh” button to show the updated statuses of the ports. www.signamax.eu... -
Page 14: Vlan
1. Remove the members of the VLAN group by unmarking their marked checkboxes. 2. Clear the VLAN ID of the VLAN you want to remove in the “VLAN\Port” column. (Don’t type N/A. Just leave it blank.) 3. Click the “Apply” button to execute. www.signamax.eu... -
Page 15: Pvid
PVID When the VLAN-enabled Switch receives a tagged packet, the packet will be sent to the port’s default VLAN according to the PVID (port VLAN ID) of the receiving port. www.signamax.eu... -
Page 16: Aggregation/ Trunk Configuration
Destination MAC. XOR mode calculates the result of the DMAC and SMAC modes to decide the path of the packets. Note: Settings in VLAN, Port Aggregation, and Mirror are co-dependent. Please make sure that the settings won’t influence one another. www.signamax.eu... -
Page 17: Quality Of Service
1. Select “Port” in the “Mode” column for those ports that are going to function as part of port-based QoS. Click the “Apply” button. 2. Click the “Port priority” button. The “Port Priority Setting” appears. 3. Click on the drop menu to specify priority levels. 4. Click “Apply” to execute. www.signamax.eu... - Page 18 5. Click the “Apply” button again to execute your configuration. DSCP-mode QoS: DSCP-mode QoS assigns packet priority according to the types of the incoming packets. It distinguishes packets according to the “Delay”, “Throughput” and “Reliability” information attached to the packet. www.signamax.eu...
-
Page 19: Mirror
1. Select those ports that are going to be monitored by marking the checkboxes in the “Monitor Port” column. 2. Click the drop menu in the “Sniffer Port” column. Select a port as the administration port for monitoring those source ports. 3. Click “Apply” to activate. www.signamax.eu... -
Page 20: Rate Limit
3. Fill in a name in the “Community Get” column, which is the password for accessing MIB with read-only authority. 4. Fill in a name in the “Community Set” column, which is the password for accessing MIB with read-and-write authority. www.signamax.eu... -
Page 21: Discovery
1. Enter the IP address & name in the text box. 2. Click “Add” to add the new IP address on the table. Delete 1. Click the check box of the one you want to remove. 2. Click “Delete” to remove. www.signamax.eu... -
Page 22: Statistics Overview
“Refresh” button to renew the statistics. Restart Restart: To restart the system, click the “Yes” button. The system restarts and shows the authentication window. Please fill in the username and password to continue. www.signamax.eu... -
Page 23: Factory Default
NOT selected in “Smart Boot”, that is, the new firmware is going to be applied on the flash that is NOT chosen as the booting flash. Please ensure that you boot this device with the correct flash before performing a firmware upgrade. www.signamax.eu... -
Page 24: Product Specifications
USER´S MANUAL Product Specifications www.signamax.eu... -
Page 25: Appendix - Command Line Interface
- At top level, a list of command groups will be shown. - At group level, a list of the command syntaxes will be shown. - If given after a command, the syntax and a description of the command will be shown. www.signamax.eu... -
Page 26: Entering Commands
Show system name, username, password, software version and management MAC address. Optionally show the full configuration. [all]: Show the total switch configuration (default: System configuration only). System Restore Default [keepIP] Description: Restore factory default configuration. [keepIP]: Preserve IP configuration (default: Not preserved). www.signamax.eu... -
Page 27: Console Commands
Port Configuration [<portlist>] Port Mode [<portlist>] [<mode>] Port Flow Control [<portlist>] [enable|disable] Port Admin [<portlist>] [enable|disable] Port MaxFrame [<portlist>] [<framesize>|reset] Port Statistics [<portlist>] [clear] Note: If you want to make maxframe bigger than 1518, the [Flow Control] should be enabled! www.signamax.eu... -
Page 28: Vlan Commands
Port Statistics [<portlist>] [clear] Description: Show or clear statistics for the port. [<portlist>]: Port list (default: All ports). [clear] : Clear port statistics (default: Show statistics). VLAN Commands Commands at VLAN level: VLAN Configuration [<portlist>] VLAN Add <vidlist> [<portlist>] VLAN Delete <vidlist> www.signamax.eu... - Page 29 The ‘none’ option can be used for trunk links. VLAN OnlyTag [<portlist>] [enable|disable] Description: Set or show the onlytag setting of this port. [<portlist>]: Port list (default: All ports). [enable|disable]: Only accept tagged frame or not (default: Show disable). www.signamax.eu...
-
Page 30: Aggregation Commands
[<portlist>]: Port list (default: All ports). QoS Mode [<portlist>] [tag|port|diffserv] Description: Set or show the QoS mode for the port. [<portlist>]: Port list (default: All ports). [tag|port|diffserv]: Enable tag, port or IP differentiated services class of service for the port (default: Show mode). www.signamax.eu... -
Page 31: Mirror Commands
[<port>]: Mirror destination port (default: Show mirror port). Mirror Source [<portlist>] [enable|disable] Description: Set or show the source port mirror mode. [<portlist>]: Source port list (default: All ports). [enable|disable]: Enable/disable mirroring of frames received on port (default: Show mirror mode). www.signamax.eu... -
Page 32: Ip Commands
SNMP Setup [enable|disable] Description: Activate or deactivate the SNMP. [enable|disable]: Enable/disable SNMP (default: Show SNMP mode). SNMP Trap [<IP Address>] Description: Set or show SNMP traps destination. <IP Address>: IP address to send traps to. (default: Show trap configuration) www.signamax.eu... -
Page 33: Ratelimit Commands
[<traffic type>]: Ratelimit to set. Can be one of: [ICMP|Broadcast|Multicast] (default: Show all). [enable|disable]: Enable or disable specified ratelimit. [<rate>]: Frame rate in kiloframes. Allowed values are 1k, 2k, 4k, 8k, 16k, 32k, 64k. www.signamax.eu... - Page 34 K E E P I N G Y O U R W O R L D C O N N E C T E D www.signamax.eu...
Need help?
Do you have a question about the 065-7932 and is the answer not in the manual?
Questions and answers