Table of Contents
Advertisement
Available languages
Available languages
Advertisement
Chapters
Table of Contents

Related Manuals for CYBEX SOLUTION Q-FIX


Summary of Contents for CYBEX SOLUTION Q-FIX
- Page 1 SOLUTION Q-FIX Owner’s Manual Manual del Propietario READ this Owner’s Manual carefully before first use, and keep it for future reference. LEA este Manual del Propietario minuciosamente antes de usarlo y guarde para su futura referencia.
- Page 2 Thank you for purchasing the CYBEX Solution Q-fix High Back Booster Seat. We are proud to bring this German engineered seat to North America. We hope the Solution Q-fix will make your child’s travel both safer and more pleasant, as well as making installation and use for you as simple and easy as possible.
-
Page 3: Table Of Contents
INDEX SOLUTION Q-FIX FEATURES ............................2 REGISTRATION AND RECALL INFORMATION ......................3 WARNINGS AND IMPORTANT SAFETY INFORMATION ..................... 4 BOOSTER SEAT OVERVIEW ............................6 CHILD SIZE: HEIGHT, WEIGHT AND AGE RANGES ....................8 ASSEMBLY ..................................9 THE SEAT ..................................9 L.S.P. -
Page 4: Solution Q-Fix Features
SOLUTION Q-FIX FEATURES The Solution Q-fix brings all new technologies to the High Back Booster Seat category to greatly increase the safety of your child in the event of a side impact collision. Reports show that 27% of all crashes are side impact collisions LINEAR SIDE-IMPACT PROTECTION™... -
Page 5: Registration And Recall Information
Send your name, address, e-mail address if available, and the restraint’s model number and manufacturing date to: CYBEX Registration 1100 Cobb Place Blvd NW Kennesaw, Georgia 30144, USA or call 1-800–593–5522... - Page 6 WARNING! DEATH OR SERIOUS INJURY CAN OCCUR • YOUR CHILD’S SAFETY depends on you correctly installing • The primary protection for occupants of a vehicle in a and using this booster seat. collision is the structure of the vehicle itself; a booster seat will not protect a child when the vehicle is seriously •...
- Page 7 • DO NOT USE accessories or parts with this booster seat unlocked. In the event of a sudden stop, a loose vehicle other than those approved by Cybex. Use of accessories or seat back could prevent this booster seat from protecting parts from other manufacturers could alter the performance your child as well as it should.
-
Page 8: Booster Seat Overview
BOOSTER SEAT OVERVIEW FRONT VIEW Reclining Headrest Head Protection Backrest Shoulder Protection LSP Bolster Armrest Lower Belt Guide Rigid LATCH LATCH Guides (tied to Booster Base for shipping) Booster Base... - Page 9 REAR VIEW Backrest Height Adjustment Handle Shoulder Belt Guide Pocket for Owner’s Manual LATCH Connector BOTTOM VIEW (stored inside base) Product Information Label Owner’s Manual Manual del Propietario Owner’s Manual LATCH Adjustment Handle...
-
Page 10: Child Size: Height, Weight And Age Ranges
CHILD SIZE: HEIGHT, WEIGHT AND AGE RANGES DO NOT USE THIS CHILD RESTRAINT IF YOUR CHILD DOES NOT MEET ALL OF THESE REQUIREMENTS: • 3 YEARS OR OLDER • HEIGHT IS BETWEEN 38—60 INCHES (96–152 CM) • WEIGHT IS BETWEEN 33—110 LB (15—50 KG) ONLY use this booster seat with the bottom of the Head Protection positioned at two fingers width above child’s shoulders. -
Page 11: Assembly
ASSEMBLY THE SEAT Step 1 Connect the Backrest to the Booster Base. Step 2 Fold the Backrest up until it CLICKS into place. L.S.P. BOLSTERS Line up the tabs on the left L.S.P. Bolster with key holes on the Shoulder Protection and slide down to lock in place. Repeat with the Right L.S.P. - Page 12 WARNING! DEATH OR SERIOUS INJURY CAN OCCUR • Only place this booster seat in a vehicle seating location allowed by the vehicle manufacturer. Refer to your vehicle Owner’s Manual for information about vehicle seat belt systems, air bags, and child restraint/booster seat installation to determine allowable seating positions.
-
Page 13: Vehicle Seat Location Requirements
VEHICLE SEAT LOCATION REQUIREMENTS The design and operation of vehicle seat belt systems vary from vehicle to vehicle and from seating location to seating location in the same vehicle. Refer to your vehicle Owner’s Manual for proper use, placement, and adjustment of the vehicle’s lap and shoulder belts. - Page 14 VEHICLE SEAT LOCATION REQUIREMENTS The vehicle headrest MUST NOT interfere with the booster seat head support. If the vehicle headrest interferes with the installation of this booster seat, adjust or remove the vehicle headrest. Check your vehicle Owner’s Manual for more information.
-
Page 15: Vehicle Latch Requirements
• LATCH (Lower Anchors and Tethers for CHildren) refers to a pair of fixed Lower Anchors and Top Tether Anchors built into your vehicle. The Solution Q-fix High Back Booster Seat has been designed to attach to the lower LATCH anchors. A top tether is not required for Belt Positioning Booster seats such as the Solution Q-fix. - Page 16 INSTALLATION USING LATCH CONNECTORS The Solution Q-fix is designed to be used with the vehicle’s lower LATCH anchors, if available. This booster seat may be used in seating positions without lower LATCH anchors, see page 18. DO NOT INSTALL this booster seat using LATCH if the seat belt buckle is located in between the lower LATCH anchors.
- Page 17 INSTALLATION USING LATCH CONNECTORS Step 3 Place the Solution Q–fix on its side. While squeezing the orange LATCH Adjustment Handle, located on the bottom of the Booster Base, pull the LATCH Connectors out until they stop. Step 4 Rotate the LATCH Connectors 180°. Step 5 Slide both of the LATCH Connectors into both LATCH Guides (if being used) until you hear both of them CLICK as they lock...
-
Page 18: Installing With Seat Belt Only
INSTALLING WITH SEAT BELT ONLY First, refer to pages 13—14 for Vehicle Seat Location Requirements. Select a seat location allowed by your vehicle manufacturer that is equipped with a THREE POINT LAP AND SHOULDER BELT system. With the LATCH connectors pushed in and stored away, simply place the booster seat on the vehicle seat, making sure that the Backrest is in full contact with the vehicle seat back and does not interfere with by the vehicle’s headrest. -
Page 19: Adjusting The Seat For Your Child
ADJUSTING THE SEAT FOR YOUR CHILD HEIGHT AND WIDTH The innovative size adjustment of the Solution Q-fix automatically adjusts the width of the Shoulder Protection as the height of the Headrest is adjusted. After the Solution Q-fix is properly installed:... -
Page 20: Adjusting The Reclining Headrest
ADJUSTING THE RECLINING HEADREST Proper head position is critical for protecting your child in side impact crashes. The Solution Q-fix has a Three Position Reclining Headrest to help prevent your child’s head from falling forward while asleep. By first lifting up and then... -
Page 21: Securing Your Child In The Booster Seat
SECURING YOUR CHILD IN THE BOOSTER SEAT NEVER USE WITH A LAP BELT ONLY. NEVER ALLOW your child to place the shoulder belt behind his or her back. NEVER ALLOW your child to place the shoulder belt under his or her armpit. NEVER ALLOW the seat belt buckle to be located within the Lower Belt Guide. -
Page 22: Securing Child In Booster Seat
SECURING YOUR CHILD IN THE BOOSTER SEAT Step 1 Slip the shoulder belt between the Shoulder Protection and the Headrest and route the belt inside the Belt Guide making sure it rests INSIDE the area Step 2 Pull the shoulder belt down across your child’s chest while guiding the lap belt underneath both armrests. - Page 23 SECURING YOUR CHILD IN THE BOOSTER SEAT A PROPERLY SECURED CHILD When your child sits properly in the booster seat, the lap and shoulder belts MUST LIE WITHIN THE GREEN ZONE shown: • The shoulder belt threaded through the belt guide and positioned across the mid-point of your child’s chest and shoulder,...
-
Page 24: Uninstalling The Booster Seat
UNINSTALLING THE BOOSTER SEAT STEP 1 Unbuckle the vehicle seat belt and remove it from the Shoulder Belt Guide. STEP 2 While squeezing the LATCH Adjustment Handle, pull the booster seat away from the vehicle seat. STEP 3 Release both LATCH Connectors at the same time by pressing in while pulling back on the red release buttons. -
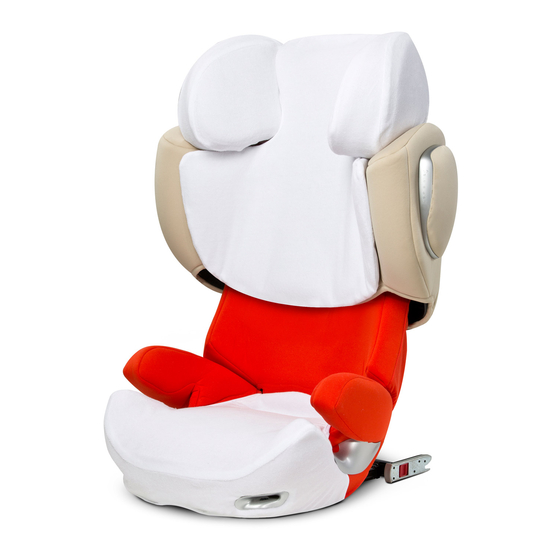
Page 25: Fabric Covers
FABRIC COVERS REMOVING THE SEAT COVERS The seat cover consists of five parts which are fixed to the seat with velcro, press studs or button holes. Once you have released the fasteners, the cover parts can be removed. To remove the covers, please follow the instructions below: Undo the snaps on the lower side of the Headrest cover. -
Page 26: Care And Cleaning
CARE AND CLEANING Follow these instructions to care for your Solution Q–fix: SPOT CLEANING Spot clean the fabric seat covers as needed with a clean cloth using mild detergent and water. FABRIC SEAT COVERS The Booster Base and Lower Backrest Covers may bTe laundered according to following instructions: Machine wash separately, cold water, gentle cycle Do not bleach... - Page 27 METAL AND PLASTIC PARTS Wipe clean with mild detergent and cold water. Do not use household cleaners or solvents. REPLACEMENT SEAT COVERS In the event you need to replace your seat covers, please contact us at 1-800-593-5522 to purchase a new fabric set. Keep in mind that colors and styles change each year, so your current color might not be available.
-
Page 28: Safety Checklist
SAFETY CHECKLIST Did you read and completely understand this Owner’s Manual and all labels found on this booster seat? Is the booster seat complete, with the Backrest attached to the Booster Base? Is today’s date before the “Do Not Use After” date on your booster seat? Does your child weigh between 33 and 110 pounds, AND stand 38 to 60 inches tall, AND is he/she 3 years of age or older? Is the booster seat forward–facing, in a seating position with a three-point lap and shoulder belt? Is the Head Protection positioned at two fingers widths above your child’s shoulders? -
Page 29: Resources
This information can be found on page 3 of this be replaced. Your insurance company may provide Owner’s Manual, or on the underside of your Booster Base. some assistance in replacing the child restraint. Please contact the U.S. CYBEX Distributor, Regal Lager, Inc.: Toll free: 1–800–593–5522 E-mail: info@regallager.com... -
Page 30: Warranty
This limited warranty is conditional upon strict compliance with the provisions of the Owner’s Manual. In no event will CYBEX or the dealer selling this product be liable to you for any damages, including incidental or consequential damages, arising out of the use or inability to use this product. - Page 32 1100 Cobb Place Blvd. NW, Suite 120 | Kennesaw, Georgia 30144 USA TOLL FREE: 1-800-593-5522 | E-MAIL: INFO@REGALLAGER.COM | WWW.REGALLAGER.COM © 2014 CYBEX Industrial, Ltd. All rights reserved. Printed in China. This product and its components are subject to change without notice.
- Page 33 Esperamos que el asiento Asiento Infantil de Elevación con Respaldo Alto Solution Solution Q-fix haga más seguro y placentero el viaje en Q-fix. automóvil para su hijo, además de que la instalación y la utilización resulten para ustedes lo más sencillo y fácil...
- Page 34 LA SOLUTION Q-FIX ..............................2 REGISTRO E INFORMACIÓN SOBRE RETIRO DEL PRODUCTO ................3 CHILD SIZE: HEIGHT, WEIGHT AND AGE RANGES ....................7 VISTA GENERAL DEL SOLUTION Q-FIX ........................8 MONTAJE ..................................10 EL ASIENTO ................................. 10 L.S.P. APOYOS ................................10 REQUISITOS DEL VEHÍCULO –...
-
Page 35: La Solution Q-Fix
Gracias a la Cabecera Reclinable del asiento Solution Q-fix, el niño podrá dormir cómodamente conservando la cabeza dentro la Zona de Seguridad. -
Page 36: Registro E Información Sobre Retiro Del Producto
Envíe su nombre, dirección, dirección de correo electrónico, de contar con una, y el número del modelo y la fecha de fabricación del sistema de sujeción a: Attention: CYBEX Registration Regal Lager, Inc. 1100 Cobb Place Blvd. NW Kennesaw, Georgia 30144, USA o llamar a: 1-800–593–5522... - Page 37 ¡ADVERTENCIA! MUERTE o GRAVES LESIONES podrían ocurrir • LA SEGURIDAD DE SU HIJO depende de que usted instale • JAMÁS UTILICE la Base del Asiento Infantil de Elevación y utilice correctamente este asiento de elevación. Lea y sin el respaldo acoplado. siga cuidadosamente todas las instrucciones del asiento •...
- Page 38 ¡ADVERTENCIA! MUERTE o GRAVES LESIONES podrían ocurrir • La cabecera del vehículo NO DEBE ESTORBAR el automáticos o que estén instalados en la puerta del vehículo. Su hijo no estará correctamente sujetado en caso Respaldo del asiento de elevación. Consulte el Manual del de choque.
- Page 39 • NO UTILICE accesorios o piezas con este asiento de certificadas. elevación distintos a los autorizados por CYBEX. La • JAMÁS PERMITA que un niño juegue con este asiento de utilización de accesorios o piezas de otros fabricantes podría elevación.
-
Page 40: Child Size: Height, Weight And Age Ranges
CHILD SIZE: HEIGHT, WEIGHT AND AGE RANGES NO UTILICE ESTE SISTEMA DE SUJECIÓN INFANTIL SI EL NIÑO NO CUMPLE CON TODOS ESTOS REQUISITOS. • PESO ES ENTRE 33 A 110 LIBRAS (15–50 KG) • ESTATURA SEA ENTRE 96 Y 30 PULGADAS (96–142 CM) •... -
Page 41: Vista General Del Solution Q-Fix
VISTA GENERAL DEL SOLUTION Q-FIX Cabecera Reclinable de Tres Posiciones VISTA DELANTERA Protección para la Cabeza Respaldo Protección para los Hombros L.S.P. Apoyo Apoyabrazos Guías Inferiores del Cinturón Conectores del sistema de anclajes inferiores y sujetadores para niños – sistema LATCH... - Page 42 VISTA TRASERA Manija de Ajuste de Altura Guías del Cinturón de Hombro Bolsa para el Manual del Propietario VISTA INFERIOR Etiqueta de Información Conectores del Producto del sistema de anclajes inferiores y sujetadores para niños – sistema LATCH – (guardados al interior de base) Manija de Ajuste del sistema de Owner’s Manual...
-
Page 43: Montaje
MONTAJE EL ASIENTO Step 1 Ensamble el Respaldo a la Base del Asiento Infantil de CLIC! Elevación. Step 2 Doble el Respaldo hasta que se trabe y quede en su lugar. L.S.P. APOYOS Line up the tabs on the left L.S.P. Bolster with key holes on the Shoulder Protection and slide down to lock in place. - Page 44 ¡ADVERTENCIA! MUERTE o GRAVES LESIONES podrían ocurrir • SOLAMENTE COLOQUE este asiento de elevación en la ubicación de asientos admisible para el fabricante del vehículo. Consulte su Manual del Propietario para obtener información acerca de los sistemas de cinturones de seguridad, bolsas de aire e instalación de asientos Consulte el Manual sujetadores/de elevación para determinar las ubicaciones del Propietario...
- Page 45 REQUISITOS PARA LA UBICACIÓN DE LOS ASIENTOS DEL VEHÍCULO El diseño y funcionamiento de los sistemas de cinturones de seguridad varían de un vehículo a otro y de una ubicación de los asientos a otra en un mismo vehículo. Consulte el Manual del Propietario de su vehículo para el uso, colocación y ajuste adecuados de los cinturones de regazo...
- Page 46 REQUISITOS PARA LA UBICACIÓN DE LOS ASIENTOS DEL VEHÍCULO La cabecera del vehículo NO DEBE obstaculizar al soporte para cabeza del asiento de elevación. Si la cabecera del vehículo obstaculiza la instalación de este asiento de elevación, ajuste o retire la cabecera del vehículo.
-
Page 47: Requisitos Del Vehículo - Sistema Latch
REQUISITOS DEL VEHÍCULO – SISTEMA LATCH Aplicables únicamente si se instala el asiento de elevación utilizando los anclajes inferiores del sistema LATCH • El sistema LATCH (Anclajes Inferiores y Sujetadores para Niños) consiste en un par de anclajes inferiores fijos y anclajes sujetadores superiores integrados a su vehículo. -
Page 48: Instalación Utilizando El Sistema Latch
INSTALACIÓN UTILIZANDO EL SISTEMA LATCH El Solution Q-fix está diseñado para utilizarse con los anclajes inferiores LATCH del vehículo, si los mismos están disponibles. Este asiento de elevación puede utilizarse en posiciones sin los anclajes inferiores LATCH, ver pagina 18. - Page 49 INSTALACIÓN UTILIZANDO EL SISTEMA LATCH 3. Coloque el asiento Solution Q-fix sobre su costado. Al tiempo que oprime la Manija de Ajuste anaranjada del sistema LATCH localizada en la Base de Elevación, empuje los Conectores del sistema LATCH hasta que se detengan.
-
Page 50: Instalación Utilizando Únicamente El Cinturón De Seguridad
INSTALACIÓN UTILIZANDO ÚNICAMENTE EL CINTURÓN DE SEGURIDAD 1. Primero, consulte las páginas 47—50 para ver los Requisitos para la Ubicación de los Asientos del Vehículo. 2. Seleccione una ubicación para el asiento aprobado por el fabricante del vehículo y que esté equipado con CINTURONES DE SEGURIDAD DE REGAZO Y DE HOMBRO de tres puntos. -
Page 51: Ajuste Del Asiento Infantil De Elevacióna La Medida Del Niño
Apoyo para la Cabeza se ajusta. Luego de instalar la Solution Q-fix adecuadamente: 1. Oprima la Manija de Ajuste del Respaldo anaranjada para ajustar la altura del Respaldo en su más alta posición. -
Page 52: Para Ajustar La Cabecera Reclinable
AJUSTE DEL ASIENTO INFANTIL DE ELEVACIÓN A LA MEDIDA DEL NIÑO PARA AJUSTAR LA CABECERA RECLINABLE La posición correcta de la cabeza es crítica para proteger al niño en choques de impacto lateral. El asiento Solution Q–fix cuenta con una Cabecera Reclinable de Tres Posiciones para ayudar a evitar que la cabeza del niño se incline hacia delante al quedarse dormido. -
Page 53: Sujeción Del Niño En El Asiento
SUJECIÓN DEL NIÑO EN EL ASIENTO JAMÁS UTILICESE con un cinturón que sea sólo de regazo. JAMÁS PERMITA que su hijo coloque el cinturón de hombro por detrás de su espalda. JAMÁS PERMITA que su hijo coloque el cinturón de hombro por debajo de la axila. La hebilla del cinturón de seguridad JAMÁS DEBE estar ubicada dentro de las Guías Inferiores del Cinturón de seguridad. - Page 54 SUJECIÓN DEL NIÑO EN EL ASIENTO 1. Dirija el cinturón de hombro por detrás de la cabecera hasta que quede acomodado DENTRO de la Guía ROJA del Cinturón de Hombro. 2. Jale hacia abajo el cinturón de hombro para que cruce el pecho de su hijo mientras coloca el cinturón de regazo por debajo de ambos apoyabrazos.
-
Page 55: Un Niño Correctamente Sujetado
SUJECIÓN DEL NIÑO EN EL ASIENTO UN NIÑO CORRECTAMENTE SUJETADO Si su niño está sentado correctamente en el asiento de elevación, los cinturones de regazo y hombro DEBEN QUEDAR UBICADOS dentro de la zona verde tal y como se muestra: •... -
Page 56: Desinstalación Del Asiento
DESINSTALACIÓN DEL ASIENTO 1. Desabroche el cinturón de seguridad del vehículo y retírelo de la Guía del Cinturón de Hombro. 2. Al tiempo que oprime la Manija de Ajuste del sistema LATCH, jale el asiento hasta retirarlo del asiento del vehículo. -
Page 57: Forros De Tela
FORROS DE TELA QUITAR LA FUNDA DE LA SILLA El tapizado consta de 5 partes, que se acoplan a la silla con velcro o botones. Una vez haya desabrochado todas las fijaciones puede quitar el tapizado. Desconecte los botones de presión en la parte baja de la vestsidura del respaldo. -
Page 58: Care And Cleaning
CARE AND CLEANING PARA SACAR MANCHAS Cuando sea necesario sacarle manchas a los forros de tela, use un paño limpio con agua y detergente suave. LAVADO DE LOS FORROS DE TELA • Lavar a maquina por separado, agua tibia, ciclo delicado •... -
Page 59: Lista De Verificación Sobre Seguridad
CUIDADO! hombro y regazo de tres puntos? ¿La parte inferior de la protección para la cabeza PRÁCTICAS SEGURAS DE CYBEX colocada a un ancho de dos dedos arriba de los • ¡Todos nos abrochamos o el vehículo no avanza! No hombros del niño? -
Page 60: Si Necesita Ayuda
SI NECESITA AYUDA Favor de ponerse en contacto con nuestro Departamento EVENTO DE REVISIÓN DE ASIENTOS DE AUTO de Servicio al Cliente, donde nuestro personal cuenta Para localizar la ubicación y el horario de los eventos de con muchos Especialistas en Seguridad de Pasajeros revisión de asientos de auto en su zona: Infantiles (CPS), con las preguntas que pudiera tener sobre •... -
Page 61: Garantia
CYBEX garantiza al comprador original que este producto estará libre de defectos en cuanto a materiales y fabricación durante dos (2) años a partir de la fecha de la compra original (el “Período de Garantía”). Durante el Período de Garantía, CYBEX, a opción suya, puede reparar o reemplazar este producto si el fabricante encuentra que está...
Need help?
Do you have a question about the SOLUTION Q-FIX and is the answer not in the manual?
Questions and answers