Table of Contents
Advertisement
Quick Links
POWER
USER'S
MANUAL
This is HIGH-POWER item; please DO NOT USE THE SAME OUTLET WITH OTHER
HIGH-POWER HOUSEHOLD APPLIANCE like air-conditioning etc.
Please choose an outlet exclusively for the machine and make sure the fuse is 10A.
Special tips:
1.
Before installation and operation, please read this operation manual carefully.
2.
Please save this manual for future reference.
3.
Product may vary slightly from the item pictured due to model upgrades
http://www.lifespanfitness.com.au/
Advertisement
Table of Contents

Related Manuals for LifeSpan Power


Summary of Contents for LifeSpan Power
- Page 1 POWER USER’S MANUAL This is HIGH-POWER item; please DO NOT USE THE SAME OUTLET WITH OTHER HIGH-POWER HOUSEHOLD APPLIANCE like air-conditioning etc. Please choose an outlet exclusively for the machine and make sure the fuse is 10A. Special tips: Before installation and operation, please read this operation manual carefully.
-
Page 2: Table Of Contents
Table of Contents ...........- 2 - 1. Brief Description ........- 2 - 2. Main Technical Features ..........- 3 - 3. Tips for Safety ....- 4 - 4. Installation: See “Installation sketch” ........- 4 - 5. Use and Operation ..........- 8 - 6. -
Page 3: Brief Description
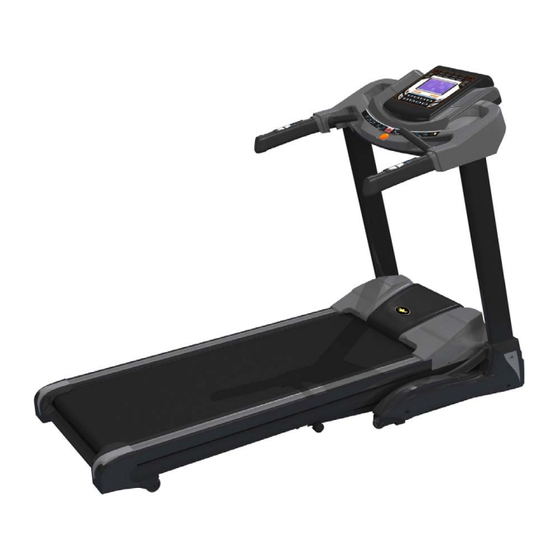
1. Brief Description power Treadmill (diagram 1) can help complete your goal of keeping fit together with unique and elegant appearance. Easily read panel parameter. Easily operated folding system realizes space-saving. Auto speed range 1-20km/h and auto incline range1-20. All makes it hot home use fitness equipment. -
Page 4: Tips For Safety
3. Tips for Safety 1) Insert the power plug into the socket directly. Current load should be less than 10A 2) The constant running time is less than 2 hours, max weight is about 130kgs. 3) Place your treadmill on the clean floor,not on the thick carpet; otherwise it will not be convenient for ventilation. -
Page 5: Installation: See "Installation Sketch
15) Please drink adequate water after taking exercises on our treadmill for more than 20 minutes. 4. Installation: See “Installation sketch” 5. Use and Operation 5.1 Panel Keys and Function (2)on/off (1)incline shortcut key (3)speed shortcut key (15)LCD window (13) music (6)... - Page 6 (minimum unit is 500m). And you also can record it by press “clear/set” key after stop the treadmill, its minimum unit is 100m. The records will remain after you shut off the power supply. (7)“body fat”...
- Page 7 It will be displayed when MP3 function is in use. 5.2 Unload operating a. Insert power plug into the socket with earth wire, turn the switch to “1” position which is on the frame b. Put the safe key in the right position, then circuit is on, press “on/off”, keep it...
- Page 8 5.3 Meter operating instruction 5.3.1 a. Insert power plug into the socket with earth wire, turn the switch to “1” position which is on the frame. Place the safety key to the appointed position. After a few seconds, panel will show that the machine is ready.
-
Page 9: Maintenance
AFTER EACH USE (DAILY) Clean and inspect, following these steps: • Turn off the treadmill with the on/off switch, then unplug the power cord at the wall outlet. • Wipe down the running belt, deck, motor cover, and console casing with a damp cloth. -
Page 10: General Cleaning
• Inspect all assembly bolts of the machine for proper tightness. • Turn off the treadmill with the on/off switch, then unplug the power cord and wait 60 seconds. • Remove the motor cover. Wait until ALL LED lights turn off. -
Page 11: General Care
1. Use a soft, dry cloth to wipe the area between the belt and deck. 2. Spread lubricant onto the inside surface of belt and deck evenly (make sure the machine is turned off and power is disconnected). - 10 -... -
Page 12: How To Check The Running Mat For Proper Lubrication
If the surface is dry to the touch, apply a suitable silicone lubricant. We recommend you use a silicone based spray to lubricate your Lifespan Treadmill. This can be purchased from your local sports Retailer or a local hardware store. -
Page 13: Guides For Malfunction
When an adjustment is made to the belt tension, you must also make a tracking adjustment to compensate for the change in belt tension. DO NOT OVERTIGHTEN - Over tightening will cause belt damage and premature bearing failure. 6.7 Belt Tracking Adjustment: This treadmill is designed to keep the belt reasonably centred while in use. -
Page 14: Warranty
Turn meter reconnect Heart rate can’t The pole of heart rate Wet the pole with water or displayed sensor liquor hard contact enough lenses Disturbed Stay away from electromagnetism electromagnetism Incline doesn’t work The motor wire is not Open the motor cover and well connected reconnect it Running belt runs faster... -
Page 15: Error And Self-Inspection
9. Error and self-inspection 9.1 Error Treadmill gives the following error code if anything wrong,please contact the prodessional service people soon if it happens. E1:no speed feedback E2:no safety key E3:over loading alarm E4:incline down alarm E5:incline up alarm E6:incline up and down alarm E7:over speeding alarm E8:short circuit alarm E9:main motor alarm... - Page 16 - 15 -...
- Page 17 - 16 -...
-
Page 18: Warranty Registration
Proofreading has been carefully done to the manual, if there are printing mistakes, please kindly understand. If pictures and the real product do not match, please take the product as the final and correct one. If any improvement on function and specification, please kindly understand if you are not informed. 10.
Need help?
Do you have a question about the Power and is the answer not in the manual?
Questions and answers