Table of Contents
Advertisement
Quick Links
Advertisement
Table of Contents

Related Manuals for LifeSpan PRO Series


Summary of Contents for LifeSpan PRO Series
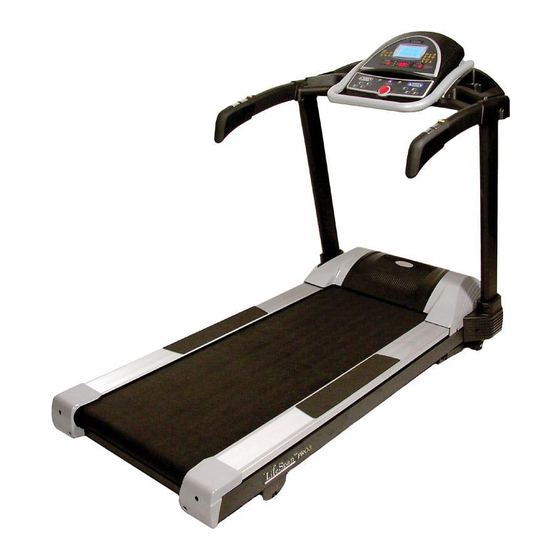
- Page 1 series Owners Manual treadmill Version 1.0...
-
Page 2: Table Of Contents
Maintenance and Cleaning ..... . . 21 Congratulations on the purchase of your LifeSpan Pro Series treadmill. To ensure safe and trouble free operation, we suggest that you read this Owners Manual and follow its recommendations. - Page 3 6 hours per day. The requirement for performance and durability is at the heart of each Pro Series model. We start with a heavy gauge robotically welded steel frame, add top of the line components like 3” machine ground roll- ers, 1.2”...
-
Page 4: Specifications
specifi cations Power Requirement 30 * 16 LCD Program Matrix DISPLAY PANEL This product should be used on a nominal 120-volt circuit with a grounding pole that looks like the outlet 3 LED Displays shown in the illustration below. Improper connection of the equipment grounding conductor can result in Heart Rate, Incline, Speed, Distance, READOUTS Time, Calories, Mile Lap Count... -
Page 5: Limited Home Use Warranty
A minimum of 4 feet of clearance behind the treadmill is required for safety reasons. If within the time frames specified above, any part of the LifeSpan Pro 3 fails to operate properly contact • Do not operate where aerosol spray products are being used or where oxygen is being administered. -
Page 6: Find A Certified Health Fitness Instructor
Owners Manual is designed to give you a brief overview that will be beneficial in starting or modifying Interval training varies the amount of effort required to workout. The LifeSpan Pro 3 comes with 5 programs your exercise program. We recommend however, that you consider using a certified fitness professional that that vary speed automatically and 7 programs that vary incline. -
Page 7: Assembly Instructions
assembly instructions The three components of a successful cardiovascular exercise program are: Since your treadmill is a heavy piece of equipment, we recommend that after taking off the top portion of the box, you slit the corners of the lower carton and fold down the sides. This will •... - Page 8 STEP 1: Handlebar Support Post Assembly STEP 3: Handlebar and Console Assembly FIG-7 FIG-6 FIG-8 20 19 A. Stand up the handlebar post (4) and attach the 4 dome head screws on the bottom of the A. Rotate the console to the proper position. Tighten the dome head Allen screws (22) on the handlebar posts (17).
-
Page 9: Electronics Overview
electronics overview exercise programs Preset Programs The Pro 3 comes with 5 Preset Speed Programs, these are programs P1 – P5, and 7 Preset Incline Programs, programs P6 – P12. Programs P1 – P10 are time based and completed when the preset Program Matrix time is obtained. - Page 10 Incline Programs – for each Incline Program you select, the treadmill incline will adjust to the level of Body Composition - is a scientific measure that uses a ratio of height and weight. It is a general measure intensity of the program selected. Incline programs P6 through P10 are based on workout time and programs of health risk, but does not take into account lean body mass.
-
Page 11: Treadmill Operations
1. Be certain that your treadmill sits stable on the floor. It is also recommended that you locate your The Pro 3 comes with the LifeSpan Intelli-Key™ button system that simply and easily steps treadmill in a pleasant area that gives you something to look at while working out, such as a window you through the program setup process. - Page 12 Body Composition Pause Function To complete the BMI analysis the following information - sex, height, weight, and age need to be entered. Pause the treadmill at any time during operation by pressing the “Start/Stop” button once. To resume operations, press the “Start” button. 1.
-
Page 13: Troubleshooting
troubleshooting maintenance and cleaning The treadmill is designed and manufactured to be reliable and easy to use. However, if you have a Belt Tensioning problem, these troubleshooting steps may help you find the cause. If the belt begins to slip during use, it will need to be tensioned. Your treadmill is equipped with tension bolts that are accessible from the back of the treadmill. - Page 14 Belt Lubrication Periodically lubricating the running belt on your Pro 3 treadmill is the most important maintenance procedure. Without proper belt maintenance and lubrication the friction between the belt and running deck will increase causing additional wear and tear on moving parts and electronics. Replacement of the belt, deck, drive motor and motor controller board my not be covered under your product warranty plan if regular maintenance is not performed on your treadmill.
- Page 15 801-973-9993 www.pcefitness.com P.O. Box 981316 Park City, Utah 84098-1316...
Need help?
Do you have a question about the PRO Series and is the answer not in the manual?
Questions and answers