Table of Contents
Advertisement
Quick Links
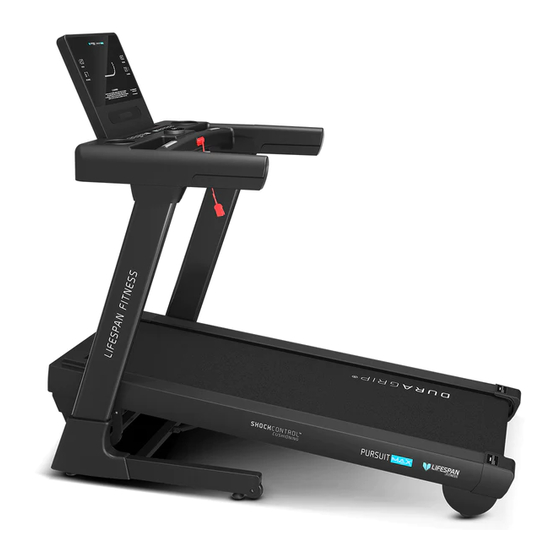
Pursuit Max Treadmill
Product may vary slightly from the item pictured due to model upgrades.
Read all instructions carefully before using this product.
Retain this owner's manual for future reference.
NOTE:
This manual should not be used to guide your purchasing decision. Your product, and the contents inside its carton, may vary
from what is listed in this manual. This manual may also be subject to updates or changes. Updated manuals are available
through our website at
USER MANUAL
www.lifespanfitness.com.au
Advertisement
Table of Contents

Related Manuals for LifeSpan Pursuit Max Treadmill


Summary of Contents for LifeSpan Pursuit Max Treadmill
- Page 1 Pursuit Max Treadmill USER MANUAL Product may vary slightly from the item pictured due to model upgrades. Read all instructions carefully before using this product. Retain this owner’s manual for future reference. NOTE: This manual should not be used to guide your purchasing decision. Your product, and the contents inside its carton, may vary from what is listed in this manual.
-
Page 2: Table Of Contents
TABLE OF CONTENTS Important Safety Instructions ....... 03 II. Important Electrical Information ......05 III. -
Page 3: Important Safety Instructions
I. IMPORTANT SAFETY INSTRUCTIONS WARNING: Read all instructions before using this treadmill. It is important your treadmill receives regular maintenance to prolong its useful life. Failing to regularly maintain your treadmill may void your warranty. DANGER To reduce the risk of electric shock disconnect your treadmill from the electrical outlet prior to cleaning and/or service work. - Page 4 • The treadmill is intended for in-home use only and is not suitable for commercial environments. • To disconnect, turn all controls to the off position, remove the safety key, and then remove the plug from the outlet. • The pulse sensors are not medical devices. Various factors, including the user’s movement, may affect the accuracy of heart rate readings.
-
Page 5: Important Electrical Information
II. IMPORTANT ELECTRICAL INFORMATION WARNING! • Route the power cord away from any moving part of the treadmill including the elevation mechanism and transport wheels. • NEVER remove any cover without first disconnecting AC power. • NEVER expose this treadmill to rain or moisture. This treadmill is not designed for use outdoors, near a pool, or in any other high humidity environment. -
Page 6: Important Operating Instructions
III. IMPORTANT OPERATING INSTRUCTIONS • Understand that changes in speed and incline do not occur immediately. Set your desired speed on the display console and release the adjustment key. The display will obey the command gradually. • Use caution while participating in other activities while walking on your treadmill, such as watching television, reading, etc. -
Page 7: Assembly Hardware
IV. ASSEMBLY HARDWARE The following figure shows the scatter diagram of the parts installed in the whole machine table. Open the packaging box, and you can remove the following parts from the box. PARTS LIST Key No. Description Specs Qty. Key No. -
Page 8: Assembly Instructions
V. ASSEMBLY INSTRUCTIONS STEP 1 1. Open the carton and remove the above parts from the box. 2. Place the main frame onto level ground. STEP 2 1. Raise the display and the upright columns up, as shown in image. NOTE: Support the upright with your hands to prevent it falling and causing injury. - Page 9 STEP 3 STEP 4 1. Use 5# hexagon wrench to secure M8*42 1. Carefully raise the display into the position as hexagon round head screw (73) and internal pictured. sawtooth lock gasket (90) on the upright column to the main frame base. 2.
- Page 10 STEP 5 STEP 6 1. First secure the armrest cover (28) into the 1. Place the safety lock (43) onto the display safety display and lock with drill screw (79) with the key slot. cross wrench. 2. Then plug power cord (54) to a main power point 2.
-
Page 11: Folding And Unfolding
VI. FOLDING AND UNFOLDING FOLDING Place your hand on position (A), then pull up the base frame until you hear the click sound emitted when the air pressure bar (B) is locked into the round tube. UNFOLDING Whilst supporting position (A) with our hand, gently push position (B), the marked area on the air pressure bar, with your foot. -
Page 12: Operation Guide
VII. OPERATION GUIDE DISPLAY 1. Incline/Calorie Window: Displays moving calories or incline level. The corresponding element is displayed when the corresponding icon is illuminated. 2. Time Window: Displays exercise time. 3. Speed Window: Show the motion speed. 4. Pulse/Distance Window: Display the running distance or pulse reading. The corresponding element is displayed when the corresponding icon is illuminated. - Page 13 MAIN FUNCTIONS On startup, all windows will light up for 2 seconds, and then enter the standby state. 1. Quick Start (Manual Mode): Put the safety key on the display and press the start button. After the 3 seconds countdown, the treadmill will start moving at the lowest speed. Adjust the speed by pressing the SPEED ▲, ▼...
- Page 14 BODY FAT TEST FUNCTION 1. In the standby state, press "PROGRAM" until the window shows "FAT". 2. Press the "MODE" button to input data into parameters "SEX/AGE/HEIGHT/WEIGHT". The corresponding window displays "-1-", "-2-", "-3-" and "-4-". For each parameter category selected, press SPEED▲, ▼ to adjust the parameter value.
- Page 15 Data Display and Setting Range The default value Range Default Mode Set the scope of program Speed 1-16km -------- -------- 1-16km Incline -------- -------- 0—15% Time 0:00—99:59 30:00 30:00 5:00---99:00 Distance 0.00km —99.9km 1.00km -------- 0.5km —99.9km Calories 0Kcl —999Kcl 50Kcl -------- 10Kcl —990Kcl...
- Page 16 15 Built-in Data Sheets for 20 paragraphs To set time/20 time = running time of each time period PROGRAM TIME 9 10 11 12 13 14 15 16 17 18 19 20 SPEED INCLINE SPEED INCLINE SPEED INCLINE SPEED INCLINE SPEED INCLINE SPEED...
-
Page 17: Exercise Guide
VIII. EXERCISE GUIDE PLEASE NOTE: Before beginning any exercise program, consult your physician. This is important especially if you are over the age of 45 or individuals with pre-existing health problems. The pulse sensors are not medical devices. Various factors, including the user’s movement, may affect the accuracy of heart rate readings. - Page 18 COOL DOWN Finish each workout with a light jog or walk for at least 1 minute. Then complete 5 to 10 minutes of stretching to cool down. This will increase the flexibility of your muscles and will help prevent post- exercise problems.
-
Page 19: Maintenance Instructions
IX. MAINTENANCE INSTRUCTIONS Reasonable cleaning/lubricating should be made to extend the life time of this unit. Performance is maximized when the belt and mat are kept as clean as possible. WARNING: • The mat/deck friction may lay a major role in the function and life of your treadmill and that is why we recommend you constantly lubricate this friction point to prolong the useful life of your treadmill. - Page 20 Running Belt Board Video Tutorial Available at: http://youtu.be/cP9NtFHfWlc Lifespan Fitness YouTube Channel: http://www.youtube.com/user/treadmillsvideos 4. HOW TO CHECK THE RUNNING MAT FOR PROPER LUBRICATION 1. Disconnect the main power supply. 2. Fold the treadmill up into the storage position. 3. Feel the underside surface of the running mat.
- Page 21 5. ADJUSTING THE RUNNING BELT Place treadmill on a level surface. Run treadmill at approximately 4km/h, checking the running condition. If the belt has drifted to the right: Whilst the If the belt has drifted to the left: Whilst the treadmill is running at 4km/h, carefully turn treadmill is running at 4km/h, carefully turn the right adjusting bolt 1/4 turn clockwise.
- Page 22 Some treadmills that have longer belts may give different measurements for correct belt tightness. Simply, if the belt begins to slip during use, this is an indication that the belt still needs tightening. Video Tutorial Available at: http://youtu.be/vllsamTSvvA Lifespan Fitness YouTube Channel: http://www.youtube.com/user/treadmillsvideos | MAINTENANCE INSTRUCTIONS...
-
Page 23: Exploded Diagram
X. EXPLODED DIAGRAM EXPLODED DIAGRAM |... -
Page 24: Parts List
XI. PARTS LIST Key No. Description Specs. Qty. Key No. Description Qty. Main Frame Left Foaming Assembly Armrest Base Assembly Right Foaming Armrest Incline Frame Assembly Handlebar Cover Left Upright Screen Panel Assembly Panel Rear Cover Right Upright Foot Pad Assembly Transportation Display Frame... - Page 25 Key No. Description Specs. Qty. Key No. Description Specs. Qty. Inner Hexagonal Electronic Meter Flat Round Head M8*42 Power Line Screw Silicon Oil Bottle Inner Hexagonal Flat Round Head M8*16 Wrench w/ Screw Screwdriver Inner Hexagonal 5 # Hexagon Flat Round Head M8*25 Wrench Screw...
- Page 26 Key No. Description Specs. Qty. Standard-type Spring Washer Internal Serrated Lock Washer Internal Serrated Lock Washer | PARTS LIST...
-
Page 27: Warranty
Any claim against this warranty must be made through your original place of purchase. Proof of purchase is required before a warranty claim may be processed. If you have purchased this product from the Official Lifespan Fitness website, please visit https://lifespanfitness.com.au/warranty-form For support outside of warranty, if you wish to purchase replacement parts or request a repair or service, please visit https://lifespanfitness.com.au/warranty-form and fill in our Repair/Service... - Page 28 WWW.LIFESPA NF ITN ES S.COM.AU...
Need help?
Do you have a question about the Pursuit Max Treadmill and is the answer not in the manual?
Questions and answers