
Related Manuals for SMART for two coupé


Summary of Contents for SMART for two coupé
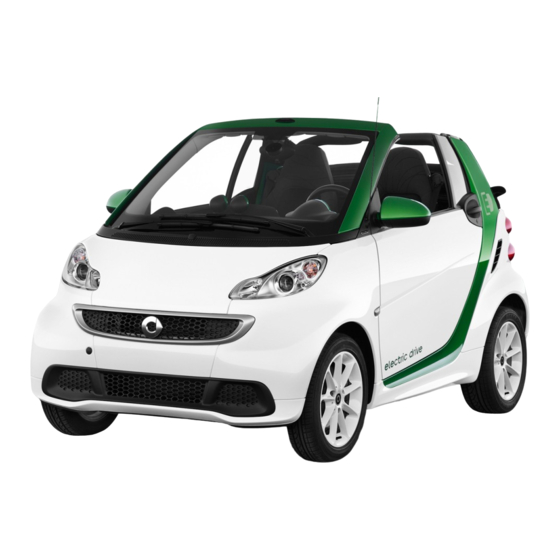
- Page 1 >> Operator’s Manual. smart fortwo coupé and smart fortwo cabriolet electric drive www.smart.com smart - A Daimler brand...
- Page 2 Your authorized electric drive smart Trademarks center has trained technicians and Genu- Bluetooth ® is a registered trademark of ine smart Parts to service your vehicle Bluetooth SIG Inc. properly. ® is a registered trademark of For expert advice and quality service, con- Daimler.
- Page 3 Should you Please contact an authorized electric have any questions about the vehicle and drive smart center if you have any further how to safely operate its features, please questions. use common sense and contact smart dealer...
- Page 5 Contents Index ..........4 At a glance ........21 Introduction ......... 13 Safety .......... 29 Controls ........51 Operation ........111 Practical hints ......159 Technical data ......211...
-
Page 6: Table Of Contents
Index Anticorrosion/antifreeze ..219, 220 1, 2, 3 ... Antiglare, Interior rear view mir- 12-volt battery ror ..........61 Charging ........ 199 Antilock Brake System Indicator lamp ......171 see ABS Notes ........197 Anti-theft systems ......49 Removing and installing .... 199 Anti-theft warning system ... - Page 7 Index Settings menu ......93 Start menu ....... 90 CAC (Customer Assistance Center) ..18 Time menu ....... 94 California retail buyers and les- Coolant sees, important notice for ....14 Anticorrosion/antifreeze ..219, 220 Cargo compartment cover blind ..104 Battery ........
- Page 8 Index Through standing water ..... 152 Tips, recuperation ..... 81 Flat tire ........187 Tips, transmission ..... 81 Fluids Driving and parking Capacities ......218 Safety notes ......76 Fog lamps ........ 67, 180 Driving safety systems ....46 Front air bags ABS ........
-
Page 9: Instruments And Controls
Index High-voltage battery Instruments and controls Battery care ......113 see Cockpit Charge level gauge ..... 81 Intelligent charging management Charging (AC power socket) ..114 High-voltage battery ....123 Charging (control system) ... 92 Interior motion sensor ....49 Charging (private wallbox) .. - Page 10 Index Overview (kilometers) ....26 Overview (miles) ....... 24 Occupant Classification System Passenger front air bag off ..36, 175 see OCS (Occupant Classifica- Seat belt telltale ..... 168 tion System) SRS ........169 Occupant distribution ....145 Turn signals ......172 Occupant safety License plate lamps .......
- Page 11 Sidewall (tires) ......145 see Occupant safety Side windows Rims ........145, 216 Operation ........ 75 Roadside Assistance ....... 15 Signs and labels ......214 smart surround sound system ..... 97 Roof see Soft top system Snow chains ......... 146...
- Page 12 Index Snow tires Service fluids and capacities ..217 Windshield/rear window washer see Winter tires system ........218 Soft top system ......70 Temperature Cleaning the soft top fabric ..157 Coolant ........152 Locking rear soft top manually ..178 Interior temperature ....
- Page 13 Index Problems under-/overinflation . . . 130 Retreads ......... 127 Uniform Tire Quality Grading Rims and tires (technical data) . . . 216 Standards ......138, 146 Rotation ......... 139 Unlocking the vehicle ..... 52 Service life ......137 Manually ......... 177 Sizes ........
- Page 14 Index Warranty information ...... 13 Washer fluid Mixing ratio ......218 Refilling ........ 126 Wiping ........70 Washer jet nozzles ......187 Washing the vehicle ...... 153 Wheel change ....... 195 Wheels, sizes ....... 216 Wheels, Tires and ......127 Where will I find...? Tire repair kit ......
-
Page 15: Introduction
Manual, your authorized electric drive authorized electric drive smart center. In smart center will be glad to inform you of addition, you will receive comprehensive correct care and operating procedures. information on permissible technical The Operator’s Manual and Maintenance/... -
Page 16: Maintenance
Mercedes-Benz USA LLC Important notice for California retail One Mercedes Drive buyers and lessees of smart automo- Montvale, NJ 07645 biles Under California law you may be entitled to a replacement of your vehicle or a refund... - Page 17 Roadside Assistance available. The smartmove Assistance (Canada) and If you sell your smart, please leave all lit- smart 1 service (USA) Program provides erature with the vehicle to make it avail- factory trained technical help in the event able to the next operator.
-
Page 18: Tions
For safety reasons, smart recommends all is qualified to work on smart electric vehi- work to be carried out by a smart service cles for further inspection or repairs. * optional... - Page 19 >> Introduction. WARNING partner which is qualified for smart elec- tric drive. The high‑voltage battery of the drive sys- Particular care should be taken involving tem is located under the vehicle’s under- all areas which are in the vicinity of high body.
-
Page 20: High-Voltage Disconnect Device
Do not drive the vehicle if you believe it may not be safely operated. -
Page 21: Copyright
This information helps, for example, to diagnose vehicle systems after a collision and to continuously improve vehicle safety. smart may access the information and share it with others for safety research or vehicle diagnosis purposes with the consent of the vehicle owner or... - Page 23 Cockpit ........... 22 Instrument cluster (miles) ....23 Instrument cluster (kilometers) ... 25 Center console ........27 Overhead control panel ...... 28 Door control panel ......28...
-
Page 24: Cockpit
Cockpit Cockpit Function Page Function Page Exterior lamp switch Gear selector lever Steering wheel Starter switch Instrument cluster Auxiliary power outlet Steering wheel paddle Storage tray* shifters* Wiper switch Charge level gauge Cruise control switch* Control lever (control Power gauge system) Glove box On-board Diagnostics... - Page 25 Instrument cluster (miles) Instrument cluster (miles) Miles Instrument cluster (U.S. vehicles) Function Page Function Page Speedometer Center indicator and warning lamp display Right indicator and warn- ing lamp display Resetting trip odometer Resetting trip computer Adjusting instrument cluster illumination Left indicator and warn- Adjusting ambient light- ing lamp display ing*...
-
Page 26: Instrument Cluster (Miles)
Instrument cluster (miles) Indicator and warning lamps Function Page Function Page M Low‑beam head- ? Coolant tempera- lamp indicator ture warning lamp lamp N High-voltage bat- # Left turn signal tery warning lamp indicator lamp # 12-volt battery ÷ ESP indicator lamp ®... - Page 27 Instrument cluster (kilometers) Instrument cluster (kilometers) Kilometers Instrument cluster (Canada vehicles) Function Page Function Page Speedometer Center indicator and warning lamp display Right indicator and warn- ing lamp display Resetting trip odometer Resetting trip computer Adjusting instrument cluster illumination Left indicator and warn- Adjusting ambient light- ing lamp display ing*...
-
Page 28: Instrument Cluster (Kilometers)
Instrument cluster (kilometers) Indicator and warning lamps Function Page Function Page M Low‑beam head- ? Coolant tempera- lamp indicator ture warning lamp lamp N High-voltage bat- # Left turn signal tery warning lamp indicator lamp # 12-volt battery ÷ ESP indicator lamp ®... -
Page 29: Center Console
Center console Center console Function Page Function Page Charge level gauge Hazard warning flasher switch Power gauge Central locking switch Air conditioning with climate control Switching front fog lamps* on/off Radio Storage tray* Drawer Gear selector lever Switching seat heating* on/off Starter switch Restarting TPMS button... -
Page 30: Door Control Panel
Door control panel Overhead control panel Door control panel Function Page Function Page Passenger front air bag Inside door handle off indicator lamp Adjusting exterior rear Switching interior light- view mirrors ing on/off Opening and closing Interior rear view mirror passenger side window Opening and closing driver’s side window... -
Page 31: Safety
Occupant safety ........ 30 Panic alarm ........45 Driving safety systems ....... 46 Anti-theft systems ......49... -
Page 32: Occupant Safety
Additional protection potential is pro- Occupant safety vided by: Introduction Supplemental Restraint System (SRS) The smart vehicle is equipped with seat with belts and dual stage air bags to protect you Air bags ( page 33) in a crash. However, children can be killed... -
Page 33: Seat Belts
Contact an authorized electric drive smart center. If it is necessary to modify WARNING an air bag system to accommodate a person Never ride in a moving vehicle with the seat... - Page 34 Seat belts of a vehicle involved in an acci- which would increase the chance of head dent must be inspected by smart. Only then and neck injuries. The seat belt would is it possible to determine whether the seat...
-
Page 35: Occupant Safety
Tensioning Devices will no longer function this, you may wish to get out of the vehicle properly and must be replaced. smart rec- as soon as it is safe to do so. If you have any ommends that you visit a qualified work- breathing difficulty but cannot get out of shop to have this done. - Page 36 The driver and passenger should always contact an authorized electric drive wear their seat belts. Otherwise it is not smart center. possible for air bags to provide their Do not lean your head or chest close to the supplemental protection.
-
Page 37: Safety Guidelines
ETD that has deployed must be replaced. These instructions are available from Do not pass seat belts over sharp edges. any authorized electric drive smart They could tear. center. Do not make any modification that could... - Page 38 Occupant safety SRS indicator lamp 6 in the instrument The lighter the passenger side occupant, the higher the vehicle deceleration rate cluster illuminates. required for the second stage inflation ! If the air bags are activated, you will of the air bag. hear a loud noise and some dust may be The air bags will not deploy in impacts generated.
-
Page 39: Head-Thorax
Passenger knee bag Only use seat covers which have been tested The knee bags are designed to provide and approved by smart for your vehicle increased protection for the driver and model. A seat cover must have a deployment passenger against the risk of injuries to control seam for the head-thorax air bag. -
Page 40: Thorax-Pelvis
Occupant safety WARNING Only use seat covers which have been tested and approved by smart for your vehicle model. A seat cover must have a deployment control seam for the thorax-pelvis side air bag. Using other seat covers may interfere with or prevent the deployment of the thorax-pelvis side air bags. -
Page 41: Indicator Lamp
The thorax-pelvis side air bags are inte- tric drive smart center. Only seat acces- grated into the driver and passenger seat sories approved by smart may be used. backrests. - Page 42 Occupant safety When the OCS senses that the passenger seat If the 4 0 indicator lamp is not occupant is classified as being up to or illuminated, the passenger front air bag is less than the weight of a typical activated and will be deployed 12‑month‑old child in a standard child in the event of certain frontal impacts...
- Page 43 Have the system checked as soon as pos- 12‑month‑old child seated in a standard sible by qualified technicians. Contact child restraint — both instances where an authorized electric drive smart the system suppresses deployment of the center. passenger front air bag even though the...
-
Page 44: Children In The Vehicle
Only have the seat repaired or replaced by an authorized electric drive smart Children in the vehicle center. If an infant or child is traveling with you... -
Page 45: Tems
Occupant safety and 225 and Canadian Motor Vehicle Safety Unsecured or improperly positioned cargo Standards 213, 213.1 and 213.2. increases a child’s risk of injury in the A statement by the child restraint manu- event of facturer of compliance with these stand- strong braking maneuvers ards can be found on the instruction label sudden changes of direction... - Page 46 Occupant safety WARNING Your vehicle is equipped with air bag technology designed to turn off the Infants and small children should never passenger front air bag in your vehicle share a seat belt with another occupant. when the Occupant Classification System During an accident, they could be crushed senses the weight of a typical between the occupant and seat belt.
-
Page 47: Panic Alarm
Panic alarm The top tether anchorage is located on the pull on the seat backrests to ensure they are floor of the cargo compartment. The top properly secured in the locked position. If tether guide for the top tether strap is a seat backrest is not properly locked, the located above, on the head restraint. -
Page 48: Safety Systems
Driving safety systems Canada only: Antilock Brake System (ABS) This device complies with RSS‑210 of WARNING Industry Canada. Operation is subject to Do not pump the brake pedal. Use firm, the following two conditions: steady brake pedal pressure instead. Pump- 1. -
Page 49: Driving Safety Systems
Driving safety systems the ignition. It goes out when the drive When the ABS is malfunctioning, the wheels system is active. may lock during hard braking, reducing Depending on the driving situation, the steering capability and extending the braking distance. ®... -
Page 50: Acoustic Vehicle Indication
Driving safety systems erwise seriously damage the brake sys- accidents. The capabilities of a hydraulic tem which is not covered by the smart brake assistant equipped vehicle must Limited Warranty. never be exploited in a reckless or dan- gerous manner which could jeopardize the ®... -
Page 51: Anti-Theft Systems
Anti-theft systems Anti-theft systems Electronic immobilizer The electronic immobilizer prevents unauthorized persons from starting your vehicle. When leaving the vehicle, always take the key with you and lock the vehicle. The drive system can be switched on by anyone with a key that is left inside the vehicle. - Page 52 Anti-theft systems Arming: Lock the vehicle using the Exit the vehicle. remote control. Lock the vehicle using the remote The tow-away protection and the interior control. motion sensor are armed after about The tow-away protection and the inter- 25 seconds. ior motion sensor remain switched off Disarming: Unlock the vehicle using the until you lock your vehicle again.
-
Page 53: Controls
Opening and closing ......52 Starter switch positions ..... 57 Seats ..........58 Mirrors ........... 61 Seat belts ........62 Lighting ......... 64 Windshield wipers ......69 Soft top system (cabriolet only) .... 70 Side windows ........75 Driving and parking ......76 Transmission ........ -
Page 54: Operation
Opening and closing Check the batteries in the remote control Opening and closing and replace them if necessary. If you do not have a spare transmitter battery at hand, use the key to open the driver’s door and the charge socket flap page 177). -
Page 55: Opening And Closing
Opening and closing Drive lock function absorbing objects) and interference emitted by other radio transmission sys- The vehicle locks automatically when the tems. Similarly, the operating range ignition is switched on and the wheels are fluctuates in line with the direction turning at vehicle speeds of approximately from which the remote control is acti- 8 mph (14 km/h) or more. -
Page 56: Inside Door Handle
Opening and closing switched on and the ignition is switched off. Opening the upper tailgate on the coupé Locking: Press central locking switch :. The indicator lamp on central locking switch : comes on, when the starter switch is in position 1. The indicator lamp on central locking switch : flashes, when the starter Press button # on the key twice. -
Page 57: Opening And Closing
Opening and closing Pull either of the release levers : back- Swivel the lower tailgate upwards to close. Allow the two release levers to wards. engage audibly. The lower tailgate is unlocked. Swivel the upper tailgate downwards to Swivel the lower tailgate downwards to close. - Page 58 Opening and closing Opening the tailgate on the cabriolet Key with remote control * Lock button Press button # on the key twice. $ Opening the retractable soft top Pull the release handle in handle # Unlock button recess : of the tailgate. Opening: Press button $ on the key for The tailgate is unlocked.
-
Page 59: Starter Switch Positions
Starter switch positions Closing: Swivel the rear soft top down- Starter switch positions wards to close. Pull soft top down. Pull release levers :, located to the left and right of the retaining clip, down- wards. Make sure the rear soft top is correctly locked in place on both sides. -
Page 60: Seats
Adjusting the seat while driving could cause the driver to lose control of the vehi- WARNING cle. Contact an authorized electric drive smart Never ride in a moving vehicle with the seat center if the seats have become damaged. backrest in an excessively reclined posi- The seat is an integral part of the vehicle’s... -
Page 61: Armrest
Seats Release adjustment lever : when the Folding up and down desired seat backrest tilt is reached. Folding up: Hold front of armrest and fold When you hear an audible click, the seat it up in direction of arrow :. backrest is again fixed into place. -
Page 62: Seat Heating
! If the seat heating is malfunctioning, the indicator lamp(s) on the switch braking come(s) on briefly when you press the switch and then go(es) out again. Contact vehicle maneuvers an authorized smart center. an accident * optional... -
Page 63: Mirrors
Mirrors Exterior rear view mirror heating Mirrors After switching on the rear window Adjust the interior and exterior rear view defroster, the exterior rear view mirrors mirrors before driving so that you have a will be heated automatically. This pre- good view of the road and traffic condi- vents icing up the exterior rear view mir- tions. -
Page 64: Fastening
Seat belts Seat belts WARNING Never ride in a moving vehicle with the seat Fastening the seat belts backrest in an excessively reclined posi- tion as this can be dangerous. You could WARNING slide under the seat belt in a collision. If Always fasten your seat belt before driving. -
Page 65: Seat Belts
Allow the retractor to completely rewind replaced. Contact an authorized electric the seat belt by guiding latch plate =. drive smart center. Proper use of seat belts Correct driver seat adjustment Do not twist the seat belt when fastening. -
Page 66: Automatic Headlamp Mode
Lighting Side marker lamps Exterior lamp switch Low‑beam headlamps For safety, smart recommends that you drive with your low‑beam headlamps on You can switch on and off the low‑beam during the day. In certain countries, local headlamps with the exterior lamp switch laws dictate that low‑beam headlamps are... -
Page 67: Lighting
Lighting Switching on: To minimize risk to you and to others, acti- vate headlamps by turning exterior lamp Start the drive system. switch to position L when driving or The daytime running lamps are switched when traffic and/or ambient lighting con- ditions require you to do so. -
Page 68: Combination Switch
Lighting Turn signals Reactivating (USA only): Switch off the ignition. Remove the key from the starter switch. Switch on the high-beam flasher and press button # on the key simultane- ously. An acoustic signal sounds. The daytime running lamp mode is reac- tivated. -
Page 69: Ambient Lighting
Lighting When returning to the vehicle repeatedly until the desired setting is reached. Press button # on the key either once or The current setting is stored. twice. The vehicle is either selectively or When adjusting the ambient lighting, globally unlocked. the illumination level for instrument cluster is also changed ( page 83). -
Page 70: Hazard Warning Flasher
Lighting Make sure the parking lamps or the after 15 seconds if all doors are closed low‑beam headlamps are switched on. after 10 minutes if at least one door is Switching on: Press switch :. open The front fog lamps come on. The rocker switch can be set to three dif- ferent positions. -
Page 71: Windshield Wipers
Windshield wipers Windshield wipers Intermittent wiping Only switch on intermittent wiping under Switching windshield wipers on and off wet weather conditions or in the presence of precipitation. Vehicles with rain-light sensor*: When you select intermittent wiping, the sensor is activated. The sensor automatically sets a suitable wiping interval depending on the wetness of the sensor surface. -
Page 72: Rear Window Wiper/Washer
Soft top system (cabriolet only) To prevent smears on the windshield, or Introduction noisy/chattering wiper blades, wipe with windshield washer fluid periodi- The soft top system of the smart cabriolet cally even when it is raining. consists of a retractable soft top Single wipe... -
Page 73: Soft Top System (Cabriolet Only)
If you cannot open or close the retracta- ble soft top due to a malfunction contact Roadside Assistance or an authorized Opening and closing the retractable electric drive smart center. soft top To avoid draining the battery, leave the You can open and close the retractable soft... - Page 74 Soft top system (cabriolet only) ing the retractable soft top will inter- rupt the opening procedure. Closing For safety reasons, you can only close the retractable soft top using the retractable soft top switch inside the vehicle. Make sure the key is in starter switch position 1.
- Page 75 Soft top system (cabriolet only) Open the driver’s and passenger door when conditions are safe to do so. Open the tailgate ( page 56). Retractable soft top switch Closing Opening Pull handle : on the inside of the tail- Opening the rear soft top gate backward.
-
Page 76: Mounting The Side Rails
Soft top system (cabriolet only) Carry out the following steps when con- Close the storage compartment cover. ditions are safe to do so. Press on the “PRESS” marking in the mid- First lift the side rail at the rear end in dle of the storage compartment cover direction of arrows ?. -
Page 77: Side Windows
Side windows ! Make sure the side rails are installed correctly. Otherwise the side rails may not function properly or may be damaged. Close the storage compartment cover. Press on the “PRESS” marking in the mid- dle of the storage compartment cover until it engages audibly. -
Page 78: Starting
Driving and parking Driving and parking result in an accident and/or serious per- sonal injury. Starting The switches for both power windows are on WARNING the driver’s door. In addition, there is a Make sure absolutely no objects are switch for the passenger side on the obstructing the pedals’... -
Page 79: Driving And Parking
Driving and parking appears in the multifunction display Parking page 87). WARNING The pointer of the power gauge moves from "OFF“ to "0“ ( page 81). With the drive system inactive, there is no power assistance for the brake and steering systems. -
Page 80: Brake Pedal
Driving and parking WARNING Always engage the parking brake in addi- tion to shifting to park position P. Engaging the parking brake while the vehi- cle is in motion can cause the rear wheels When parked on an incline, always turn the to lock up. -
Page 81: Steering Wheel Paddle Shifters
Have the brake Turn the key to starter switch position system repaired at an authorized electric drive smart center, if there is a fault in the Remove the key from the starter switch. brake system. -
Page 82: Transmission
Transmission ces the braking effect of the electric motor. In overrun or braking mode, the motor's braking effect may therefore be reduced or may not be present at all. As a result of the reduced engine braking effect, you may cause an accident and injure yourself or others. -
Page 83: Instrument Cluster
Instrument cluster Press the brake pedal. Under certain circumstances, in over- run phases recuperation does not work as Release the brake pedal. described above. This may be e. g the Apply sufficient pressure to the accel- case if the high-voltage battery is erator pedal to drive off. -
Page 84: Exterior Lighting
Instrument cluster ! Do not hang any objects on the power The illumination for both gauges comes on when you switch on the ignition and the gauge. exterior lighting. This could cause the power gauge to be torn from its mountings and be damaged. Charge level gauge Power gauge ;... -
Page 85: Control System
Control system Adjusting instrument cluster illumi- or when traffic and road conditions permit nation it to be done safely. Bear in mind that at a speed of just 30 mph You can adjust the illumination of (approximately 50 km/h ), your vehicle is the switches and dials in the instrument covering a distance of 44 feet (approx- cluster... -
Page 86: Recuperation Display
The transmission position indicator : to secure the vehicle displays the current gear selector lever from rolling away. position. Contact an authorized electric drive smart Display Function center. Park position Move the gear selector Reverse gear lever to park position P or neutral position N. -
Page 87: Control System
Control system No recuperation (level 0) High recuperation (level 2) Symbol for no recuperation Symbol for high recuperation When this mode is set, there is no recuper- High recuperation occurs when this mode ation. When you release the accelerator is set. When you release the accelerator pedal, the vehicle rolls on unbraked. -
Page 88: Eco Indicator
Control system Three segments: maximum power is Feedback is provided by: available. your driving style when accelerating and Two segments: Less than 66 % amount of coasting power is available. If you accelerate evenly and moder- One segment: Less than 33 % amount of ately, the ECO value increases. -
Page 89: Charging Mode Display
Control system To change the setting: press and hold the READY indicator control switch on the control lever up or down until the desired mode is selected in the multifunction display ( page 83). Additional information: Setting the departure time ( page 90) Starting the charging process immedi- ately (... - Page 90 Control system Freeze warning (Canada vehicles only) When the outside temperature falls below 3¥, the multifunction display makes you aware of the fact that the road may be icy. An additional freeze warning, i.e. an ice crystal symbol :, in the multifunction display flashes.
-
Page 91: Menus And Submenus
Control system Menus and submenus Function Odometer Odometer menu ( page 89) YSTART START menu (trip statistics since start) ( page 90) YRESET RESET menu (trip statistics since last reset) ( page 90) Charge and depart Charge and depart menu ( page 90) Messages Messages... -
Page 92: Reset Menu
Control system Odometer Odometer menu appears in the multi- Reset menu function display. YRESET RESET menu menu shows you the trip To switch between submenus: Press the OK statistics since the last reset. button on the control lever briefly. To reset the trip odometer: Select the trip odometer display. - Page 93 Control system This is useful: over the charging of the high‑voltage battery. if you wish to cool the interior of the vehicle before driving Activating the set departure time if you wish to charge the vehicle at a charging station/wallbox at the most inexpensive electricity rate With the "Air conditioning before start"...
- Page 94 "Air ing process. Contact an authorized electric conditioning before start" function is drive smart center should you require activated or deactivated. assistance. If necessary, adjust the set- Briefly press the OK button on the control tings of your vehicle.
-
Page 95: Messages Menu
! Failure to have the maintenance service performed at the designated Messages menu times/mileage, may result in vehicle damage that is not covered by the smart Messages Messages menu stores messages that Limited Warranty. you can call up. -
Page 96: Time Menu
Control system Press the control switch on the control Language Language submenu appears in the multi- lever ( page 83) up or down until the function display. desired unit is selected. Press the OK button on the control lever Press the OK button on the control lever briefly. -
Page 97: Audio System
83) up or down until the If you wish to have an audio system other desired setting is selected. than an original smart audio system fitted Press the OK button on the control lever in your vehicle, please always have the nec- briefly to confirm. -
Page 98: Basic
Audio system* Video operation from CD/DVD or SD Card, Audio system basic ® via AUX/USB/iPod The audio system basic contains the fol- Image display from CD/DVD or SD Card, lowing functions: ® via USB/iPod Radio (FM/AM) ! Please be sure to read the operating Radio Broadcast Data System (RBDS) and instructions for the audio system navi- radio text... -
Page 99: Driving Systems
With the cruise control is activated and a speed set, the following message appears smart surround sound system* in the multifunction display: The smart surround sound system supple- ments the existing speakers with more powerful and additional speakers (includ- ing a digital amplifier in the passenger footwell and a passive subwoofer). - Page 100 Driving systems Canada only: The set speed appears in the multifunction display next to cruise control symbol V. On uphill grades, the cruise control may not be able to maintain the set speed. Once the grade eases, the set speed will be resumed.
-
Page 101: Notes
Air conditioning with climate control Press RES/+ button ; briefly. pages. Otherwise the windows could fog up, The cruise control resumes the previ- impairing visibility and endangering you ously set speed. and others. The last set speed stored in memory is The air conditioning improves the level of deleted when the drive system is comfort when driving at high outside tem-... -
Page 102: Air Conditioning With Climate
Air conditioning with climate control The range of the vehicle is decreased when the air conditioner is switched on. In warmer weather, ventilate the passenger compartment for a short period of time before utilizing the air conditioning. Further information on the "Air condition- ing before start"... -
Page 103: Air Vents
Air conditioning with climate control Control panel Air volume control Air conditioning switch Rear window defroster switch Air recirculation switch Temperature control Air distribution control Increasing or decreasing: Push temper- Switching on/off ature control A up or down. Control panel ( page 101). -
Page 104: Air Volume
Air conditioning with climate control fresh air can flow freely into the vehicle Adjusting: Turn slider : to the left, interior. right, up, or down. Do not obstruct air vents or ventilation Opening: Turn slider : inwards towards grilles in the vehicle interior. the center console. -
Page 105: Air Recirculation Mode
Air conditioning with climate control Increasing or decreasing: Push air vol- ume control : up or down. Defrosting WARNING Never drive with iced up or fogged win- dows. Visibility will be significantly impaired. Impaired visibility could endanger yourself and others. This may Make sure the key is in starter switch prevent you from observing the traffic con- position 1. -
Page 106: Cargo Compartment Cover Blind
Loading and storing Switching on: Press air recirculation Vehicle occupants could be injured by switch ?. objects being thrown around in the vehicle The indicator lamp in air recirculation in the event of switch ? comes on. hard braking a change of direction Switching off: Press air recirculation switch ? once more. - Page 107 Loading and storing Controls Open the tailgate. Secure cargo compartment cover blind : at the front of the cargo com- partment with the parcel net bag. Insert cargo compartment cover blind : on the right-hand side in top mounting ; or in bottom mounting =. Closing: Take hold of cargo compartment cover blind : in the middle and pull backwards.
-
Page 108: Coin Holder
Loading and storing Storage compartments WARNING To help avoid personal injury during a col- lision or sudden maneuver, exercise care when storing objects in the vehicle. Put luggage or cargo in the cargo compartment if possible. Do not pile luggage or cargo higher than the seat backrests. -
Page 109: Drawer
Loading and storing Opening: Pull on glove box lid release : and fold down the glove box lid. Closing: Lift up the glove box lid with a bit of force until it engages. Locking: Insert the key into the glove box lock and turn it to position 3. -
Page 110: Loading And Storing
Loading and storing this reason, please make sure that the luggage or cargo in the cargo compartment charging cable is only stowed in the if possible. Do not pile luggage or cargo intended location. higher than the seat backrests. Keep compartment lids closed. This will help to prevent stored objects from being thrown about and injuring vehicle occu- pants during... -
Page 111: Sun Screen
Useful features cle are indicated on the certification label which can be found on the driver’s door B‑pillar. For more information, see “Loading the vehicle” ( page 133). The handling characteristics of a fully loaded vehicle depend greatly on the load distribution. -
Page 112: Useful Features
Useful features it takes to inflate the tire without any Auxiliary power outlet problem The auxiliary power outlet supplies power the vehicle battery will discharge when to the following electrical accessories current is drawn. when the key is turned to starter switch position 1: the electric air pump, available in con- junction with the tire repair kit*... - Page 113 High-voltage battery ......112 Front compartment ......123 Tires and wheels ......127 Winter driving ........ 146 Driving instructions ......147 Driving abroad ........ 153 Vehicle care ........153...
-
Page 114: High-Voltage Battery
220 V / 240 V service. Charge connectors inflammable gas will escape via a duct. The will be available for purchase through inflammable gas escapes to an area under your authorized electric drive smart the vehicle. This prevents the high‑voltage center. battery from exploding. -
Page 115: Battery Care
High-voltage battery Energy consumption and range Use only charging cables which have been approved and recommended for the vehicle. The available energy of the high-voltage Do not use: battery is reduced by: extension chords low outside temperatures cable reels switching on electrical consumers multiple sockets At low temperatures and after being parked travel adapters... -
Page 116: Overvoltage Protection
High-voltage battery Charging cable and ‑connecter warming ture range from Ò4 ‡ (Ò20 ¥) to 104 ‡ (40 ¥) . Observe the safety notes on ( page 112). When the vehicle is exposed to tempera- Charging cable and ‑connecter can become tures below Ò13 ‡... -
Page 117: Storing
High-voltage battery Do not use: to charge the vehicle. Do not extend a charging cable. Do not use a charging cable extension chords if it is damaged. cable reels You could otherwise suffer an electric multiple sockets shock and be seriously or even fatally Do not use power socket adapters to con- injured. -
Page 118: Control Element
Contact an authorized electric drive smart center should you require assistance. If necessary, adjust the set- Indicator lamp ; tings of your vehicle. lights up There is no malfunction. - Page 119 High-voltage battery If you remove the charging cable from the The vehicle must not be moved during power supply socket, the value is reset to charging. the default value for the next charging The è indicator lamp in the instru- process.
- Page 120 This function is called "Plug & page". Please consult an authorized Charge". Information is exchanged electric drive smart center if you do not between the vehicle and the charging sta- have access to the Internet. tion via the charging cable for activation.
- Page 121 High-voltage battery Removing the charging cable The battery is charged completely when the indicator in the charge level gauge is at 100% ( page 81). ! Make sure the charging cable has been disconnected before driving off. The vehicle or charging cable may otherwise be damaged.
-
Page 122: Process
The charge socket flap is unlocked but the opening mechanism is jammed. Lock and unlock the vehicle again. If the opening mechanism is still jammed: Contact an authorized electric drive smart center. The charging cable The vehicle power socket is locked. cannot be inserted Make sure that the gear selector lever is in position P. -
Page 123: Data Protection
"Vehicle Homepage" with electric drive smart center when you costs. Further information can be obtained receive the vehicle. at any authorized electric drive smart center. -
Page 124: Via Powerline
High-voltage battery mated values because, for example, they are standard. Data is transmitted via phase L1 influenced by the following factors: and the neutral conductor of the power line. outside temperature In order for the vehicle to access the Inter- net, you require a commercially available active electrical consumers, e.g. -
Page 125: Front Compartment
Contact an authorized electric drive If the windshield wipers should inadver- smart center if you have any questions. tently be switched on, you could be ser- iously injured by the wiper washer drive, Next, set the value of the charge current which is located just below the service to the desired value once again. -
Page 126: Radiator Grille
Front compartment Removing Pull both levers ; fully towards the out- side in the direction of the arrows. Using a suitable object, push both open- Lift the front of service flap =. ers : towards the inside in direction of First pull service flap = forward the arrows. -
Page 127: Drive System
Front compartment Insert left and right links D of service flap = under links C on the fender. Push service flap = down in direction of arrow G. First push both levers ; inward and then to the rear. Insert both tabs E on the back of service flap = completely into openings F. - Page 128 Front compartment Adding coolant cooling period of at least 30 minutes. Oth- erwise, you could be seriously burned if hot Cover pressure cap : with a rag. coolant escapes. Slowly turn pressure cap : approx- imately Ö turn counterclockwise to The coolant is a mixture of water and anti- release any excess pressure.
-
Page 129: Brake Fluid
23) although the parking brake Safety notes is released. Contact an authorized electric drive smart ! If you find that the brake fluid in the center for information on tested and rec- brake fluid reservoir has fallen to the... - Page 130 Break in new tires for approximately 60 miles (100 km) at moderate speeds. When replacing rims, only use genuine smart wheel bolts specified for the partic- Regularly check the tires and rims for ular rim type. Failure to do so can result in damage.
-
Page 131: Tires And Wheels
Tires and wheels In addition to the Tire and Loading Infor- ride comfort, wear unevenly, increase mation placard on the driver’s door B‑pil- stopping distance, and result in sudden lar, also consult the tire inflation pres- deflation (blowout) because they are more sure label (if available) on the inside of likely to become punctured or damaged by the filler flap for any additional informa-... -
Page 132: Checking
Tires and wheels depending on the driving speed and the Checking tire inflation pressure tire load. Safety notes Potential problems associated with WARNING underinflated and overinflated tires Follow recommended tire inflation pres- sures. Underinflated tires Do not underinflate tires. Underinflated WARNING tires wear excessively and/or unevenly, Follow recommended tire inflation pres-... -
Page 133: Tire Pressure Monitoring Sys Tem (Tpms)
Tires and wheels If you have overfilled the tire, release carefully applying the brakes and avoiding tire inflation pressure by pushing the abrupt steering maneuvers. metal stem of the valve with e.g. a tip of a pen. Then recheck the tire inflation WARNING pressure with the tire gauge. - Page 134 Tires and wheels Canada only: function exists. When the malfunction This device complies with RSS‑210 of indicator is illuminated, the system may Industry Canada. Operation is subject to not be able to detect or signal low tire the following two conditions: pressure as intended.
-
Page 135: Information Placard
Tires and wheels Press Restarting TPMS button :. For illustration purposes only. Actual The combination low tire pressure/TPMS data on tires are specific to each vehicle malfunction telltale in the instrument and may vary from data shown in above cluster ( page 23) flashes for approx- illustration. -
Page 136: Seating Capacity
Tires and wheels Weight Rating (GAWR). The GAWR is the total allowable weight that can be car- ried by a single axle (front or rear). Never exceed the GVWR or GAWR for either the front axle or rear axle. The Tire and Loading Information placard showing load limit information : is located on the driver’s door B‑pillar page 134). -
Page 137: Load Limit
Tires and wheels illustration. Refer to Tire and Loading The higher the weight of all occupants, the Information placard on vehicle for less cargo and luggage load capacity is actual data specific to your vehicle. available. Steps for determining correct load limit The following steps have been developed as required of all manufacturers under Title 49, Code of U.S. -
Page 138: Certification Label
Tires and wheels Examples for steps 1 to 3 Example 1 Example 2 Step 1 Combined weight limit of occu- 540 lbs 540 lbs pants and cargo from Tire and Load- ing Information placard Step 2 Number of occupants (driver and passenger) Occupants weight Occupant 1: 150 lbs... -
Page 139: Care And Maintenance
Tires and wheels Life of tire For more information on tire load rating page 140). WARNING For information on calculating total and Tires should be replaced after 6 years, cargo load capacities ( page 135). regardless of the remaining tread. The service life of a tire is dependent upon Direction of rotation varying factors including but not limited... -
Page 140: Storing Tires
Tires and wheels wear :, traction ;, and temperature resistance =. Although not a Government of Canada requirement, all tires made for sale in North America have these grades branded on the sidewall. For illustration purposes only. Actual data on tires are specific to each vehicle and may vary from data shown in above illustration. -
Page 141: Tire Labeling
Temperature 81 lb‑ft (110 Nm). WARNING Only use genuine smart wheel bolts speci- fied for your vehicle’s rims. The temperature grade for this tire is established for a tire that is properly For information on wheel change, see “Flat... - Page 142 Tires and wheels No letter preceding the size designation Manufacturer (as illustrated above): Passenger car tire Tire ply material ( page 143) based on European design standards. Tire size designation, load and speed Letter “P” preceding the size designation: rating ( page 140) Passenger car tire based on U.S.
- Page 143 Tires and wheels Tire speed rating B indicates the tire failure may result and cause an acci- approved maximum speed for the tire. dent and/or serious personal injury to you or others. Summer tires Always replace rims and tires with the same Index Speed rating designation, manufacturer and type as...
- Page 144 Tires and wheels ity of the tire is limited to 186 mph Load identification (300 km/h). Any tire with a speed capability above 186 mph (300 km/h) must include a “ZR” in the size designation AND the service description must be placed in parenthe- sis.
-
Page 145: Accessory Weight
Tires and wheels Tire type code Tire type code ? may, at the option of the manufacturer, be used as a descriptive code for identifying significant charac- teristics of the tire. Date of manufacture Date of manufacture A identifies the week and year of manufacture. -
Page 146: Cold Tire Inflation Pressure
Tires and wheels GAWR (Gross Axle Weight Rating) and heater, to the extent that these items are available as factory-installed equip- The GAWR is the maximum permissible axle ment (whether installed or not). weight. The gross vehicle weight on each axle must never exceed the GAWR for the Air pressure front and rear axle indicated on the cer-... -
Page 147: Normal Occupant Weight
Tires and wheels Normal occupant weight TIN (Tire Identification Number) The number of occupants the vehicle is Unique identifier which facilitates designed to seat, multiplied by 68 kilo- efforts by tire manufacturers to notify grams (150 lbs). purchasers in recall situations or other safety matters concerning tires and gives purchasers the means to easily identify Occupant distribution... -
Page 148: Snow Chains
Snow chains* Tire change. ! Remember that snow chains must always be compatible with the tire sizes of a vehicle. Snow chains that are approved by smart are only permitted for the fol- lowing tire size: * optional... -
Page 149: Driving Instructions
Driving instructions 175/55 R15 on the rear axle. surface. This means that you should always For safety reasons, smart recommends adapt your driving style to suit the current that you only use snow chains that have road and weather conditions. -
Page 150: Brakes
When driving down long and steep grades, tem which is not covered by the smart do not depress the brake pedal perma- Limited Warranty. nently. Depress it in intervals instead to Brake pad wear or a leak in the brake system reduce the vehicle speed. -
Page 151: Driving Instructions
New brake pads cles in front. Only install brake pads recommended by To help prevent brake disc corrosion after smart. driving on wet road surfaces (particularly salted roads), it is advisable to brake the WARNING vehicle with considerable force prior to If other than recommended brake pads are parking. -
Page 152: Hydroplaning
Hydroplaning appear unsafe, have the vehicle towed to the Depending on the depth of the water layer nearest smart center or tire dealer for on the road, hydroplaning may occur repairs. resulting in a loss of control, even at low speeds and with new tires. -
Page 153: Winter Driving Instructions
Driving instructions sidewall, any authorized electric drive approximately in (4 mm) on all four smart center will be glad to assist you. wheels for the winter season to ensure nor- mal balanced handling characteristics. On For information on speed ratings for packed snow, they can reduce your stopping winter tires, see “All-season and winter... -
Page 154: Coolant Temperature
Please do not forget that your primary and the high-voltage battery, which is responsibility is to drive the vehicle not covered by the smart Limited War- safely. Only operate the radio or tele- ranty. Observe all legal requirements. -
Page 155: Driving Abroad
For more information on coolant tempera- ronmental influences is to wash it and use ture warning lamp ( page 172). protective treatments regularly. smart recommends that you care for the paintwork at least twice a year (e.g. in the Driving abroad spring and autumn). WARNING Abroad, there is an extensive smart service Many cleaning products can be hazardous. - Page 156 The following topics deal with the cleaning soft top fabric*. Environmental influen- and care of your vehicle and give important ces are not covered by the smart Limited “how-to” information as well as references Warranty. to smart approved vehicle-care products.
- Page 157 Vehicle care Selecting the right cleaning agent ! To avoid damage to interior equipment and materials: Never rub roughly or use cleaning spirits on the cloth upholstery, never use strong agents, stain remover etc. on the leather upholstery. Never scour or use solvent on plastic parts. Never use strong and aggressive agents on windows, do not touch the inside of the windows with hard objects such as an ice scraper or ring, doing so may damage the windows.
-
Page 158: Power Washer
Vehicle care Exterior Special considera- Lightly soiled Heavily soiled tions Hand-/Automatic Hand-/Automatic car washes car washes Wheels and wheel Two-layer metallic Car shampoo con- Car shampoo con- covers paint (high-gloss) centrate, rim care centrate, rim care Retractable soft top PAC fabric Car shampoo con- Car shampoo con- centrate, soft top... -
Page 159: Paintwork Care
Recommended touch-up paint pens can be seals obtained in a smart center. other rubber parts The distance should be at least 3.9 in For any major paintwork damage, please (10 cm) and the water temperature must contact a smart center. - Page 160 Vehicle care Wet cleaning smart recommends that you use an approved car shampoo concentrate and soft top cleaner. “Dry clean” the vehicle first. Wash the soft top off using a soft brush or sponge and plenty of lukewarm water. Then rinse thoroughly with clear water.
- Page 161 Where will I find ......160 Display messages ......161 What to do if ........166 Unlocking/locking manually ....177 Replacing transmitter battery .... 178 Replacing bulbs ....... 179 Replacing wiper blades ..... 185 Flat tire ........187 Wheel change ........
-
Page 162: Where Will I Find
Where will I find ... Where will I find ... carefully. When using the tire repair kit follow the instructions in this section. Tire repair kit Failure to follow these instructions can result in severe injury or death. The tire repair kit is located in the passenger footwell under the carpet. -
Page 163: Display Messages
(Canada only) When braking, continue to depress the brake pedal. Brake System See Brake System See Contact an authorized electric drive smart center. Operator's Manual Operator's Manual There is a serious malfunction in the vacuum supply of the (USA only) braking system. - Page 164 Move the gear selector lever to P. There is a malfunction in the coolant compressor or in the heating/coolant circuit. Malfunction Serv. Malfunction Serv. Contact an authorized electric drive smart center. Req. Req. The outside temperature is too low. The full battery capacity is not available.
- Page 165 In addition, the yellow þ warning lamp in the instrument Service Required Service Required cluster lights up. Contact an authorized electric drive smart center. þ There is a malfunction in the drive train. If the drive system continues to run, the drive train can become damaged.
- Page 166 Malfunction Malfunction vehicle power socket, the high‑voltage battery does not charge. There is a malfunction in the on-board charger. Contact an authorized electric drive smart center. The voltage on the vehicle power socket is too low. No Charge No Charge Check whether the charging cable is inserted correctly in the power sockets of both the vehicle and the power source.
- Page 167 Display messages Accordingly, when the low tire pressure telltale illuminates, you should stop and check your tires as soon as possible, and inflate them to the proper pressure. Driving on a significantly underinflated tire causes the tire to overheat and can lead to tire failure. Underinflation also reduces fuel efficiency and tire tread life, and may affect the vehicle’s handling and stopping ability.
-
Page 168: What To Do If
What to do if ... What to do if ... Warning and indicator lamps in the instrument cluster General information If any of the following lamps in the instru- ment cluster fails to come on during the bulb self-check when switching on igni- tion ( page 57), have the respective bulb checked and replaced if necessary. -
Page 169: Warning Lamp
ò (USA only) There is a malfunction in the ABS system. ! (Canada only) Have the ABS system checked at an authorized electric drive The ABS indicator smart center immediately. lamp illuminates while the drive system is running. ò (USA only) The ABS system fails. -
Page 170: Seat Belt Telltale
! If you find that the brake fluid in the brake fluid reservoir has fallen to the minimum mark or below, have the brake system checked for brake pad thickness and leaks imme- diately. Contact an authorized electric drive smart center immediately. Do not add brake fluid as this will not solve the problem. -
Page 171: Srs Indicator Lamp
For your safety, we strongly recommend that you contact an author- ized electric drive smart center immediately to have the system checked; A malfunctioning SRS system may not deploy when needed in an accident resulting in serious or fatal injury, or it might deploy unexpectedly and unnecessarily which could result in an accident and/ or injury to you or to others. -
Page 172: Warning Lamp
WARNING When the EPS is not available a higher degree of effort is necessary to steer the vehicle. Have the system checked at an authorized electric drive smart center. * optional... -
Page 173: High-Beam Headlamps
N The yellow There may be a malfunction in the high-voltage system. high-voltage Contact an authorized electric drive smart center immediately battery warn- and have the high-voltage system checked. ing lamp comes on while driv- ing. -
Page 174: Temperature Warning Lamp
Replace the bulb as soon as possible ( page 180). cator lamp(s) flashes at double frequency. Have the turn signal checked at an authorized electric drive smart center as soon as possible. Drive system Problem Possible causes/consequences and M M Solutions ? The red coolant The coolant is too hot. -
Page 175: Drive Diagnostics Indicator Lamp
See also “Restarting the TPMS” ( page 132). h The combina- There is a malfunction in the TPMS. tion low tire Have the TPMS checked at an authorized electric drive smart pressure/TPMS center. malfunction After the malfunction has been remedied the combination low... -
Page 176: What To Do If
What to do if ... As an added safety feature, your vehicle has been equipped with a tire pressure monitoring system (TPMS) that illuminates a low tire pressure telltale when one or more of your tires is significantly underinflated. Accordingly, when the low tire pressure telltale illuminates, you should stop and check your tires as soon as possible, and inflate them to the proper pressure. - Page 177 Possible causes/consequences and M M Solutions There is a malfunction in the system. The passenger front Have the system checked at an authorized electric drive air bag off indicator smart center. lamp illuminates and remains illuminated with the weight of a typical adult or some-...
-
Page 178: Door
Report the loss of the key to your car insurance company immediately. If necessary, have the mechanical lock replaced. Your authorized electric drive smart center will be glad to supply you with a replacement following an identity check. Acoustic warning signals... -
Page 179: Unlocking/Locking Manually
Have the brake pads checked at an authorized electric drive ing. smart center. To unlock the vehicle centrally press Unlocking/locking manually the central unlocking switch in the upper Unlocking the vehicle center console ( page 27). -
Page 180: Replacing Transmitter Battery
The rear soft top closes the locking hooks. Close the retractable soft top com- pletely. Have the rear soft top checked at an authorized electric drive smart center. Replacing transmitter battery Notes Insert a suitable object such as a coin The remote control’s transmitter battery is... -
Page 181: Replacing Bulbs
Correct headlamp adjustment is extremely important. Have headlamps checked and readjusted at regular intervals and when a bulb has been replaced. Contact an author- ized electric drive smart center for head- lamp adjustment. WARNING Bulbs and bulb sockets can be very hot. -
Page 182: Front
Replacing bulbs Overview bulbs Front lamps Headlamp Type : Low‑beam headlamp H7 (55 W) ; High‑beam headlamp H7 (55 W) = Parking and side marker lamp WY 5 W ? Turn signal lamp 2357 A Type Front fog lamp* : Front fog lamp H 11 Side turn signal lamp Type... -
Page 183: Backup Lamp
Replacing bulbs Rear lamps Tail lamp unit Type : Brake lamp/tail lamp/turn signal lamp/side marker lamp 12 V 21/5 W ; Reflector = Backup lamp 12 V 21 W License plate lamps Type : License plate lamps C 5 W High‑mounted brake lamp Type : High‑mounted brake lamp... - Page 184 Replacing bulbs Bend the retainer spring end down and Replacing bulbs for front lamps forward until it unclips. Fold the Before you start to replace a bulb for a retainer spring back. front lamp, do the following first: Pull the bulb out of the headlamp hous- Turn the exterior lamp switch to position ing.
- Page 185 Replacing bulbs The arrow on bulb socket : must be in Replacing bulbs for rear lamps line with the line on the headlamp hous- Before you start to replace a bulb for a rear ing. lamp, do the following first: Turn bulb socket : clockwise by a quar- Turn exterior lamp switch to position ter of turn.
- Page 186 Replacing bulbs High-mounted brake lamp Left bulb carrier with bulb sockets (right bulb carrier in reverse) Removing: Unscrew retaining screws :. Retaining tab Remove high-mounted brake lamp ?. Brake, tail, turn signal and side marker lamp bulb Detach electrical connector ; from bulb Backup lamp bulb socket =.
-
Page 187: Replacing Wiper Blades
Replacing wiper blades Detach electrical connectors ;. Detach electrical connector ; from the interior lamp. Remove bulb =. Remove bulb = from mount ?. Insert the new bulb. Installing: Insert the new bulb. Attach electrical connectors ;. Attach electrical connector ; to the Fit the license plate lamp unit on the interior lamp. - Page 188 We recommend that you have this work carried out at an authorized electric drive smart center. To ensure proper visibility it is vital that you have wiper blades that are in perfect shape...
-
Page 189: Flat Tire
Tire Pressure Monitoring System (TPMS)*. Such damage is not cov- Front washer jet nozzles ered by the smart Limited Warranty. Rear washer jet nozzles When having the damaged tire replaced, Adjusting: Use a needle to move washer also have the TPMS sensors* checked for jet nozzles : or ;... - Page 190 You should have the sealed tire replaced Do not use the tire sealant after the expi- at an authorized electric drive smart ration date has elapsed (see top of con- center. tainer).
- Page 191 Flat tire Keep away from open flame, heat source or sparks. Do not smoke. Sealing a tire (Version 1) Take the tire repair kit from the passenger footwell ( page 160). Open the tire repair kit lid. Unscrew flange lid :. Unscrew the lid of tire sealant container E.
- Page 192 In this case, the tire sealant cannot prop- erly seal the tire. Do not drive the vehicle. Contact the nearest authorized electric drive smart center for assistance or call Press I on electric air pump switch C. Roadside Assistance. The electric air pump is switched on and inflates the tire.
- Page 193 Park your vehicle safely away from the tires can adversely affect handling and roadway and contact the nearest authorized ride comfort, wear unevenly, increase electric drive smart center or call Road- stopping distance, and result in sudden side Assistance. deflation (blowout) because they are more Have the damaged tire replaced.
- Page 194 Flat tire Drive to the nearest authorized electric With the O-ring seals towards the elec- drive smart center, to have the damaged tric air pump housing, insert yellow clo- tire replaced. sure cap A into fixture ;. Contact an authorized electric drive...
- Page 195 In this case, the tire sealant cannot prop- erly seal the tire. Do not drive the vehicle. Contact the nearest authorized electric drive smart center for assistance or call Roadside Assistance. Check the tire inflation pressure using pressure gauge E.
- Page 196 Drive to the nearest authorized electric To detach tire sealant container : from drive smart center, to have the damaged the electric air pump, press both tire replaced. latches. Contact an authorized electric drive...
-
Page 197: Wheel Change
WARNING Contact an authorized electric drive When jacking up the vehicle, only use a smart center for information on which suitable jack. Observe the manufacturer’s jack and wheel wrench are required. safety instructions. Prepare the vehicle as described The jack must be designed for jacking up page 195). - Page 198 This could cause an accident. Be sure to use the correct wheel bolts. WARNING Warning label Only use genuine smart wheel bolts. Other The take-up brackets are identified by the wheel bolts may come loose. embossed recesses in the area of the door Do not tighten the wheel bolts when the sills.
-
Page 199: Batteries
Observe all safety instructions and pre- When replacing the battery, always use bat- cautions when handling automotive batter- teries approved by smart. For information, ies. contact an authorized electric drive smart center. Never lean over batteries while connect- ing, you might get injured. -
Page 200: Notes
Battery fluid contains sulfuric acid. Do not tenance intervals or contact an author- allow this fluid to come in contact with ized electric drive smart center for fur- eyes, skin or clothing. In case it does, ther information. immediately flush affected area with water and seek medical help if necessary. -
Page 201: Charging
Batteries Disconnecting, removing, charging, reinstalling and reconnecting 12‑volt battery Disconnecting the 12-volt battery If the 12-volt battery is disconnected or discharged turning the key in the starter switch will have no effect the transmission will remain in park position P ! Always disconnect the battery in the order described below. -
Page 202: Jump Starting
! Never attempt to recharge a frozen bat- Never lean over batteries while connecting tery. Have the battery checked at a smart or jump starting, you might get injured. center. The battery housing could be Battery fluid contains sulfuric acid. Do not damaged. - Page 203 (12 V). Jump starting with a more powerful battery could dam- age the vehicle’s electrical system. Such damage will not be covered by the smart Limited Warranty. Only use jumper cables with sufficient cross-section and insulated terminal clamps.
- Page 204 Jump starting Jump start assistance Your vehicle’s 12-volt battery is located in the passenger footwell below the footrest page 199). For jump starting, use the terminals of the battery, keeping the leads connected. Make sure the two vehicles do not touch. Switch off all electrical consumers.
-
Page 205: Towing
You can now switch on the headlamps. Remount the positive terminal cover. Have the 12-volt battery checked at the nearest authorized electric drive smart center. Please keep in mind that it will take quite some time to charge the 12-volt battery. - Page 206 P. WARNING Contact an authorized electric drive With the drive system inactive, there is no smart center for assistance or call Road- power assistance for the brake and steering side Assistance. systems. In this case, it is important to...
-
Page 207: Fuses
If a fuse is blown, the components and sys- tems secured by that fuse will stop operat- ing. WARNING Only use fuses approved by smart with the specified amperage for the system in ques- Rear covers tion and do not attempt to repair or bridge a blown fuse this may cause an overload Remove respective cover : or ;... - Page 208 Fuses Switch off the drive system. Remove the key from the starter switch. Replacing a fuse The fuse box is located on the driver’s side below the dashboard. From the fuse chart ( page 208), deter- mine which fuse belongs to the malfunc- tioning accessory or component.
- Page 209 Fuses Fuse box Front side Fuse : - \ Backup fuse slots y - ¥...
-
Page 210: Fuse Chart
Fuses Rear side Fuse ^ - © Fuse chart Accessory/Component Amperage Color — — — Windshield wipers 25 A Neutral Power window (left and right) 20 A Yellow Passenger compartment blower 25 A Neutral Front fog lamps, LED daytime running lamps 10 A Right parking lamp, right tail lamp, license 7.5 A Brown... - Page 211 Fuses Accessory/Component Amperage Color CPC, shifter, brake force booster vacuum 7.5 A Brown pump Coolant pumps 1 and 2, high-voltage battery 15 A Blue 25 A Neutral ® control unit Exterior lamp switch, turn signal lamp 10 A switch, cockpit switch module, on-board diagnostics socket, exterior rear view mir- ror heating, anti-theft warning system, rain-light sensor, charge level and power...
-
Page 212: Fuses
Fuses Accessory/Component Amperage Color Rear window defroster 40 A Orange Soft top (cabriolet only) 30 A Green Radiator cooling fan 40 A Orange Horn, central locking system 20 A Yellow — — — Starter switch (ignition) 50 A 40 A Orange ®... - Page 213 Parts service ........212 Warranty coverage ......212 Drive system and high-voltage system electronics ........212 Identification labels ....... 214 Vehicle specification ...... 215 Rims and tires ........ 216 Service fluids and capacities .... 217...
-
Page 214: Electronics
Loss of Warranty booklet gent quality inspections. Each part has been specifically developed, manufac- Should you lose your smart USA Warranty tured or selected for and adapted to smart booklet (USA only) or the Warranty booklet vehicles. (Canada only), have an authorized electric... -
Page 215: Drive System And High-Voltage System Electronics
! Damage or consequential damage due to specialist knowledge and tools to carry out retrofitting a device in the vehicle is the work required, e.g. at a smart center. In not covered by smart’s warranty. particular, work relevant to safety or on... -
Page 216: Certification Label
Identification labels Identification labels Signs and labels Certification label (on driver’s door B‑pillar) Data shown on the example certifica- tion label are for illustration purpose only. These data are specific to each vehicle and may vary from data shown in the illustration. -
Page 217: Identification Number (Vin)
Vehicle specification Vehicle specification The quoted data apply only to the standard vehicle. Contact an authorized electric drive smart center for the corresponding data of all special bodies and special equipment. Main dimensions Overall vehicle 107.4 in (2 727 mm) -
Page 218: Rims And Tires
® cle such as the ABS or the ESP Using tires other than those approved by smart may result in damage that is not covered by the smart Limited Warranty. ! Using tires other than those approved by smart can have detrimental effects,... -
Page 219: Service Fluids And Capacities
Vehicle components and their respective lubricants must match. Therefore only use products tested and approved by smart. Please contact an authorized electric drive smart center for products tested and approved by smart. WARNING Comply with all valid regulations with respect to handling, storing and disposing of service fluids. -
Page 220: System
Refer to your vehicle’s Mainte- the manufacturer’s instructions nance Booklet for replacement interval. Washer fluid mixing ratio Only brake fluid approved by smart is rec- ommended. Any authorized electric drive Temperature above 32¦ (0¥): smart center will provide you with addi- 1 part windshield washer concentrate tional information. -
Page 221: Coolant
Always use anticorrosion/antifreeze that not covered by the smart Limited War- has been approved by smart. For informa- ranty. tion contact an authorized electric drive If the antifreeze mixture is effective to smart center. - Page 222 The coolant is also regularly checked each time you bring your vehicle to an author- ized electric drive smart center for service. Anticorrosion/antifreeze quantity: Approximate freeze protection -35¦...
Need help?
Do you have a question about the for two coupé and is the answer not in the manual?
Questions and answers