Table of Contents
Advertisement
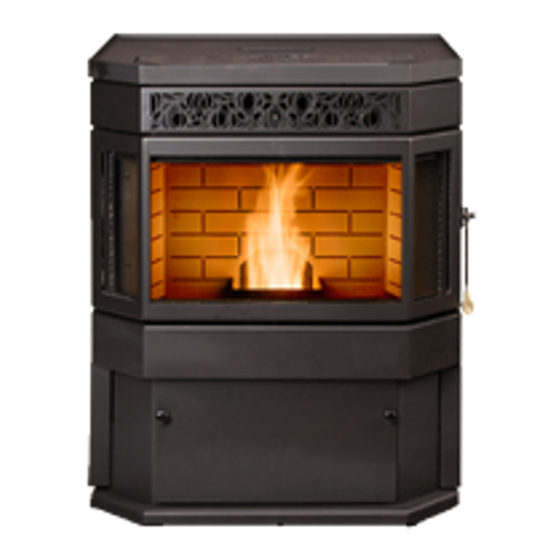
Installation & Operations Manual
Lincoln SCR
Multi-Fuel Stove
"Please read this entire manual before installation and use of this pellet fuel-
burning room heater.
Failure to follow these instructions could result in
property damage, bodily injury or even death."
"Contact local building or fire officials about restrictions and installation
inspection requirements in your area.
Save these Instructions
210
Lincoln SCR Manual
1
Advertisement
Table of Contents

Related Manuals for St. Croix SCR

Summary of Contents for St. Croix SCR
- Page 1 "Please read this entire manual before installation and use of this pellet fuel- burning room heater. Failure to follow these instructions could result in property damage, bodily injury or even death." "Contact local building or fire officials about restrictions and installation inspection requirements in your area. Save these Instructions Lincoln SCR Manual...
-
Page 2: Table Of Contents
Venting – Hearth Mount.................. 21 Floor Protection ......................22 Minimum Clearances to Combustible Materials ............ 23, 24 Outside Combustion Air ..................... 25 Mobile Home Installation ..................26, 27 Thermostat ........................28 Installation Check ......................29 Preventing Chimney Fires..................... 29 Lincoln SCR Manual... - Page 3 Shutting Off the Stove ................... 41 Combustion Air Damper Adjustment ............41-44 Damper Adjustment & Pilot Setting, Thermostat Control......44 Diagnostic & Safety Features ..............45, 46 Lincoln SCR Maintenance ..................47 Daily Maintenance ..................47 Periodic Maintenance................48-50 Yearly Maintenance ................. 51, 52 Safe Operation ......................
-
Page 4: Quick Start Guide (Read This First)
2 – SmartStat Mode is the Automatic Mode. In this mode the Thermostat controls the unit. The Lincoln SCR starts as soon as the Thermostat calls for heat. The unit shuts off only after the unit pilots for 1 hour with out calling for heat. If Operating in the SmartStat Mode, make sure the Thermostat is not calling for heat when trying to shut the Lincoln SCR off at the Control Board. - Page 5 4 - Adjusting the Draft Fan Voltage (if needed) (See point 9 on page 61) 5 - Adjusting the Heat Level to a lower setting (to prevent the Lincoln SCR from excessive ON/OFF cycling). This will also help in maintaining an even temperature in the home. (See figure 23 on page 36) Moving to the next Program will also produce less heat.
- Page 6 Figure 3 Once the jam has been cleared, simply plug the unit back in and the drum will rotate through and stop in the correct position. Lincoln SCR Manual...
- Page 7 When running the unit in SmartStat Mode it will start the unit 6 times before running out of pellets. Be sure to keep the small hopper filled up when unit is starting frequently. Optional Hopper Extension, Part # 80P54093, is available for a larger Hopper Capacity. Lincoln SCR Manual...
-
Page 8: General Information
Since Even Temp Company has no control over the installation of the Stove, Even Temp Company grants no warranty, implied or stated, for the installation of the Stove and assumes no responsibility for any special, incidental or consequential damages. MANUFACTURED BY: Even Temp Inc Hwy 34 Waco, NE, 68467 Lincoln SCR Manual... -
Page 9: Installation Check List
4. Caution: The high temperature paint can be easily scratched prior to burning the Stove. CAUTION: FAILURE TO FOLLOW THE INSTRUCTIONS IN THE INSTALLATIONS MANUAL MAY RESULT IN A HOUSE FIRE. PLEASE FOLLOW INSTALLATION AND MAINTENANCE INSTRUCTIONS. Lincoln SCR Manual... -
Page 10: Stove Layout Diagram
Stove Layout Figure 1 The burn system used in the Lincoln SCR is the St. Croix Patent Pending “Revolution Burn System”. This burn system is Self-Cleaning and Self-Igniting during operation. This system utilizes a Patent Pending Dual Hopper System that uses wood pellets to ignite the Fuel that is in the main hopper. -
Page 11: Stove Dimensions
F – Center of Exhaust from the Floor C – Center of Air Intake from Floor G – Depth of Stove D – Center of Stove to Center Intake H – Height of Stove with Control Extended Lincoln SCR Manual... -
Page 12: Approved Installations
Approved Installations The Lincoln SCR is approved for CONVENTIONAL and MOBILE HOME installations as a FREESTANDING stove. The stove may also be installed on the Hearth in front of a fireplace and vented through the chimney of the fireplace. Figure 3... - Page 13 PL Vent with the use of corn. ATTENTION BATTERY BACKUP: Battery backup system are useful if the Stove is installed using horizontal venting only. This prevents any smoke from entering your home in the event of a power failure. Lincoln SCR Manual...
-
Page 14: Exhaust Venting
High temperature ceramic roping reduces potential fly ash escaping through joints. Stainless steel inner liners resist corrosive flue gas damage to the system. Flex pipe should be stainless steel, 4 ply construction with a total thickness of approx. .07 inches. Lincoln SCR Manual... -
Page 15: Venting-Typical Pl Vent Components
TYPICAL PL VENT COMPONENTS RAIN CAP VERTICAL OR WALL THIMBLE CHIMNEY SUPPORT BRACKET HORIZONTAL ADAPTER ADJUSTABLE LENGTH SINGLE TEE SINGLE REDUCTION DOUBLE TEE PIPE w/TEE CAP TEE w/TEE CAP w/TEE CAP PIPE ADAPTER INCREASER ELBOW ELBOW Lincoln SCR Manual... -
Page 16: Venting: Determining Materials
PL vent elbow (45 or 90 degrees). Note: End caps or elbows must vent exhaust gases away from the building. 4. For termination above the building roofline a rain cap is required. 5. The exhaust pipe on the Lincoln SCR is 4” O.D. to accommodate a pipe adaptor. Lincoln SCR Manual... -
Page 17: Venting: Termination Requirements
4a. Figure 4a 4’ (1.2 m) BELOW a door, window, cavity, or air vent 4’ (1.2 m) HORIZONTALLY FROM a door, window, cavity, or air vent 1’ (305 mm) ABOVE a door, window, cavity, or air vent Lincoln SCR Manual... - Page 18 50000 BTU/Hr shall be located not less than 12” from the opening. Figure 4b 1’ (305 mm) ABOVE, BELOW OR HORIZONTALLY FROM a door, window, cavity, or air vent. Lincoln SCR Manual...
-
Page 19: Venting: Termination Clearance Requirements
1’ (305 mm) FROM The wall penetration point 3’ (915mm) FROM a gas meter/regulator assembly 2’ (610 mm) FROM any adjacent combustibles such as: Adjacent buildings, fences, protruding parts of the structure, roof eaves or overhangs, plants, shrubs, etc. Lincoln SCR Manual... -
Page 20: Venting: Into An Existing Chimney
When wall penetration is necessary to access a masonry chimney, use a listed PL vent wall thimble. (Figure 6). 4. When venting into a Class A steel chimney, (Figure 7), use an appropriate PL Vent adapter. Lincoln SCR Manual... -
Page 21: Venting - Hearth Mount
(D). An approved flex liner of PL vent must be used. A chimney system with known drafting problems may require a liner, which may also need to be insulated to keep vent system warm in a cold chimney environment. Lincoln SCR Manual... -
Page 22: Floor Protection
Hearth models may be placed directly on the noncombustible hearth of a fireplace. The Hearth must extend a minimum of 6” (152 mm) in Front of Unit and beyond each side of the Fuel Loading and Ash Removal Opening(s). Figure 9 Floor protection (Top View) Lincoln SCR Manual... -
Page 23: Minimum Clearances To Combustible Materials
Floor protection: Front (from faceplate) 6” Floor protection: Sides 6” Alcove: Vertical to Combustibles 16” Alcove: Sides 6” Alcove: Back 4” Figure 10 (Top View) Figure 11 (Top View) Clearances: corners of stove Clearances Sides and Back Lincoln SCR Manual... - Page 24 Operations Manual. Please read the section covering Daily, Periodic and Yearly Maintenance Operations Manual. Figure 14 Alcove Installation (Top View) Lincoln SCR Manual...
-
Page 25: Outside Combustion Air
OUTSIDE COMBUSTION AIR 1. Under certain conditions it is recommended that the Lincoln SCR be connected to an outside source of combustion air to improve performance. Flexible metal hose, or rigid metal pipe, (conduit), must be connected around (NOT INSIDE) the combustion air inlet tube. Be careful not to pinch or bend the outside air pipe with too small a radius which may be terminated flush with the outside wall but should be protected from wind and weather by a hood. -
Page 26: Mobile Home Installation
HOME! FAILURE TO DO SO MAY CREATE NEGATIVE PRESSURE WITHIN THE MOBILE HOME AND COULD DISRUPT PROPER VENTING AND OPERATION OF THE PELLET STOVE. 3. CAUTION: THE STRUCTURAL INTEGRITY OF THE FLOORS, WALLS, CEILING AND ROOF MUST BE MAINTAINED. Lincoln SCR Manual... - Page 27 8. Do not use components other than those specified for use with this unit. 9. Floor protection requirement must be followed precisely. 10. PL Vent must be used for exhaust venting. (Single wall vent is not allowed). Follow PL Vent manufacturer’s installation directions and observe all listed clearances to combustibles. Lincoln SCR Manual...
-
Page 28: Thermostat
(See figure 18) Read the Frequently Asked Questions section Operations Manual to Troubleshoot the Thermostat. Figure 18 NOTE: Installers must determine a neutral location of where to mount the thermostat panel for accurate room temperature measurements. Figure 17 Lincoln SCR Manual... -
Page 29: Installation Check
LINCOLN SCR OPERATION CAUTION: Operate this unit only with the fuel hopper lid closed. Failure to do so may result in emission of products of combustion from the hopper under certain conditions. Maintain hopper seal in good condition. Hopper lid switch will prevent the auger from running if lid is left open. -
Page 30: Approved Fuels
Read the section covering Daily, Periodic and Yearly Maintenance for proper Maintenance Schedules. The Stove is not warranted against damage caused by using poor pellets or other fuels not approved for use in this Stove, incorrect operation, improper maintenance, or incorrect installation. Lincoln SCR Manual... -
Page 31: The Revolution Burn System
Ignition the hole in the front of the pot for the Igniter needs to be kept open. If a change is noticed in how the Furnace Ignites, shut the unit down and clean the hole. See Figure left more information. Figure 19 Lincoln SCR Manual... - Page 32 5 – Remove the screw that holds the burnpot in place and lift the burnpot up and out of the stove. (See figure 19) 6 – Reverse steps to re-install the Revolution pot. Caution: Pay close attention to how everything lines up before re-installing the Pot and Drive Coupler. Lincoln SCR Manual...
- Page 33 Clinker Cutters on the other. The drum will now drop out the bottom of the Pot Assembly. To re-assemble the Pot Assembly reverse the steps above. (Be sure to place the drum with the drive coupling facing the Revolution gear motor) Lincoln SCR Manual...
-
Page 34: Self Ignition
Self ignition Figure 22 The Multi-Fuel Revolution pot used in the Lincoln SCR uses a Dual Hopper (See Figure 22). The Dual Hopper feature is a Patent Pending Ignition System using pellets to ignite the Stove and automatically switch over to Corn, Wheat, Rye, Cherry Pits or Distiller’s Grain after ignition has taken place. -
Page 35: Operating Instructions
OPERATING INSTRUCTIONS A different type of heater. The Lincoln SCR is a Stove. FOLLOW THESE OPERATING INSTRUCTIONS EXACTLY AS STATED TO ENSURE SAFE AND RELIABLE OPERATION. 1. Carefully read this “Operation and Maintenance” manual in its entirety BEFORE lighting your Stove for the first time. -
Page 36: Control Board Features
Thermostat Mode and an LED Light bar that indicates which of the 5 Heat Settings the Stove is running on. The LED Light bar is also used during the Diagnostic process, see page 45 for more details. Figure 23 Lincoln SCR Manual... -
Page 37: Thermostat Function
If the Thermostat does not call for heat during that hour the Stove shuts off and re-lights itself the next time the Thermostat calls for heat. This setting is the recommended setting if a thermostat is used. The stove is Fully- Automatic. Lincoln SCR Manual... -
Page 38: Pre-Lighting Instructions
To adjust the damper for other types of fuel, use the following procedures: First turn the setscrew clockwise until it stops against the tube. See figure 24. Figure 24 Lincoln SCR Manual... -
Page 39: Changing The Program On The Control Board
The number of times the lights Flash will indicate which program is running. Program 1 – LED lights flash once Program 2 – LED lights flash twice Program 3 –LED lights flash three times Program 4 – LED lights flash four times Figure 26 Lincoln SCR Manual... -
Page 40: Lighting Your Stove
The board will check for P.O.F. again. If the board still fails to sense the Proof of Fire switch the Stove will go into “Safety Shutdown” (See section on Diagnostic Features on page 45.) If this happens, repeat the Start-Up process. Lincoln SCR Manual... -
Page 41: Shutting Off The Stove
To know if the damper needs to be adjusted you should learn to recognize how Corn, Wheat, Rye, Pellets, Cherry Pits & Distiller’s Grain burn in this Stove system. Figure 27 Lincoln SCR Manual... - Page 42 2. Lag time. This is the time it takes for the corn to start burning and the burn pot to become balanced. Corn will tend to stick together in a clump in the burn pot if the corn feeds in faster than it’s burning. Lincoln SCR Manual...
- Page 43 If the Stove has been connected to an existing chimney system that has good natural draft, the procedure mentioned in the last 2 points above may actually require that Lincoln SCR Manual...
-
Page 44: Damper Adjustment & Pilot Setting, Thermostat Control
Remember: Choosing a lower Pilot setting may require the damper to be fine- tuned to match the lower feed rate. Monitor how the Stove is operating after a change is made and adjust the damper if needed. Lincoln SCR Manual... -
Page 45: Diagnostic & Safety Features
Power Reset” - If the board becomes unresponsive for a long period of time, you must unplug the Stove, wait 10 seconds and plug the Stove back in to reset the board. Lincoln SCR Manual... -
Page 46: Safety Features
2 hours, the stove will go into shut down mode. WARNING: These safety features are designed to protect life and property. Bypassing these features voids all warranties and the safety listing of the Stove. The Lincoln SCR has been Safety Tested by an accredited, independent laboratory. Lincoln SCR Manual... -
Page 47: Lincoln Scr Maintenance
LINCOLN SCR MAINTENANCE NOTE: WHEN YOU FIRST OPERATE YOUR STOVE, CHECK TO DETERMINE THE NEEDED CLEANING FREQUENCY. THE STOVE REQUIRES A MINIMUM AMOUNT OF DAILY MAINTENANCE. REQUIRED MAINTENANCE DEPENDS LARGELY UPON THE QUALITY OF FUEL BURNED AND THE RATE OF BURN. THE AMOUNT OF DAILY MAINTENANCE WILL INCREASE IF FUEL QUALITY DECREASES AND/OR THE BURN RATE INCREASES. -
Page 48: Periodic Maintenance
If the holes in the pot remain plugged, remove the Burnpot, (as shown in Figure 19 on Page 31 & figure 20 on page 32) and use a small metal object (Nail, Drill Bit, etc) to clean out plugged holes. Figure 28 Lincoln SCR Manual... - Page 49 Figure 30 on the next page) Clean the baffle on a regular basis. Frequency of cleaning depends on amount of fuel being burnt and the quality of the fuel. Fuel with low ash content is recommended. Failure to clean the baffle can cause the Stove to become plugged with fly ash. Lincoln SCR Manual...
-
Page 50: Baffle Removal
7. Air Filter. Check the Air Filter at least once a month and clean or replace when needed. The filter material may be purchased at a local hardware stove and cut to size to fit into the filter bracket. Lincoln SCR Manual... -
Page 51: Yearly Maintenance
NOTE: UNPLUG THE STOVE. Remove the access panels of the Stove. Carefully clean or vacuum any dust, cobwebs and household dust. Carefully vacuum around the fan motors. If electrical wires become disconnected call your dealer for service if needed. Figure 31 Lincoln SCR Manual... -
Page 52: Safe Operation
Corn/Pellet-burning heater. If creosote has accumulated, it should be removed to reduce the risk of a chimney fire. 4. Do not Overfire this unit. Follow all instructions regarding the proper use of this heater. Lincoln SCR Manual... -
Page 53: Wiring Schematic
15 Amp. A dedicated circuit for the Stove is recommended. CAUTION: The electrical components of the Stove are not owner serviceable. Call your dealer for proper diagnosis of electrical problems and service to those components. Lincoln SCR Manual... -
Page 54: Parts Layout
Parts Layout Figure 33 Lincoln SCR Manual... - Page 55 Parts Layout - Continued Figure 34 Lincoln SCR Manual...
- Page 56 80P54047 IGNITER ASSEMBLY 80P30493 DECORATIVE GRILL – RIGHT HAND 80P53958 REVOLUTION POT - COMPLETE 80P30506 HEAT EXCHANGE BAFFLE 80P52567 TUBE SCRAPER ROD 80P30593 STEEL BRICK – RIGHT PANEL 80P30577 STEEL BRICK – BACK PANEL 80P30561 HOPPER MAGNETS Lincoln SCR Manual...
- Page 57 MOTOR MOUNT BRACKET ASSEMBLY 80P20248 5/8" COLLAR WITH SETSCREW 80P20278 AUGER MOTOR 80P30191 MOTOR RETAINER BRACKET 80P20245 AUGER GASKET 80P50858 AUGER BUSHING WASHER 80P30045 SPEAKER TERMINAL-THERMOSTAT 80P30431 RELAY - REVOLUTION MOTOR 80P52630 TERMINAL BLOCK 80P30612 WIRING HARNESS Shown Lincoln SCR Manual...
-
Page 58: Troubleshooting & Frequently Asked Questions
INDUCER IS ESPECIALLY IMPORTANT AT THE END OF THE HEATING SEASON TO MINIMIZE CORROSION DURING THE SUMMER MONTHS CAUSED BY ACCUMULATED ASH. h. Do Not Use Chemicals or Fluids to Start The Fire. Do Not Burn Garbage, Gasoline, Naphtha, Engine Oil, or Other Inappropriate Materials Lincoln SCR Manual... - Page 59 Stove. First check to see if there are pellets in the hopper. If there are pellets in the hopper, why did the Stove go out? Unburned fuel in the burnpot means the fire went out before the auger quit feeding. Lincoln SCR Manual...
- Page 60 Draft settings on the Board, or a combination of both. It also could be an indication that the Stove is getting plugged and needs a good cleaning. Refer to the section in the manual that covers the Daily, Periodic and Yearly Maintenance of the Stove. Lincoln SCR Manual...
- Page 61 LED’s. The default setting is the center LED. This gives 2 adjustments increasing the voltage (LED’s 4 & 5) and 2 adjustments decreasing the voltage. (LED’s 1 & 2) The voltage is increased or decreased 2.5 volts with each adjustment. Figure 30 Lincoln SCR Manual...
- Page 62 Step 4 – Observe the LED light flashing as described in point 10 above. Changing the Cycle Time will change the BTU Input of the Stove. The longer the Cycle time the lower the BTU rating. Figure 32 Lincoln SCR Manual...
-
Page 63: Warranty
LINCOLN SCR WARRANTY The Stove manufactured by Even Temp, Inc. is warranted for five (5) years, to the original owner, against defects and workmanship on all steel parts (excluding the burn grate) and two (2) year on electrical components from the date of sale to the original owner. There specifically is no warranty on the paint, glass, burn grate and all gaskets. -
Page 64: Stove Settings & Notes
PELLETS – CORN – WHEAT - RYE - CHERRY PITS - DISTILLER’S GRAIN PROGRAM: Circle one (see Figure 26 on page 39) Serial Number: Date of Purchase: Dealer Information: Even Temp, Inc. P.O. Box 127 Waco, NE 68460 EMAIL: support@stcroixstoves.com WEB ADDRESS: www.stcroixstoves.com Lincoln SCR Manual...
Need help?
Do you have a question about the SCR and is the answer not in the manual?
Questions and answers