
Related Manuals for TIPTEL 545 SD


Summary of Contents for TIPTEL 545 SD
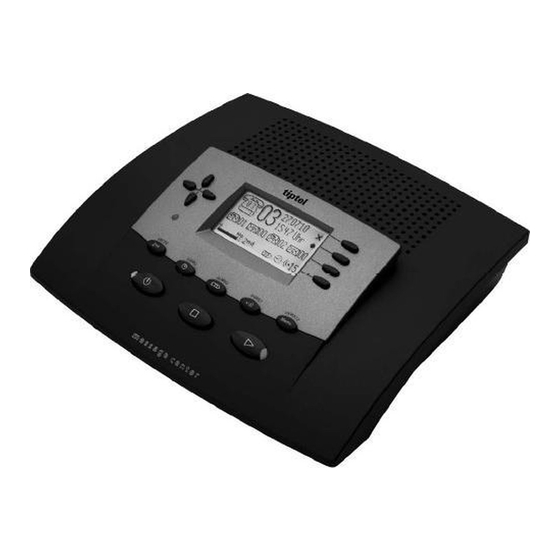
- Page 1 Manual (en) Call Manager with automatic attendant and Music-On-Hold for PABXs tiptel 545 SD tiptel...
-
Page 3: Safety Instructions
Safety instructions Safety instructions The device may not be installed or operated in the following environments: in the open in damp or wet rooms (bathroom, shower, swimming pool ...) at locations with direct sunlight in explosive areas with ambient temperatures below 0 °C or above 40 °C with strong concussions or vibrations in dusty environment During a thunderstorm you should neither use the phone nor connect or disconnect... -
Page 4: Button Allocation
Button allocation Button allocation Playback: Starts playback of incoming messages that have not yet been listened to. If pressed during playback lets you repeat the last 3 seconds. Stop: Ends the current function; is used to close open menus. Answering mode: Switches answering mode on or off. Menu: Opens the menu. - Page 5 Button allocation Selection button: Used to select from menus, entry fields and functions that are displayed next to the corresponding button. Secondary function and playback can be pressed in succession: Starts playback for all incoming messages. Playback starts with the oldest and ends with the newest recording.
-
Page 6: User Elements
User elements User elements SMS-LED Flashes when there are new, unread short messages. Flashes quickly if the mail inbox is full and there is no more memory for new short mes- sages. LED in the answering Is lit when answering mode is switched on (answering machine active). mode button LED in the playback Flashes when there are new, unread incoming messages. -
Page 7: Table Of Contents
Contents Contents Safety instructions ......................... Fehler ! Textmarke nicht definiert. Button allocation ..................... 4 User elements ....................6 Contents ......................7 Display symbols ....................11 Getting started ....................13 Parts supplied ..................... 13 Installation ....................13 Connecting ....................13 Notes on memory cards ................14 Outgoing messages .................. - Page 8 Contents Absence manager ................... 29 Call list ......................31 Telephone book ....................33 General ......................33 Entering and saving entries ................ 33 Summary of possible characters ..............36 Search entries ..................... 36 Checking and changing entries ..............37 Personal OGM (call filter) ................38 Vocal Clip ....................
- Page 9 Contents Call forwarding ....................69 Setting options for call forwarding .............. 69 Settings for call forwarding ................. 70 Sample call forwarding entries ..............72 Automatic monitoring ..................73 Setting options for automatic monitoring ........... 73 Settings for automatic monitoring .............. 74 Security lock ....................
- Page 10 Contents Appendix ......................105 Service ......................105 Guarantee ....................105 CE symbol ....................107 Troubleshooting ..................108 Firmware-Update ..................109 Delivery status ..................... 110 Technical data ..................... 112 Index ........................ 113 Brief instructions ..................... 117...
-
Page 11: Display Symbols
Display symbols Display symbols Answering mode switched on, Answering mode switched on. new incoming messages available. Caller's number, telephone Playback answering mode. Recording taking place, Call forwarding microphone on. ... - Page 12 Display symbols Entry (text) possible Notes on errors and operation Switch on/off basic settings, Send/receive short message software update, call forwarding Transfer telephone book to a Automatic answering, line busy second device ...
-
Page 13: Getting Started
Therefore use a non-slip underlay especially for new or freshly treated furniture. Connecting Before you can use your tiptel 545 SD you first need to connect all the necessary cables. Fit the small connector of the mains plug into the "POWER" jack and the plug into a 230 V socket outlet. -
Page 14: Notes On Memory Cards
If you wish to use memory cards with more than 2 GByte (e.g. 4 GByte) the card must be formatted once in your tiptel 545 SD. The device will partition the card in such a way that there is only one partition with the size of 2 GByte is available. This operation cannot be undone. - Page 15 Getting started computer. Recordings that have been edited or renamed by your computer can no longer be played back with your tiptel 545 SD. Only replace the memory card in the devices basic mode. Never replace or pull the card during play back or recording.
-
Page 16: Outgoing Messages
Outgoing messages General Your tiptel 545 SD has 14 individual outgoing messages (OGM 1-14) and one pre- configured outgoing message (OGM 15). You can select the OGMs via the selection button next to the OGM symbol. OGM 15 can not be personalised. A distinction is made between two types of outgoing message: OGMs with and without the option to record an incoming message. -
Page 17: Recording An Outgoing Message
OGM does not give the option of record- ing you will hear two beeps at the end. If you record OGM 14 without the option to record (OGM only) when the incoming message memory is full your tiptel 545 SD switches to this OGM automatically. -
Page 18: Recording Ogms From An External Signal Source
Outgoing messages Recording OGMs from an external signal source You can also record professional outgoing messages via the audio input from an external signal source (e.g. cassette recorder). Select the desired OGM using the The selected OGM is displayed next to selection button next to the OGM the symbol on the bottom right of the symbol. -
Page 19: Notes For Sound Studios
Professionally produced announcements can also be directly transferred to the de- vice by using the memory card. In order to do so copy your announcements with your computer to the directory "TIPTEL". In case mailboxes have been set up copy these announcements to the corresponding sub-directories (MBX1, MBX2, etc.). -
Page 20: Deleting Ogms
Outgoing messages Press OGM briefly. The OGM is played back. The playback symbol, the time that you have already heard and the number of the current OGM are displayed. The volume can be set using the control buttons (left/right). Deleting OGMs Press the selection button next to The current OGM is deleted. -
Page 21: Answering Mode
Answering mode Answering mode Make sure that there is enough memory for new messages (max. 999). You may need to change the memory card or delete messages. If required select the OGM using the The selected OGM is displayed next to selection button next to the OGM the symbol on the bottom right of the symbol. - Page 22 If you record OGM 14 without the option to record (OGM only) when the in- coming message memory is full your tiptel 545 SD switches to this OGM au- tomatically. Otherwise the device leaves the answering mode and does not...
-
Page 23: Playing Back And Deleting Incoming Messages
Playing back and deleting incoming messages Playing back and deleting incoming messages Playing back new incoming messages Press playback. Starts playback of unheard incoming messages. The current number, remain- ing playback time and date and time of The volume can be set using the the incoming message are displayed. -
Page 24: Play Back Of Individual Messages
Playing back and deleting incoming messages Play back of individual messages Press 2nd function key. The display will show you the 2nd func- tion icon. Press cursor key (up). The message list will be opened. Use cursor keys to browse (up/down) for message to be played back. -
Page 25: Fast Forward And Rewind
Playing back and deleting incoming messages Fast forward and rewind Press and hold the selection button Playback is interrupted and the display next to the go backwards or for- counts down or up the playback time. wards symbol. Deleting individual incoming messages Press the selection button next to The current incoming message is erased. - Page 26 Playing back and deleting incoming messages After dialling accept the call by lift- The display shows a stopwatch that ing the receiver. counts the duration of the current call.
-
Page 27: Monitoring/Personal Info (Memo)
Monitoring/Personal info (memo) Monitoring/Personal info (memo) Monitoring telephone calls You can record the content of important calls. Press the selection button next to The device starts to record. A lifted tele- the record symbol speed during a phone receiver is displayed so as to indi- call. -
Page 28: Personal Info
Monitoring/Personal info (memo) Personal info You can record personal information via the in-built microphone. Press the selection button next to Wait, you will hear a short tone, a micro- the record symbol. phone is displayed to signal ongoing re- cording. Start speaking (maintain approx. -
Page 29: Absence Manager
Absence manager Absence manager If you leave your office for a while, for example to attend a meeting, your tiptel 545 SD can inform your callers as to when you will be available again. Callers will hear this message: "Hello, the person you are trying to call will be available again from … I repeat [time] …... - Page 30 Absence manager Press stop. The setting is complete, the LED in the answering mode button lights up and the display shows the absence time. Calls are answered and the caller hears the absence message. Press Answer mode to end the ab- The display changes and returns to the sence manager ahead of time.
-
Page 31: Call List
Call list Call list The last 50 calls received are saved in call list with their date and time. If the caller's telephone number is transferred during a call then this is also displayed. If the tele- phone number matches one from the telephone book, the caller's name is dis- played. - Page 32 Call list To delete an entry press the selec- The entry is deleted. tion button next to the delete sym- bol. 2s To delete the whole call list press The entire call list is deleted. the selection button next to the de- lete symbol for 2 seconds.
-
Page 33: Telephone Book
Telephone book Telephone book General The telephone book manages the names and telephone numbers of your business partners. You can save up to 100 entries. An entry comprises the name (search term) and the telephone number. The name must begin with a letter and the tele- phone number should begin with an area code so that the corresponding name can be displayed later when the call number is received. - Page 34 Telephone book If required change occupancy of the The display shows the possible occu- entry buttons by pressing the con- pancies: (ABC) = Capital letters trol button (up) (refer to p. 36, (abc) = Small letters "Summary of possible characters" (12!?) = Numbers and special table).
- Page 35 Telephone book Enter the first digit of the call num- Digits and special symbols are displayed. ber using the control buttons The special symbols have the following (up/down). meanings: ~ = Wait for dial tone / 3 Sec. pause = Internal (for PABX) F = Flash (for PABX) H = Hook flash (for PABX) Press control button (right) to...
-
Page 36: Summary Of Possible Characters
Telephone book Summary of possible characters Button Occupancy (ABC) Occupancy (abc) Occupancy (12!?) A B C D E Ä É a b c d e ä é è , . ? ! : ‘ ; " F G H I J f g h i j ì... -
Page 37: Checking And Changing Entries
Telephone book You can enter (up to 5) other letters The corresponding entries are displayed for the search using the control but- for selection. ton (right) and the corresponding entry keys. Checking and changing entries Search for names as described un- ... -
Page 38: Personal Ogm (Call Filter)
Telephone book Personal OGM (call filter) You can assign each entry in the telephone book to one of the fourteen individual, recordable OGMs. If the telephone number calling matches the entry the caller hears an OGM that is specially recorded for him. You can also switch the answering machine off for certain callers. -
Page 39: Vocal Clip
You can assign each entry in the telephone book to one of the fourteen individual ringing tones. If the telephone number calling matches the entry you hear an indi- vidual ringing tone from the tiptel 545 SD loudspeaker. Open entry field. -
Page 40: Dialling From The Telephone Book
Telephone book Dialling from the telephone book Each telephone number from the telephone book can be dialled directly from your tiptel 545 SD. Search for names as described un- der "Search entries", 36. Press the selection button next to The device starts dialling the selected the desired name. -
Page 41: Automatic Redialling /Automatic Call Back When Engaged (Ccbs)
Automatic redialling /Automatic call back when engaged (CCBS) If the person you are trying to call is constantly engaged your tiptel 545 SD can take over by repeatedly trying to call the other person. For automatic re-dialling if the caller is engaged there is a pause and the device repeats the dialling up to 10 times. -
Page 42: Message Function
The message function enables a caller that knows the message code to leave a message even if your tiptel 545 SD plays an OGM with no option to leave an incom- ing message. The message function enables the caller to skip the OGM for OGMs that give the option of leaving an ICM. -
Page 43: Remote Access
Remote access Remote access You can access your tiptel 545 SD remotely from anywhere in the world using the keypad on a tone-enabled (DTMF) telephone. You need a personal remote access code to access the phone remotely. You can set your personal remote access code as described in "Settings"... -
Page 44: Remote Access Functions
The microphone switches on and you can Press 1. listen to what is happening in the sur- roundings of your tiptel 545 SD. Press 1 again. The device switches to intercom. People located there can hear your voice from the... - Page 45 The message is played back again for checking after you change or modify it. Your tiptel 545 SD will then ask whether you are still on the line with the "Please quit" voice message. You must respond to this quit request within 8...
- Page 46 Remote access Message transfer function Changing the 1st call number for The first current call number is announced. message transfer (only the first num- Next comes the request to enter a new call ber can be changed) number. Press * and 9 in succession.
-
Page 47: Remote Activation Of The Answer Mode
The OGM is played for checking. The the telephone keypad. Start entry device can be operated remotely (e.g. to with * and confirm with #. record a new OGM). After leaving the function your tiptel 545 SD is in answer- ing mode and will answer calls. -
Page 48: Short Messages (Sms)
(CLIR) is not suppressed in your PABX Registering and de-registering with your message centre You have to register your tiptel 545 SD for your network operator's SMS service to receive fixed network SMS. In Germany, for example, you can reach the Deutsche Telekom message centre nationally by calling "0193010". -
Page 49: Entry Options For Short Messages
You will then receive a confirmation message from the Deutsche Telekom SMS ser- vice. You can now be sure that you can send and receive SMS using your tiptel 545 You can deactivate receiving SMS messages by sending "ABMELD" to target call number 8888. -
Page 50: Inbox
Short messages (SMS) Inbox If you have new, unread messages (SMS) the SMS LED flashes. If the SMS- LED blinks rapidly there is no space in the inbox for new messages. Delete the older messages to create more space. Press menu. - Page 51 The device must be in standby for you to receive a message (SMS). Your tiptel 545 SD will not respond if you are currently scrolling through the menu or changing settings. This ensures that you can not be disturbed (for example...
-
Page 52: Outbox
Short messages (SMS) Outbox Press menu. The main menu is displayed. Press the selection button next to The messages menu is displayed. "Messages (SMS"). Press the selection button next to The display changes and displays the "Outbox". outbox. You can scroll through the existing messages using the control buttons (up/down). - Page 53 Short messages (SMS) If required change the occupancy of The display shows the possible occu- the entry buttons by pressing the pancies: control button (up) (refer to "Sum- (ABC) = Capital letters mary of possible symbols" table in (abc) = Small letters the "Telephone book"...
-
Page 54: Sending A Message (Sms)
Short messages (SMS) Sending a message (SMS) For a message (SMS) to be sent it is essential that something is in the outbox and that a message centre has been entered. Open the message menu as de- The messages menu is displayed. scribed in "Inbox"... - Page 55 Short messages (SMS) Search for names as described un- der "Search entries" ("Telephone book" chapter Page 36). You can insert a character by An empty space is inserted to the left of pressing secondary function and the cursor. the control button (down). To delete an entry move the cursor The character under the cursor is delet- to the location and press the selec-...
-
Page 56: Templates
Short messages (SMS) Templates Here you can save up to 5 templates that you can edit, delete or copy to the outbox individually. Open the message menu as de- The messages menu is displayed. scribed in "Inbox" and "Outbox". Press the selection button next to The display switches to the templates. -
Page 57: Message Centre
Short messages (SMS) Message centre Enter the telephone number for your message centre here (e.g. Deutsche Telekom 0193010). If you are using the device in a different country or network, your network operator will tell you the call number of your message centre. In some countries you have to enter two telephone numbers –... -
Page 58: Timer
Timer Timer The timer function contains up to 10 switching times during which answering mode, outgoing messages, message transfer and call forwarding can be switched on/off or changed. Setting options for timer Switching time ...... You set the times here for when the function should be switched on, off or changed. -
Page 59: Programming Timer
Timer Programming timer Press menu. The main menu is displayed. Press the selection button next to The entry field for the first switching time timer. is displayed. You can search the individual The display switches between the 10 switching times using the control possible switching times. -
Page 60: Sample Programming For Timer
Sample programming for timer You want your tiptel 545 SD to switch on OGM 1 on Mondays to Fridays at 17.00 and switch off at 08.00. When the office closes on Friday and over the weekend the answering machine should use OGM 2 throughout. This requires 3 switching times. -
Page 61: Switching On Timer
Timer Switching on timer Press timer. The display shows a clock as the symbol for activated timer. The timer sets the current functional status. Press timer again to switch off tim- The clock symbol disappears. -
Page 62: Message Transfer
(5 – 60 minutes) the device dials the complete call number sequence again as a reminder. If there is no remote control your tiptel 545 SD makes no, one or two rep- etitions depending on the setting you have chosen. -
Page 63: Settings For Message Transfer
Message transfer Settings for message transfer Press menu. The main menu is displayed. Press the selection button next to The message transfer menu is shown in message transfer. the display. Search for the desired setting op- All setting options are displayed. tion using the control buttons (up/down). - Page 64 Message transfer When entering the call numbers The entry location flashes. press the selection button next to Digits and special symbols are displayed. "Call number" and make the desired The special symbols have the following settings using the control buttons meanings: (up/down).
-
Page 65: Message Transfer By Sms
Example: You would like to receive an SMS to your mobile phone when you have new mes- sages on your tiptel 545 SD. When you enter your mobile phone call number in the "Forwarding/call number" menu, enter an "S" before it. -
Page 66: Sample Call Number Entries
Message transfer Sample call number entries For PABX the prefix for the public telephone network is dialled before each call number (refer also to Page 101 "Settings, PABX/prefix"). To suppress this enter "i" before internal call numbers. If you would like message transfer by short message (SMS) you must enter an "S" before the call number. -
Page 67: Individual Ringing Tone
15 because it is pre-configured. Choose the ringing tone for your tele- phone and your tiptel 545 SD will play it back. Please note that your individual ring- ing tone is only played back on the second call signal. During playback it is not possible to receive a new call number (CLIP). - Page 68 Individual ringing tone Press the selection button next to The numbers 1 to 15 and "-" appear in "Ringing tone" and select it using the display. The individual ringing tone is the control buttons (up/down). switched off using the "-". Set the desired volume using the The volume bar indicates the set volume control buttons (left/right).
-
Page 69: Call Forwarding
Call forwarding Call forwarding If your telephone network or PABX supports the "call forwarding" function you can enter the required settings here. Then you only have to enter the times for which you want to activate call forwarding in the "timer". For example at 6 pm you can switch calls automatically to your private line and then switch them back again to your business line at 8 am the following day (day/night switching). -
Page 70: Settings For Call Forwarding
Call forwarding Settings for call forwarding Press menu. The main menu is displayed. Search for the "Call forwarding" entry using the control buttons (up/down). Press the selection button next to The call forwarding menu is shown in the "Call forwarding". display. -
Page 71: Automatic Monitoring
Automatic monitoring When entering the target call num- Digits and special symbols are displayed. ber set the first digit using the con- The special symbols have the following trol buttons (up/down). meanings: ~ = Wait for dial tone / 3 Sec. pause = Internal (for PABX) F = Flash (short, for PABX) H = Hook flash (long, for PABX) -
Page 72: Sample Call Forwarding Entries
Target call number ....i 51# Example 3: You have a tiptel 1/8 Fax CLIP PABX, are connected with it to "Deutsche Telekom" and you have activated the "call forwarding" service. You want to forward all external calls to your private connection. -
Page 73: Automatic Monitoring
Automatic monitoring Automatic monitoring If you have activated "automatic monitoring" the recording starts as soon as the handset is lifted. The recording stops automatically when you replace the receiver. You can decide whether to record all calls or only incoming calls (recording threat- ening calls). -
Page 74: Settings For Automatic Monitoring
Automatic monitoring Settings for automatic monitoring Press menu. The main menu is displayed. Search for the "Automatic monitor- ing" entry using the control buttons (up/down). Press the selection button next to The entry field for automatic monitoring "Automatic monitoring". is displayed. Press the selection button next to The display shows the current setting. -
Page 75: Security Lock
Security lock Security lock In order to protect your tiptel 545 SD from unauthorised use you can lock the device with a PIN (personal identification number). The PIN is number containing 1 to 4 digits. You must enter this PIN to unlock the device. In the factory pre-set, the PIN code is "0000". -
Page 76: Unlocking Device
"Lock unit". small key shows that the device is locked. Press the selection button next to The tiptel 545 SD requests you to enter a "Change PIN". new PIN. Use the control buttons to enter a The display shows the current entry. -
Page 77: Welcoming And Connecting Callers
Welcoming and connecting callers Welcoming and connecting callers Your tiptel 545 SD can welcome your callers in PABXs and then transfer them to a different extension (e.g. a central number). If the extension to which the caller is transferred is engaged the caller hears the configured engaged message. -
Page 78: Settings For Welcoming And Connecting Callers
Welcoming and connecting callers Engaged message ....1 to 14 or -. Here you select the message to be played to the caller if the destination number is engaged. If you select "-" no check is made as to whether the number is engaged. Automatic switchboard .. - Page 79 Welcoming and connecting callers Use the control buttons (up/down) All setting options are displayed. to move to the desired setting op- tion. Press the selection button next to The display shows the current setting. the desired line and if desired change the entry using the control buttons (up/down).
- Page 80 Welcoming and connecting callers You can search for and select The name appears below the number. names as described in "Search en- tries". To insert a character press the sec- A space is inserted to the left of the cur- ondary function button and the con- sor.
-
Page 81: Answering Mode With A Welcome Message And Call Transfer
Examples of use Some practical examples of the wide range of applications for the tiptel 545 SD are provided below. In each case a practical situation and a possible solution are de- scribed. - Page 82 The caller in this case wants to talk to the Service department and presses the 3 key on his telephone. The tiptel 545 SD message centre then connects the call to the appropriate extension. The call is answered and the caller is now connected to the department with which he wanted to speak.
- Page 83 If the switchboard is "engaged" the call should be transferred back to the tiptel 545 SD message centre. The caller then once again hears the welcome message (which requires that the PABX is capable of automatically transfer- ring the call back when a destination number is engaged).
- Page 84 Welcoming and connecting callers Timer-controlled voicemail system Your tiptel 545 SD has a timer system which can automate certain processes (see also "Timer" on page 58). If the sales office in the first example above wants, for example, to offer a mailbox with a message recording capability for each of the three departments outside normal business hours, (i.e.
- Page 85 Welcoming and connecting callers Necessary settings: Record a welcome (reception) message as a "message without the option of leaving an incoming message" (see also "Recording messages" on page 16). In our example we select message 9 as the welcome message for the voicemail system.
- Page 86 The solution: An external call is received. The telephone system forwards the call to the tiptel 545 SD message centre. The device accepts the call and plays, for example, the following welcome message: "Hello. You are connected with the Accounts department of the Er- lensee company.
-
Page 87: Holding Loop
A call shall be accepted even though the called party is engaged and the caller shall be held on the line until the called party is free. Your tiptel 545 SD continues to try to connect the call until the desired party is reached. - Page 88 545 SD (please note that your telephone system must sup- port the "Call forwarding when engaged" feature and ensure that calls are forwarded in such cases to the extension to which your tiptel 545 SD is connected). The caller then hears, for example, the following welcome message: "Hello.
-
Page 89: Menu-Guided Information System
The solution: An external call is received. The telephone system forwards the call to the tiptel 545 SD message centre. Your tiptel 545 SD accepts the calls and plays, for example, the following message: "Hello. You are connected with the Sunnytime travel agency infor- mation system. - Page 90 Welcoming and connecting callers Necessary settings Record the welcome message as a "message with the option of leaving an incoming message" (see also "Recording messages" on page 16). In our ex- ample we select message 1 as the welcome message. Activate the mailboxes (1-3) required for our example.
-
Page 91: Music-On-Hold For Pabxs
Music on hold for PABXs Music-on-hold for PABXs You can use your tiptel 545 SD to play the on-hold music into your PABX. To do this, connect the "OUT" output to the audio input of your PABX using the supplied cable. -
Page 92: Music-On-Hold Settings
Music on hold for PABXs Music-on-hold settings Press Menu. The main menu is displayed. Use the control buttons (up/down) to move to the "Music on hold" en- try. Press the selection button next to The music-on-hold menu is displayed. "Music on hold". Use the control buttons (up/down) All settings options are displayed. -
Page 93: Answering Mode With Music-On-Hold
Music on hold for PABXs Use the control buttons (up/down) The displayed number increases or de- to change the setting. creases. To end the input of numbers, press The input position stops blinking. the selection button next to the rele- vant line again. -
Page 94: Mailboxes
8 mailboxes. Each mailbox has its own OGM, remote control code and its own tar- get call number for message transfer. If your tiptel 545 SD is used by several people the caller can leave a message in the relevant mailbox. You should mention this function in the OGM. -
Page 95: Setting Up Mailboxes
Mailboxes Extension ....... If you want to use the "Automatic call forwarding to mailbox" function you can enter the relevant exten- sion number here. Target call number ....If you want to use the mailboxes and the "message transfer" function you must enter the target call number here. - Page 96 Mailboxes Select the desired mailbox using the The settings menu for the selected mail- selection button. box is displayed. Search for the desired setting op- All setting options are displayed. tion using the control buttons (up/down). Press the selection button next to The display shows the current setting.
-
Page 97: Using The Mailboxes
Mailboxes Using the mailboxes The corresponding symbols are displayed when you have set up mailboxes. In an- swering mode the number of ICMs in the mailbox is indicated to the right of the symbol. The mailboxes include playback and delete ICMs, monitoring/personal info (memo) and OGM functions. -
Page 98: Remote Access To Mailboxes
Connect your tiptel 545 SD to a free extension (analogue port) on your PABX. Set the mailboxes up and enter the call numbers of the corresponding extensions. Rec- ord individual OGMs for the individual mailboxes and switch the device to answer- ing mode. -
Page 99: Settings
PABX (the year is not transferred and must be set manually). DST ......Yes or no. Select "Yes" if you want your tiptel 545 SD to change automatically to summer time on the last Sunday in March and to winter time on the last Sunday in October. - Page 100 Settings My number ......>> Number ...... If you enter your own call number your tiptel 545 SD announces this call number for internal OGM texts. Remote control ...... >> Access code ....The access code is a 1 to 4 digit number between 0 and 9999.
- Page 101 Settings PABX ........>> Prefix ......Enter your prefix for the public telephone network (e.g. 0) here. This prefix is dialled automatically be- fore each call number unless the call number is marked with an "i" as an internal call number within the PABX.
-
Page 102: Settings Menu
Settings Settings menu Press menu. The main menu is displayed. Search for the "Settings" entry using the control buttons (up/down). Press the selection button next to The settings menu is displayed. settings. Search for the desired setting op- All setting options are displayed. tion using the control buttons (up/down). -
Page 103: Adjusting The Volume
Settings When entering digits press the se- The entry location flashes. lection button next to the desired line. Change the settings using the con- The display counts up or down. trol buttons (up/down). For settings with several digits The selected entry location flashes. move the entry location to the re- quired location using the control buttons (left/right). -
Page 104: Service Menu
There is also the option of transferring the telephone book from one tiptel 545 SD to another via the audio sockets. To do this first set one device to "Receive a telephone book" and the other to "Send a telephone book". -
Page 105: Appendix
If your dealer cannot help you further, you can also contact Tiptel.com Business So- lutions direct. Initial information can be obtained from out internet pages listed be- low in the support section under FAQ –... - Page 106 Claims for damage caused by transport shall be asserted to the shipping company. Notes on processing: Repairs will only be carried out by TIPTEL Service. With our 48 hour repair service you will usually receive a repaired device or a replacement after 2 working days plus the usual delivery period.
-
Page 107: Ce Symbol
Tiptel.com GmbH Business Solutions herewith declares that the equipment com- plies with all the fundamental requirements of European Directive 1999/5/EC. -
Page 108: Troubleshooting
Appendix Troubleshooting Power failure The device is not operational during a power failure. The internal clock stops. But all settings are retained so that the previous status is reset when power returns. You may need to reset the time. Using the following table try to define the cause of a problem and solve the error. Problem Possible cause Remedy/Recommendation... -
Page 109: Firmware-Update
Then save the extracted update file to the memory card in the "TIPTEL" directory. Now re-insert the card into your answering machine. When your tiptel 545 SD detects a new firmware update process will start automatically. -
Page 110: Delivery Status
Appendix Delivery status The following list states the default settings for your tiptel 545 SD. You can change these default settings individually. You can return to the delivery status at any time by opening the service menu. Language German Network time... - Page 111 Appendix Waiting period 60 seconds Repeat period 20 minutes Repetitions OGM playback Individual ringing tone Activation code for call forwarding Deactivation code for call forwarding Automatic monitoring All calls Confirm save 0000 Mailboxes Reception and switching Music on hold Mailboxes...
-
Page 112: Technical Data
Appendix Technical data Dimensions (W x H x D) tiptel 545 SD 220 x 50 x 190 mm Mains plug 53 x 68 x 44 mm Weight tiptel 545 SD 540 g Mains plug 270 g Operating voltage Mains plug... -
Page 113: Index
Index Index Deleting individual ICMs ....25 Deleting OGMs ......... 20 Absence manager ......29 Delivery status ........ 110 Access code ........94 Destination call number ..... 69, 95 Adjusting the volume ...... 103 Destination number ......77 Answering mode ....... 21 Dial tone/dial pause ..... - Page 114 Index Memory cards ........14 Reception message ......77 Menu-guided information system ..89 Recipient's call number ....54 Message centre ......49, 57 Recording OGMs ......17 Message code ......42, 100 Recording quality ......99 Message transfer ......62 Recording threatening calls .....
- Page 115 Index Telephone book ........ 33 User elements ........6 Telephone connection cable .... 13 Using the mailboxes ......97 Templates ........49, 56 Text entry .......... 33 Vocal Clip ......... 39 Timer function ........58 Timer-controlled voicemail system ... 84 Transfer cables .........
-
Page 117: Brief Instructions
Brief instructions Record OGM Select OGM with Press and hold Start speaking Release OGM Select OGM type selection button down OGM using selection button Checking OGMs Select OGM using Press OGM briefly Set desired volume Press selection button selection button to delete Play incoming messages... - Page 124 Tiptel.com GmbH Business Solutions Halskestraße 1 D - 40880 Ratingen Tel.: 0900 100 – 84 78 35* Vanity Tel.: 0900 100 – TIPTEL* Internet: www.tiptel.de International: Internet: www.tiptel.com *(gebührenpflichtig) Tiptel GmbH Tenschertstraße 5 A - 1230 Wien Tel.: 01 - 616 78 71...
Need help?
Do you have a question about the 545 SD and is the answer not in the manual?
Questions and answers