
Related Manuals for BK Medical Type 2052


Summary of Contents for BK Medical Type 2052
- Page 1 User Guide Type 2052 Anorectal 3D Transducer English BB1804-C For Professional Users Only January 2014...
- Page 2 If you receive an email message from us asking for your feedback, we hope you will be willing to answer some questions about your experience buying and using our products. Your opinions are important to us. You are of course always welcome to contact us via your BK Medical representative or by contacting us directly.
-
Page 3: Table Of Contents
Contents General Information ..........5 About the Transducer . -
Page 5: General Information
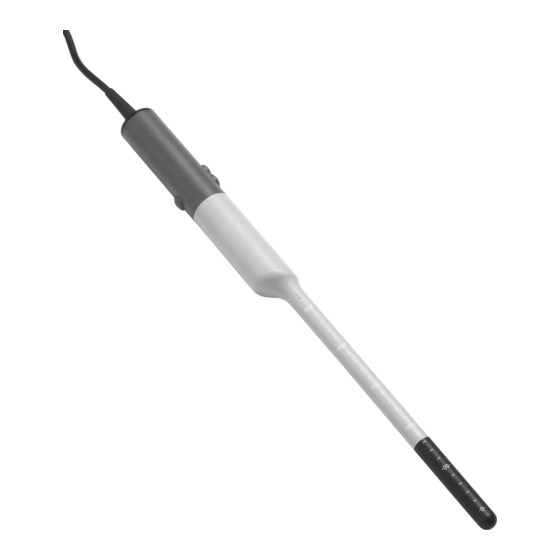
General Information Figure 1. Anorectal 3D transducers type 2052. This is the user guide for Anorectal 3D Transducer Type 2052. It contains a description of the transducer, a list of the intended applications, and information about operating this particular transducer. You must use this guide together with other documents that contain important information, including vital safety information. -
Page 6: Crystals
Colorectal Imaging • endoanal imaging • endorectal imaging Pelvic Floor Imaging • endoanal imaging • endovaginal imaging of the pelvic floor Crystals The transducer is a mechanical (single-element) multifrequency transducer with a built-in 3D mover. Inside the transducer head is a double crystal assembly where 2 crystals sit back to back. -
Page 7: Control Buttons
Do not remove the system cover. • Contact your BK Medical representative or hospital technician. • Contact your BK Medical representative if you believe the correct functioning of any BK Medical equipment is impaired in any way. 2052 User Guide (BB1804-C) -
Page 8: Service And Repair
WARNING Service and repair of BK Medical electromedical equipment must be carried out only by the manufacturer or its authorized representatives. BK Medical reserves the right to disclaim all responsibility, including but not limited to responsibility for the operating safety, reliability and performance of equipment serviced or repaired by other parties. -
Page 9: Connecting The Transducer
WARNING Use only water-based gel (sterile if you are using a sterile transducer cover). Products containing parabens, petroleum or mineral oils may harm the transducer or Water- transducer cover. soluble gels only WARNING Because of reports of severe allergic reactions to medical devices containing latex (natural rubber), FDA is advising health-care professionals to identify their latex-sensitive Latex patients and be prepared to treat allergic reactions promptly. -
Page 10: Selecting The Crystal And Imaging Frequency
The 2052 Crystal Position Imaging With Pro Focus UltraView 2202 This section only applies to Anorectal Transducer Type 2052 when used with the Pro Focus UltraView 2202 system. The 2052 Crystal Position Displayed on the Pro Focus UltraView 2202... - Page 11 A short press moves the crystal. As you hold the button down, the crystal moves faster. • On-screen Click Crystal Pos under General on the left side of the screen and drag the control slider (or point at Crystal Pos and press The value you set is displayed in italic font to indicate that it is the desired (destination) position rather than the actual position (see Fig.
-
Page 12: Imaging
Imaging Image Orientation The 12 o’clock position on the displayed image is identified by the two control buttons on the transducer handle pointing to the anterior 12 o’clock position. WARNING To avoid misinterpreting structures in the ultrasound image, verify the orientation of both crystals in the transducer before you start imaging. -
Page 13: Endorectal Imaging
You must use a water standoff system to image the rectum from the anorectal junction and beyond. BK Medical offers reusable water standoff systems and single-use water standoff systems. When using a water standoff system, you should always follow policies established by your office, hospital or institution when you are performing endorectal imaging. -
Page 14: Preparing The Patient
Stopcock Water tube Inner cover Outer cover Tape Figure 6. UA0048 water standoff system components. NOTE: See the Product Data sheet for ordering information. Preparing the Patient Always perform a digital palpation before you insert a rectosigmoidoscope or endo transducer into the rectum. Give the patient an enema –... - Page 15 Make sure that the marker on the water standoff collar is aligned with the marker on the transducer. align the two markers two markers aligned water standoff collar Pull a water standoff condom over the transducer, attaching it to the groove on the water standoff collar.
- Page 16 The transducer is designed to pass through Rectosigmoidoscope UA0672, Rectosigmoidoscope UA0673 or single-use Rectosigmoidoscope UA0683. Caution: If you use a rectosigmoidoscope that you do not purchase from BK Medical, it must be fully cylindrical and have an inner diameter of at least 21 mm.
-
Page 17: Preparing The Ua0048 Single-Use Water Standoff System
Preparing the UA0048 Single-Use Water Standoff System Before you start, see Fig. 6 to familiarize yourself with the parts of the single-use water standoff system. To prepare the single-use water standoff system: Place the transducer in an upright and stable position, for example, in the system’s transducer holder. - Page 18 Create a tape handle: Partly remove the protective strip from the tape so only the first cm of the tape is exposed. Then bend the first (sticky) cm in half and tape the sides together to create a 0.5 cm “handle”. (See Fig. 10.) Expose 1 cm of the tape.
- Page 19 Figure 12. Inner cover correctly taped. Pull the outer cover (B in Fig. 6) over the transducer and inner cover. Make sure that it completely covers the tape, as shown in Fig. 13. Top of outer cover Figure 13. Pulling the outer cover on to cover the tape completely. Using a standard syringe, fill the water standoff system slowly with degassed water (max 200 ml).
-
Page 20: Performing A Rectoscopy Using A Reusable Water Standoff System
Lubricate the entire outer surface of the standoff that will enter the patient. Aspirate enough water from the standoff to allow for easy insertion. The transducer is now prepared for an endorectal examination. Performing a Rectoscopy Using a Reusable Water Standoff System WARNING To avoid tissue damage, always perform a thorough rectoscopy before doing an endorectal imaging. - Page 21 WARNING Do not use excessive force during insertion. Do not make excessive lateral movements during or after insertion. Risk of injury or tissue damage to the patient could occur under certain circumstances. Slowly remove the obturator. Use the light source and visually inspect the rectum. If necessary, empty the rectum. Using visual guidance, advance the rectosigmoidoscope to the level of interest –...
- Page 22 Inserting the transducer and reusable water standoff system Reusable Make sure that the entire outer surface of the water standoff condom is thoroughly water lubricated with a glycerine-based lubricant. standoff Insert the transducer just until the tip of the transducer is at the far end of the system rectosigmoidoscope.
- Page 23 Inserting the Transducer and Single-Use Water Standoff System Do not use The single-use water standoff system is not designed for use with a NOTE: together with rectosigmoidoscope. a rectosig- moidoscope WARNING To avoid tissue damage, always perform a thorough rectoscopy before doing an endorectal imaging.
- Page 24 Figure 15. Removing the outer cover. Remove the tape from the inner cover. Figure 16. Removing the tape. Remove the inner cover by pulling it inside out up over the transducer tip. Figure 17. Removing the inner cover. Clean Immediately after Use If biological materials are allowed to dry on the transducer or attachments, disinfection and sterilization processes may not be effective.
-
Page 25: 3D Imaging
3D Imaging To acquire a 3D dataset, you must have the 3D option installed on your system: this includes the necessary software and hardware as well as a 3D license. To acquire a 3D dataset: • See the system user guide for instructions. The maximum length of a dataset acquired using this transducer is 60mm. - Page 26 January 2014 2052 User Guide (BB1804-C)
Need help?
Do you have a question about the Type 2052 and is the answer not in the manual?
Questions and answers