Subscribe to Our Youtube Channel
Summary of Contents for BK Medical Type 8808
- Page 1 User Guide Type 8808 Biplane Transducer English BB0339-M For Professional Users Only June 2012...
- Page 2 If you receive an email message from us asking for your feedback, we hope you will be willing to answer some questions about your experience buying and using our products. Your opinions are important to us. You are of course always welcome to contact us via your BK Medical representative or by contacting us directly.
-
Page 3: Table Of Contents
Imaging with Type 8808 ........ -
Page 5: Introduction
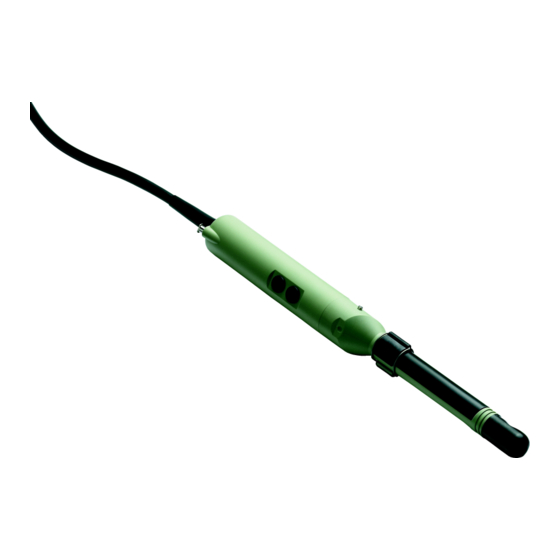
Introduction This is the user guide for Biplane Transducer Type 8808 and must be used together with Care, Cleaning & Safety which contains important safety information. Indications for Use Biplane Transducer Type 8808 is designed for transrectal prostate imaging. Puncture attachment UA1232 and biopsy guide UA1257 provide guidance for needles or other interventional devices during an ultrasound-guided procedure. -
Page 6: General Information
Turn off the system. Unplug the system from the wall and make sure it cannot be used • until it has been checked. Do not try to repair the system yourself. • Contact your BK Medical representative or hospital technician. • June 2012 8808 User Guide (BB0339-M) -
Page 7: Service And Repair
Service and Repair WARNING Service and repair of BK Medical electromedical equipment must be carried out only by the manufacturer or its authorized representatives. BK Medical reserves the right to disclaim all responsibility, including but not limited to responsibility for the operating safety, reliability and performance of equipment serviced or repaired by other parties. -
Page 8: Connecting The Transducer
Connecting the Transducer WARNING Keep all plugs and sockets absolutely dry at all times. The transducer is connected to the system using the array Transducer Socket on the system. To connect, the transducer plug’s locking lever should first be in a horizontal position. -
Page 9: Changing Orientation
To change the orientation of the image on the monitor, refer to the applicable system user guide for instructions. Imaging with Type 8808 The 8808 is designed for simultaneous biplane imaging of the prostate. Assembling the Transducer for Transrectal Use The 8808 can be equipped with a water standoff facility to improve contact and field of view during transrectal imaging of the prostate. - Page 10 99019 Figure 4. Assembly of the water standoff facility. To remove all air from the rubber sheath, hold the transducer horizontally with the control buttons facing left (water inlet upwards). Then, using the syringe, draw off as much air as possible. You may have to tilt the transducer downwards to remove all the air (Pictures 4 and 5).
-
Page 11: Puncture And Biopsy Facilities
WARNING We do not recommend use of the water standoff facility when the UA1257 biopsy channel bracket is in place and biopsies are to be performed. This is due to the strong likelihood of puncturing the rubber sheath with the biopsy needle. Instead, prior to performing the biopsy, the standoff should be drained of water. - Page 12 The transducer is prepared for transrectal puncture or biopsy by pulling a sterile transducer cover over the transducer, placing the appropriate needle guide in the UA1257 channel bracket (see Figure 5 and Figure 6) and clipping the channel bracket onto the transducer (See “Mounting a Transrectal Puncture Guide” on page 13.).
- Page 13 WARNING Sterile-packed components must be stored in a safe environment and kept out of direct sunlight. Large temperature changes during storage may cause condensation and violate the integrity of the packaging. Please refer to Care, Cleaning and Safety for an example of how to open a sterile- packed product.
-
Page 14: For Transperineal Puncture
For Transperineal Puncture The UA1232 metal puncture attachment (see Figure 8) is designed for transperineal puncture and biopsy. When UA1232 is being used, the dummy channel bracket UA1272 (shown in Figure 3) must be in place. UA1232 consists of a needle guide and a mounting ring with a lock screw. The needle guide comprises 9 parallel guide channels, spaced 5mm apart, each with an internal diameter of 2.1mm, suitable for a 14-gauge needle. -
Page 15: Performing Puncture And Biopsy
Caution: Always use the longitudinal plane image to check that the needle has advanced to the correct position. If you use the transverse plane, remember that the image plane’s distance from the needle guide increases by 2.6mm for every 10mm distance from the transducer (see Figure 11). -
Page 16: Cleaning After Puncture And Biopsy
WARNING If the needle guide is detached from the transducer during interventional procedures, cover the transducer with a new transducer cover. If the cover is damaged during interventional procedures, follow the policies of the hospital or clinic for treatment of the patient under such circumstances. To remove the puncture line from the image, refer to the applicable system user guide for instructions. -
Page 17: 3D Imaging
Caution: Do not stick anything into the water inlet to clean it. Poking something into this hole can damage the water channel inside the transducer. You can clean the water channel by flushing it with water soon after use, before any foreign matter such as imaging gel has a chance to harden. - Page 18 June 2012 8808 User Guide (BB0339-M)
- Page 20 LEGAL MANUFACTURER : BK Medic al ApS , Milepa rken 34, 2730 Herlev, Denma rk. Tel.: +45 44528100 Fax : +45 44528199 E mail: info@bkmed.dk...


Need help?
Do you have a question about the Type 8808 and is the answer not in the manual?
Questions and answers