
Related Manuals for Solectria Renewables PVI 50KW


Summary of Contents for Solectria Renewables PVI 50KW
- Page 1 Installation and Operation Manual (Rev A) PVI 50‐100KW Series Inverters PVI 50KW PVI 60KW PVI 75KW PVI 85KW PVI 100KW INSTALLATION AND OPERATION MANUAL © 2013, Solectria Renewables LLC DOCR‐070233...
- Page 2 Installation and Operation Manual (Rev A) PVI 50‐100KW Series Inverters IMPORTANT REGISTRATION AND WARRANTY INFORMATION For warranty to become active, this inverter must be registered. To activate warranty and register inverter, please visit the link below. www.solectria.com/registration DOCR‐070233 Page 2 of 92...
- Page 3 Installation and Operation Manual (Rev A) PVI 50‐100KW Series Inverters IMPORTANT SAFETY INSTRUCTIONS SAVE THESE INSTRUCTIONS In this manual “inverter” or “inverters” refers to the inverter models: PVI 50KW, PVI 60KW, PVI 75KW, PVI 75KW‐PE, PVI 85KW, PVI 85KW‐PE, PVI 100KW and PVI 100KW‐PE unless one of the specific models is noted. This manual contains important instructions that shall be followed during installation and maintenance of the inverter. To reduce the risk of electrical shock, and to ensure the safe installation and operation of the inverter, the following safety symbols are used to indicate dangerous conditions and important safety instructions: WARNING: Use extreme caution when performing this task. This indicates a fact or feature very important for the safety of the user and/or which can cause serious hardware damage if not applied appropriately. NOTE: This indicates a feature that is important either for optimal and efficient use or optimal system operation. EXAMPLE: This indicates an example. ...
- Page 4 Tous les travaux d’installation électrique doivent être exécutés en conformité aux normes électriques locales ainsi qu’à la norme nationale américaine et canadienne. Le PVI ne contient aucune pièce requérant un entretient effectué par l‘utilisateur. Pour toute maintenance, veuillez consulter Solectria Renewables ou un installateur agrée par Solectria Renewables (les coordonnées de Solectria Renewables et des installateurs agrées sont indiquées sur le site web de Solectria Renewables: www.solectria.com. Avant d’installer ou d’utiliser le PVI veuillez lire toutes instructions et toutes les mises en garde présentes dans ce manuel, sur le PVI et sur les modules PV. ...
-
Page 5: Table Of Contents
Installation and Operation Manual (Rev A) PVI 50‐100KW Series Inverters Table of Contents 1 Introduction .......................... 7 2 Site Preparation and Inverter Placement .................. 9 2.1 Clearance Requirements ..................... 10 2.2 Inverter Dimensions ...................... 11 3 Installation .......................... 11 3.1 Checking For Shipping Damage ................... 11 3.2 Inverter Lifting ........................ 11 3.3 Mounting Details ......................... 12 4 DC Connections from the PV Array and AC Connections to the Grid ........ 14 4.1 Grounding ........................... 14 4.2 AC Grounding Connections .................... 16 4.3 DC Grounding Connections ... - Page 6 Installation and Operation Manual (Rev A) PVI 50‐100KW Series Inverters 6.11 Establishing Ethernet Connectivity ................... 49 6.12 Setting up TCP/IP Networking .................. 50 6.13 Viewing Current TCP/IP settings: .................. 50 6.14 Manually Configuring Network Settings ................ 52 6.15 Automatically Configuring Network Settings .............. 55 6.16 Setting Fallback IP Address .................... 56 6.17 Enabling SolrenView Web‐based Monitoring .............. 59 6.18 Viewing and setting the Date/Time .................. 60 6.19 Rebooting the SolrenView Gateway ................. 63 6.20 Resetting the SolrenView Gateway to Factory Defaults ........... 64 6.21 Inverter Counts and Logs .................... 65 6.22 Displaying Error Counts ..................... 66 6.23 Displaying Error Logs ...................... 68 ...
-
Page 7: Introduction
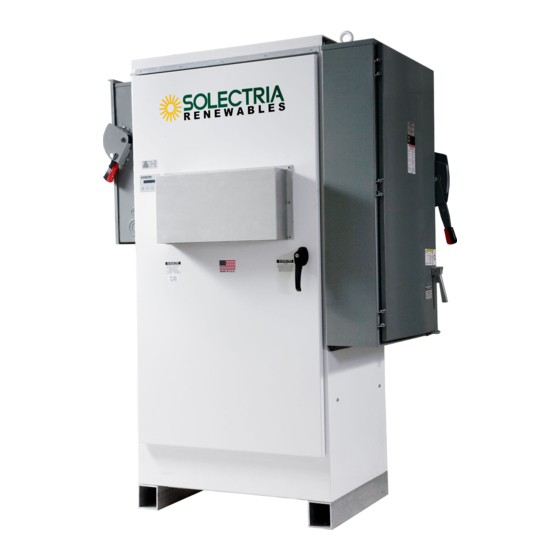
Installation and Operation Manual (Rev A) PVI 50‐100KW Series Inverters 1 Introduction The PVI 50‐100KW inverter series are commercial, three‐phase grid‐tied PV inverters designed to be interconnected to the electric utility grid. By following this manual the inverter can be installed and operated safely. This installation guide is used as a reference for commissioning and as a guideline on how to use the inverter most effectively. Feeding power onto the grid involves conversion of the DC voltage from the PV array to grid compatible AC voltage by inverting DC to AC. This unit feeds power into a standard, three‐phase ... - Page 8 Installation and Operation Manual (Rev A) PVI 50‐100KW Series Inverters AC Disconnect LCD Display, Keypad, & LED Indicators DC disconnect switch Nameplate Cooling Air Intake Figure 1.2 – PVI Inverter (Front View) Communications or SolrenView AIR Exhaust Air Output Figure 1.3 – PVI Inverter (Rear View) DOCR‐070233 Page 8 of 92...
-
Page 9: Site Preparation And Inverter Placement
Installation and Operation Manual (Rev A) PVI 50‐100KW Series Inverters 2 Site Preparation and Inverter Placement The inverter is comprised of a rainproof, industrial enclosure containing electrical and electronic components and AC and DC integrated disconnecting means. NOTE: If the inverter is mounted outside, ensure that the enclosure and disconnect switch doors remain closed during the installation process in case of rain or snow. Leaving these doors open during installation will void the warranty. NOTE: It is recommended to store the inverter indoors before installation. If the inverter is to be stored outdoors for more than one month before being installed and commissioned, care must be taken to avoid condensation inside the unit. Removing the ... -
Page 10: Clearance Requirements
Installation and Operation Manual (Rev A) PVI 50‐100KW Series Inverters Inverter Model Weight PVI 50‐60KW 1,450 lbs PVI 75‐85‐100KW 1,875 lbs PVI 75‐85‐100KW‐PE 2,070 lbs Table 2.1 – Weight of PVI 50‐100 Inverters Installations in most US jurisdictions are subject to NFPA 70, known commonly by electricians as the National Electric Code (NEC). The NEC requires that the inverter be connected to a dedicated circuit and no other outlets or devices may be connected to this circuit. The NEC also imposes limitations on the size of the inverter and the manner in which it is connected to the utility grid. See applicable revision of the NEC for more information. It is the installer’s responsibility to follow all applicable electric codes. 2.1 Clearance Requirements The ambient temperature must be between –40 F ... -
Page 11: Inverter Dimensions
Please inspect the inverter thoroughly after it is delivered. If any damage is seen, immediately notify the shipping company to make a claim. If there is any question about potential shipping damage, contact Solectria Renewables. Photos of the damage will be helpful in documenting potential shipping damage. ... -
Page 12: Mounting Details
Installation and Operation Manual (Rev A) PVI 50‐100KW Series Inverters Use a forklift or fork attachment or other equipment if lifting from the bottom. The forks should be set with a 27" outside spacing so they fit just in between the inverter's 4 x 4" aluminum tube feet. Before lifting, make sure forks are against the inside edges of both feet. ... - Page 13 Installation and Operation Manual (Rev A) PVI 50‐100KW Series Inverters Fig. 3.3 Mounting Hole Diagram (View from top of Inverter) DOCR‐070233 Page 13 of 92...
-
Page 14: Dc Connections From The Pv Array And Ac Connections To The Grid
Installation and Operation Manual (Rev A) PVI 50‐100KW Series Inverters 4 DC Connections from the PV Array and AC Connections to the Grid WARNING: All electrical installations shall be performed in accordance with applicable local, state, and national electric codes. WARNING: Only connect the DC and AC power and grounding wires with the AC and DC disconnect switches off and the circuits isolated from AC power from the grid and DC power from the array. WARNING: Make sure to connect the inverter and other exposed metal equipment in the system to the grounding electrode system through the installation of the Grounding ... - Page 15 Installation and Operation Manual (Rev A) PVI 50‐100KW Series Inverters on both the AC and DC points of entry. GEC(s) and EGC(s) should be sized and installed per the electrical code requirements of the Area Having Jurisdiction. DC Disconnect Switch o Ground Lug – For DC GEC connection. Depending on the grounding system configuration, the DC ground lug may serve as the connection point for combined: ...
-
Page 16: Ac Grounding Connections
Installation and Operation Manual (Rev A) PVI 50‐100KW Series Inverters 4.2 AC Grounding Connections AC grounding connection locations, connection quantity, conductor range, and terminal torque requirements are shown below. AC Ground Bar AC Ground Bar AC Ground Lug (400A AC Disco Only) Fig. 4.1a AC Ground Connection – 200A Fig. 4.1b AC Ground Connection – 400A (200A Unfused AC Disconnect Switch Shown) (400A Unfused AC Disconnect Switch Shown) AC Disconnect AC Ground Max Number of Switch Type* Connection Connections Conductor Range ... -
Page 17: Dc Grounding Connections
Installation and Operation Manual (Rev A) PVI 50‐100KW Series Inverters 4.3 DC Grounding Connections DC grounding connection locations, connection quantity, conductor range, and terminal torque requirements are shown below. DC Ground Lug DC Ground Bar Fig. 4.2 DC Ground Connection (600A DC Disconnect Switch w/ DC Breakers Shown) DC Disconnect DC Ground Max Number of Switch Type* Connection Connections Conductor Range Torque 4 14 ‐ 1/0 AWG Ground Bar 40 in‐lbs 400A 1 ... -
Page 18: Ac Power Connections
Installation and Operation Manual (Rev A) PVI 50‐100KW Series Inverters 4.4 AC Power Connections NOTE: Each AC lug is designed for single conductor use only. Where multiple lugs per phase are provided, each lug is designed for single conductor use only. NOTE: Note that each inverter power rating is offered with the option of either a fused or unfused AC disconnect switch. The installer should refer to the current requirements for the specific inverter power rating, AC voltage, and disconnect switch type (fused/unfused) to determine the appropriate wire sizes. NOTE: The phase rotation of the grid connections to the inverter must follow the L1/A, L2/B and L3/C clockwise order. NOTE: When a fused AC disconnect switch is not provided, overcurrent protection of AC power output cables shall be provided by others according to local, state, and national code requirements. ... -
Page 19: Ac Cable Entry
Installation and Operation Manual (Rev A) PVI 50‐100KW Series Inverters AC Cable Entry The AC cable entry location depends on the AC disconnect switch current rating and orientation (side facing or forward facing). Use the following tables to determine which disconnect switch your inverter uses, and then refer to the customer interface drawing (DOCR‐070190) for AC cable entry locations. AC Voltage Drop AC voltage drop should be minimized to avoid nuisance tripping resulting from increased AC voltage seen at the inverter’s output terminals as the inverter feeds current into the grid. Minimizing AC voltage drop also results in higher system efficiency. An AC voltage drop of less than 1% is recommended. ... - Page 20 Installation and Operation Manual (Rev A) PVI 50‐100KW Series Inverters The table below pertains to the standard AC disconnect switches without fuses. It includes requirements for the AC conductor size, the number of terminals available, proper terminal torque, and AC disconnect switch current ratings for all PVI 50‐100KW inverter models. The PE models use the same AC disconnect switches as the standard models. INVERTER MODEL DISCONNECT AC TERMINALS TERMINAL With Unfused AC WIRE GAUGE ...
- Page 21 Installation and Operation Manual (Rev A) PVI 50‐100KW Series Inverters The table below pertains to the optional AC disconnect switches with fuses. It includes requirements for the AC conductor size, the number of terminals available, proper terminal torque, and AC fuse and disconnect switch current ratings for all PVI 50‐100KW inverter models. The PE models use the same AC disconnect switches as the standard models. AMPERAGE INVERTER MODEL With AC OF TERMINALS TERMINAL DISCONNECT ...
-
Page 22: Neutral Kit Option
Installation and Operation Manual (Rev A) PVI 50‐100KW Series Inverters Neutral Kit Option A neutral is not required for proper inverter operation; hence, the inverter is most often connected as a 3‐wire system with no connection point for a neutral conductor. For the interconnection of the inverter as a 4‐wire system, a neutral kit option is available. As shown in Figure 4.5, the kit includes a factory installed neutral lug inside the AC disconnect switch to connect a neutral conductor. When configured with the neutral kit, a jumper from the neutral ... -
Page 23: Ac Ground Fault Detection
Installation and Operation Manual (Rev A) PVI 50‐100KW Series Inverters AC NO. OF TERMINAL DISCONNECT NEUTRAL WIRE GAUGE TORQUE SWITCH TYPE CONDUCTORS 200A 1 6AWG ‐ 250kcmil 275 in‐lbs 3 6AWG ‐ 250kcmil 275 in‐lbs 400A 1/0AWG ‐ 750kcmil 1 or 500 in‐lbs 2 1/0AWG ‐ 300kcmil *See Tables 4.3 & 4.4 to determine the AC disconnect switch type by inverter model. Table 4.5 – AC Neutral Conductor Sizes & Torques 4.5 AC Ground Fault Detection The PVI series of inverters are not equipped with AC ground fault protection. When AC ground fault protection is used on the onsite electrical service, determine if the ground fault device is listed to be backfed. The inverter AC output should be connected on the supply side of the device ... -
Page 24: Dc Power Connections
4.6 DC Power Connections NOTE: The PVI 50‐100KW inverter models are designed for negative‐grounded PV arrays only. Contact Solectria Renewables before you install a system with positive‐ grounded PV arrays. NOTE: The maximum current from the PV array must be below the rating of the DC ... - Page 25 Installation and Operation Manual (Rev A) PVI 50‐100KW Series Inverters Grounded Grounded Conductor Conductor Connection Connection Ungrounded Conductor Connection Ungrounded Conductor Connections No Subcombiner Subcombiner with (8) 40‐60A Fuses Grounded Grounded Conductor Conductor Connection Connection Ungrounded Ungrounded Conductor Conductor Connections Connections Subcombiner with (6) 70‐100A Fuses Subcombiner with (4) 110A‐200A Fuses Figure 4.6a DC Power Connection Locations (1 of 2) DOCR‐070233 Page 25 of 92...
- Page 26 Installation and Operation Manual (Rev A) PVI 50‐100KW Series Inverters Grounded Grounded Conductor Conductor Connection Connection Ungrounded Conductor Ungrounded Conductor Connections Connections Subcombiner with (2) 225A‐300A Fuses Subcombiner with (6) 40‐100A Breakers Grounded Grounded Conductor Conductor Connection Connection Ungrounded Conductor Connections Ungrounded Conductor Connections Subcombiner with (3) 110A‐200A Breakers Subcombiner with (2) 225A‐300A Breakers Figure 4.6b DC Power Connection Locations (2 of 2) DOCR‐070233 Page 26 of 92...
-
Page 27: Standard Dc Disconnect Switch
Installation and Operation Manual (Rev A) PVI 50‐100KW Series Inverters Standard DC Disconnect Switch The table below includes requirements for the DC conductor size, the number of terminals available, proper terminal torque, and DC disconnect switch current ratings for the standard DC disconnect switches provided (no subcombiner) on the PVI 50‐100KW. The PE models use the same DC disconnect switches as the standard models. NOTE: The torque is different for the grounded and ungrounded terminals on the DC disconnect switch. TERMINAL TERMINAL ... -
Page 28: Dc Breaker Subcombiner
Installation and Operation Manual (Rev A) PVI 50‐100KW Series Inverters DC Breaker Subcombiner The table below includes requirements for the DC conductor size, the number of terminals available and proper terminal torque for the fused DC subcombiner options on the PVI 50‐ 100KW. NOTE: The torque is different for the grounded and ungrounded terminals on the DC breaker subcombiner. NO. OF TERMINAL TERMINAL ... - Page 29 Installation and Operation Manual (Rev A) PVI 50‐100KW Series Inverters WARNING: If the GFDI fuse blows upon connection of one or more combined strings, a ground fault in the array must be located and eliminated before proceeding. The DC ground fault is eliminated when the GFDI fuse can be replaced and remains intact. Failure to obey these instructions may cause the grounded conductor to rise to potentially unsafe voltage levels. WARNING: Even when the DC disconnect switch is in the off position, the ungrounded DC conductor leading up to the DC disconnect switch will remain energized on the PV side as long as the PV modules are in daylight. The inverter side of the DC disconnect switch will also remain energized after the disconnect switch has been shut off until 60 seconds after the LEDs turn off, as the DC bus capacitors in the inverter discharge. ...
-
Page 30: Lightning And Surge Protection
Installation and Operation Manual (Rev A) PVI 50‐100KW Series Inverters 4.8 Lightning and Surge Protection The inverter is designed with certain protections against voltage surges in accordance with IEEE 1547. The DC inputs are equipped with IEC 61643‐1/‐11 Class II, EN 61643‐11 Type 2 surge protection devices (SPD). The SPD helps protect the inverter from surges by creating a temporary low impedance path to ground. On the DC input, separate surge paths exist from positive (+) to ground and negative (‐) to ground. Each path is made by a separate insert within the SPD. A red indicator flag will mark that an insert requires replacement. The SPD’s can are installed inside the DC disconnect switch. Added protection and proper grounding provisions will help protect against ... - Page 31 Installation and Operation Manual (Rev A) PVI 50‐100KW Series Inverters The terminal blocks are labeled 9‐13 and are wired per the picture and table below: Location Connection Remote Shutdown Terminal Block 9 Input Remote Shutdown Terminal Block 10 Return Revenue Grade Terminal Block 11 Meter (RS485A) Revenue Grade Terminal Block 12 Meter (RS485B) Revenue Grade Terminal Block 13 Meter (RS485‐Gnd) Table 4.11 – Customer Terminal Block Definition Remote Shutdown Wiring The PVI 50‐100KW inverters feature a remote shutdown input to allow for advanced remote command and control systems. The input required is an isolated 24VDC signal that is wired to the ...
-
Page 32: Commissioning The Inverter
Installation and Operation Manual (Rev A) PVI 50‐100KW Series Inverters 5 Commissioning the Inverter Before commissioning, ensure that the inverter is properly secured to the mounting structure and that all power and grounding connections are made to ensure that the inverter is ready to power up. NOTE: Make sure all tools, parts, etc. are removed from the inverter cabinet, DC and AC disconnect switches, and around the vicinity of the inverter before turning on. WARNING: Make a final check of all AC and DC power and grounding wiring at the inverter and within the system before turning the inverter on. NOTE: With the PV modules connected and inverter disconnect switches still off, perform ... -
Page 33: Operation
Installation and Operation Manual (Rev A) PVI 50‐100KW Series Inverters 5.2 Operation The control electronics and DSP will be active as soon as DC (PV) voltage reaches 245 VDC. The inverter will go on‐line with the utility/building 3‐phase grid when the DC voltage first exceeds 400 VDC (strike voltage). Next, the inverter will load the array, bringing the DC voltage down from 400 VDC. Once there is enough PV power to back‐feed the grid, the inverter will produce power according to what is being delivered by the PV array. ... -
Page 34: Inverter Control And Communications" In The Pvi 50-100
Installation and Operation Manual (Rev A) PVI 50‐100KW Series Inverters 6 Inverter Control and Communications” in the PVI 50‐100 Every Solectria Renewables commercial inverter includes a SolrenView gateway integrated into the inverter door. This device performs multiple functions including control, monitoring and data logging. From the inverter a user can configure, monitor and control the inverter using a human‐machine interface (HMI). This HMI consists of the LCD display, four buttons, and LED indicators for power, ground fault, and error. Figure 6.1 – SolrenView Gateway HMI (Front) DOCR‐070233 Page 34 of 92... - Page 35 Installation and Operation Manual (Rev A) PVI 50‐100KW Series Inverters The back side of SolrenView gateway, which can only be physically accessed when the inverter door is open, provides connectivity to data monitoring systems. Solectria Renewables’ own SolrenView.com data monitoring system can be interfaced using Ethernet over twisted pair. Third‐party monitoring systems can be connected to the inverter using Modbus RTU protocol (RS‐ 485.) WARNING: SolrenView gateway connections must be made by qualified personnel ...
-
Page 36: Led Indicators
Installation and Operation Manual (Rev A) PVI 50‐100KW Series Inverters LED Indicators The LED indicators mounted on the front left of the inverter enclosure just above the LCD screen allow the installer and user to see the current status of the inverter. CAUTION Power RISK OF ELECTRICAL SHOCK NORMALLY Ground Fault GROUNDED CONDUCTORS MAY BE UNGROUNDED AND ENERGIZED Error WHEN A GROUND FAULT IS INDICATED Figure 6.3 – LED Indicators at Normal Status The basic LED indicator statuses are as follows: For other LED indications please contact Solectria Renewables Customer Support. DOCR‐070233 Page 36 of 92... -
Page 37: Button Descriptions
PVI 50‐100KW Series Inverters WARNING: If the yellow Ground Fault indicator is lit then normally grounded conductors may be ungrounded and energized. Do not touch the inverter as there is a risk of electrical shock. For maintenance, please contact Solectria Renewables or an authorized installer by visiting http://www.solectria.com or by calling +1‐ 978‐683‐9700. 6.1 Button Descriptions The SolrenView HMI is controlled by four buttons that are integrated into the inverter door. ... -
Page 38: Main Display
Installation and Operation Manual (Rev A) PVI 50‐100KW Series Inverters 6.2 Main Display Figure 6.4 Main Display During normal inverter operation the Main Display shows AC Energy (Eac) and AC Power (Pac). The display updates every few seconds with new data from the inverter. Units are dynamically displayed based on the energy and power levels. 6.3 Accessing the Menu From the Main Display press the ENTER button to access the menu. Figure 6.5 Main Menu DOCR‐070233 Page 38 of 92... -
Page 39: Navigating The Menu Structure
Installation and Operation Manual (Rev A) PVI 50‐100KW Series Inverters 6.4 Navigating the Menu Structure The Main Menu allows the user to configure, monitor and control inverter functions. The selected menu option is shown with an arrow on the left. Please note that the display only shows two menu options at a time and will scroll to show the other options. Press the DOWN or UP button to change the selected menu option, as indicated by the arrow. Press the ENTER button to activate the selected function or submenu. Hint: All menus wrap around. Pressing the UP button when the at the top of a menu will select the bottom‐most menu option. Pressing the DOWN button when at the bottom of a menu will select the top‐most menu option. DOCR‐070233 Page 39 of 92... -
Page 40: Displaying Inverter Measurements
Installation and Operation Manual (Rev A) PVI 50‐100KW Series Inverters 6.5 Displaying Inverter Measurements 1. From the Main Menu select the Measurements function and then press the ENTER button. 2. The display will show the AC Energy readout: Figure 6.6 – Measurements Function 3. Press the DOWN or UP buttons to display different measurement values. 4. Press the ESCAPE button to return to the Main Menu. DOCR‐070233 Page 40 of 92... - Page 41 Installation and Operation Manual (Rev A) PVI 50‐100KW Series Inverters The following table summarizes the measurements available: AC Energy Cumulative AC Energy (kWh) AC Power AC Power output (W) AC Voltage AC Voltage, Three‐phase (V) AC Frequency AC Frequency (Hz) AC Current AC Current, Three‐phase average (A) ...
-
Page 42: Controlling The Inverter
Installation and Operation Manual (Rev A) PVI 50‐100KW Series Inverters 6.6 Controlling the Inverter Many inverter functions can be controlled through the HMI under the Set Inverter menu option. The power can be temporarily disabled or curtailed. Third‐party RS‐485 Modbus settings can be viewed and modified, including inverter id and baud rate. Inverter AC voltage and frequency trip settings can be viewed and modified. The following table summarizes the control functions: Power Disable Temporarily disables the AC output of the inverter Inverter ID Serial port address/ID of the inverter Baud Rate Serial port baud rate (19200 or 9600) Vac Very High AC Voltage Critical High Trip Setting Vac High AC Voltage High Trip Settings Vac Low ... -
Page 43: Stopping And Starting The Inverter
Installation and Operation Manual (Rev A) PVI 50‐100KW Series Inverters 6.7 Stopping and Starting the Inverter WARNING: Before conducting any maintenance or service on the PV System the inverter disconnect switches must be set to the “OFF” position and the absence of voltage must be verified by qualified personnel. Do not rely on HMI functions to stop the inverter as a reset might cause the inverter to start unexpectedly. Quick Stop and Start The Inverter can be temporarily stopped so that it ceases to export power to the grid. Hold down the ESCAPE button for two seconds to temporarily stop the inverter if it is running. Likewise, hold down the ESCAPE button for two seconds to initiate inverter starting if it is stopped. ... -
Page 44: Accessing Password Protected Functions
Installation and Operation Manual (Rev A) PVI 50‐100KW Series Inverters 6.8 Accessing Password Protected Functions Certain menu functions can only be accessed after the four digit password (or PIN) is entered through the HMI interface. 1. Select the Set Inverter submenu from the Main Menu. 2. Select the Password function at the bottom of the Set Inverter submenu. Hint: This option can quickly be accessed by pressing the UP button from the top of the Set Inverter submenu, as the menu wraps around. 3. The Password screen will appear. 4. Press the ENTER button to begin entering the default password (PIN). 5. Specify each of the four PIN digits one at a time. Press the UP button to increment the digit. Press the DOWN button to decrement the digit. Press the ENTER button to accept the digit. Press the ESCAPE button to cancel PIN entry at any point. When the fourth digit is entered the PIN entry will be evaluated and the “Password Correct” message will flash if the PIN is verified. ... -
Page 45: Changing The Inverter Password
The inverter password ensures that unauthorized users are not able to access certain menu functions. The default password (0000) should be changed on commissioning. Please use a password that you can easily remember. Solectria Renewables does NOT have a master password to reset the unit. ... -
Page 46: Changing Voltage And Frequency Trip Settings
Installation and Operation Manual (Rev A) PVI 50‐100KW Series Inverters 6.10 Changing Voltage and Frequency Trip Settings The inverter is designed to operate within certain voltage and frequency ranges, as specified by the utility. When the inverter senses that the inverter and/or grid is outside any of these ranges the inverter ceases exporting power and disconnects from the grid. This action is referred to as an inverter trip. Inverter trip settings that can be reviewed include: Vac Very High Voltage Vac Very High Trip Time (not changeable) Vac High Voltage Vac High Voltage Trip Time Vac Low Voltage Vac Low Voltage Trip Time Vac Very Low Voltage Vac Very Low Voltage Trip Time (not changeable) Fac Low Frequency Fac Low Frequency Trip Time Fac Very Low Frequency (not changeable) Fac Very Low Frequency Trip Time (not changeable) Fac High Frequency (not changeable) NOTE: Prior to changing trip settings, the password must be entered through the ... - Page 47 Installation and Operation Manual (Rev A) PVI 50‐100KW Series Inverters 1. To change trip settings, first select Set Inverter on the Main Menu: 2. Next, select VAC Very High function on the Set Inverter submenu: 3. The VAC Very High function will be displayed. Press ENTER to modify the setting. The voltage value will flash, indicating that it can be changed. Press the DOWN and UP buttons to change the voltage setting. 4. Press the ENTER button to accept the voltage setting change. 5. If the trip time is adjustable, it will flash to indicate that it can be changed. Press the DOWN and UP buttons to change the trip time setting. 6. Press the ENTER button to accept the trip time setting change. 7. Press the DOWN button to step to the next trip setting (VAC High). DOCR‐070233 Page 47 of 92...
- Page 48 Installation and Operation Manual (Rev A) PVI 50‐100KW Series Inverters 8. Repeat steps 3–6 for each trip setting to be modified. DOCR‐070233 Page 48 of 92...
-
Page 49: Establishing Ethernet Connectivity
Installation and Operation Manual (Rev A) PVI 50‐100KW Series Inverters 6.11 Establishing Ethernet Connectivity Before SolrenView web‐based monitoring can function the inverter must be networked to the Internet. Customers ordering the SolrenView AIR 3G Router have network connectivity turned on in the factory; no additional steps are required. WARNING: Before conducting any maintenance or service on the PV System the inverter disconnect switches must be set to the “OFF” position and the absence of voltage must be verified by qualified personnel. Do not rely on HMI functions to stop ... -
Page 50: Setting Up Tcp/Ip Networking
Installation and Operation Manual (Rev A) PVI 50‐100KW Series Inverters NOTE: The green link and yellow activity LEDs only light when the SolrenView gateway is powered. 6.12 Setting up TCP/IP Networking Connection to the Internet and to the SolrenView web‐based monitoring service requires functioning TCP/IP protocol. This protocol runs over twisted pair Ethernet wiring and requires certain connections to properly operate. See Section 6.11 or details on establishing Ethernet connectivity. ... - Page 51 Installation and Operation Manual (Rev A) PVI 50‐100KW Series Inverters 2. Information on the inverter will be displayed including the IP, gateway, and netmask settings. Press the ENTER button to hold the display on the item of interest. In the above example, the IP address, gateway and netmask values are being automatically being set through the DHCP service. The exact values displayed will depend on the configuration of the network, but typically are in one of three ranges: 10.0.0.0 – 10.255.255.255 192.168.0.0 – 192.168.255.255 172.16.0.0 – 172.31.255.255 3. If the network is working on the Ethernet protocol level, but the SolrenView is unable to obtain settings through the DHCP service the following will typically be displayed: ...
-
Page 52: Manually Configuring Network Settings
Installation and Operation Manual (Rev A) PVI 50‐100KW Series Inverters If the network is not working on the Ethernet protocol level, such as if the twisted pair Ethernet cable is not plugged in, the following will be displayed: 6.14 Manually Configuring Network Settings To manually configure network settings: 1. Select Config from the Main Menu and press ENTER. DOCR‐070233 Page 52 of 92... - Page 53 Installation and Operation Manual (Rev A) PVI 50‐100KW Series Inverters 2. Select LAN from the Config Menu and press ENTER. 3. Select the DHCP function and press ENTER to edit this setting. 4. Press the DOWN button to turn DHCP Mode Off and press ENTER to save this setting. 5. The DHCP Mode setting will now show Off. 6. Press the DOWN button to access the Static IP setting. 7. Press ENTER to modify the Static IP value. DOCR‐070233 Page 53 of 92...
- Page 54 Installation and Operation Manual (Rev A) PVI 50‐100KW Series Inverters 8. Specify each of the four octet values (0‐255), one at a time. Press the UP button to increment the octet. Press the DOWN button to decrement the octet. Press the ENTER button to accept the octet. Press the ESCAPE button to cancel entry at any point. When the fourth octet is entered the entry will be saved. 9. Press the DOWN button to access the Gateway setting. Change in the same manner that the Static IP was modified. 10. Press the DOWN button to access the Netmask setting. Change in the same manner that the Static IP was modified. ...
-
Page 55: Automatically Configuring Network Settings
Installation and Operation Manual (Rev A) PVI 50‐100KW Series Inverters 6.15 Automatically Configuring Network Settings When shipped from the factory, the SolrenView gateway uses DHCP to configure the TCP/IP settings. If the gateway has been changed to use static IP address the following instructions will explain how to turn on DHCP. To configure the SolrenView gateway to use DHCP: 1. Select Config from the Main Menu and press ENTER. 2. Select LAN from the Config Menu and press ENTER. DOCR‐070233 Page 55 of 92... -
Page 56: Setting Fallback Ip Address
Installation and Operation Manual (Rev A) PVI 50‐100KW Series Inverters 3. Select the DHCP function and press ENTER to edit this setting. 4. Press the DOWN button to turn DHCP Mode On and press ENTER to save this setting. 5. The DHCP Mode setting will now show On. 6.16 Setting Fallback IP Address When the SolrenView gateway is set to use DHCP, but is unable to acquire an IP address lease, it will “fallback” to using a specified IP address after a few seconds. 1. To specify a fallback IP, first select Config on the Main Menu and press ENTER. DOCR‐070233 Page 56 of 92... - Page 57 Installation and Operation Manual (Rev A) PVI 50‐100KW Series Inverters 2. Select LAN from the Config Menu and press ENTER. 3. Confirm that the DHCP Mode setting shows On. The Fallback IP is only available when DHCP is turned on. 4. Press the Down button to show the Fallback IP setting. 5. To change the Fallback IP, press the ENTER button. 6. Specify each of the four octet values (0‐255), one at a time. Press the UP button to increment the octet. Press the DOWN button to decrement the octet. Press the ENTER ...
- Page 58 Installation and Operation Manual (Rev A) PVI 50‐100KW Series Inverters 7. Press the DOWN button to show the Gateway IP setting. 8. To change the Gateway, press the ENTER button. 9. When DHCP is on, the Gateway can either be autodetected or manually specified. 10. To configure the SolrenView gateway to autodetect the gateway from the DHCP server, select the “Autodetect” option in using the HMI. Autodetect is the special gateway value of 0.0.0.0. 11. To configure the SolrenView gateway to use a manual gateway, specify each of the four octet values (0‐255), one at a time. Press the UP button to increment the octet. Press the DOWN button to decrement the octet. Press the ENTER button to accept the octet. Press the ESCAPE button to cancel entry at any point. When the fourth octet is entered the entry will be saved. ...
-
Page 59: Enabling Solrenview Web-Based Monitoring
Installation and Operation Manual (Rev A) PVI 50‐100KW Series Inverters 6.17 Enabling SolrenView Web‐based Monitoring Before SolrenView web‐based monitoring can function the inverter must be networked to the Internet, see sections 6.12 through 6.15 for more details. As explained in section 6, data logging is one of the main functions of the SolrenView gateway. This option is turned on with the SRV Mode setting. Once enabled, the SolrenView gateway will periodically update various operational values and send this data to the SolrenView web‐based monitoring service. If SRV Mode is turned on and the gateway is unable to transfer data to the monitoring service then data will accumulate in a queue on the SolrenView gateway. This queue is stored in non‐volatile ... -
Page 60: Viewing And Setting The Date/Time
Installation and Operation Manual (Rev A) PVI 50‐100KW Series Inverters 2. Next, select SRV Mode function on the Config Menu and press ENTER: 3. The SRV Monitoring function will be displayed. Press ENTER to modify the setting. Press the DOWN button to change the setting to On. 4. Press the ENTER button to accept the setting change. 6.18 Viewing and setting the Date/Time When the SolrenView web‐based monitoring service is purchased and functioning, it is normally not necessary to set or maintain the time on the inverter. The time will automatically be set and adjusted based on the inverter’s time‐zone. NOTE: The date is only editable if SRV Mode is off. DOCR‐070233 Page 60 of 92... - Page 61 Installation and Operation Manual (Rev A) PVI 50‐100KW Series Inverters To view the date and time: 1. First select Config on the Main Menu and press ENTER. 2. Select the Date/Time option on the Config Menu and press ENTER. 3. The current date will be displayed. If the date can be modified an arrow will appear just before the month. Note: The date is only editable if SRV Mode is off. When SRV Mode is on, the date and time is automatically set. DOCR‐070233 Page 61 of 92...
- Page 62 Installation and Operation Manual (Rev A) PVI 50‐100KW Series Inverters 4. Press the ENTER button to begin changing the date. The month will flash, indicating that this portion of the date can be changed with the buttons. Press the UP button to increment the month and the DOWN button to decrement the month. Press the ENTER button to accept the month. Press the ESCAPE button to cancel and return to the menu. 5. The day will flash, indicating that this portion of the date can be changed with the buttons. Press the UP button to increment the day of the month and the DOWN button ...
-
Page 63: Rebooting The Solrenview Gateway
Installation and Operation Manual (Rev A) PVI 50‐100KW Series Inverters 6.19 Rebooting the SolrenView Gateway If the SolrenView Gateway cannot communicate over the Internet or is not updating inverter data it may need to be rebooted. To reboot SolrenView gateway: 1. First select Config on the Main Menu and press ENTER: 2. Select the Reboot option from the menu and press ENTER. 3. The Reboot monitor prompt will be shown. Press the ENTER button to reboot the SolrenView gateway. DOCR‐070233 Page 63 of 92... -
Page 64: Resetting The Solrenview Gateway To Factory Defaults
Installation and Operation Manual (Rev A) PVI 50‐100KW Series Inverters 6.20 Resetting the SolrenView Gateway to Factory Defaults It may be necessary to reset the SolrenView gateway to factory defaults. This does not reset the inverter core, nor shutdown the inverter for any period of time. NOTE: Resetting the SolrenView gateway will also clear events, revenue‐grade KYZ counters and SolrenView.com data queue. Caution should be used with this function to avoid data loss. To reset the SolrenView gateway: 1. First select Config on the Main Menu and press ENTER. 2. Select the Reset All option from the menu and press ENTER. DOCR‐070233 Page 64 of 92... -
Page 65: Inverter Counts And Logs
Installation and Operation Manual (Rev A) PVI 50‐100KW Series Inverters 3. A message warning that the SolrenView gateway is about to be set to factory defaults is shown. Press the ESCAPE button to cancel the reset. 4. Select the Yes option under Clear settings to reset the SolrenView gateway to factory defaults. The Reset Storage screen will appear for a moment. 6.21 Inverter Counts and Logs The inverter keeps track of various events and errors through error logging and cumulative counters. Error logs are a record of events (changes of state), with the earliest event shown first. There are a total of 30 log entries available and newer entries overwrite older entries. Each entry in the log is time stamped in MM/DD/YY format. Error counts display cumulative counters for each supported event/error, with the highest error count shown first. DOCR‐070233 Page 65 of 92... -
Page 66: Displaying Error Counts
Installation and Operation Manual (Rev A) PVI 50‐100KW Series Inverters 6.22 Displaying Error Counts 1. Select Inv Events from the Main Menu and press ENTER. 2. Select Err Counts from the Inv Events Menu and press ENTER. DOCR‐070233 Page 66 of 92... - Page 67 Installation and Operation Manual (Rev A) PVI 50‐100KW Series Inverters 3. The Error Counts are displayed in order of occurrence, with the most frequent error displayed at index position 1. In this example the most frequent error is Contactor Failure; two contactor fail events were logged with the last one logged on Jan 02, 2013 at 7:12 am. The data format is index number, date/time and occurrences on the first line. The second line is the type of the event. 4. Press the DOWN button to see the next Error Count entry. Continuing our example, the second most frequent error is Lost Frequency lock, which occurred once on Jan 01, 2013 at 7:10 am. 5. If no Count data is recorded, the date and time that the Counts were last cleared is displayed. 6. Press the ESCAPE button to return to the Inv Events menu. DOCR‐070233 Page 67 of 92...
-
Page 68: Displaying Error Logs
Installation and Operation Manual (Rev A) PVI 50‐100KW Series Inverters 6.23 Displaying Error Logs 1. Select Inv Events from the Main Menu and press ENTER. 2. Select Err Logs from the Inv Events Menu and press ENTER. DOCR‐070233 Page 68 of 92... - Page 69 Installation and Operation Manual (Rev A) PVI 50‐100KW Series Inverters 3. The most recent Error Log entries is displayed at index position 1. The data format is index number, date/time and event state on the first line. When the Error first is asserted the event state is shown as “On”. When the Error ceases the event state is shown as “Off”. The second line is the type of the event. 4. Press the DOWN buttons to see the next event stored in the log. In this example, the inverter asserted a Lost Freq Lock error on Jan 01, 2013 at 7:10 am and ceased to assert the Lost Freq Lock error on Jan 01, 2013 at 7:11 am. 5. If no Events are recorded, the date and time that the Events were last cleared is displayed. 6. Press the ESCAPE button to return to the Inv Events menu. Hint: Press the UP button from Error log index 1 to see the most recent Error logged. DOCR‐070233 Page 69 of 92...
-
Page 70: Clearing Error Counts Or The Log
Installation and Operation Manual (Rev A) PVI 50‐100KW Series Inverters 6.24 Clearing Error Counts or the Log 1. Select Inv Events from the Main Menu and press ENTER. 2. Select Clear from the Inv Events Menu and press ENTER. The Clear History prompt will be shown. Select the type of history to be cleared by pressing the UP and DOWN buttons. Press ENTER to clear the history based on one of these settings. Press the ESCAPE button to cancel. None: H istory is not cleared. Err Log: Clears the Error Log only. Err Counts: Clears the Error Counts only. All: Clears the Error Counts and Error Log. DOCR‐070233 Page 70 of 92... - Page 71 Installation and Operation Manual (Rev A) PVI 50‐100KW Series Inverters List of Logged Events The following events are logged and counted: AC Contact Open AC Frequency High AC Frequency Low AC Islanding AC Voltage High AC Voltage Low Contactor Err CT Failure DC GND FAULT DC Voltage High Desat Error DMGI Overtemp Fan Life Reached IGBT Overtemp Lost Freq Lock MAG Fail Min Vmpp Reached ...
-
Page 72: Hmi Menu Structure
Installation and Operation Manual (Rev A) PVI 50‐100KW Series Inverters 6.25 HMI Menu Structure DOCR‐070233 Page 72 of 92... -
Page 73: Troubleshooting And Maintenance
AC Freq High acceptable limits, the inverter will restart when frequency returns to normal range. If possible measure the frequency or contact The AC grid voltage is less than the Pac: XXXX W local utility provider. If AC frequency is below low limit. AC Freq Low acceptable limits, the inverter will restart when frequency returns to normal range. Turn off the inverter and contact Solectria The AC contactor or sensing circuit Contactor Fail Renewables. The inverter may need to be has failed 978‐683‐9700 serviced by an authorized service provider. The internal current monitoring has Turn the DC and AC off, restart the inverter. CT Failure The inverter may need to be inspected and failed 978‐683‐9700 serviced by an authorized service provider. ... - Page 74 Waiting for grid The VAC grid connection phasing does Swap two of the phase wire positions at the Reverse phasing inverter AC wiring terminals in the AC not match the inverter’s phasing & restart PVI! disconnect switch, then restart The inverter will hold the DC voltage at this The power point tracking has been Pac: XXXX W level until Vmpp increases. reached Min Vmpp reached The AC contactor is open when it is being Turn off the inverter and contact Solectria AC Contact Open commanded to be closed Renewables. The inverter may need to be 978‐683‐9700 serviced by an authorized service provider. Turn off the inverter and contact Solectria An internal failure of the voltage Vsense Err Renewables. The inverter may need to be sensing circuit has occurred 978‐683‐9700 ...
-
Page 75: Troubleshooting
Before attempting to troubleshoot the inverter, please read the entire manual. Steps to Perform when PV system not functioning: Check inverter LED indicator status and LCD screen for inverter status and error messages Check to ensure that inverter is connected to AC power Check for clockwise phase rotation of AC power connections Check to ensure that DC (PV) input is connected Verify proper polarity of DC (PV) positive (+) and negative (‐) input pairs Verify PV string Maximum Power Point Voltage at design high temperature and PV string Open Circuit Voltage at design low temperature is compatible with inverter input voltage specifications. Contact installer or Solectria Renewables if malfunction persists If contacting Solectria Renewables for assistance, please provide: 1. Inverter Model Number/Part Number 2. Inverter Serial Numbers 3. Short Description of Problem (LCD messages, when problem started, how often problem occurs, under what conditions the problem occurs) 4. Design Information (PV modules, string sizing, output power, short‐circuit current and open circuit voltage string layout) See Appendix for Solectria contact information. ... -
Page 76: Preventative Maintenance
Check the fan and make sure it spins freely. o See Section 7.4 about turning the inverter off before performing this service. No grid sensing: o Grid sensing fuses blown (1A AC or as labeled) inside the main enclosure. Contact Solectria Renewables (Do not replace fuses, as this represents an abnormal failure). No LED indications when the sun is shining. If the grid voltage and DC (PV) voltage is present and no response from inverter is evident: ... -
Page 77: Intake Louver Vent Cleaning
Installation and Operation Manual (Rev A) PVI 50‐100KW Series Inverters A harsh environment is defined as any of the following conditions: Excessive temperature either hot or cold In a desert area with sand or other debris constantly in contact with the inverter In an area with excessive pollen or dust Indoors if located in a manufacturing area with airborne particles Coastal regions exposed to salt water 7.4 Intake Louver Vent Cleaning WARNING: The intake louver vent can be cleaned only when the inverter is off, both DC and AC Disconnect switches off and completely locked and tagged out. Absence of dangerous voltages must be verified by qualified personnel before performing any service. Intake louver vent cleaning is recommended at the intervals specified in Section 7.3. Consider cleaning intake louver vent during the early morning or late evening so little or no energy generation is lost. ... - Page 78 Installation and Operation Manual (Rev A) PVI 50‐100KW Series Inverters Opening the Main Enclosure WARNING: The enclosure can only be opened when the inverter is off, both DC and AC Disconnect switches off and completely locked and tagged out. Absence of dangerous voltages must be verified by qualified personnel before performing any service. Use the SolrenView HMI keypad to temporarily disable the power output by pressing and holding the ESCAPE button for two seconds. Switch off DC disconnect switch Switch off AC disconnect switch Watch until all LED indicators have been off for 60 seconds to allow capacitors to discharge Open handle on door (use key if locked) Before closing the main enclosure always check for any signs of problems such as corrosion, loose parts, insect or animal infestation, excessive dirt/dust or over heated or deformed/aged‐looking parts. Opening the DC Disconnect Switch Enclosure WARNING: DC Input wiring from the array may be energized even with inverter off and DC Disconnect Switch open. Disconnect inverter from DC power from array to ensure that live DC is not entering DC disconnect switch enclosure. Use the SolrenView HMI keypad to temporarily disable the power output by pressing and holding the ESCAPE button for two seconds. Switch off DC disconnect switch Switch off AC disconnect switch Watch until all LED indicators have been off for 60 seconds to allow capacitors to discharge Remove DC disconnect switch cover door retention screws Opening the AC Disconnect Switch Enclosure WARNING: AC output wiring leaving the AC Disconnect Switch Enclosure to point of interconnect may be energized even with inverter off and AC Disconnect switch open. ...
-
Page 79: Fuse Replacements
Installation and Operation Manual (Rev A) PVI 50‐100KW Series Inverters 7.6 Fuse replacements AC Fuses (if equipped) WARNING: If inverter is equipped with the fused AC disconnect switch, fuses must only be replaced with 600VAC rated fuses of the same type and rating. The following table includes current ratings of fuses provided with fused AC disconnect switch option according to inverter power rating and AC output voltage. Inverter Model AC Voltage PVI‐50KW PVI‐60KW PVI‐75KW PVI‐85KW PVI‐100KW PVI‐75KW‐PE PVI‐85KW‐PE PVI‐100KW‐PE 208V 175A 225A 300A 300A 350A 240V 150A 200A 225A 300A 300A 480V 110A 110A 125A 150A ... -
Page 80: Warranty Policy
Installation and Operation Manual (Rev A) PVI 50‐100KW Series Inverters 7.7 Warranty Policy Solectria Renewables Warranty Coverage: Solectria Renewables Limited Warranties are provided by Solectria Renewables, LLC. ("Solectria Renewables") and cover defects in workmanship and materials. Solectria Renewables’ price for the products is based on inclusion of these limited warranty provisions and disclaimers. In the event of a conflict between the terms of this Limited Warranty and any terms and conditions proposed by purchasers of Solectria Renewables’ products, these Limited Warranty provisions shall govern the parties’ obligations with respect to warranty coverage for defective products. Warranty Registration: To register the product, please enter the following information at: http://www.solectria.com/registration Duration of a Solectria Renewables Warranty Period: For three‐phase inverters (PVI 10kW and higher) and for the PVI 1800 and PVI 2500 inverters, the warranty period is 60 months from the date of purchase of the inverter by the end user or 64 months after the delivery date from Solectria Renewables to the distributor or the dealer / installer, whichever is shorter. If a warranty extension has been purchased, the term is defined as an extension beyond 60 months. For example, if a 5 year extension (to 10 years total) is purchased, the term becomes 120 months from date of purchase. For the PVI 3000 to PVI 7500 inverters, the warranty period is 120 months from the date of purchase by the end user or 124 months after the delivery date from Solectria Renewables to the distributor or the dealer / installer, whichever is shorter. If Solectria Renewables repairs or replaces a product, its warranty continues for the remaining portion of the original Warranty Period or 90 days from the date of the repair/replacement shipment to the customer, whichever is greater. Solectria Renewables’ obligation to repair or replace a defective product under this warranty is contingent upon Solectria Renewables receiving full and timely payment for the warranted products and associated shipping charges. Solectria Renewables Warranty Coverage is voidable, at Solectria Renewables’ sole option, if full payment for products and associated shipping charges are not received in full and in a timely manner by Solectria Renewables. Please contact Solectria Renewables Customer Service for further details on other products. ... - Page 81 Installation and Operation Manual (Rev A) PVI 50‐100KW Series Inverters What will Solectria Renewables do? Solectria Renewables will, at its sole option, repair or replace the defective product free of charge, provided that Solectria Renewables is notified of the product defect within the Warranty Period for the product, and provided that Solectria Renewables, through inspection, establishes the existence of such a defect and that it is covered by the Limited Warranty. Solectria Renewables will, at its sole option, use new and / or reconditioned parts in performing warranty repair and/or replacements. Solectria Renewables reserves the right to use parts or products of original or improved design in the repair or replacement of the product. All replaced products and all parts removed from repaired products become the property of Solectria Renewables. Solectria Renewables will attempt to repair the unit within a reasonable time period. No provision will be made for reimbursement of lost energy production. For three‐phase inverters 10kW and higher: Solectria Renewables covers parts, travel and labor necessary to repair the product and shipment of parts to and from the customer via a Solectria Renewables‐selected non‐expedited surface freight within the contiguous United States, Canada and Mexico. For Alaska, Hawaii and all other installation locations Solectria Renewables will supply necessary parts as needed for warranty repairs; however, travel is not included. Contact Solectria Renewables customer service for details on the freight policy for return shipments outside of the contiguous United States, Canada and Mexico. Obtaining Service: If your product requires troubleshooting or warranty service, contact your distributor or dealer / installer. If you are unable to contact your distributor or dealer / installer, or the distributor or dealer / installer is unable to provide service, contact Solectria Renewables directly at the number listed on the website in the customer service section for your product. Solectria Renewables may send personnel to a jobsite or contract with an area technician, installer or other authorized, trained service personnel to service / replace components. Reimbursement for contracted services: Solectria Renewables will submit a purchase order to the designated service personnel before work is performed. This purchase order will cover time expected for the required service and most likely an allocation for travel time. Direct returns may be performed according to the Solectria Renewables Return Material Authorization Policy. In any warranty claim, dated proof of purchase must accompany the product and the product must not have been disassembled or modified without prior written authorization by Solectria Renewables. ...
- Page 82 ‐ The dated invoice or purchase receipt showing the product exchanged under warranty. Solectria Renewables provides technical assistance Monday‐Friday, 8:30am‐7pm EST and on‐ call technical support is provided outside normal business hours. What does the Solectria Renewables warranty not cover? Solectria Renewables Limited Warranties do not cover normal wear and tear of the product or costs related to the removal, installation, or troubleshooting of the customer's electrical systems. These warranties do not apply to and Solectria Renewables will not be responsible for any defect in or damage to: a) The product, if it has been misused, neglected, improperly installed, physically damaged or altered, either internally or externally, or damaged from improper use or use in an unsuitable environment; b) The product, if it has been subjected to fire, water, generalized corrosion, biological infestations, acts of God or input voltage that creates operating conditions beyond the maximum or minimum limits listed in the Solectria Renewables product specifications including high input voltage from generators or lightning strikes; c) The product, if repairs have been made to it other than by Solectria Renewables or its authorized, trained service personnel; d) The product, if it is used as a component part of a product expressly warranted by another manufacturer; e) The product, if its original identification (trademark, serial number) markings have been defaced, altered, or removed; f) The product, if it has been damaged in shipping (unless approved in writing by Solectria Renewables); g) Any installation and operation beyond the scope covered by relevant safety regulations (UL1741, NFPA 70, etc.); h) Third party monitoring equipment. i) Failure to perform Preventative Maintenance may void the warranty. DOCR‐070233 Page 82 of 92...
- Page 83 Installation and Operation Manual (Rev A) PVI 50‐100KW Series Inverters DISCLAIMER SOLECTRIA RENEWABLES LIMITED WARRANTIES ARE THE SOLE AND EXCLUSIVE WARRANTY PROVIDED BY SOLECTRIA RENEWABLES IN CONNECTION WITH YOUR SOLECTRIA RENEWABLES PRODUCT AND ARE, WHERE PERMITTED BY LAW, IN LIEU OF ALL OTHER WARRANTIES, CONDITIONS, GUARANTEES, REPRESENTATIONS, OBLIGATIONS AND LIABILITIES, EXPRESS OR IMPLIED, STATUTORY OR OTHERWISE IN CONNECTION WITH THE PRODUCT, HOWEVER ARISING (WHETHER BY CONTRACT, TORT, NEGLIGENCE, PRINCIPLES OF MANUFACTURER'S LIABILITY, OPERATION OF LAW, CONDUCT, STATEMENT OR OTHERWISE), INCLUDING WITHOUT RESTRICTION ANY IMPLIED WARRANTY OF MERCHANTABILITY OR CONDITION OR QUALITY OF THE PRODUCT, ANY IMPLIED WARRRANTY OF FITNESS FOR A PARTICULAR PURPOSE, OR ANY IMPLIED WARRANTY OF DISTRIBUTOR OR DEALER/INSTALLER ABILITY, ALL OF WHICH ARE EXPRESSLY DISCLAIMED TO THE FULLEST EXTENT PERMITED BY LAW. ANY IMPLIED WARRANTIES OF MERCHANTABILITY OR FITNESS FOR A PARTICULAR PURPOSE, OR ANY IMPLIED WARRANTY OF DISTRIBUTOR OR DEALER / INSTALLER ABILITY, TO THE EXTENT REQUIRED UNDER APPLICABLE LAW TO APPLY TO THE PRODUCT, SHALL BE LIMITED IN DURATION TO THE PERIOD STIPULATED UNDER THIS LIMITED WARRANTY, TO THE FULLEST EXTENT PERMITTED BY LAW. IN NO EVENT WILL SOLECTRIA RENEWABLES, INCLUDING ITS SUPPLIERS, MANUFACTURERS, VENDORS, SUBCONTRACTORS, DISTRIBUTORS, DEALERS AND ANY OTHER AFFILIATES BE LIABLE FOR ANY SPECIAL, DIRECT, INDIRECT, INCIDENTAL OR CONSEQUENTIAL DAMAGES, LOSSES, COSTS OR EXPENSES HOWEVER ARISING WHETHER IN CONTRACT OR TORT INCLUDING WITHOUT RESTRICTION ANY ECONOMIC LOSSES OF ANY KIND, ANY LOSS OR DAMAGE TO PROPERTY, INCLUDING LOSS OF USE AND INTANGIBLE HARM OF ANY KIND, AND ANY PHYSICAL DAMAGE OR OTHER DAMAGE ARISING FROM OR AS A RESULT OF ANY USE, MISUSE OR ABUSE OF THE PRODUCT, OR THE INSTALLATION, INTEGRATION OR OPERATION OF THE PRODUCT, REGARDLESS OF WHETHER SUCH INSTALLATION, INTEGRATION OR OPERATION WAS PERFORMED PROPERLY OR IMPROPERLY. Solectria Renewables neither assumes nor authorizes any other person to assume for it any other liability in connection with the repair or replacement of the Product. Exclusions of the Policy: ...
- Page 84 Installation and Operation Manual (Rev A) PVI 50‐100KW Series Inverters WITHOUT LIMITING THE GENERALITY OF THE FOREGOING, UNLESS SPECIFICALLY AGREED TO BY IT IN WRITING, SOLECTRIA RENEWABLES (a) MAKES NO WARRANTY AS TO THE ACCURACY, SUFFICIENCY OR SUITABILITY OF ANY TECHNICAL OR OTHER INFORMATION PROVIDED IN MANUALS OR OTHER DOCUMENTATION PROVIDED BY IT IN CONNECTION WITH THE PRODUCT; AND (b) ASSUMES NO RESPONSIBILITY OR LIABILITY FOR LOSSES, DAMAGES, COSTS OR EXPENSES, WHETHER SPECIAL, DIRECT, INDIRECT, CONSEQUENTIAL OR INCIDENTAL, WHICH MIGHT ARISE OUT OF THE USE OF SUCH INFORMATION. THE USE OF ANY SUCH INFORMATION WILL BE ENTIRELY AT THE USERS’ RISK. WARNING: LIMITATIONS ON USE Please refer to your product user manual for limitations on uses of the product. Specifically, please note that Solectria Renewables’ products are not intended for use in connection with life support systems and Solectria Renewables makes no warranty or representation in connection with any use of the product for such purposes. DOCR‐070233 Page 84 of 92...
-
Page 85: Return Material Authorization Policy
Installation and Operation Manual (Rev A) PVI 50‐100KW Series Inverters 7.8 Return Material Authorization Policy Please review our Return Merchandise Authorization Policy below. Obtaining a required, Return Material Authorization: Before returning a product directly to Solectria Renewables you must obtain a Return Material Authorization (RMA) number and the correct factory "Ship To" address. Products must also be shipped prepaid. Product shipments will be refused and returned at your expense if they are unauthorized, returned without an RMA number clearly marked on the outside of the shipping box, if they are shipped collect, or if they are shipped to the wrong location. Information Solectria Renewables needs when you are obtaining service: 1) The model names and serial number of your product Preparing the product for shipping: 1) Package the unit safely, preferably using the original box and packing materials. Please ensure that your product is shipped fully insured in the original packaging or equivalent. This warranty will not apply where the product is damaged due to improper packaging. 2) Include the following: The RMA number supplied by Solectria Renewables clearly marked on the outside of the box. A return address to which the unit can be shipped. Post office boxes are not acceptable. A contact telephone number where you can be reached during work hours. A brief description of the problem. Ship the unit prepaid to the address provided by your Solectria Renewables’ customer service representative. Returning a product from outside of the USA or Canada: In addition to the above, you MUST include return freight funds and are fully responsible for all documents, duties, tariffs, and deposits. Contact information: ... -
Page 86: Technical Data
The highest open circuit voltage occurs when the PV modules are at the coldest temperature and in bright sun. Because the PV modules also have a reduction in voltage at high cell temperatures, you must make sure the MPPT voltage of the strings will not drop below the minimum inverter DC input voltage in hot temperature conditions. Both the maximum open circuit voltage (OCV) when at maximum cold temperatures and minimum MPPT voltage when at maximum hot temperatures can be calculated for a PV module using its specification sheet. PV module string sizing can then be used to determine how many modules can be used in a string. Visit http://www.solectria.com/?page_id=30 to use Solectria Renewables’ interactive string sizing tool. 8.1 Input DC (PV) Specifications PVI 75KW PVI 85KW PVI100KW PVI 50KW ... -
Page 87: Output Ac Specifications
Break load rated, NEMA 3R, Breaks Ungrounded Conductor DC Disconnect Voltage Rating DC Disconnect Current Rating 400A or 600A, Varies by model, see Table 4.6 *Low Voltage (LV) Units are not ETL listed, contact Solectria for availability Table 8.1 – DC Input Specifications 8.2 Output AC Specifications The inverters are designed to feed power into a standard 60Hz, three‐phase AC utility service provided within a facility by a transformer with a rating of not less than the rating of the ... -
Page 88: Other Specifications
Installation and Operation Manual (Rev A) PVI 50‐100KW Series Inverters Factory Default Adjustment Range ANSI Device Voltage Limit Clearing Time Voltage Limit Clearing Time Trip Setting Number (p.u.) (s) (p.u.) (s) Undervoltage (fast) 27 V < 0.5 0.16 V < {0.5, fixed} 0.16 Undervoltage (slow) 27 V < 0.88 2.00 V < {0.5 to 1.0} 0.16 to 300 Overvoltage (slow) 59 V > 1.1 1.00 V > {1.1 to 1.2} 0.16 to 300 Overvoltage (fast) 59 V > 1.2 0.16 ... - Page 89 Installation and Operation Manual (Rev A) PVI 50‐100KW Series Inverters MPPT Min. (Standard) MPPT Min. (LV Option) Strike Voltage (Standard) Strike Voltage (LV Option) Figure 8.1 AC Output Power vs. DC Input Voltage of PVI 50‐100KW Series Inverters DOCR‐070233 Page 89 of 92...
-
Page 90: Internal Circuit Diagram
Installation and Operation Manual (Rev A) PVI 50‐100KW Series Inverters 8.4 Internal Circuit Diagram The basic power flow within the PVI 50KW‐100KW series inverters is shown in the simplified one‐ line diagram below. Note that grounding and GFDI circuit is not depicted. Figure 8.2 – Simplified One‐Line Diagram of PVI 50‐100KW Series Inverters DOCR‐070233 Page 90 of 92... -
Page 91: Appendices
Installation and Operation Manual (Rev A) PVI 50‐100KW Series Inverters 9 Appendices 9.1 Appendix A – PVI 50KW, 60KW, 75KW, 85KW, 100KW Data Sheet http://www.solectria.com/datasheets/PVI_50‐100KW_Datasheet.pdf 9.2 Appendix B – String Sizing Tool http://www.solectria.com/?page_id=30 9.3 Appendix C – Contact Information Solectria Renewables LLC 360 Merrimack Street Building 9, 2 floor Lawrence, Massachusetts 01843 USA Tel: 978.683.9700 Fax: 978.683.9702 Sales/General Info: inverters@solectria.com Customer Support: service@solectria.com Website: www.solectria.com 9.4 Appendix D – Authorized Distributors See website for complete and updated listing: www.solectria.com DOCR‐070233 Page 91 of 92... -
Page 92: Appendix E - Ul1741/Ieee 1547 Authorization Letter To Mark Product
Installation and Operation Manual (Rev A) PVI 50‐100KW Series Inverters 9.5 Appendix E – UL1741/IEEE 1547 Authorization Letter to Mark Product DOCR‐070233 Page 92 of 92...
Need help?
Do you have a question about the PVI 50KW and is the answer not in the manual?
Questions and answers