Table of Contents
Advertisement
Quick Links
Download this manual
See also:
Installation Manual
Advertisement
Table of Contents

Related Manuals for RuggedCom RuggedBackbone RX1510


Summary of Contents for RuggedCom RuggedBackbone RX1510
- Page 1 RuggedBackbone™ RX1510 Hardware Installation Guide Revision 104 - October 14, 2011 www.RuggedCom.com...
- Page 2 We have checked the contents of this manual against the hardware and software described. However, deviations from the description cannot be completely ruled out. RuggedCom shall not be liable for any errors or omissions contained herein or for consequential damages in connection with the furnishing, performance, or use of this material.
-
Page 3: Table Of Contents
3.13. Cellular Modems ..................... 31 3.13.1. GSM, EDGE, HSPA+ Cellular Modem Card ..........32 3.13.2. Installing SIM Cards for GSM, EDGE, HSPA+ Cellular Modems ....32 3.14. APE: Application Processing Engine ..............34 RuggedCom® RuggedBackbone™ RX1510 Installation Guide Rev 104... - Page 4 4.4.2. Gigabit Ethernet (1Gbps) Optical Specifications ..........41 4.5. Operating Environment ..................... 41 4.6. Mechanical Specifications ..................41 5. EMI And Environmental Type Tests ..................42 6. Agency Approvals ........................ 44 7. Warranty ..........................45 RuggedCom® RuggedBackbone™ RX1510 Installation Guide Rev 104...
- Page 5 ......................... 22 3.15. Critical Alarm Relay Connector ..................23 3.16. RJ45 Serial Console Port ....................24 3.17. RJ45 T1/E1 Pin Configuration ..................24 3.18. RJ45 T1/E1 Pin Configuration ..................25 RuggedCom® RuggedBackbone™ RX1510 Installation Guide Rev 104...
- Page 6 3.32. Cellular Modem Module Assembly: W11 and W32 Single Antenna Modules ....32 3.33. Cellular Modem Module Assembly: W12 Dual Antenna Modules ........32 3.34. APE Faceplate and Ports ....................34 3.35. APE Chassis Network Connection .................. 35 RuggedCom® RuggedBackbone™ RX1510 Installation Guide Rev 104...
- Page 7 4.9. Mechanical Specifications ....................41 5.1. IEC 61850-3 EMI Type Tests ................... 42 5.2. IEEE 1613 (C37.90.x) EMI Immunity Type Tests ............. 43 5.3. Environmental Type Tests ....................43 6.1. Agency Approvals ......................44 RuggedCom® RuggedBackbone™ RX1510 Installation Guide Rev 104...
-
Page 8: Fcc Statement And Cautions
This product contains no user-serviceable parts. Attempted service by unauthorized personnel shall render all warranties null and void. Changes or modifications not expressly approved by RuggedCom Inc. could invalidate specifications, test results, and agency approvals, and void the user’s authority to operate the equipment. -
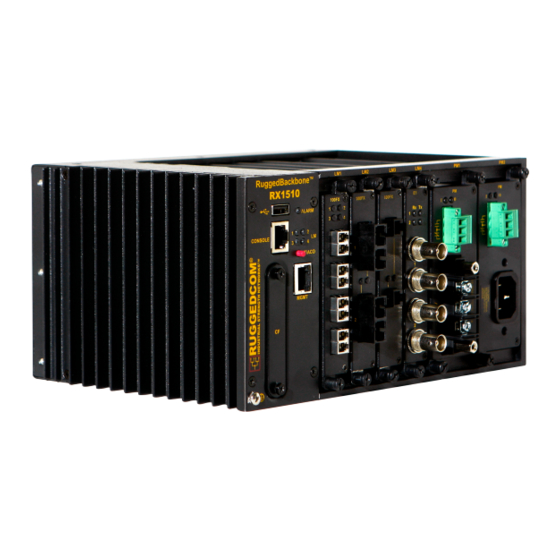
Page 9: Product Overview
• Failsafe Output Relay: For critical failure or error alarming Physical Ports • Field replaceable line modules • Up to 24 ports 100FX • Up to 24 ports 10/100TX • Up to 8 ports Gigabit Ethernet RuggedCom® RuggedBackbone™ RX1510 Installation Guide Rev 104... - Page 10 • Dual redundant, modular, hot-swappable power supplies • Fully integrated power supplies (no external adaptors) • Input voltage ranges: 10-36VDC, 36-72VDC, 88-300VDC, 85-264VAC • TUV/UL 60950 safety approved to 85°C Warranty • 5 Year Warranty RuggedCom® RuggedBackbone™ RX1510 Installation Guide Rev 104...
-
Page 11: Ruggedbackbone™ Modules
2. RuggedBackbone™ Modules 2. RuggedBackbone™ Modules The RX1510 chassis provides six module slots . Each slot accommodates a particular type of RuggedCom module. Figure 2.1, “RX1510 Chassis Slot Assignment” shows the module slots on the RX1510. Figure 2.1. RX1510 Chassis Slot Assignment... -
Page 12: Front Panel
The front panel module status LEDs provide the following information: Purpose Description Green = OK LM 1 through 4 Indicates the line module status. Orange = Warning alert Red = Configuration error Table 2.1. Module Status LED Indications RuggedCom® RuggedBackbone™ RX1510 Installation Guide Rev 104... -
Page 13: Line Modules (Lm)
Figure 2.8. 4FX03: 4 × 100FX MTRJ Figure 2.7. FX03: 2 × 100 FX MTRJ Figure 2.9. FX**: 2 × 100FX SC Figure 2.10. FX**: 2 × 100FX ST Figure 2.11. 10FL: 3 × 10FL ST RuggedCom® RuggedBackbone™ RX1510 Installation Guide Rev 104... -
Page 14: Sfp Modular
Figure 2.18. E02: 2 × E1 BNC Figure 2.19. TC4: 4 × T1/E1 RJ45 2.2.5. Serial Figure 2.20. 6S01: 6 × Serial RJ45 2.2.6. Cellular Modem Figure 2.21. W11, W21, W32 Cellular Modem Figure 2.22. W12, W22 Cellular Modem RuggedCom® RuggedBackbone™ RX1510 Installation Guide Rev 104... -
Page 15: Dds - Digital Data Services
2. RuggedBackbone™ Modules 2.2.7. DDS - Digital Data Services Figure 2.23. D02: 1 × DDS RJ45 2.2.8. APE - Appplication Processing Engine Figure 2.24. APE 1402 RuggedCom® RuggedBackbone™ RX1510 Installation Guide Rev 104... -
Page 16: Power Supply
Figure 2.25. Screw terminal block power module: terminal cover in place (HI module shown) Figure 2.26. Screw terminal block power module: terminal cover removed (HI module shown) Figure 2.27. Pluggable terminal block power module (HIP module shown) RuggedCom® RuggedBackbone™ RX1510 Installation Guide Rev 104... -
Page 17: Installation
To attach the mounting brackets, align the brackets with the threaded holes on the sides of the appliance. Secure the mounting brackets to the appliance with the screws included in the mounting bracket kit. Figure 3.1. Installing Mounting Brackets Figure 3.2. DIN Rail Mounting: Front View RuggedCom® RuggedBackbone™ RX1510 Installation Guide Rev 104... -
Page 18: Rx1510Dimensions
3. Installation Figure 3.3. DIN Rail Mounting: Side View 3.1.1. RX1510Dimensions Figure 3.4. RX1510 Dimensions – Front View RuggedCom® RuggedBackbone™ RX1510 Installation Guide Rev 104... -
Page 19: Rx1510Dimensions - Top View
3. Installation Figure 3.5. RX1510Dimensions – Top View Figure 3.6. RX1510 Dimensions – Side View RuggedCom® RuggedBackbone™ RX1510 Installation Guide Rev 104... -
Page 20: Power Supply Wiring And Grounding
3.2.2. Connectors for 24, 24P, 48, and 48P Power Modules Figure 3.9. Screw Terminal Power Figure 3.10. Pluggable Phoenix Power Connector for 24 and 48 Power Modules Connector for 24P and 48P Power Modules RuggedCom® RuggedBackbone™ RX1510 Installation Guide Rev 104... -
Page 21: Chassis Ground Connection
• For 125/230VAC rated equipment, a appropriately rated AC circuit breaker must be installed. • It is recommended to provide a separate circuit breaker for each power supply module. • Equipment must be installed according to applicable local wiring codes. RuggedCom® RuggedBackbone™ RX1510 Installation Guide Rev 104... -
Page 22: Dc Power Supply Wiring Examples
• Equipment must be installed according to applicable local wiring codes. 3.2.6. AC and DC Power Supply Wiring Example Figure 3.14. Wiring for AC and DC Power Supplies (HIP module shown at left; 24P or 48P module shown at right) RuggedCom® RuggedBackbone™ RX1510 Installation Guide Rev 104... -
Page 23: Critical Alarm Wiring
You can configure control of the relay output through the ROX™ user interface. A common application for this output is to signal an alarm in case of a power failure. Figure 3.15. Critical Alarm Relay Connector RuggedCom® RuggedBackbone™ RX1510 Installation Guide Rev 104... -
Page 24: Serial Console Port
Carefully note the orientation of the RJ45 receptacle when inserting or removing cabling. See the illustration and table below for pin configuration and assignment. T1/E1 pinout Description RRING RTIP TRING TTIP Figure 3.17. RJ45 T1/E1 Pin Configuration Table 3.2. RJ45 T1/E1 Pin Assignment RuggedCom® RuggedBackbone™ RX1510 Installation Guide Rev 104... -
Page 25: Wan Ports: Bnc
TIA/EIA-568-A compliance. The table: Cabling Categories and 1000Base- TX Compliance summarizes the relevant cabling standards as they apply to 100Base-TX connections. RuggedCom® RuggedBackbone™ RX1510 Installation Guide Rev 104... -
Page 26: Transient Suppression
IEEE 1613 Class 1. This means that during a transient electrical event, it is possible for communications errors or interruptions to occur, but recovery is automatic. RuggedCom does not recommend the use of copper cabling of any length for critical, real-time, substation automation applications. -
Page 27: Serial Ports: Rj45
R1: Transmit data to network (Ring 1) T1: Transmit data to network (Tip 1) T: Receive data from network (Tip) R: Receive data from network (Ring) Figure 3.21. RJ45 DDS Pin Configuration Table 3.6. RJ45 DDS Pin Assignment RuggedCom® RuggedBackbone™ RX1510 Installation Guide Rev 104... -
Page 28: Dds Rx And Tx Led Indications
• Disconnect all cables from the SFP module before inserting or removing the module. • Use only components certified by RuggedCom Inc. with RuggedCom products. Damage can occur to optics and product if compatibility and reliability have not been properly assessed. -
Page 29: Module Insertion - Sfp
Extend the bail latch found on the top of the module. Grasp the bail latch and gently pull outwards to unlock and remove the module. Immediately after removal, store the SFP module in an ESD-safe environment. RuggedCom® RuggedBackbone™ RX1510 Installation Guide Rev 104... -
Page 30: Fiber Ethernet Ports
The drawings in the following figures show a side and top view of each supported fiber optic connector type to assist in identifying the proper cable connection orientation. Figure 3.26. LC Figure 3.27. MTRJ Figure 3.29. ST Figure 3.28. SC Table 3.9. Available Fiber Connector Types RuggedCom® RuggedBackbone™ RX1510 Installation Guide Rev 104... -
Page 31: Cellular Modems
Figure 3.30. Single Port Cellular Modem: Antenna Connections Figure 3.31. Dual Port Cellular Modem: Antenna Connections If two or more antennas are to be installed, the antennas must be separated by a minimum distance of 20 cm (7.9"). RuggedCom® RuggedBackbone™ RX1510 Installation Guide Rev 104... -
Page 32: Gsm, Edge, Hspa+ Cellular Modem Card
2. On the smooth side of the module, remove the four screws and remove the back of the module. Figure 3.32. Cellular Modem Module Assembly: Figure 3.33. Cellular Modem Module W11 and W32 Single Antenna Modules Assembly: W12 Dual Antenna Modules RuggedCom® RuggedBackbone™ RX1510 Installation Guide Rev 104... - Page 33 6. Flip the cage down and slide the silver catch up away from the antenna connector end of the module. 7. Replace the back of the module and secure the back of the module with the four screws removed earlier. 8. Re-install the module in the RX1510. RuggedCom® RuggedBackbone™ RX1510 Installation Guide Rev 104...
-
Page 34: Ape: Application Processing Engine
The APE supports any x86-compatible operating system. The following operating systems have been tested and confirmed to work with the APE module: • Microsoft Windows Embedded Standard 7 • Debian GNU/Linux 6 • Ubuntu 11.04 • Linux Mint 10 • OpenSuse 11.4 RuggedCom® RuggedBackbone™ RX1510 Installation Guide Rev 104... -
Page 35: Secondary Network Interface
ROX™ as can be done with any other switch port. For example, if the APE is Line Module 2 (LM2), then setting the lm2/1 pvid parameter to 10 places the APE secondary network interface connection on VLAN 10. RuggedCom® RuggedBackbone™ RX1510 Installation Guide Rev 104... -
Page 36: Installing An Operating System
Exit Saving Changes. The APE restarts and boots from the internal drive. It is also possible to run a live operating system from the USB device itself. However, this may result in slower overall performance of the operating system. RuggedCom® RuggedBackbone™ RX1510 Installation Guide Rev 104... -
Page 37: The Ape Bios
Indicates read and write Disk LED Green, steady or blinking. activity to the solid state drive. Ethernet Port LED Green, steady or blinking. Indicates incoming and outgoing network activity. Table 3.13. APE Module LED Indicators RuggedCom® RuggedBackbone™ RX1510 Installation Guide Rev 104... -
Page 38: Faqs
IP address of the ROX™ VLAN. Can I use the APE module as a DHCP server or a DNS server? Yes. The APE module supports any x86-compatible operating system and the services offered by the system. RuggedCom® RuggedBackbone™ RX1510 Installation Guide Rev 104... -
Page 39: Technical Specifications
Auto-negotiating Duplex FDX / HDX Auto-negotiating Cable-Type > Category 5 Shielded/Unshielded Wiring Standard TIA/EIA T568A/B Auto-Crossover, Auto-Polarity Max Distance 100 m Connector RJ45 Isolation 1.5kV RMS 1-minute Table 4.3. Copper Ethernet Port Specifications RuggedCom® RuggedBackbone™ RX1510 Installation Guide Rev 104... -
Page 40: Fiber Ethernet Port Specifications
Ethernet modules available for the RX1510. The specifications are organized by order code. Module order codes are contained within each unit when it is assembled and configured at the factory. Consult the RuggedCom ROX™ User Guide for help in obtaining the factory configuration data. -
Page 41: Gigabit Ethernet (1Gbps) Optical Specifications
Notes: 1. Maximum segment length is greatly dependent on factors such as fiber quality, and the number of patches and splices. Please consult RuggedCom sales associates when determining maximum segment distances. 2. All optical power numbers are listed as dBm averages. -
Page 42: Emi And Environmental Type Tests
D.C. Power ports 1.5kVDC A.C. Power ports 2kVAC Signal ports 5kV (Fail-Safe Relay output) IEC 60255-5 H.V. Impulse D.C. Power ports A.C. Power ports RuggedCom-specified severity levels Table 5.1. IEC 61850-3 EMI Type Tests RuggedCom® RuggedBackbone™ RX1510 Installation Guide Rev 104... -
Page 43: Ieee 1613 (C37.90.X) Emi Immunity Type Tests
IEC 60068-2-30 Humidity (Damp Heat, Cyclic) Test Db 95% (non-condensing), 55°C , 6 cycles IEC 60255-21-1 Vibration 2g @ (10 - 150) Hz IEC 60255-21-2 Shock 30g @ 11mS Table 5.3. Environmental Type Tests RuggedCom® RuggedBackbone™ RX1510 Installation Guide Rev 104... -
Page 44: Agency Approvals
FCC Part 15, Class A CISPR EN55022, Class A FDA/CDRH 21 CFR Chapter 1, Subchapter J Laser Eye Safety Designed and manufactured using an ISO9001:2008 ISO9001: 2008 certified quality program Table 6.1. Agency Approvals RuggedCom® RuggedBackbone™ RX1510 Installation Guide Rev 104... -
Page 45: Warranty
7. Warranty 7. Warranty RuggedCom warrants this product for a period of five (5) years from the date of purchase. This product contains no user-serviceable parts. Attempted service by unauthorized personnel shall render all warranties null and void. For warranty details, visit www.RuggedCom.com...
Need help?
Do you have a question about the RuggedBackbone RX1510 and is the answer not in the manual?
Questions and answers