Table of Contents
Advertisement
Advertisement
Table of Contents

Related Manuals for DCS WO-227SS


Summary of Contents for DCS WO-227SS
-
Page 1: Wall Oven
WALL OVEN TECHNICAL SERVICE GUIDE Models: WO-227SS WO-127SS WO-227PL WO-127PL WO-227GN WO-127GN WO-227BL WO-127BL WO-227WT WO-127WT WO-227BK WO-127BK WO-230SS WO-130SS WO-230PL WO-130PL WO-230GN WO-130GN WO-230BL WO-130BL WO-230WT WO-130WT WO-230BK WO-130BK... - Page 2 T o Ou r Valued Se rvice Pa rtne rs DCS is a leading manufacturer of premium quality cooking and speciality appliances for both residential and professional use. We are proud of our reputation for quality and our commitment to customer satisfaction.
-
Page 3: Table Of Contents
T able Of Contents SAFETY PRACTICES & PRECAUTIONS ................3 SPECIFICATIONS ..........................4-7 PRODUCT IDENTIFICATION ......................8 PARTS IDENTIFICATION ECO Failure Codes.........................9 Oven Can Assembly ........................10 Oven Can Parts List ........................11 Oven Door Assembly........................12 Oven Door Parts List ......................13-15 Display Assembly ...........................16 Display Parts List...........................17 Upper Oven Assembly .........................18 Upper Oven Parts List.........................19 Lower Oven Assembly.........................20... -
Page 4: Safety Practices & Precautions
Electrical requirements: 240V 35amp (27 & 30 single oven) and 50amp for (227 & 230 double oven). Hard wire should be use. When properly cared for, your new DCS appliance has been designed to be safe,and reliable.When using this restaurant caliber appliance, use it with extreme care, as this type appliance provides intense heat and can increase the accident potential. -
Page 5: Specifications
Specifications / Dimensions WO-127 27” Single Wall Oven Front Side 25-1/2" 26-7/8" 23-7/8" 29-15/16" 29-3/8" Bottom Trim screws Interior Dimension = 16"H x 22"W x 18-5/8"D Rack Dimension = 21-3/8" W x 15"D WALL OVEN Cabinet Dimensions WALL OVEN 27" min. - Page 6 Specifications / Dimensions WO-227 27” Double Wall Oven Front Side 25-1/2" 26-7/8" 23-7/8" 54-15/16 " 54-3/16 " Interior Dimension = 16"H x 22"W x 18-5/8"D Bottom Trim screws Rack Dimension = 21-3/8"W x 15"D WALL OVEN WALL OVEN Cabinet Dimensions Cut Out Dimensions 27"...
- Page 7 Specifications / Dimensions WO-130 30” Single Wall Oven Front Side 25-1/2" 29-7/8" 23-7/8" 29-15/16" 29-3/8" Interior Dimension = 16"H x 25"W x 18-5/8"D Bottom Trim screws Rack Dimension = 24-3/8"W x 15"D WALL OVEN Cabinet Dimensions 30" WALL OVEN min. Cut Out Dimensions 28-1/2 "...
-
Page 8: Specifications
Specifications / Dimensions WO-230 30” Double Wall Oven Front Side 25-1/2" 29-7/8" 23-7/8" 54-15/16 " 54-3/16 " Bottom Trim screws Interior Dimension = 16"H x 25"W x 18-5/8"D Rack Dimension = 24-3/8"W x 15"D WALL OVEN WALL OVEN Cabinet Dimensions Cut Out Dimensions 30"... -
Page 9: Product Identification
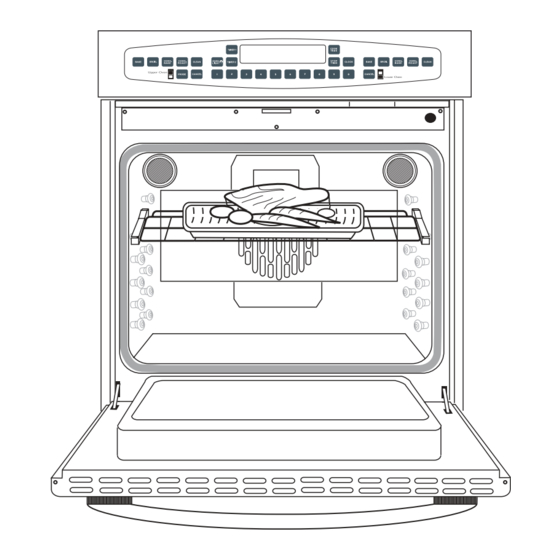
Product Identification ELECTRONIC OVEN CONTROL TOUCH PAD COOLING FUNCTION KEYS 12:30 VENTS CATALYST AIR DUCT DOOR LOCK* CONVECTION FAN (behind convection baffle) OVEN LIGHT CONCEALED SIX RACK POSITIONS: BROIL ELEMENT HIDDEN CONVECTION ELEMENT SERIAL # LOCATION HIDDEN FOOD BAKE PROBE ELEMENT (upper oven only) (OVEN FLOOR) -
Page 10: Parts Identification
Pa rts Identification EOC FAILURE CODES All failure modes give a visual and audible alarm. Failure modes can be canceled, but will return after the appropriate debounce time if the error condition still exists. —F7— ALARM A shorted key for 32 seconds in a row will activate a “CANCEL” feature in both ovens.This applies to all keys, including CANCEL. -
Page 11: Oven Can Assembly
Pa rts List Oven Can Assembly... -
Page 12: Oven Can Parts List
Pa rts List Oven Can ITEM DESCRIPTION 127/227 PART NO. 130/230 PART NO. RACK ASSEMBLY 96125 96204 RACK ROLLER HORIZONTAL 14197-01 14197-01 NUT, ROLLER 15021-04 CONVECTION BAFFLE W/A PORC. 96150-PC 96171-PC CONVECTION ELEMENT 16256 16256-02 SCREWS (2) 15001-23 CONVECTION MOTOR BLADE 16130 BAFFLE SCREWS (4) 15001-23... -
Page 13: Oven Door Assembly
Pa rts List Oven Doo r Assembly 14 13... -
Page 14: Oven Door Parts List
Pa rts List Oven Doo r ITEM DESCRIPTION 127/227 PART NO. 130/230 PART NO. DOOR SEAL 96068 96166 INNER DOOR GLASS 14193-01 14192-02 DOOR SEAL CHANNEL 96073 DOOR LINER W/ASSEMBLY 96118-PC 96213-PC HINGE TOP BRACKET 96001 DOOR INSULATION COVER 96070 96192 GLASS SPACER 96071... - Page 15 Pa rts List Oven Doo r ITEM DESCRIPTION 127/227 PART NO. 130/230 PART NO. DOOR SKIN ASSEMBLIES 27” WO EURO STYLE HANDLE: DOOR SKIN ASSEMBLY S/S NO LOGO 96231-01 DOOR SKIN ASSEMBLY S/S W/ LOGO 96231-02 DOOR SKIN ASSEMBLY WHITE NO LOGO 96231-06 DOOR SKIN ASSEMBLY WHITE W/ LOGO 96231-05...
- Page 16 Pa rts List Oven Doo r ITEM DESCRIPTION 127/227 PART NO. 130/230 PART NO. DOOR SKIN ASSEMBLIES 30” WO PRO STYLE HANDLE: DOOR SKIN ASSEMBLY S/S NO LOGO 96293-25 DOOR SKIN ASSEMBLY S/S W/ LOGO 96293-26 DOOR SKIN ASSEMBLY WHITE NO LOGO 96293-28 DOOR SKIN ASSEMBLY WHITE W/ LOGO 96293-27...
-
Page 17: Display Assembly
Pa rts List Display Assembly... -
Page 18: Display Parts List
Pa rts List Display ITEM DESCRIPTION 127/227 PART NO. 130/230 PART NO. CONTROL COVER FRONT 96097-PA 96200-01-PA CONTROL COVER REAR 96201 96201 CONTROL PANEL SKIN BLACK 96116-04-PA 96205-04-PA CONTROL PANEL SKIN GREEN 96116-06-PA 96205-06-PA CONTROL PANEL SKIN PLATINUM 96116-07-PA 96205-07-PA CONTROL PANEL SKIN WHITE 96116-03-PA 96205-03-PA... -
Page 19: Upper Oven Assembly
Pa rts List Uppe r Oven Assembly... -
Page 20: Upper Oven Parts List
Pa rts List Uppe r Oven ITEM DESCRIPTION 127/227 PART NO. 130/230 PART NO. OUTER AIR JACKET TOP 96008 96170 AIR DUCT 96049 96181 LATCH COVER TOP 96132 96188 CATALYST DUCT W/ASSEMBLY 96114 BLOWER MOTOR 16258 BLOWER THERMOSTAT 16255 BLOWER MOTOR BRACKET 96134 CATALYST DUCT BRACKET 96133... -
Page 21: Lower Oven Assembly
Pa rts List Lowe r Oven Assembly... -
Page 22: Lower Oven Parts List
Pa rts List Lowe r Oven ITEM DESCRIPTION 127/227 PART NO. 130/230 PART NO. CATALYST DUCT W/ASSEMBLY 96114 CATALYST DUCT BRACKET 96133 BLOWER THERMOSTAT 16255 BLOWER MOTOR 16258 BLOWER MOTOR BRACKET 96134 LATCH RETAINER 96083 LATCH 16247 LATCH MOUNT 96082 AIR DUCT 96049 96181... -
Page 23: Bake Parts List / Assembly
Pa rts List / Assembly Bake ITEM DESCRIPTION 127/227 PART NO. 130/230 PART NO. ELEMENT MOUNTING BRACKET 96060 96202 BAKE BOX REAR TOP 96056-02 BAKE ELEMENT BRACKET REAR 96023 BAKE BOX REAR BOTTOM 96056-01 BAKE ELEMENT BRACKET WELDMENT 96110-1 BAKE ELEMENT HOLDER 96022 BAKE ELEMENT 16257... -
Page 24: Hardware Parts List
Fastene r Pa rt List LOCATION DESCRIPTION PART NO. OUTSIDE AIR JACKET SM 10 X 1/2 SCREW 15001-19 REAR AIR JACKET SM 10 X 1/2SCREW (MIDDLE) (2) 15001-19 INSIDE/LOWER AIR JACKET SM 10 X 1/2 SCREW 15001-19 HINGE POCKET SM 10 X 1/2 SCREW 15001-19 AIR JACKET SIDES/BTM SIDES (4) ACROSS BTM (3) - Page 25 Fastene r Pa rt List LOCATION DESCRIPTION PART NO. CONTROL BOX SIDE MS 10-24 X 1/2 SCREW 15001-23 CONTROL BOX BOTTOM SM 10 X 1/2 SCREW 15001-19 TERMINAL BOX SMS 8-32 1/2 15001-46 T-BLOCK SMS 8-32 1/2 15001-4 MAIN/LO RELAY BOARD SM 10 X 1/2 15001-04 RELAY SPDT...
-
Page 26: Operating Instructions
Ope rating Inst ructions THE OVEN DISPLAY • The clock digits and functions are on the left side of the oven display and are in blue. • The upper oven temperature digits and heating functions are in the middle of the display and are in red (on double ovens). -
Page 27: Convection Bake
Ope rating Inst ructions NOTE: When baking if the oven door is open, the oven will not heat.The word on may appear in the display, but this only indicates the oven is below temperature, and will resume normal operation when the door is closed. You may BAKE, BROIL, CONVECTION BAKE , or CONVECTION ROAST in both ovens at the same time. -
Page 28: Convection Roast
Ope rating Inst ructions 2) CONV BAKE, PREHEAT and ON will be displayed. The actual temperature in the oven will be displayed until it reaches the set temperature. When it reaches it’s set temperature, it will chime once and the words on and preheat will go out.The oven is now ready to cook. The word ON will be displayed whenever the oven requires more heat to stay at it’s set temperature. -
Page 29: Setting Broil
Ope rating Inst ructions NOTE: During convection roast, if the oven door is open the oven will not heat.The word on may appear in the display, but this only indicates the oven is below temperature, and will resume normal operation when the door is closed. You may bake, broil, convection bake, or convection roast in both ovens at the same time. -
Page 30: Setting Timers
Ope rating Inst ructions TO SET TIMER 1 OR TIMER 2 NOTE: Timer 1 and Timer 2 these timers DO NOT turn the oven on and off, they are simply timers.Their function is to alert you that the specified time has been reached. -
Page 31: Timed Cooking
Ope rating Inst ructions 3) About 5 seconds after inserting the probe’s plug into the oven receptacle the flashing word Probe will show in the display along with rapid beeping. Location for the Press the probe key and enter a probe cooking plug end of food temperature between 100... -
Page 32: Timed Cooking
Ope rating Inst ructions 1) To set the oven to cook a specific length of time press cook time. The oven will display COOK TIME U for upper or L for lower oven. Set the cook time by pressing the number keys. You may enter cooking times from 5 minutes up to 11 hours and 55 minutes.The display will then read TIMED U or L OVEN. -
Page 33: Oven Calibration
Ope rating Inst ructions USER OPTION OVEN CALIBRATION This oven is normally calibrated with a 15 F offset. That is, the oven is intentionally set to operate 15 F below normal. When operating the oven at 350 F in bake, the average temperature will be F. -
Page 34: Element Removal / Convection Motor
Element Removal / Component Access CONVECTION MOTOR NOTE: To replace the convection motor follow steps for convection element replacement page 40. STEP 1 Remove the four (4) baffle screws securing the convection pad cover to the liner. Pull motor assembly forward to gain access to the wires. -
Page 35: Component Access
Component Access REAR COMPONENTS NOTE: Power to the oven must be turned off before servicing the oven. STEP 1 Using an oven dolly, pull the oven from its cutout. With a 5/16” socket, remove the eleven (11) screws securing the cover to the oven. STEP 2 You will now have access to Blower Motor, Blower Thermostat, High Temperature Cut-out and Bake Elements (figs 07 &... -
Page 36: Blower Motor / Thermostat
Component Access BLOWER MOTOR AND BLOWER THERMOSTAT REMOVAL STEP 1 With a 5/16” socket remove the two (2) screws securing the blower motor assembly to the oven (fig.22). Pull the blower assembly towards you, then disconnect wires from motor. STEP 2 Carefully remove blower thermostat from blower motor assembly (fig.12). -
Page 37: High Temperature Cut-Out
Component Access HIGH TEMPERATURE CUT-OUT STEP 1 The high temperature cut-out is held in place by the cut-out bracket. The bracket is secured to the oven by two (2) screws, disconnect wires from terminals. STEP 2 With a 5/16” socket remove the two (2) screws. FIG.13 FIG.14 FIG.15... -
Page 38: Oven Control Removal
Oven Cont rol Removal ELECTRONIC OVEN CONTROL Be sure the Wall Oven is cool and no food items or trays are in the oven. NOTE: Make sure the Wall Oven is unplugged from the electrical supply before servicing. STEP 1 Remove upper oven door. -
Page 39: Oven Control Removal
Oven Cont rol Removal ELECTRONIC OVEN CONTROL (CONTINUED) STEP 3 The control cover assembly can now be removed. Care must be taken when removing since molex plugs are still attached. Remove molex plugs. STEP 4 Place a drop cloth on a flat surface, then lay the control panel assembly on its face to remove electronic oven control. -
Page 40: Latch Removal
Latch Removal UPPER AND LOWER STEP 1 Remove oven door. With a phillips screwdriver remove the five (5) screws securing the latch cover bottom and top (figs.21 & 22). STEP 2 Latch assembly can now be pulled forward to access the rear of latch assembly (fig.23). NOTE: It is always wise to transfer wires while the original latch is still in place. -
Page 41: Element Replacement
Element Replacement CONVECTION ELEMENT STEP 1 Remove oven door. Remove the four (4) screws securing the convection baffle to the oven liner (fig.24). STEP 2 Remove the two (2) screws securing the element to the liner (figs.25 & 26). Pull element forward to reveal terminals. -
Page 42: Current Flow & Operation
Cu r rent Flow And Ope ration CURRENT FLOW ELEMENTS NOTE: 240 volts flow to each element. Upper Oven Bake Element - 2450 Watts, 10.2 Amps. Upper Oven Convection Element - 1900 Watts, 7.9 Amps. Upper Oven Broil Element (outer) - 1650 Watts, 6.88 Amps. Upper Oven Broil Element (inner) - 1850 Watts, 7.71 Amps. -
Page 43: Lower Oven
Cu r rent Flow And Ope ration UPPER OVEN CONVECTION ROAST • Relay switch E23 to E8 closes in temperatures below 200 degrees, and will remain close for 12 seconds out of every 60 seconds. In temperatures above 200 degrees it remains closed until preheat is complete. -
Page 44: Lower Oven
Cu r rent Flow And Ope ration LOWER OVEN CONVECTION BAKE • Relay switch E13 to the normally open switch (Relay SPDT) closes in preheat and remains closed for 12 seconds out of every 60 seconds during temperatures less than 200 degrees. During preheat temperatures above 200 degrees, relay switch E23 to the normally open switch (Relay SPDT), remains closed for 20 seconds out of every 60 seconds. -
Page 45: Warranty
All repair labor and parts found to be defective due to materials or workmanship for one full year from date of purchase. Service must be provided by Authorized Factory Agent during normal working hours. DCS WILL NOT PAY FOR • Installation or start-up. - Page 46 As product improvement is an ongoing process at DCS, we reserve the right to change specifications or design without notice. 5800 Skylab Road, Huntington Beach, CA. 92647 Tel: (714) 372-7000 Part No. 10930 Rev. B Fax: (714) 372-7004 Parts/Customer Service (888) 281-5698 Litho in USA 01/2002 www.dcsappliances.com...
Need help?
Do you have a question about the WO-227SS and is the answer not in the manual?
Questions and answers