INSTEON LampLinc 2457D2 (Dual-Band) Owner's Manual
Plug-in lamp dimmer module, 2-pin dual-band & single-band
Hide thumbs
Also See for Insteon LampLinc 2457D2 (Dual-Band):
- Owner's manual (33 pages) ,
- Quick start manual (8 pages) ,
- Quick start manual (8 pages)

Related Manuals for INSTEON Insteon LampLinc 2457D2 (Dual-Band)


Summary of Contents for INSTEON Insteon LampLinc 2457D2 (Dual-Band)
- Page 1 ™ LampLinc ® INSTEON Plug-In Lamp Dimmer Module, 2-Pin Model : 2457D2 (Dual-Band) 2457D2X (Single-Band)
-
Page 2: Table Of Contents
LampLinc Owner’s Manual TABLE OF CONTENTS ABOUT LAMPLINC............................3 Key LampLinc Features..........................3 What is Included with LampLinc ........................ 3 WHAT IS INSTEON?............................ 4 INSTALLATION............................4 Preparing to Install LampLinc........................4 Installing LampLinc............................ 5 USING LAMPLINC ............................5 Using the Buttons ............................5 Status LED and Beeper Activity ........................ -
Page 3: About Lamplinc
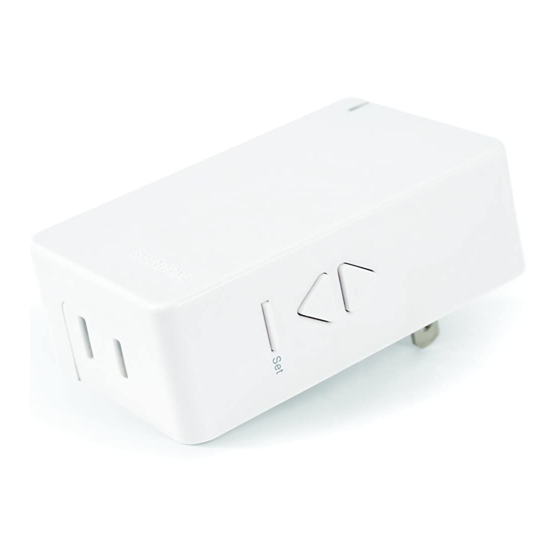
LampLinc Owner’s Manual ABOUT LAMPLINC LampLinc presents you with an elegant and stylish way to dim and remotely control any lamp or other plug-in device in your home at the touch of a button. Send commands to LampLinc from an INSTEON Controller. -
Page 4: What Is Insteon
LampLinc Owner’s Manual WHAT IS INSTEON? Since its inception in 2005, INSTEON has become a best-selling home-control networking technology, offering more reliability and flexibility than any other home management system on the market. INSTEON systems are simple, reliable, and affordable. Simple, because each device takes mere minutes to install. Reliable, because every INSTEON device works as a network repeater, ensuring your commands will not be lost. -
Page 5: Installing Lamplinc
LampLinc Owner’s Manual Installing LampLinc Plug the lamp/device (the load) you want to control into the outlet on LampLinc Plug LampLinc into an unswitched wall outlet The load may turn on If the LampLinc Status LED is solid green, installation is complete If the Status LED is solid red, tap the Up button The LampLinc Status LED will turn on solid green and the load will turn on If the load does not turn on, turn it on manually using the switch on the load itself... -
Page 6: On-Levels And Ramp Rates
LampLinc Owner’s Manual ON-LEVELS AND RAMP RATES The On-Level is the brightness that the load will go to when you turn it on. The On-Level is adjustable from off to 100% brightness. The default is 100%. The Ramp Rate is the amount of time it will take the load to go from full-off to full-on or from full-on to full- off. -
Page 7: Setting The Ramp Rate
LampLinc Owner’s Manual Setting the Ramp Rate NOTE: Setting the Ramp Rate does not change/affect the On-Level brightness. 1) Setting the Ramp Rate is done using the brightness level as an indicator for how fast LampLinc should ramp. Use the Up and Down buttons on LampLinc to set the brightness to a brighter level for a faster Ramp Rate or dimmer for a slower Ramp Rate. -
Page 8: Controlling Insteon Responders From Lamplinc
LampLinc Owner’s Manual CONTROLLING INSTEON RESPONDERS FROM LAMPLINC Linking LampLinc to an INSTEON Responder To use LampLinc as an INSTEON Controller, follow these steps to Link LampLinc and an INSTEON Responder (the device you wish to control with LampLinc) together. Refer to the Responder’s Owner’s Manual for detailed instructions on how to properly install and Link it to LampLinc. -
Page 9: Controlling Lamplinc From An Insteon Controller
LampLinc Owner’s Manual CONTROLLING LAMPLINC FROM AN INSTEON CONTROLLER Linking an INSTEON Controller to LampLinc To use LampLinc as an INSTEON Responder, follow these steps to Link LampLinc and a Controller together. Refer to the Controller’s Owner’s Manual for detailed instructions on how to properly install and Link it to LampLinc. -
Page 10: Advanced Features
LampLinc Owner’s Manual ADVANCED FEATURES Using LampLinc as a Phase Bridger (for LampLinc (Dual-Band) only) Use the following procedure to test that the phases have been bridged: 1) Install additional dual-band INSTEON devices if they aren’t already installed 2) Start Phase Bridging Detection Mode by tapping the Set button on LampLinc four times quickly LampLinc will begin beeping continuously and the Status LED... -
Page 11: Multi-Linking And Multi-Unlinking
LampLinc Owner’s Manual Multi-Linking and Multi-Unlinking Multi-Linking Multi-Linking Mode allows you to Link multiple Responders to a single Controller and quickly create an INSTEON scene. Once the Controller is in Multi-Linking Mode, you can Link any number of Responders, one right after the other. The following will work for the most common INSTEON devices: 1) Set each of the Responders to the state you wish to activate from the Controller •... -
Page 12: Cross-Linking Insteon Devices
LampLinc Owner’s Manual Cross-Linking INSTEON Devices Cross-Linking Two INSTEON Devices Cross-Linking devices allow you to track the on/off status of the load on all Linked INSTEON Responders. For this example we will use a primary device controlling the load and one secondary device in a virtual 3-way. They will be referred to as: the Primary Device (the device wired to the load or load-controlling) and the Secondary Device (the additional device in the circuit). -
Page 13: Restoring Power To Lamplinc
LampLinc Owner’s Manual Restoring Power to LampLinc LampLinc stores all of its settings, such as Links to other INSTEON devices, On-Levels/Ramp Rates, etc., with non-volatile memory. Because settings are saved in this non-volatile memory, they will not be lost in the event of a power failure. -
Page 14: X10 Programming Options
LampLinc Owner’s Manual X10 PROGRAMMING OPTIONS LampLinc is X10 ready, meaning that it can respond to X10 commands from X10 controllers and send commands to X10 devices. However, to operate LampLinc in X10 mode, you must first set up an X10 address. -
Page 15: About Insteon
INSTEON signal improves. If it does, then you can plug in filters that will permanently fix the problem. ADDITIONAL RESOURCES Find home automation solutions, helpful tips, interactive demos, videos, user forums, and more at the Smarthome Learning Center: www.smarthome.com/learningcenter.html Page 15 of 19... -
Page 16: Troubleshooting
LampLinc Owner’s Manual TROUBLESHOOTING Problem Possible Cause Solution The Status LED on LampLinc is not LampLinc may not be Make sure LampLinc is not plugged into a turning on and won’t getting power. switched outlet that is turned off. control the load. The Controller or Responder might have been reset without... - Page 17 LampLinc Owner’s Manual Problem Possible Cause Solution LampLinc can turn off a Responder, but Re-Link the Responder to LampLinc, while the nothing happens when The Responder may be Responder’s load is on. See the Responder’s I send an ON Linked at its off state. Owner’s Manual for more detailed Linking command from instructions.
-
Page 18: Specifications, Certification, And Warranty
LampLinc Owner’s Manual SPECIFICATIONS, CERTIFICATION, AND WARRANTY Specifications View specifications for LampLinc – INSTEON Plug-In Lamp Dimmer Module (Dual-Band) (#2457D2) at: www.smarthome.com/2457D2.html View specifications for LampLinc – INSTEON Plug-In Lamp Dimmer Module (#2457D2X) at: www.smarthome.com/2457D2X.html Certification This product has been thoroughly tested by ITS ETL SEMKO, a nationally recognized independent third- party testing laboratory. -
Page 19: Limited Warranty
INSTEON Technology Patent U.S Patent No. 7,345,998, International patents pending © Copyright 2011 Smarthome, 16542 Millikan Ave., Irvine, CA 92606, 800-762-7845, www.smarthome.com Rev 05-02-2011 Page 19 of 19...
Need help?
Do you have a question about the Insteon LampLinc 2457D2 (Dual-Band) and is the answer not in the manual?
Questions and answers