
Related Manuals for INSTEON 2452-222


Summary of Contents for INSTEON 2452-222
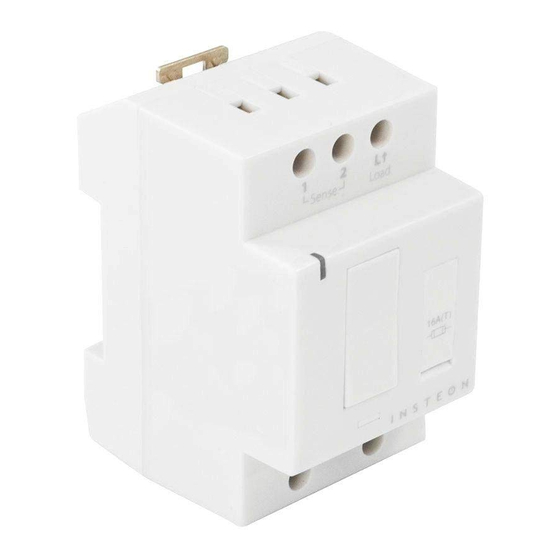
- Page 1 DIN Rail Dimmer Owner’s Manual 2452-222 (US) 2452-422 (EU) 2452-522 (AUS/NZ) Page 1 of 19 2452-222/2452-422/2452-522 - Rev: 1/21/2014 7:50 AM...
-
Page 2: Table Of Contents
Change LED Brightness (or turn it off) ........................8 Error Blink ..................................8 INSTEON Setup ................................8 INSTEON Controllers, Responders and Links ......................8 Make DIN Rail a Responder ............................9 Make DIN Rail a Controller ............................9 Groups ..................................9 Scenes .................................. -
Page 3: About Din Rail Dimmer
To minimize heat buildup, ensure the area surrounding this product is as clear of clutter as possible. Each INSTEON product is assigned a unique INSTEON I.D., which is printed on the product’s label. To reduce the risk of overheating and possible damage to other equipment, do not use this product to control loads in excess of the specified maximum(s) or, install in locations with electricity specifications which are outside of the product’s... -
Page 4: Identify Switch Type
4) Use a voltage meter to identify the fixture’s line, load and neutral wires, then turn off breaker/fuse again 5) For reference, write down the INSTEON I.D. (on the side of the module) and the load it is controlling 6) Snap module onto DIN rail. (If installing next to another module, allow 3/4" (2 cm) between modules for heat dissipation.) -
Page 5: Switch Operation Mode
DIN Rail module will beep LED will start double-blinking red 6) Press and hold set button until it double-beeps LED will stop blinking 3-way toggle mode is now disabled (or re-enabled) Page 5 of 19 2452-222/2452-422/2452-522 - Rev: 1/21/2014 7:50 AM... -
Page 6: Local Control Operations
1) Press and hold set button until it beeps LED will start blinking green 2) Press and hold set button until it beeps a second time LED will start blinking red Page 6 of 19 2452-222/2452-422/2452-522 - Rev: 1/21/2014 7:50 AM... -
Page 7: Local Ramp Rate
DIN Rail off. When you turn it on again it will return to the last used dim level. 1) Press and hold set button until it beeps LED will start blinking green Page 7 of 19 2452-222/2452-422/2452-522 - Rev: 1/21/2014 7:50 AM... -
Page 8: Change Led Brightness (Or Turn It Off)
INSTEON Controllers, Responders and Links Let’s define a few terms. • The INSTEON “transmitter” is called a controller • The INSTEON “receiver” is called a responder Note: Some devices are controllers only (e.g., motion sensors, handheld remotes), some are responders only (e.g., FanLinc), and some can be controllers and responders (e.g., switches and dimmers). -
Page 9: Make Din Rail A Responder
The link just created is one way. See “Make DIN Rail a Controller” to add another link to keep the two products in synch, or see “Groups” section. Make DIN Rail a Controller Use DIN Rail to control other INSTEON devices: Press and hold DIN Rail set button until it beeps DIN Rail LED will start blinking green... -
Page 10: Make Din Rail A Controller Of Multiple Responders
DIN Rail will no longer respond Remove DIN Rail as a Controller of Multiple Responders (Unlink) 1) Press and hold DIN Rail set button until it beeps DIN Rail LED will start blinking green Page 10 of 19 2452-222/2452-422/2452-522 - Rev: 1/21/2014 7:50 AM... -
Page 11: Factory Reset
3) Send the X10 address 3 times (with or without commands) DIN Rail will double-beep and its LED will stop blinking 4) Test by sending X10 on and off commands Load will not respond Page 11 of 19 2452-222/2452-422/2452-522 - Rev: 1/21/2014 7:50 AM... -
Page 12: Specifications
*Range may vary due to local interference Phase bridge detect beacon INSTEON device category 0x01 dimmable lighting control (all frequencies) 0x34 INSTEON device subcategory 0x36 AUS/NZ 0x37 X10 address 1 optional (comes unassigned) Page 12 of 19 2452-222/2452-422/2452-522 - Rev: 1/21/2014 7:50 AM... - Page 13 Incandescent 300 watts (@ 240VAC) Maximum load 300 watts (@ 120VAC) Minimum load 5 watts 16A, 5x20mm slow blow/burn glass fuse User replaceable fuse 2A, 5x20mm slow blow/burn glass fuse Page 13 of 19 2452-222/2452-422/2452-522 - Rev: 1/21/2014 7:50 AM...
- Page 14 < 1 watt Safety approval(s) ETL, CE, C-Tick FCC 15.107, 15.109, 15.249 RSS 210 EN 300 220-2, 301 489-3 Certifications AS/NZS 4268, CISPR 22 UL 1472 IEC 60669-2-1 FCC ID SBPDR01 Page 14 of 19 2452-222/2452-422/2452-522 - Rev: 1/21/2014 7:50 AM...
-
Page 15: Troubleshooting
INSTEON on-level at a load with another high brightness and an X10 controller, the load will Remove the X10 address from the INSTEON controller Primary or scene address on- turn on, then back off Level at a low brightness... - Page 16 DIN Rail, it takes a long scene responder that is not If the INSTEON device is still available, remove it from time for other INSTEON powered on DIN Rail and then re-add it devices it is controlling to Perform a factory reset respond The bulb filaments are vibrating.
-
Page 17: Phase Bridge Detect Beacon/Rf Range Test
2- and 3- phase circuits. The phase bridge detect beacon can also be used as an RF range test to see if your devices are within communication range. You will need at least one other INSTEON dual-band device installed. -
Page 18: Certification And Warranty
3) Hazardous Substance Directive 2005/95/EC Technical data and copies of the original Declaration of Conformity are available and can be obtained from INSTEON; 16542 Millikan Ave, Irvine, CA, USA. User Information for Consumer Products Covered by EU Directive 2002/96/EC on Waste Electric and Electronic Equipment (WEEE) This document contains important information for users with regards to the proper disposal and recycling of INSTEON products. -
Page 19: Limitations
For repair or replacement during the warranty period, call INSTEON at 866-243-8022 with the Model # and Revision # of the device to receive an RMA# and send the product, along with all other required materials to:...