Table of Contents
Advertisement
Quick Links
Download this manual
See also:
Owner's Manual
Advertisement
Table of Contents

Related Manuals for moon Evolution 700i Series


Summary of Contents for moon Evolution 700i Series
- Page 1 Owner’s Manual MOON Evolution Series 700i Reference Dual-Mono Integrated Amplifier...
-
Page 2: Important Safety Instructions
MOON 700i Dual-Mono Integrated Amplifier Important Safety Instructions Read these instructions. Keep these instructions. Heed all warnings. Follow all instructions. Do not use this apparatus near water. Clean only with a dry cloth. Do not block ventilation openings. Install in accordance with the manufacturer’s instructions. - Page 3 To prevent shock hazard, all three connections must ALWAYS be used. Connect the MOON 700i only to an AC source of the proper voltage; Both the shipping box and rear panel serial number label will indicate the correct voltage. Use of any other voltage will likely damage the unit and void the warranty AC extension cords are NOT recommended for use with this product.
-
Page 4: Table Of Contents
MOON 700i Dual-Mono Integrated Amplifier Table of Contents Congratulations ..........5 Unpacking............5 Introduction ............. 6 Installation & Placement ........6 Front Panel Controls ........7 Software Setup ..........9 Rear Panel Connections ........13 SimLink™ ............14 Operating the 700i .........14 Remote Control Operation .......15... -
Page 5: Congratulations
Before setting up your new MOON 700i, we encourage you to please read this manual thoroughly to properly acquaint yourself with its features. We hope you enjoy listening to the MOON 700i dual-mono integrated amplifier as much as the pride we have taken in creating this fine audio product. We understand the power and emotion of music and build our products with the goal of faithfully capturing these elusive qualities. -
Page 6: Introduction
Installation & Placement The MOON 700i dual-mono integrated amplifier is very heavy. It requires reasonable ventilation to maintain an optimum and consistent operating temperature. Consequently, it should be placed in a location with empty space around it for proper heat dissipation. -
Page 7: Front Panel Controls
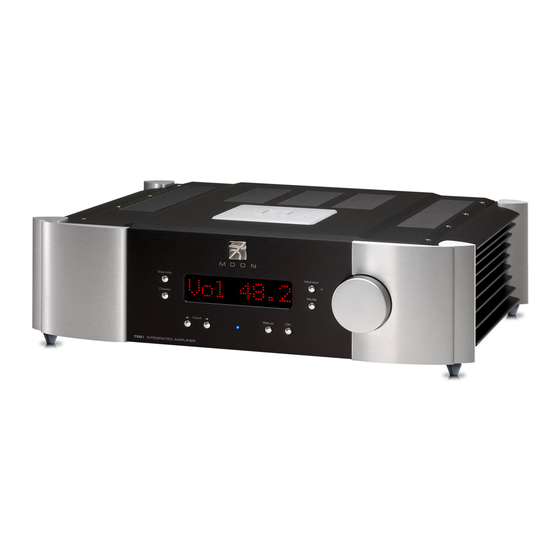
MOON 700i Dual-Mono Integrated Amplifier Front Panel Controls Figure 1: Front panel of MOON 700i dual-mono Integrated Amplifier The front panel will look similar to Figure 1 (above). The large display window normally indicates the current volume level and, whenever you change the input, it will briefly show the selected input label. On each side of the display window, are two (2) buttons. - Page 8 The next section, entitled “Software Setup”, explains their usage in detail. Software Setup The MOON 700i integrated amplifier includes powerful software that allows you to configure it to meet your specific needs. label For each of the five (5) inputs, you can assign a to replace the factory assigned name (i.e.
-
Page 9: Software Setup
MOON 700i Dual-Mono Integrated Amplifier Software Setup The MOON 700i integrated amplifier includes powerful software that allows you to configure it to meet your specific needs. label For each of the five (5) inputs, you can assign a to replace the factory assigned name (i.e. B1, S1, etc.), assign a... - Page 10 IR codes, or resetting the 700i back to factory default status (see the following examples). The MOON 700i is equipped with software that allows the MiND app to control various features of this preamplifier. With the MiND app you will be able to adjust the volume level, mute the output, place the preamplifier into ‘Standby’ mode and then place it back into operational mode.
- Page 11 Press the “Setup” button to exit from the Setup menu. The MOON 700i is equipped with a 12 Volt trigger output. When an input is assigned to the 12 Volt trigger, the device connected to the trigger will automatically start-up whenever you switch to that input. The default setting for all five inputs is on.
- Page 12 The MOON 700i is equipped with a rear mounted IR input for use with aftermarket wired infrared remote control receivers. In the event that you want control the MOON 700i with a universal remote control and NOT the one included (FRM-2), you can change the RC-5 remote control system codes.
-
Page 13: Rear Panel Connections
Figure 2: Rear panel of MOON 700i Integrated Amplifier The rear panel of the MOON 700i dual-mono integrated amplifier will look similar to Figure 2 (above). There are two rows of connectors; the top row contains one pair of heavy duty gold-plated speaker binding posts for each channel to connect to your loudspeakers. -
Page 14: Simlink
SimLink™ chain; no one particular component operates as the main communications controller. In the event that you are using your MOON 700i with an older MOON product such as a SuperNova, you will need to update the software of the older product to allow for complete SimLink™ functionality. Contact your retailer for further details. -
Page 15: Remote Control Operation
The MOON 700i Dual-Mono Integrated Amplifier uses the ‘FRM-3’ full function, all aluminum backlit remote control (figure 3). It operates on the Philips RC-5 communication protocol and is can be used with other MOON components such as CD Players, DAC’s, Integrated Amplifiers, as well as other Preamplifiers. -
Page 16: Troubleshooting
For example, when one conductor is carrying a signal of +10 Volts, the other will be carrying a signal of –10 Volts. When these two inverted signals on a balanced line are output from the MOON 700i, any noise picked up by the interconnect will be eliminated since a differential circuit amplifies only the difference between these two signals: Noise on a balanced interconnect will be equal on both conductors and therefore not be processed. -
Page 17: Specifications
Pin 1........ Ground Pin 2........ Positive Pin 3 ......Negative NOTE: In the event that you require the RS-232 codes for your MOON 700i, please contact Simaudio Ltd. directly by either email (service@simaudio.com) or by toll-free telephone (877-980-2400). Fuse Replacement: For the 120V version use a 6A fast blow (3AG size).
Need help?
Do you have a question about the Evolution 700i Series and is the answer not in the manual?
Questions and answers