Table of Contents
Advertisement
Quick Links
Download this manual
See also:
Owner's Manual
Advertisement
Table of Contents

Related Manuals for moon 850P


Summary of Contents for moon 850P
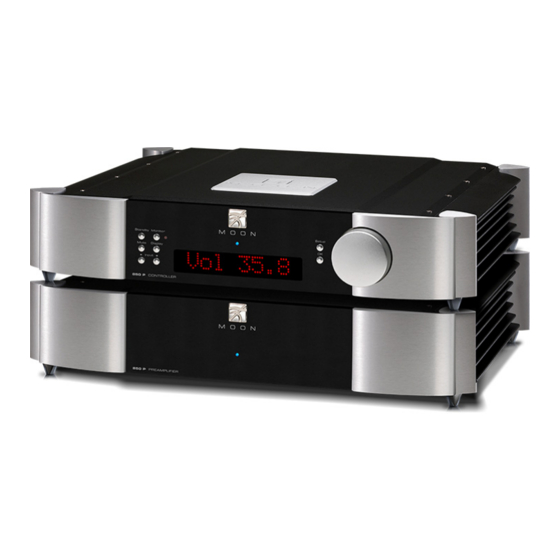
- Page 1 850P Evolution Series Reference Dual-Mono Preamplifier Owner’s Manual...
- Page 2 850P Evolution Series...
-
Page 3: Important Safety Instructions
Owner’s Manual Important Safety Instructions Read these instructions. receptacles, and the point where they exit from the apparatus. Unplug mains cord during Keep these instructions. transportation. Heed all warnings. 11. Only use attachments and accessories specified by Follow all instructions. the manufacturer. - Page 4 MOON 850P, immediately disconnect it from component. To completely disconnect this the AC mains and take it to your MOON dealer apparatus from the AC mains, disconnect the for a complete check-up. power supply cord plug from the AC receptacle.
-
Page 5: Table Of Contents
Owner’s Manual Table of Contents Introduction Unpacking Installation & Placement Connecting the 850P Preamplifier & Controller Front Panel Controls Software Setup Rear Panel Connections SimLink™ Operating the 850P Remote Control Operation Balanced Operation Specifications Quick Reference: Setup Menus Appendix www.simaudio.com Simaudio Ltd., 1345 Newton Road... -
Page 6: Introduction
MOON Evolution Series 850P will continue to improve during the first 400 hours components. of listening. This is the result of a “break-in” period required for the numerous high quality electronic parts M-Ray volume control circuit based on the R-2R resistor array configuration that uses thin film surface mount resistors with used throughout this preamplifier. -
Page 7: Unpacking
(USA and Canada only) Once the 850P is unpacked, inspect it thoroughly and report any damage to your dealer immediately. We suggest that you keep all of the original packaging, storing it in a safe, dry place in case you’re required to transport this product. -
Page 8: Connecting The 850P Preamplifier & Controller
Connecting the 850P Preamplifier & Controller Figure 1: Connecting the MOON 850P Preamplifier (bottom) and 850P Controller (top) There are three (3) connections that must be made between the MOON 850P Preamplifier’s chassis and its separate controller chassis as shown above in Figure 1. -
Page 9: Front Panel Controls
The “Standby” button disengages the input section with the option of turning off the display. There are from the rest of the 850P’s circuitry and turns off the three (3) different levels of brightness; The default is medium. Pressing the “Display” button once will digital display. -
Page 10: Software Setup
Series As well, you can assign any and all inputs to activate each of the 850P’s two 12 Volt triggers. Finally, there’s a The rotary “volume” control determines the gain facility to reset all software settings back to their factory setting, which ranges from ‘0.0dB’... - Page 11 Setup procedure and either 12. You can adjust the volume offset in either 0.1dB assign the 12 Volt trigger outputs or reset the 850P (slow rotation) or 1.0dB (faster rotation) increments back to factory default status (see the following to either +10.0dB by rotating the volume control...
- Page 12 As well, when you begin playing When “CUSTOM” appears in the display press the a music track from the MiND app, the 850P will “OK” button. The display will show automatically switch to the input configured for the “……………………………”...
- Page 13 “Setup” button and rotating the volume control until “IR CODE” appears in the display. If you want to control the MOON 850P using a wired aftermarket infrared remote control receiver with a Press “OK” and “DEFAULT” will appear in the universal remote control, you can disable the IR sensor display.
- Page 14 Trigger Output or configure more inputs (examples on previous pages). Rotate the volume control until “SURE ? Y” appears in the display. Reset the MOON 850P software settings back to their factory defaults: Press “OK” and “SAVED” will briefly appear in the display followed by “RESET”.
-
Page 15: Rear Panel Connections
Figure 3: Rear panel of the MOON 850P Preamplifier The rear panel of the MOON 850P dual-mono preamplifier will look similar to Figure 3 (above). There are two rows of connectors; the top row contains single-ended RCA inputs/outputs and the bottom row contains balanced XLR inputs/outputs, as well as the three input connections from the separate digital controller chassis. -
Page 16: Simlink
“Standby” mode along with the 850P. The same logic “POWER” to the ‘1’ (on) position to place your 850P in to applies when switching from “Standby” to active mode. standby mode. Next, briefly press the push button labeled “Standby”... -
Page 17: Remote Control Operation
To operate the 850P with this remote control, you must first press the AMP button located on the second row from the top. power button switches the 850P between ‘Standby’ and ‘On’ mode. - Page 18 MiND App on your Apple smart device (full list on the MiND page of our website) and select this system’s ZONE, the 180 MiND will turn on, as will the 750D, 850P and 870A; The 850P will automatically switch to the “MiND”...
-
Page 19: Balanced Operation
In figure 7 we have a 850P Preamplifier and a pair of 880M amplifiers connected together via their respective 12V triggers; The 12V trigger output on the 850P is connected to the 12V trigger input on the top 880M (using a 1/8”... -
Page 20: Specifications
Positive Pin 3 Negative NOTE: If you require the RS-232 codes for your 850P, please visit the "Contact Us" page and complete the "Information request" form on our website at www.simaudio.com. Fuse Replacement: For the 120V version use a 0.4A slow blow (5 x 20mm size).
Need help?
Do you have a question about the 850P and is the answer not in the manual?
Questions and answers