moon 350P Owner's Manual
Neo series
Hide thumbs
Also See for 350P:
- Owner's manual (16 pages) ,
- Owner's manual (16 pages) ,
- Owner's manual (20 pages)
Table of Contents
Advertisement
Quick Links
Advertisement
Table of Contents

Related Manuals for moon 350P


Summary of Contents for moon 350P
- Page 1 Owner’s Manual Series 350P Preamplifier...
-
Page 3: Important Safety Instructions
350P Preamplifier Important Safety Instructions Read these instructions. Keep these instructions. Heed all warnings. Follow all instructions. Do not use this apparatus near water. Clean only with a dry cloth. Do not block ventilation openings. Install in accordance with the manufacturer’s instructions. - Page 4 To prevent shock hazard, all three connections must ALWAYS be used. Connect the MOON 350P only to an AC source of the proper voltage; Both the shipping box and rear panel serial number label will indicate the correct voltage. Use of any other voltage will likely damage the unit and void the warranty AC extension cords are NOT recommended for use with this product.
-
Page 5: Table Of Contents
Optional Digital Inputs ........9 Optional Phono Section ........10 Rear Panel Connections ........12 Balanced Operation ........13 SimLink™ ............. 13 Operating the 350P ........14 Remote Operation .......... 15 Specifications ..........17 www.simaudio.com Simaudio Ltd., 1345 Newton Road... -
Page 6: Introduction
Your Nēo 350P Preamplifier incorporates many significant design features to achieve its “world-class” level of performance. This is an abbreviated list of the more important features: 7 line-level inputs (4 single-ended & 2 balanced) Fixed (single-ended) and Variable (balanced &... -
Page 7: Unpacking
350P from any potential damage during original packaging, storing it in a safe, dry place in transit. Please write the serial number of your new Simaudio Nēo 350P in the space provided below for future eference. Serial No.: ________________ Installation & Placement If you intend to use the Nēo 350P’s USB input... -
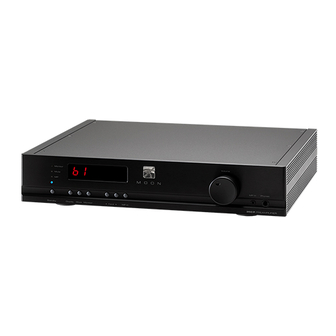
Page 8: Front Panel Controls
The follows going forward (►): blue indicator LED turns off when the 350P is in “Standby” mode. Basic Unit: “CD”, “A1”, “A2”, “A3”, “B1” and “B2”... -
Page 9: Optional Digital Inputs
TosLink digital output such as a satellite dish connect a USB flash drive or external hard drive to receiver; The “D2” and “D3” inputs are intended for the “D4” input. Figure 2: MOON 350P Optional Digital Inputs – connection examples ____________________________________________________________________________________... -
Page 10: Optional Phono Section
At the same time, the right side of the optional digital-to-analog circuit option inside the display window will initially show four dashes as Nēo 350P is capable of processing the following follows “----” which indicate that the 350P is in the sampling rates: 32.0kHz, 44.1kHz,... -
Page 11: Internal Settings
– one each for the left and right internal adjustments to the 350P phono module to channels. This is the result of the phono section’s achieve optimal sonic performance. -
Page 12: Rear Panel Connections
(with a 12V outputs are designated for output to a power trigger input) at the same time that the 350P is amplifier equipped with balanced inputs.The ‘FIX’ powered up. Next, there’s a full-function bi-... -
Page 13: Balanced Operation
MOON components. For example, switch to the input labeled ‘A1’. If your 350P if you were to connect the Nēo 260D to the 350P includes the “DAC” option, then the default input for via the SimLink™, pressing the (play) button on the MiND is the ‘D2”... -
Page 14: Operating The 350P
“POWER” to the illuminate, indicating that the 350P is now powered ‘1’ (on) position to place your 350P in to standby up and ready for use. mode. Next, briefly press the push button labeled On and Off Sequence To avoid having any annoying noises (ie. -
Page 15: Remote Control Operation
The MUTE button turns off the output volume. Pressing the “Mute” button a second time will reinstate the output volume level back to its current setting. NOTE: The buttons labelled ◄ BAL ► don’t affect the operation of the 350P. Figure 5: CRM-2... -
Page 16: Remote Operation
MiND page of our website) and select this system’s connected to a Nēo 350P Preamplifier via their ZONE, the 180 MiND will turn on, as will both 350P respective SimLink™ ports (using a 1/8” mini-jack and the 330A; The 350P will automatically switch cable), and the 350P connected to a 330A “MiND”... -
Page 17: Specifications
350P Preamplifier Specifications Configuration ..........Fully balanced differential, stereo Power Supply Transformers ......1 x 10VA (audio); 1 x 10VA (controller) Power Supply Capacitance ......26,400µF Balanced inputs (XLR) ........2 pairs Single-ended inputs (RCA) ......4 pairs Mini-jack input ..........1 (1/8”) Monitor Loop (RCA) ........ - Page 18 Jack......3.5mm microphone jack Input Impedance ..1kΩ Current Consumption ... 12mA NOTE: If you require the RS-232 codes for your Nēo 350P, please contact Simaudio Ltd. directly by either email (service@simaudio.com) or by toll-free telephone (877-980-2400). Fuse Replacement: For the 120V version use a 0.2A fast blow (5 x 20mm size).
Need help?
Do you have a question about the 350P and is the answer not in the manual?
Questions and answers