Advanced Bionics HARMONY User Manual
Sound processor hiresolution bionic ear system
Hide thumbs
Also See for HARMONY:
- Manual (5 pages) ,
- Troubleshooting (4 pages) ,
- Quick start manual (20 pages)
Table of Contents
Advertisement
Quick Links
Advertisement
Table of Contents
Troubleshooting

Related Manuals for Advanced Bionics HARMONY


Summary of Contents for Advanced Bionics HARMONY
- Page 1 USER GUIDE HARMONY ® By Advanced Bionics...
- Page 2 User Guide for the Auria Harmony Sound Processor ® ®...
- Page 3 -20° C and +55° C Fragile Do not get wet Type of Protection: BF Date of Manufacture Dispose of Properly EN60601-1 Classifi cation Information: Ordinary Construction Continuous Operation Internally Powered Equipment 2 User Guide for the Auria Harmony Sound Processor...
-
Page 4: Table Of Contents
Charger and Power Supply ......18 Part 3: Using Your Harmony Processor ......19 Turning Your Processor On/Off . - Page 5 X-ray Machines ....... . . 25 Part 4: Hearing with Your Harmony Processor..... 26 Audio Mixing .
- Page 6 Headpiece Retention ....... . . 46 Harmony Processor Retention ......46 What To Do If…...
- Page 7 Cleaning the Charger......18 Figure 17. Wearing the Harmony Processor..... .19 Figure 18.
-
Page 8: Part I: Assembling Your Auria Harmony Sound Processor
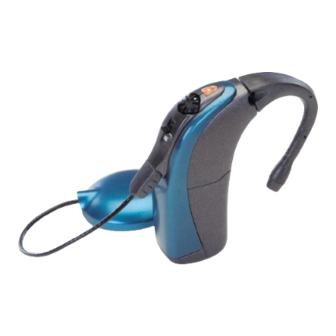
Part I: Assembling Your Auria Harmony Processor Overview Your cochlear implant system consists of a microphone, Auria Harmony Processor, headpiece, cable and implant. Sounds in the environment are captured through the microphone located on your processor. The processor then converts this sound information into a distinctive digital code that is transmitted to your implant by the headpiece. -
Page 9: Connecting Auria Accent Color Covers And Headpiece Caps
• Hold the headpiece at the base with your thumb. • Slide your other thumb under the raised portion of the color cap. • Gently lift up removing the color cap. Figure 2: Removing the Accent Color Headpiece Cap. 8 User Guide for the Auria Harmony Sound Processor... -
Page 10: Attaching The Accent Color Cover
Figure 3: Attaching the Accent Color Cover. Removing the Accent Color Cover • Unplug the headpiece cable. • Grasp the bottom of the color cover and pull off gently. Figure 4: Removing Your Accent Color Cover. User Guide for the Auria Harmony Sound Processor 9... -
Page 11: Connecting The Headpiece To The Harmony Processor
• Align the earhook fl ush with your processor. • Hold the earhook at the base and push to snap in place. • Gently pull back to confi rm that the earhook is secure. Figure 6: Connecting an Earhook. 10 User Guide for the Auria Harmony Sound Processor... -
Page 12: Removing Earhooks
NOTE: If the orange o-ring is missing from the base of the post on your processor, contact AB Customer Service for a replacement. The earhooks may rotate excessively without the o-ring. Figure 8: O-ring. User Guide for the Auria Harmony Sound Processor 11... -
Page 13: Part 2: Powering Your Harmony Processor
• Slide the PowerCel onto the processor until it stops. The PowerCel and processor should be aligned. • To remove, simply slide the PowerCel off while gently holding the processor and accent color cover (if applicable). Figure 9: Connecting the PowerCel. 12 User Guide for the Auria Harmony Sound Processor... -
Page 14: Assembling The Powercel Charger
The charging system consists of the charger, power supply and power adapters. PowerCels are custom lithium ion rechargeable batteries. • Place the charger on a fl at surface near an electrical outlet. Figure 10: Charger on a Flat Surface. User Guide for the Auria Harmony Sound Processor 13... -
Page 15: Figure 11. Power Adapters
• Connect the cable from the power supply to the charger. • Insert the power adapter that you connected to the power supply into the wall outlet. A green light indicates proper connection. 14 User Guide for the Auria Harmony Sound Processor... -
Page 16: Charging Your Powercels
PowerCel Charger Car Adapter The PowerCel Charger Car Adapter allows you to charge your PowerCels in your automobile by using your car’s power outlet (cigarette lighter). Figure 13: PowerCel Charger Car Adapter. User Guide for the Auria Harmony Sound Processor 15... -
Page 17: Inserting The Powercels Into The Charger
PowerCels can only be inserted in one direction. Removing the PowerCels from the Charger • Gently slide the PowerCel out of the slide tracks of the charger. Figure 15: Inserting and Removing a PowerCel From the Charger. 16 User Guide for the Auria Harmony Sound Processor... -
Page 18: Charger Led (Light Emitting Diode) Indicator
• You will not damage your PowerCels if they remain in the charger longer than the required charging time or overnight. • It is recommended that you use and rotate all PowerCels provided to you. This will maximize their lifespan. User Guide for the Auria Harmony Sound Processor 17... -
Page 19: Charger And Power Supply
If your power cord appears to be damaged, please contact your audiologist or AB as it should be replaced. Figure 16: Cleaning the Charger. 18 User Guide for the Auria Harmony Sound Processor... -
Page 20: Part 3: Using Your Harmony Processor
• If necessary, perform a behavioral check, for example say a few words or check if the Ling 6 sounds (ah, oo, ee, s, sh, mm) can be detected/repeated. Figure 17: Wearing the Harmony Processor. User Guide for the Auria Harmony Sound Processor 19... -
Page 21: Adjusting The Volume
To change programs, move the program switch either up or down. • Program 1: Switch all the way down • Program 2: Switch in the middle • Program 3: Switch all the way up 20 User Guide for the Auria Harmony Sound Processor... -
Page 22: Light Emitting Diode (Led) Status Indicator
Please consult with your audiologist to determine if this feature has been enabled for your processor in any or all of your programs. This feature is disabled for programs with the built-in telecoil enabled. User Guide for the Auria Harmony Sound Processor 21... -
Page 23: Low Battery And Change Battery Indicators
If this should occur, fi rst remove and replace your power source. If this does not resolve the problem, please contact your audiologist for additional troubleshooting. 22 User Guide for the Auria Harmony Sound Processor... -
Page 24: Harmony Processor Protection
Clean the contacts with a soft bristle brush (a hearing aid brush is best) at least once a month. Clean the contacts with a dry lint-free cloth immediately after exposure to moisture or perspiration. User Guide for the Auria Harmony Sound Processor 23... -
Page 25: Warnings And Precautions
Also, before placing any part of a processor system on a table or other surface, you should fi rst touch the surface. 24 User Guide for the Auria Harmony Sound Processor... -
Page 26: Airport Security Metal Detectors
T-Mic. Avoid placing these items in cargo luggage or carry-on luggage that are screened with x-rays. During airport security screening, the processor/T-Mic should either be worn through the metal detector or be examined by hand. User Guide for the Auria Harmony Sound Processor 25... -
Page 27: Part 4: Hearing With Your Harmony Processor
Avoid sharp angles (90°or greater) as they can shorten the lifespan of the T-Mic. Keep the T-Mic clean and dry. Dust, dirt, and excessive moisture could cause premature failure of the T-Mic. Figure 19: T-Mic. 26 User Guide for the Auria Harmony Sound Processor... -
Page 28: Auria Direct Connect Earhook
An alternate method for attaching the Direct Connect Cable to the Direct Connect Earhook: • Rotate the connector 180 degrees. • Approach the Direct Connect at an angle. • Snap into place. • Rotate the connector 180 degrees to align. User Guide for the Auria Harmony Sound Processor 27... -
Page 29: To Disconnect The Direct Connect Cable
• The Audio Interface Cable provides an interface between the Direct Connect Cable and the audio device. This cable incorporates 3.5 mm stereo plugs that are designed to work with external audio devices. Figure 22: Audio Interface Cable (stereo). 28 User Guide for the Auria Harmony Sound Processor... -
Page 30: Adapters
• Ensure that you are using a charged battery and PowerCel for both the FM system and the processor. • With the FM system and processor turned off, attach the patch cable. User Guide for the Auria Harmony Sound Processor 29... -
Page 31: Infrared Systems
• Gradually increase the volume on the processor to user setting (typically 12:00). • Increase the infrared gain/volume control to a comfortable listening level or as specifi ed per the infrared manufacturer. 30 User Guide for the Auria Harmony Sound Processor... -
Page 32: Troubleshooting Infrared Systems
Thus, they may pick up unwanted signals and degrade the incoming quality of the signal. User Guide for the Auria Harmony Sound Processor 31... -
Page 33: Interfacing With Hard-Wired Systems
• Gradually increase the volume on the processor to user setting (typically 12:00). • Increase the volume control on the audio device to a comfortable listening level. Figure 23: Harmony Processor Interfacing With a Portable CD player. 32 User Guide for the Auria Harmony Sound Processor... -
Page 34: Troubleshooting Hard-Wired Systems
T-Mic is an appropriate listening option. To use, simply place the headphones into the audio jack of the audio device and place the headphones over your T-Mic. User Guide for the Auria Harmony Sound Processor 33... -
Page 35: Auxiliary Microphone
Before using your Auxiliary Microphone, it is important that you consult with your au- diologist who will modify or determine which program in your processor can provide optimal benefi t for your listening needs. Figure 24: Auxiliary Microphone. 34 User Guide for the Auria Harmony Sound Processor... -
Page 36: Auria Iconnect™ Adapter
The Auria iConnect Adapter does not come with the Harmony Kit. It can be pur- chased by contacting AB. Figure 25: iConnect Adapter. -
Page 37: Iconnect Battery
Replacing the Battery To replace the battery, open the battery compartment and remove the old battery by tilting the iConnect. Figure 27: Opening the Battery Compartment. Figure 28: Removing Old Battery. 36 User Guide for the Auria Harmony Sound Processor... -
Page 38: Replacing The Battery Compartment
Dispose of old batteries appropriately. Replacing the Battery Compartment When the battery compartment is subject to high force, it may fracture. A new battery compartment snaps on easily. Figure 30: Installing a New Battery Compartment. User Guide for the Auria Harmony Sound Processor 37... -
Page 39: Iconnect Care And Maintenance
Consult your hearing professional. Cleaning If necessary, the exterior of the iConnect can be cleaned with a slightly dampened cloth or tissue. Do not use soap or solvent. 38 User Guide for the Auria Harmony Sound Processor... -
Page 40: Using The Phonak Microlink Mlxs With The Iconnect
• Operate the MLxS by turning on the FM transmitter, then the MLxS, and fi nally the Harmony. Use the 1-dot setting for the MLxS. Figure 32: Turning On the MLxS. • To use the iConnect, the processor must contain a program set up for auxiliary input. -
Page 41: Telecoil
To use your T-Coil, fi rst consult with your audiologist to determine if a program in your processor has been created for its use. If so, your T-Coil will activate once you switch to the designated program. 40 User Guide for the Auria Harmony Sound Processor... -
Page 42: Using Your Auria T-Coil
To attach the T-Coil to your Direct Connect Earhook: • Align the Auria T-Coil as shown. Figure 33: Aligning the T-Coil on the Harmony Processor. • Gently push the T-Coil onto the Direct Connect Earhook until it lightly snaps in place. -
Page 43: Connecting To Telephones
T-Mic may be a more suitable option for you. To connect, insert the headphones into the audio jack on the telephone and place the headphones directly over your T-Mic. 42 User Guide for the Auria Harmony Sound Processor... -
Page 44: Using A Speaker Phone
• You may need to practice with several telephones to fi nd one that is right for you. • When selecting a cellular phone, remember to try the phone fi rst. User Guide for the Auria Harmony Sound Processor 43... -
Page 45: Part 5: Other Accessories
• If crystals are still green (dark) after heating, try baking them longer, up to a total of six hours. If they stay green, the Dri-Aid insert needs to be replaced. 44 User Guide for the Auria Harmony Sound Processor... -
Page 46: Cleaning The Carrying Case
Your processor is designed to allow for changes in Accent Color Covers to meet your individual preference and lifestyle. Accent Color Covers are available in many color options for use with both the PowerCel Slim and the PowerCel Plus battery options. User Guide for the Auria Harmony Sound Processor 45... -
Page 47: Part 6: Troubleshooting
Earmolds are available in a variety of styles, materials and colors. Please consult with your audiologist in determining if an earmold is appropriate for you. A specially designed earmold for use with the T-Mic is available. 46 User Guide for the Auria Harmony Sound Processor... -
Page 48: What To Do If
Auria Carrying Case/Dri-Aid overnight. If no sound is present the next day, contact your audiologist. • Check for visible damage to components. • Contact your audiologist for further troubleshooting if necessary. User Guide for the Auria Harmony Sound Processor 47... -
Page 49: Processor Gets Wet
• Replace the cable/headpiece. • Refer to “No Sound / Static / Muffl ed Sound / Distorted Sound” section for additional troubleshooting steps. • Contact your audiologist for further troubleshooting if necessary. 48 User Guide for the Auria Harmony Sound Processor... -
Page 50: Orange Led Light On Harmony Does Not Blink When The Processor Is Turned On
Orange LED Light on Harmony Does Not Blink When the Processor is Turned On • Check your connections between the PowerCel and processor. • Replace your PowerCel with one that is fully charged. • Clean PowerCel and processor contacts. • Contact your audiologist for further troubleshooting if necessary. -
Page 51: Red Light On Powercel Charger Illuminated
PowerCel is already charged. • If there is no orange light and your PowerCel is not working properly, please contact your center or AB for further assistance. 50 User Guide for the Auria Harmony Sound Processor... -
Page 52: Contact Us
Contact Us Advanced Bionics is committed to providing the highest quality products and service to our customers. We welcome your comments regarding the Harmony Processor or your suggestions to improve our products. Please feel free to contact AB or discuss your suggestions with your implant professional. - Page 53 Advanced Bionics®, Auria®, T-Mic®, FireFly®, PowerCel™, Harmony® and iConnect™ are trademarks of Advanced Bionics, LLC in the United States of America and other countries. This device is protected under one or more of the following U.S. Patents: 4,400,590, 4,405,831, 4,495,917, 4,686,765, 4,721,551, 4,819,647, 4,837,049, 4,931,795,...
- Page 54 Advanced Bionics SARL Advanced Bionics 76 rue de Battenheim Mann Biomedical Park 68170 Rixheim, France 25129 Rye Canyon Loop +33.0.3.89.65.98.00 Valencia, CA 91355, USA +33.0.3.89.65.50.05 Fax 661.362.1840 europe@AdvancedBionics.com 661.362.4604 Fax LA@AdvancedBionics.com 9050050013 Rev A ©2009 Advanced Bionics or its affiliates. FEB09_ 3-01002-B-5...
Need help?
Do you have a question about the HARMONY and is the answer not in the manual?
Questions and answers