Smeg Oven Instructions For Use Manual
Hide thumbs
Also See for Oven:
- Instructions for the user (64 pages) ,
- User manual (48 pages) ,
- Instructions for use manual (44 pages)
Table of Contents
Advertisement
1. INSTRUCTIONS FOR USE ..................................................................................................... 4
2. SAFETY PRECAUTIONS ........................................................................................................ 6
3. ENVIRONMENTAL CARE ....................................................................................................... 8
3.1 Our environmental care .................................................................................................................................. 8
3.2 Your environmental care ................................................................................................................................. 8
4. GET TO KNOW YOUR APPLIANCE ....................................................................................... 9
4.1 Description of the controls on the front panel ............................................................................................... 10
5. AVAILABLE ACCESSORIES ................................................................................................. 11
5.1 Using the rack or tray .................................................................................................................................... 11
5.2 Using the support rack .................................................................................................................................. 11
5.3 Using the reduction pan stands .................................................................................................................... 11
6. USING THE COOKING HOB ................................................................................................. 12
6.1 General warnings and advice ....................................................................................................................... 12
6.2 Lighting the hob burners ............................................................................................................................... 12
6.3 Practical hints for using the hob burners ....................................................................................................... 12
6.4 Cookware diameters ..................................................................................................................................... 12
7. USING THE OVEN ................................................................................................................ 13
7.1 Before using the appliance ........................................................................................................................... 13
7.2 Oven runners ................................................................................................................................................ 13
7.3 Storage compartment (on some models only) .............................................................................................. 13
7.4 Cooling system ............................................................................................................................................. 13
7.5 Internal light .................................................................................................................................................. 13
7.6 General warnings and advice for use ........................................................................................................... 14
7.7 Using the bottom burner ............................................................................................................................... 15
7.8 Using the electric grill .................................................................................................................................... 15
8. COOKING WITH THE OVEN ................................................................................................ 16
8.1 Cooking advice and instructions ................................................................................................................... 16
8.2 Cooking information table ............................................................................................................................. 17
9. CLEANING AND MAINTENANCE ......................................................................................... 18
9.1 Cleaning stainless steel ................................................................................................................................ 18
9.2 Ordinary daily cleaning ................................................................................................................................. 18
9.3 Food stains or residues ................................................................................................................................. 18
9.4 Cleaning the cooking hob parts .................................................................................................................... 18
9.5 Cleaning the oven ......................................................................................................................................... 19
10. EXTRAORDINARY MAINTENANCE .................................................................................. 21
10.1 Removing the door ...................................................................................................................................... 21
10.2 Replacing the light bulb ............................................................................................................................... 21
10.3 Removing the door seal .............................................................................................................................. 21
11. INSTALLATION .................................................................................................................. 22
11.1 Clearances above and around household appliances ................................................................................ 22
11.2 Combustion gas discharge ......................................................................................................................... 22
11.3 Gas connection ........................................................................................................................................... 23
11.4 Room ventilation ......................................................................................................................................... 23
11.5 Extraction of the combustion products ........................................................................................................ 23
11.6 Electrical connection ................................................................................................................................... 24
11.7 Positioning the skirt (on some models only) ................................................................................................ 25
11.8 Positioning and levelling the appliance ....................................................................................................... 25
11.9 Wall mounting brackets (where present) ..................................................................................................... 25
11.10 Wall fixing .................................................................................................................................................. 26
12. ADAPTATION TO DIFFERENT TYPES OF GAS .............................................................. 27
12.1 Replacing the hob nozzles .......................................................................................................................... 27
12.2 Replacing the bottom burner's nozzle ......................................................................................................... 27
12.3 Arrangement of burners .............................................................................................................................. 27
12.4 Burner and nozzle characteristics table ...................................................................................................... 28
12.5 Final operations .......................................................................................................................................... 28
INSTRUCTIONS FOR THE USER: these contain user advice, the description of the controls and
the correct procedures for cleaning and maintenance of the appliance.
INSTRUCTIONS FOR THE INSTALLER: these are intended for the qualified technician who must
install the appliance, set it functioning and carry out an inspection test.
@
Further information about the products can be found at www.smeg.com
Contents
EN
3
Advertisement
Table of Contents

Related Manuals for Smeg Oven


Summary of Contents for Smeg Oven
-
Page 1: Table Of Contents
INSTRUCTIONS FOR THE INSTALLER: these are intended for the qualified technician who must install the appliance, set it functioning and carry out an inspection test. Further information about the products can be found at www.smeg.com... -
Page 2: Instructions For Use
Rinse thoroughly and dry using a soft cloth. Do not allow residues of sugary foods (such as jam) to set inside the oven. If left to set for too long, they might damage the enamel lining of the oven. - Page 3 If you intend to go away for a prolonged period of time, close the mains gas tap or the gas cylinder tap. Take care that no objects are stuck in the door of the oven. Do not open the storage compartment (where present) when the oven is on and still hot. The temperatures inside it may be very high.
-
Page 4: Safety Precautions
Keep children younger than 8 away from the appliance, unless under continuous supervision. Never put inflammable objects in the oven: they could be accidentally ignited and cause fires. The appliance is intended for use by adults. Do not allow children to go near it or play with it. - Page 5 General instructions Be aware of how rapidly the cooking zones heat up. Do not place empty saucepans on the heat. Danger of overheating. Fats and oils can catch fire if they overheat. You are therefore recommended not to leave the appliance unattended while preparing foods containing oils or fats.
-
Page 6: Environmental Care
Instructions for disposal 3. ENVIRONMENTAL CARE 3.1 Our environmental care Adequate selective collection for the subsequent forwarding of the decommissioned product to recycling, treatment and ecologically compatible disposal contributes to avoiding possible negative effects on the environment and on health and promotes the recycling of the materials of which the appliance consists. -
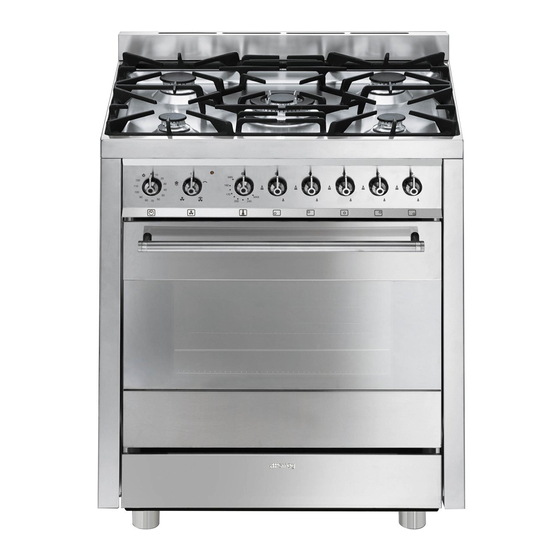
Page 7: Get To Know Your Appliance
Instructions for the user 4. GET TO KNOW YOUR APPLIANCE Cooking hob Control panel Oven light (double on some models) Oven seal Storage compartment Rack/tray support frame... -
Page 8: Description Of The Controls On The Front Panel
This knob allows the gas burner inside the oven to be lit. The cooking temperature is selected by turning the knob anti-clockwise to the required temperature, between Min. and 275°C. To find out how to light the gas oven, see chapter “7. USING THE OVEN”. -
Page 9: Available Accessories
Reduction pan stand: useful when using small pans. The oven accessories intended to come into contact with food are made of materials that comply with the provisions of current legislation. Accessories available on request: • Original supplied and optional accessories may be ordered from any Authorised Assistance Centre. -
Page 10: Using The Cooking Hob
Instructions for the user 6. USING THE COOKING HOB 6.1 General warnings and advice Before lighting the hob burners, make sure that the flame-spreader crowns are correctly positioned in their housings with their respective burner caps. 6.2 Lighting the hob burners All the appliance's control and monitoring devices are located together on the front panel. -
Page 11: Using The Oven
Do not open the storage compartment when the oven is on and still hot. The temperatures inside it may be very high. 7.4 Cooling system The appliance is equipped with a cooling system which comes into operation as soon as a cooking function starts, with the exception of the gas burner where start-up is delayed. -
Page 12: General Warnings And Advice For Use
During cooking, do not cover the bottom of the oven with aluminium or tin foil and do not place pans or oven trays on it as this may damage the enamel coating. If you wish to use greaseproof paper, place it so that it will not interfere with the hot air circulation inside the oven. -
Page 13: Using The Bottom Burner
If the burner does not ignite after 15 seconds, stop attempting to light it, leave the oven door open and do not try to light it again for at least 1 minute. -
Page 14: Cooking With The Oven
If the dough does not stick to the toothpick, the dessert is cooked. • If the dessert collapses when it comes out of the oven, on the next occasion reduce the set temperature by about 10°C, selecting a longer cooking time if necessary. -
Page 15: Cooking Information Table
230 - 240 45 - 50 Cannelloni 2.5 Kg 220 - 230 25 - 30 220 - 230 25-30 Oven-baked pasta 2.5 Kg 220 - 230 25 - 30 220 - 230 25 - 30 MEAT Roast chicken 1.2 Kg... -
Page 16: Cleaning And Maintenance
Do not allow residues of sugary foods (such as jam) to set inside the oven. If left to set for too long, they might damage the enamel lining of the oven. -
Page 17: Cleaning The Oven
• For easier cleaning, the door can be removed (see “10.1 Removing the door”). The oven should be operated at the maximum heat setting for 15/20 minutes after use of specific products, to burn off the residues left inside the oven. - Page 18 Do not use abrasive or corrosive detergents to clean the oven's door glass panels (e.g. powder products, spot-removers and wire sponges). Do not use rough or abrasive materials or sharp metal scrapers to clean the oven's glass doors since they may scratch the surface.
-
Page 19: Extraordinary Maintenance
Instructions for the user 10. EXTRAORDINARY MAINTENANCE The oven requires periodic minor maintenance or replacement of parts subject to wear, such as gaskets, light bulbs, etc. Specific instructions for each operation of this kind are given below. Before any intervention that requires access to live parts, disconnect the appliance from the power supply. -
Page 20: Installation
Instructions for the installer 11. INSTALLATION The appliance connection point shall be accessible with the appliance installed. 11.1 Clearances above and around household appliances Extract from AS5601 REQUIREMENTS 1 Overhead clearances – (Measurement A) Range hoods and exhaust fans shall be installed in accordance with the manufacturer’s instructions. -
Page 21: Gas Connection
Instructions for the installer 11.3 Gas connection This appliance is suitable for installation with Natural Gas or ULPG (propane/butane). Refer to page 25 for the relevant burner pressure and appropriate injector sizes. When the appliance is to be connected to Natural Gas then the pressure regulator supplied must be fitted to the gas inlet. -
Page 22: Electrical Connection
Instructions for the installer 11.6 Electrical connection Make sure the voltage and the cross-section of the power supply line match the specifications indicated on the identification plate positioned on the appliance. Do not remove this plate for any reason. A copy of the plate is attached to the instructions. -
Page 23: Positioning The Skirt (On Some Models Only)
Instructions for the installer 11.7 Positioning the skirt (on some models only) The skirt must always be positioned and secured correctly on the appliance. 1 Loosen the 4 screws (A) on the back of the worktop (2 for each side). 2 Place the skirt above the worktop, taking care to align the skirt's slots (B) with the screws (A). -
Page 24: Wall Fixing
Instructions for the installer Use the same height on the wall to drill the holes Before tightening the brackets fully to the wall, for fastening the brackets. The distance between check that the index on the brackets is at the same the centres of the holes is given in the diagram height as the index on the back of the appliance. -
Page 25: Adaptation To Different Types Of Gas
12.2 Replacing the bottom burner's nozzle 1 Remove all accessories from inside the oven (such as trays, racks etc.). 2 Lift up the oven base and pull it outwards as shown in the figure. 3 Unscrew the fastening screws A and B completely. -
Page 26: Burner And Nozzle Characteristics Table
12.5.2Adjusting the gas oven burner minimum setting 1 Light the oven burner and keep it at the maximum for 10/15 minutes. 2 Then turn the knob to the minimum temperature. 3 Extract the gas tap knob and turn the adjustment screw next to the tap rod (depending on the model) until the correct minimum flame is achieved. - Page 28 9 1 4 7 7 4 8 7 1 / A...
Need help?
Do you have a question about the Oven and is the answer not in the manual?
Questions and answers