Advertisement
Table of Contents
- 1 Table of Contents
- 2 Warranty
- 3 Warning Label Placement
- 4 Important Safety Instructions
- 5 Parts List
- 6 Hardware & Tools Pack
- 7 Overview Drawing
- 8 Assembly Instructions
- 9 Operating the Computer
- 10 Adjustments
- 11 Maintenance
- 12 Troubleshooting
- 13 Warm up
- 14 Parts Request Fax Form
- Download this manual
Advertisement
Table of Contents

Related Manuals for Exerpeutic 1301


Summary of Contents for Exerpeutic 1301
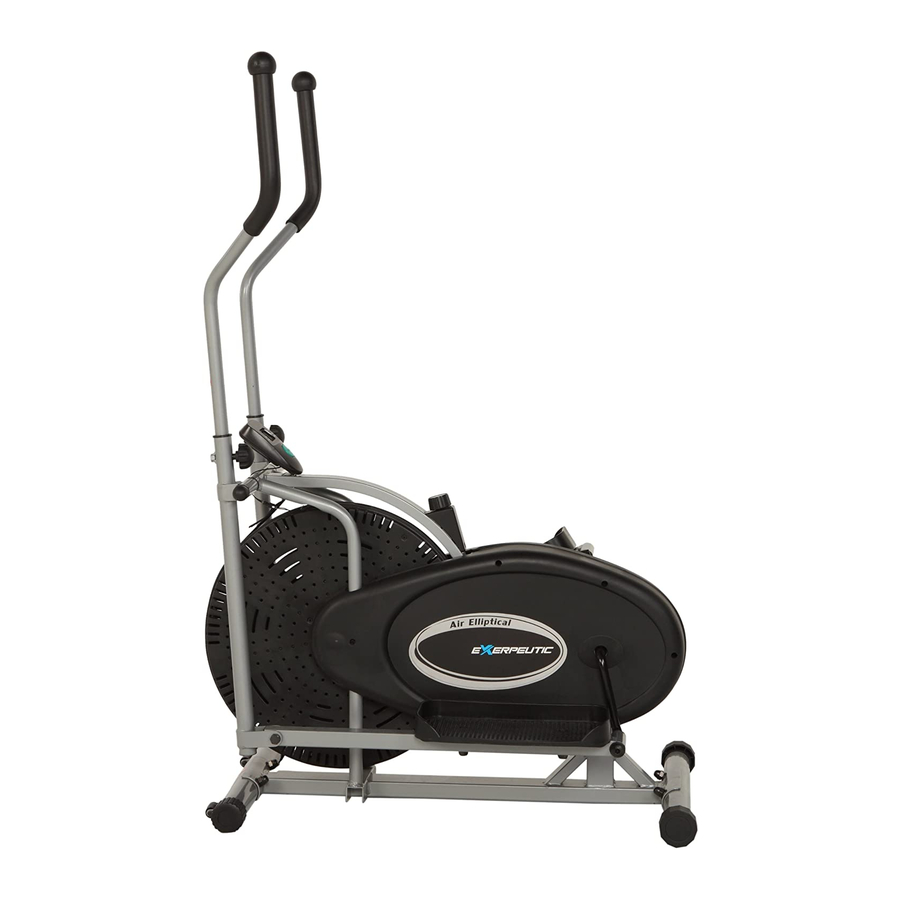
- Page 1 Air Elliptical ITEM NO.: 1301 OWNER’S MANUAL IMPORTANT: Read all instructions carefully before using this product. Retain this owner’s manual for future reference. The specifications of this product may vary from this photo, subject to change without notice.
- Page 2 IMPORTANT: FOR NORTH AMERICA ONLY To request product service and order replacement parts, please call our customer service department at: 1-866-924-1688 Monday through Friday, 8:00 AM-5:00 PM Pacific Standard Time, service@paradigmhw.com or email us at: Please visit our website at www.paradigmhw.com. Please have the following information ready when requesting for service: Your name Phone number...
-
Page 3: Table Of Contents
TABLE OF CONTENTS WARRANTY ------------------------------------------------------------------------------- 3 WARNING LABEL PLACEMENT ---------------------------------------------------- 4 IMPORTANT SAFETY INSTRUCTIONS ------------------------------------------- 5 PARTS LIST ------------------------------------------------------------------------------- 6 HARDWARE & TOOLS PACK -------------------------------------------------------- 8 OVERVIEW DRAWING ----------------------------------------------------------------- 9 ASSEMBLY INSTRUCTIONS --------------------------------------------------------- 10 OPERATING THE COMPUTER ------------------------------------------------------ 16 ADJUSTMENTS -------------------------------------------------------------------------- 17 MAINTENANCE -------------------------------------------------------------------------- 18 TROUBLESHOOTING ------------------------------------------------------------------ 19 WARM UP ---------------------------------------------------------------------------------- 20... -
Page 4: Warranty
ONE YEAR LIMITED WARRANTY Paradigm Health & Wellness, Inc. warrants to the original purchaser that this product is free from defects in material and workmanship when used for the purpose intended, under the conditions that it has been installed and operated in according to Paradigm Health & Wellness, Inc.’s Owner’s Manual. -
Page 5: Warning Label Placement
WARNING LABEL PLACEMENT 9 0 5 9 8 0 1 3 0 1 111054130100001 MADE IN CHINA / FABRIQUE EN CHINE... -
Page 6: Important Safety Instructions
IMPORTANT SAFETY INSTRUCTIONS Basic precautions should always be followed, including the following safety instructions when using this equipment: Read all instructions before using this equipment. Read all the instructions in this manual and do warm up exercises before using this product. -
Page 7: Parts List
PARTS LIST Description Qty No. Description Main Frame 900x205x630 1 027 Left Handrail Arm Ø25x2x973 Handrail Arm Height Adjustment Rear Stabilizer Ø50x1.5x540 1 028 Knob M8 Handrail Arm Foam Grip Front Stabilizer End Cap Ø50 2 029 Ø23x5x310 Bolt M10x60 4 030 Handrail Arm End Cap Ø25 Cap Nut M10... - Page 8 PARTS LIST (cont.) Description Qty No. Description Washer Ø40xØ24 1 066 Plastic Clip 29.5x26.5x15 Notched Bearing Nut 1 067 Adjustable Leveler M8x45 Bearing 2 068 Nut M8 Bearing Cup 2 069 Sensor Bracket Slotted Bearing Nut 1 070 Small Magnet Washer Ø35 1 071 Wire Plug Ø12...
-
Page 9: Hardware & Tools Pack
HARDWARE & TOOLS PACK... -
Page 10: Overview Drawing
OVERVIEW DRAWING... -
Page 11: Assembly Instructions
ASSEMBLY INSTRUCTIONS Tool: Multi Hex Tool 13#, 17#, 19# 1. Front and Rear Stabilizers Installation Position the Front Stabilizer (7) in front of Main Frame (1) and align bolt holes. Attach the Front Stabilizer (7) onto the front curve of the Main Frame (1) with two M10x60 Bolts (4), two Ø20xØ10.5 Curve Washers (6), and two M10 Cap Nuts (5). - Page 12 Tool: 2 Allen Wrenches 6# Allen Wrench 8# Multi Hex Tool 13#, 17#, 19# 2. Left/Right Handrails and Foot Bars Installation Remove two M10x18 Bolts (19), two Ø16xØ10.2x3 Spring Washers (20), two Ø28x5 Washers (21), and two Ø28xØ16.2x0.3 Washers (36). Remove bolts with two 6# Allen Wrenches provided.
- Page 13 Tighten bolts and nylon nuts with the 6# Allen Wrench and Multi Hex Tool provided. 15L LEFT 15R RIGHT In order to install the hinge bolt properly, keep it perfectly straight when the bolt goes through the CORRECT pedal tubing and the crankshaft. If the hinge bolt is connected to the crankshaft at an angle, damage to both the hinge bolt and the crankshaft INCORRECT...
- Page 14 (73) Bolt M8x43 (74) Washer Ø8 (75) Nylon Nut M8 4 PCS 4 PCS 4 PCS ․․․․․․․․․․․․․․․․․․․․․․․․․․․․․․․․․․․․․․․ Tool: Multi Hex Tool 13#, 17#, 19# 3. Right and Left Foot Pedals Installation Attach the Right Foot Pedal (23R) onto the Foot Bar (11) with two M10x45 Bolts (24) and two M10 Nylon Nuts (13).
- Page 15 4. Right/Left Handrail Arms Installation Insert the Right Handrail Arm (26) into the Handrail Arm Plastic Bushing (48) on the tube of the Right Handrail (9) and then attach the M8 Handrail Arm Height Adjustment Knob (28) onto the tube of the Right Handrail (9) by turning it in a clockwise direction to lock the Right Handrail Arm (26) in the suitable position.
- Page 16 5. Computer and Adjustable Levelers Installation Connect the Sensor Wire (31) to the wire that comes from the Computer (32). Place the Computer (32) onto the plate on the Main Frame (1) then slide it down to lock in position. Attach two M8x45 Adjustable Levelers (67) onto the Main Frame (1) with M8 Nuts (68).
-
Page 17: Operating The Computer
OPERATING THE COMPUTER SPECIFICATIONS: TIME---------------------------------------------------- 00:00-99:59 MIN: SEC SPEED------------------------------------------------- 0.0-99.9 MPH DISTANCE-------------------------------------------- 0.00-99.99 MILE CALORIES-------------------------------------------- 0-9999 CAL FUNCTIONS AND OPERATIONS: AUTO ON /OFF: When you start to exercise or press the MODE button on the computer, the computer will turn on. If you do not use the equipment for 4 minutes, the power will shut off automatically. -
Page 18: Adjustments
ADJUSTMENTS Adjusting the Tension Control Knob To increase the tension, turn the tension control knob in a clockwise direction. To decrease the tension, turn the tension control knob in a counterclockwise direction. Tension Control Knob After prolong use of the elliptical trainer, the strap will begin to stretch out and it will become necessary to tighten the strap for optimum performance. -
Page 19: Maintenance
Adjusting the Rear Stabilizer End Cap or M8x45 Adjustable Leveler Turn the rear stabilizer end cap on the rear stabilizer or M8x45 adjustable leveler on the main frame as needed to level the M8x45 elliptical trainer. Adjustable Leveler Rear Stabilizer End Cap Adjusting the Handrail Arms Height Turn the handrail arm height adjustment knob in a counterclockwise direction to... -
Page 20: Troubleshooting
TROUBLESHOOTING PROBLEM SOLUTION 1. Remove the Computer (32) and verify the wire that comes from the Computer (32) is properly connected to the wire that comes from the Main Frame (1). There is no display on the computer 2. Check if the batteries are correctly console. -
Page 21: Warm Up
WARM UP The WARM-UP is an important part of any workout. You should begin every session by stretching your muscles to prepare your body for more strenuous exercise. This will help increasing your circulation and pulse rate, and deliver more oxygen to your muscles. HEAD ROLLS Rotate your head to the right for one count, you should feel a stretching sensation up the left side of your neck. - Page 22 INNER THIGH STRETCH Sit with the soles of your feet together and your knees pointing outward. Pull your feet as close to your groin as possible. Gently push your knees toward the floor. Hold for 15 counts. TOE TOUCHES Slowly bend forward from your waist, letting your back and shoulders relax as you stretch toward your toes.
-
Page 23: Parts Request Fax Form
Paradigm Health & Wellness, Inc. PARTS REQUEST FAX FORM Please fax this form to (1-626-810-2166) OR YOU CAN EMAIL CUSTOMER SERVICE REQUESTS TO service@paradigmhw.com NAME: _________________________________________________________________ ADDRESS: ______________________________________________________________ CITY ______________ STATE ______________ ZIP ___________________ TELEPHONE: (Day) _______________________________________________________ (Night) ______________________________________________________ (Email Address) ______________________________________________ SERIAL#: ___________________________________________________ MODEL#: ___________________________________________________ PURCHASE DATE: _______________________________________________________...
Need help?
Do you have a question about the 1301 and is the answer not in the manual?
Questions and answers